
Water damage can ruin even the strongest roofs and leave lasting scars that are expensive to fix. Most people notice bubbling paint or discoloured patches and think a quick fix will do, but that hardly solves the whole problem. The real difference comes from a full waterproofing approach, and it all starts with a detailed assessment, because seemingly minor cracks or sagging areas can be warning signs of bigger trouble ahead.
Table of Contents
- Step 1: Assess Your Current Situation
- Step 2: Clean The Roof Surface Thoroughly
- Step 3: Repair Any Damaged Areas
- Step 4: Apply Waterproofing Membrane Or Coating
- Step 5: Conduct A Leak Test For Verification
Quick Summary
| Key Point | Explanation |
|---|---|
| 1. Assess roof condition thoroughly | Conduct a detailed inspection to identify signs of existing damage and moisture penetration before waterproofing. |
| 2. Clean roof surface meticulously | Remove debris and contaminants to ensure proper adhesion of waterproofing materials, using appropriate cleaning methods for different roof types. |
| 3. Repair all damaged areas | Address minor cracks and major structural issues to prevent water infiltration, using compatible repair materials for your roofing type. |
| 4. Apply waterproofing membrane correctly | Choose the right waterproofing solution and apply with precision, ensuring thorough coverage, particularly in vulnerable areas, to create a protective barrier. |
| 5. Conduct a leak test after application | Perform a leak test to verify the waterproofing’s effectiveness and detect any potential vulnerabilities before concluding the process. |
Step 1: Assess Your Current Situation
When learning how to waterproof your roof, the initial assessment is crucial for understanding the specific challenges and requirements of your specific roofing structure. A thorough evaluation will determine the extent of potential water damage, structural integrity, and the most appropriate waterproofing strategy.
Begin by conducting a comprehensive visual inspection of your entire roof surface. Look carefully for telltale signs of water damage, which might include discoloured patches, sagging areas, visible cracks, or bubbling paint on interior ceilings. These indicators suggest existing moisture penetration that requires immediate attention before waterproofing can commence.
Understanding Roof Condition Indicators
Carefully examine different roofing materials for unique damage signals. Concrete roofs might display hairline fractures, while metal roofs could show rust spots or loose seams. Tiled roofs often reveal water damage through displaced or cracked tiles that create potential entry points for moisture. Use a sturdy ladder and appropriate safety equipment during your inspection, ensuring you can closely examine all roof sections without risking personal injury.
According to South African National Standards guidelines, professional inspections recommend measuring the roof’s slope, checking drainage systems, and identifying potential water accumulation zones. These critical factors significantly influence your waterproofing approach. Pay special attention to:
- Areas around chimneys
- Roof edges and perimeter
- Zones near air conditioning units
- Skylights and roof penetrations
Document your findings meticulously. Take clear photographs from multiple angles, noting specific locations of damage or potential weakness. This visual record will serve as a crucial reference point when selecting appropriate waterproofing techniques and materials. Measurements and detailed observations will help professionals or yourself develop a targeted waterproofing strategy tailored to your roof’s unique characteristics.
Successful assessment means identifying not just visible damage, but potential future risk areas. Understanding your roof’s current condition provides the foundation for an effective, long lasting waterproofing solution that protects your property from costly water damage.
Step 2: Clean the Roof Surface Thoroughly
Cleaning the roof surface is a critical preparatory step in the waterproofing process that directly impacts the effectiveness and longevity of your protective treatment. A meticulously cleaned surface ensures proper adhesion of waterproofing materials and removes potential barriers that could compromise the seal.
Begin by gathering appropriate cleaning equipment tailored to your specific roof material. Safety remains paramount during this process, so ensure you have sturdy non slip footwear, protective gloves, and a stable ladder or scaffolding. For most roof types, you will need a stiff bristled brush, industrial strength cleaning solution appropriate to your roofing material, a pressure washer with adjustable settings, and several clean cloths or rags.
The cleaning approach varies depending on your roof’s composition. Concrete and tile roofs require a different technique compared to metal or wooden surfaces. Start by removing loose debris such as leaves, branches, and accumulated dirt using a stiff brush or leaf blower. Pay special attention to corners, edges, and areas around roof fixtures where debris tends to accumulate.
According to Agrment South Africa’s roofing guidelines, the next phase involves using a specialized cleaning solution matched to your roof material. For concrete and tile surfaces, use a pH neutral cleaner that removes algae, moss, and embedded dirt without causing surface damage. Metal roofs might require a different approach, using solutions designed to remove oxidation and prevent future rust formation.
Utilize a pressure washer with carefully controlled settings to prevent surface damage. Maintain a consistent distance and angle, typically 30 to 45 centimetres from the surface, using moderate pressure. Work systematically across the roof, ensuring complete coverage while avoiding concentrated spray on any single area that could compromise the roofing material.
After washing, allow the roof surface to dry completely. This crucial step typically requires several hours, depending on ambient temperature and humidity. Verify the surface is entirely dry by touch and visual inspection.
To help you prepare for cleaning your roof, here is a summary of recommended tools, materials, and their purposes for the cleaning stage.
| Tool/Material | Purpose | Recommended Usage/Notes |
|---|---|---|
| Stiff bristled brush | Remove loose debris and dirt | Suitable for most roof types |
| Leaf blower | Clear leaves and light debris | Use mainly on dry surfaces |
| Industrial strength cleaner | Remove algae, moss, dirt | Choose pH neutral for concrete and tile roofs |
| Specialised metal cleaner | Remove oxidation, prevent rust | For metal roof surfaces only |
| Pressure washer (adjustable) | Deep clean, ensure surface cleanliness | Maintain 30-45cm distance, moderate pressure |
| Protective gloves | Ensure hand safety from chemicals | Essential for chemical handling and cleaning |
| Non slip footwear | Prevents slipping, ensures stability | Safety measure for all roof work |
| Clean cloths or rags | Wipe down areas, final cleaning | Used after washing to dry small sections |
- No visible water droplets
- Consistent colour across the surface
- No damp or dark patches
- Surface feels completely dry to the touch
A thoroughly cleaned roof surface sets the foundation for successful waterproofing. By removing contaminants, you create an ideal substrate for sealants and protective treatments, ensuring maximum adhesion and long term protection against moisture intrusion.
Step 3: Repair Any Damaged Areas
Repairing damaged roof areas is a critical precursor to successful waterproofing, ensuring a solid foundation for your protective treatment. The objective is to address every potential weakness that could compromise your roof’s water resistance, from minor cracks to significant structural issues.
Carefully examine the detailed notes and photographs from your initial assessment. Structural integrity is paramount, so prioritize identifying and addressing areas of significant damage. Small cracks, while seemingly insignificant, can become major entry points for moisture if left unattended. Use a bright, focused light to help reveal subtle imperfections that might have been missed during the initial inspection.
Different roofing materials require specific repair approaches. Concrete roofs often develop hairline fractures that need specialized filling compounds, while metal roofs might require patch welding or specialized sealant applications. Wooden roof structures may need timber replacement or treatment against rot. Select repair materials specifically designed for your roof’s composition to ensure long term durability and compatibility with upcoming waterproofing treatments.
According to South African National Standard guidelines, proper roof repair involves more than superficial treatment. Begin by cleaning the damaged area thoroughly, removing loose debris, dust, and any compromised material. For crack repairs, use a wire brush to create a clean, slightly rough surface that allows better adhesion of repair compounds. Ensure the area is completely dry before applying any repair materials.
Choose high quality repair compounds appropriate to your specific roofing material. Silicone based sealants work well for many surfaces, providing flexibility and strong adhesion. For larger structural damages, consider fiber reinforced repair systems that offer additional strength. Apply the repair compound carefully, following manufacturer instructions precisely. Use a putty knife or trowel to create a smooth, even surface that blends seamlessly with the surrounding roofing material.
Verify your repairs by checking for:
- Smooth, even repair surface
- No visible gaps or air bubbles
- Consistent texture matching surrounding material
- No excess repair compound
Allow sufficient curing time for repair compounds, which typically ranges from 24 to 48 hours depending on the product and environmental conditions. A meticulously repaired roof surface provides the optimal foundation for subsequent waterproofing, ensuring maximum protection against moisture intrusion and potential structural damage.
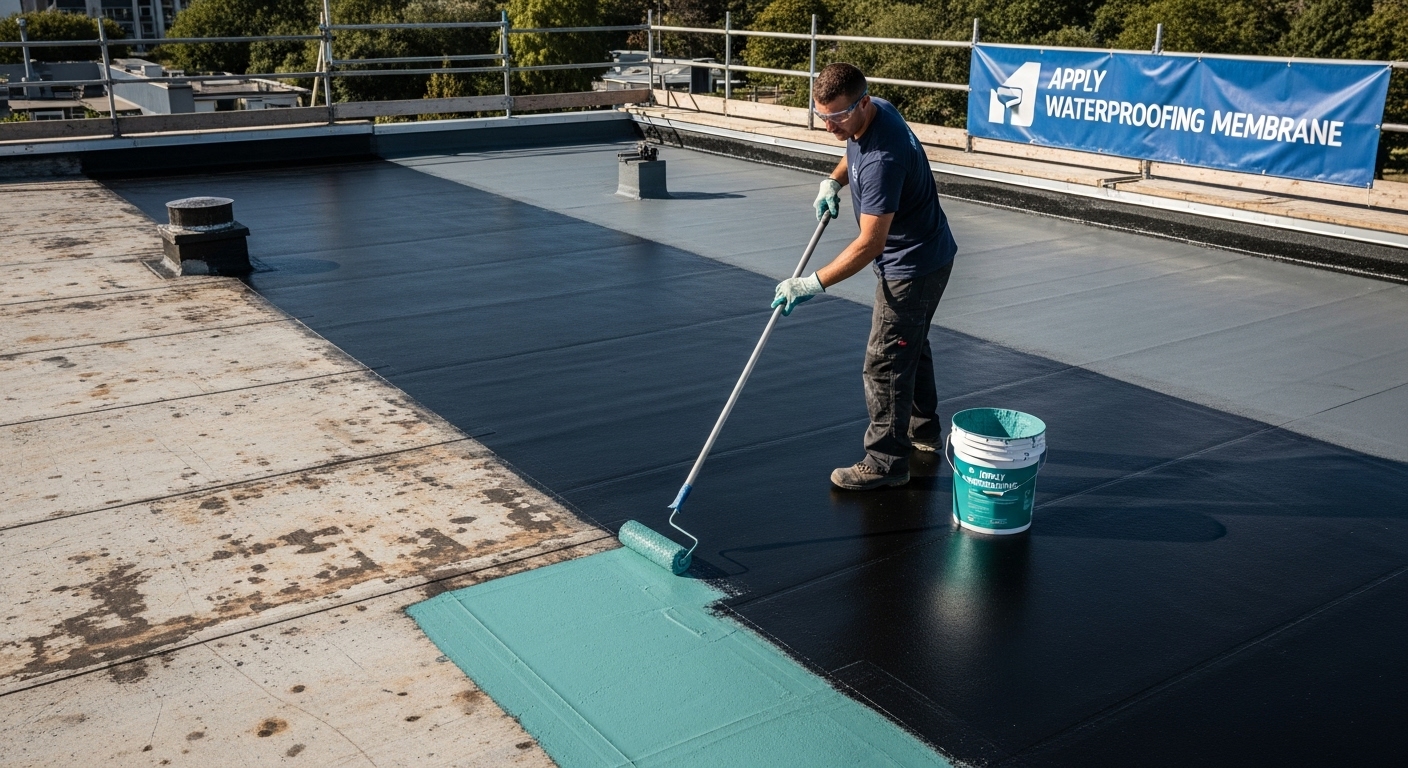
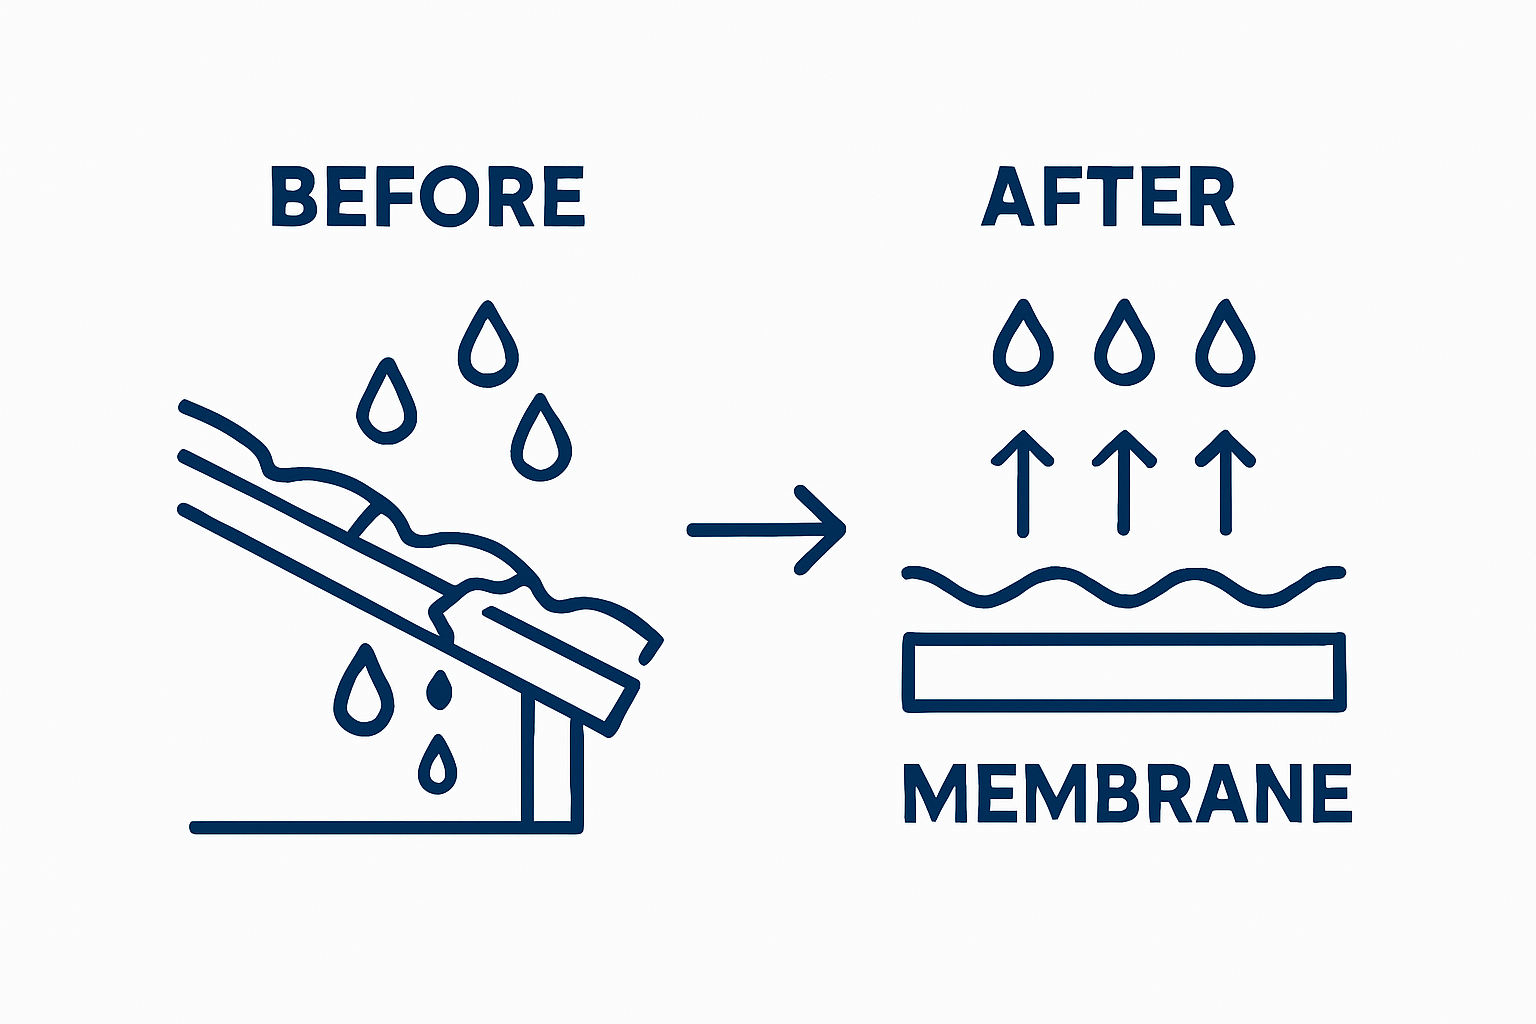
Step 4: Apply Waterproofing Membrane or Coating
Applying a waterproofing membrane or coating represents the critical transformation of your roof from vulnerable to protected. This step requires precision, patience, and careful selection of materials that match your specific roofing structure and environmental conditions.
Begin by selecting a waterproofing solution compatible with your roof’s material and existing surface condition. Liquid applied membranes and sheet membranes each offer unique advantages, so choose based on your roof’s specific characteristics. Liquid membranes provide seamless coverage and work excellently for complex roof geometries, while sheet membranes offer robust protection for larger, more uniform surfaces.
Prepare your application tools meticulously. You will need a high quality roller or specialised spray equipment, depending on the membrane type. Ensure you have protective gear including chemical resistant gloves, safety glasses, and non slip footwear. Work during moderate temperature conditions avoiding extreme heat or cold, which can compromise membrane adhesion and curing.
According to Agrment South Africa’s roofing guidelines, application requires systematic and thorough coverage. Start at the lowest point of the roof, working systematically upward to ensure complete and consistent coverage. For liquid membranes, apply using long, even strokes maintaining a consistent thickness. Most professional grade waterproofing products require two separate application layers to guarantee maximum protection.
Pay extraordinary attention to critical areas prone to water penetration. Roof edges, corners, and zones around protrusions like chimneys or ventilation units demand extra care. Use reinforcement materials such as fibreglass mesh or specialised corner patches to strengthen these vulnerable zones. Overlap membrane sections by at least 10 centimetres to prevent potential water infiltration points.
Verify your waterproofing application by checking for:
- Consistent membrane thickness across entire surface
- No visible gaps or thin spots
- Smooth, uniform coverage around complex areas
- Proper adhesion to roof surface
- No bubbling or wrinkling of membrane
Allow sufficient curing time as specified by the manufacturer, typically ranging from 24 to 72 hours depending on environmental conditions.
Below is a table summarising the verification checklist for assessing the quality of your waterproofing membrane application before proceeding to the final leak test.
| Verification Criteria | What to Look For |
|---|---|
| Membrane thickness | Consistent across the entire roof surface |
| Gaps or thin spots | None visible, full coverage ensured |
| Coverage around complex areas | Smooth and uniform around edges, corners, penetrations |
| Membrane adhesion | Firmly bonded to surface, no peeling |
| Bubbling or wrinkling | None present on membrane surface |
| Curing time | Sufficient time per manufacturer specification |
 A meticulously applied waterproofing membrane creates an impenetrable barrier, transforming your roof into a robust defence against moisture intrusion and potential structural damage.
Step 5: Conduct a Leak Test for Verification
Conducting a comprehensive leak test is the final critical verification step in your waterproofing process, ensuring the effectiveness of your protective treatment and identifying any potential vulnerabilities before they become costly problems. This meticulous examination validates the integrity of your waterproofing membrane and provides confidence in your roof’s ability to withstand moisture intrusion.
Timing is crucial when performing a leak test. Wait at least 48 hours after applying the waterproofing membrane to allow complete curing. Choose a day with stable weather conditions, preferably with no immediate rain forecast but with the possibility of simulating rainfall through controlled water application.
Prepare your testing equipment carefully. You will need a garden hose with an adjustable spray nozzle, several clean towels, a ladder, and markers to identify potential problem areas. Begin by sectioning your roof into manageable zones, focusing on areas previously identified as vulnerable during your initial assessment. Systematically test each section, starting from the lowest point and working methodically upward to ensure comprehensive coverage.
According to Professional Roof Repair and Waterproofing Association guidelines, the most effective leak test involves creating controlled water pressure that mimics natural rainfall conditions. Spray water onto the roof surface using a gentle, consistent stream, allowing water to flow naturally across the membrane. Maintain a steady application for approximately 15 to 20 minutes, paying particular attention to critical zones such as roof edges, corners, and areas around protrusions like chimneys or skylights.
While conducting the test, have a second person inside the building monitoring for any signs of water penetration. Look for:
- Water droplets on interior ceilings
- Damp spots on walls
- Moisture stains
- Any indication of water seepage
Carefully document your findings, using markers or photographs to indicate precise locations of potential leaks. If you detect any water penetration, mark the specific area and prepare for targeted reapplication of waterproofing membrane. Minor leaks can typically be addressed by applying an additional layer of liquid membrane or using specialized repair compounds.
A successful leak test provides ultimate reassurance in your waterproofing efforts. By simulating realistic water exposure conditions, you validate the comprehensive protection of your roof, preventing future moisture related damage and extending the structural integrity of your property.
Discover Tailored Roof Waterproofing Solutions Built for South African Homes and Businesses
Struggling with persistent leaks or worried about hidden cracks undermining your roof’s defences? This step-by-step guide highlighted key pain points such as detecting subtle water damage, preparing surfaces correctly, and ensuring your repairs last. But even with the right knowledge, applying professional-grade membranes and truly waterproofing all vulnerable spots often feels overwhelming, especially when the structural integrity of your property is at stake.

Why risk expensive water damage or revisit repairs season after season? Trust Pro Waterproofing, South Africa’s trusted service for expert, long-lasting solutions. Our team understands the unique requirements revealed during your roof assessment and offers both the technical expertise and genuine craftsmanship your home or business deserves. Explore practical tips, in-depth resources, and our robust guarantee by visiting our Uncategorized – Pro Waterproofing section or start with a free expert quote today at Pro Waterproofing and take the first step towards peace of mind. Act now to protect your property for years to come.
Frequently Asked Questions
How do I assess the condition of my roof before waterproofing?
Begin by conducting a visual inspection for signs of damage, such as discoloured patches, sagging areas, cracks, or bubbling paint on ceilings. Be sure to examine all roofing materials for specific damage signals and document your findings thoroughly.
What cleaning methods should I use for different types of roofing materials?
Use a stiff bristled brush or leaf blower to remove loose debris. For concrete and tile roofs, a pH neutral cleaner is recommended, while metal roofs may require solutions for oxidation removal. Always use a pressure washer with controlled settings to avoid damaging the roof surface.
What should I do if I find cracks or damage during my roof inspection?
Small cracks can become entry points for moisture if left unchecked. Clean the damaged area thoroughly and use high-quality repair compounds suitable for your roofing material. Ensure you allow adequate curing time before proceeding with waterproofing.
How long does it take for waterproofing membranes to cure?
Typically, waterproofing membranes require 24 to 72 hours to cure completely, depending on environmental conditions. It’s important to ensure full curing before conducting a leak test to verify the effectiveness of the application.