
Water can quietly turn a solid roof into a costly disaster. Dark stains and moisture rings inside your home often signal water has already found its way in. Most homeowners assume a new layer of waterproofing is all it takes. That’s where mistakes begin, because skipping the right steps at the start can leave even the best waterproofing job completely useless.
Table of Contents
- Step 1: Assess Your Current Roof Condition
- Step 2: Choose The Right Waterproofing Material
- Step 3: Prepare The Roof Surface Thoroughly
- Step 4: Apply The Waterproofing Material Evenly
- Step 5: Allow Proper Curing Time
- Step 6: Inspect And Verify Waterproofing Effectiveness
Quick Summary
| Key Point | Explanation |
|---|---|
| 1. Conduct a thorough roof assessment | Begin with an inspection for water damage and vulnerabilities to inform your waterproofing strategy. |
| 2. Choose suitable waterproofing materials | Select materials based on roof condition, climate, and specific structural requirements for effective long-term protection. |
| 3. Prepare the roof surface meticulously | Clean and repair the surface to ensure maximum adhesion of waterproofing materials before application. |
| 4. Apply material evenly and correctly | Use proper application techniques to avoid weak points; aim for consistent coverage and thickness throughout. |
| 5. Allow adequate curing time | Ensure optimal environmental conditions during curing to guarantee the waterproofing material achieves maximum effectiveness. |
Step 1: Assess Your Current Roof Condition
Before diving into any roof waterproofing process, a comprehensive assessment of your current roof condition becomes the critical foundation for successful protection. This initial evaluation will determine the extent of potential damage, identify vulnerable areas, and guide your subsequent waterproofing strategy.
Begin by conducting a meticulous visual inspection from both the interior and exterior of your property. Look for telltale signs of water damage such as discoloured ceiling patches, peeling paint, visible water stains, or subtle moisture rings. These indicators suggest potential roof vulnerabilities that require immediate attention. Dark or brownish stains frequently signal ongoing water penetration, which can compromise your roof’s structural integrity if left unaddressed.
On the exterior, systematically examine your roof’s surface for critical warning signs. Check for cracked or missing tiles, areas of surface deterioration, exposed underlayment, or visible gaps around chimneys and ventilation points. Pay special attention to roof edges, valleys, and intersections where water typically accumulates. A comprehensive external inspection helps pinpoint potential entry points for moisture.
According to Professional Roof Repair and Waterproofing Association, specific areas requiring intense scrutiny include:
- Roof junctions and intersection points
- Flashings around chimneys and roof penetrations
- Guttering and drainage systems
- Surface material integrity and consistent coating
For a more detailed assessment, consider using specialised moisture detection equipment. Infrared thermal cameras can reveal hidden moisture pockets invisible to the naked eye, providing unprecedented insight into potential problem areas. Professional roof inspectors often utilise these advanced diagnostic tools to map out precise waterproofing requirements.
Document your findings meticulously, creating a detailed map of potential vulnerabilities. Photograph each identified issue, noting its location, size, and apparent severity. This documentation will prove invaluable when developing your waterproofing strategy and can serve as a reference point for future maintenance efforts.
Successful completion of this assessment phase means you have a comprehensive understanding of your roof’s current condition, enabling targeted and effective waterproofing interventions. The insights gathered will directly inform the subsequent steps in your roof protection journey.
Step 2: Choose the Right Waterproofing Material
Selecting the appropriate waterproofing material represents a pivotal decision in your roof protection strategy. The right material can mean the difference between long lasting protection and repeated costly repairs. Your choice will depend on multiple critical factors including your roof’s current condition, local climate characteristics, and specific structural requirements.
The table below compares different types of roof waterproofing materials discussed in the article, highlighting their key features and best use scenarios for easier material selection.
| Material Type | Key Features | Best For |
|---|---|---|
| Liquid Applied Membrane | Seamless, flexible, adapts to surface movements | Complex roof shapes, seamless finishes |
| Bituminous Coating | Robust, durable, excellent water resistance | Concrete or metal roofs |
| Polyurethane Solution | Superior adhesion, resists environmental stress, versatile | Complex geometries, areas with movement |
| Concrete Repair Mortar | Repairs cracks/chips, compatible with concrete | Prepping/repairing concrete roofs |
| Metal Patching Compound | Treats imperfections in metal, prevents corrosion | Prepping/repairing metal roofs |
Consider the diverse range of waterproofing materials available, each designed to address unique roofing challenges. Liquid applied membranes offer exceptional flexibility and seamless coverage, creating a continuous protective barrier that adapts to surface movements. Bituminous coatings provide robust protection for concrete and metal surfaces, delivering excellent water resistance and durability. Polyurethane based solutions emerge as versatile options particularly suited for complex roof geometries, offering superior adhesion and resistance to environmental stressors.
Before making a final selection, carefully evaluate your roof’s specific characteristics. Concrete roofs require different waterproofing approaches compared to metal or tiled surfaces. Factors such as slope, existing damage, age of the structure, and potential exposure to extreme weather conditions will significantly influence material compatibility. For instance, flat roofs demand materials with exceptional elongation properties to accommodate potential structural shifts, while sloped roofs might prioritize materials with superior UV resistance.
According to Professional Roof Repair and Waterproofing Association, critical material selection criteria include:
- Chemical resistance capabilities
- UV stability
- Temperature range performance
- Adhesion strength
- Elongation and flexibility characteristics
Budget considerations should not compromise material quality. While premium waterproofing materials might represent a higher initial investment, they frequently deliver substantial long term savings by preventing extensive water damage. Consult professional waterproofing specialists who can provide tailored recommendations based on a comprehensive assessment of your specific roof condition.
Verify your material choice by confirming manufacturer specifications, requesting technical datasheets, and understanding warranty provisions. Proper material selection transforms your roof from a potential liability into a robust protective shield for your entire property. Learn more about our Pro Waterproofing approach to ensure you make the most informed decision possible.
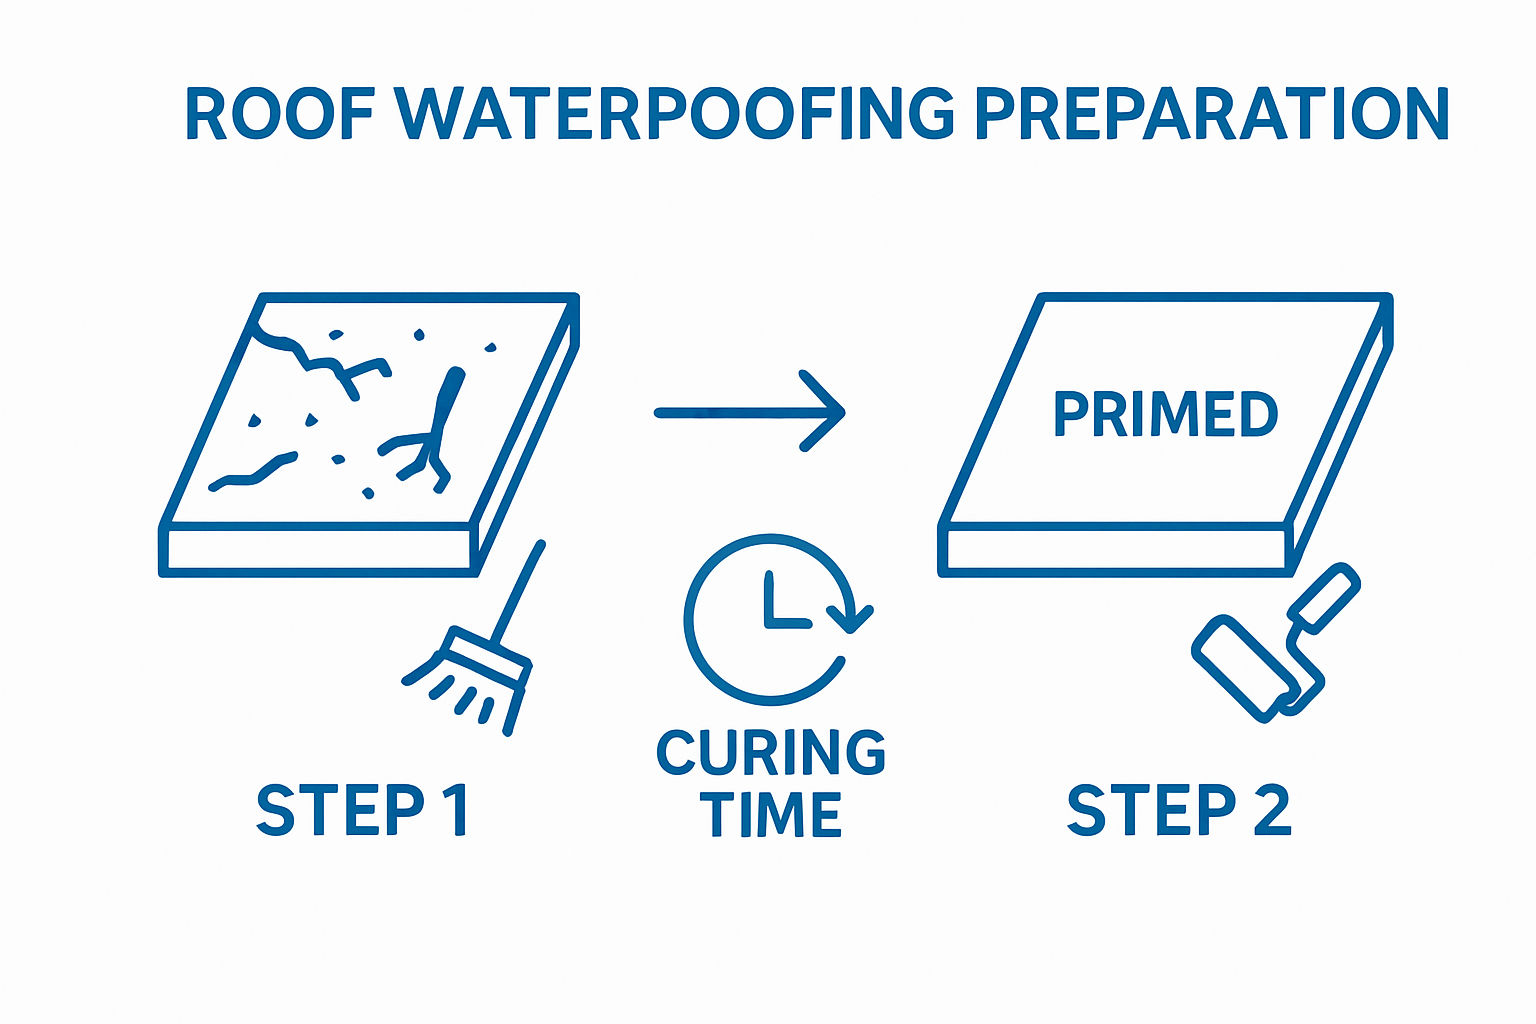
Step 3: Prepare the Roof Surface Thoroughly
Preparing your roof surface represents the most critical foundation for successful waterproofing. Inadequate surface preparation can render even the most expensive waterproofing materials completely ineffective. Think of this stage as creating a perfect canvas before painting a masterpiece.
Begin by conducting a comprehensive surface cleaning that goes beyond simple sweeping. Use high pressure water jets to remove dirt, algae, loose particles, and accumulated debris. Pay special attention to removing any existing loose paint, rust, or deteriorating sealant. A thoroughly cleaned surface ensures maximum adhesion for your waterproofing material. Professional grade cleaning solutions might be necessary for stubborn contaminants, particularly on surfaces with significant biological growth or embedded grime.
Next, carefully inspect the surface for structural imperfections. Repair all cracks, chips, and uneven areas before applying any waterproofing material. Small surface irregularities can create potential water entry points, compromising your entire waterproofing effort. Use appropriate repair compounds designed specifically for your roof’s material type. Concrete surfaces might require specialised concrete repair mortars, while metal roofs could need specific metal patching compounds.
According to Professional Roof Repair and Waterproofing Association, critical surface preparation steps include:
- Complete surface decontamination
- Structural damage repair
- Surface levelling and smoothing
- Moisture content verification
- Primer application
Priming represents the final crucial preparation stage. Apply a high quality primer compatible with both your roof surface and chosen waterproofing material. Primers create a superior bonding surface, enhancing the adhesion and long term performance of your waterproofing system. Different surfaces require specific primer types, so consult manufacturer recommendations carefully.
Successful surface preparation transforms your roof from a vulnerable structure to a robust, protected surface ready for comprehensive waterproofing. The time and effort invested in this stage will directly translate into years of reliable protection. Take your time, be meticulous, and remember that preparation is the silent hero of effective waterproofing. Learn more about our comprehensive Pro Waterproofing approach to surface preparation and protection.
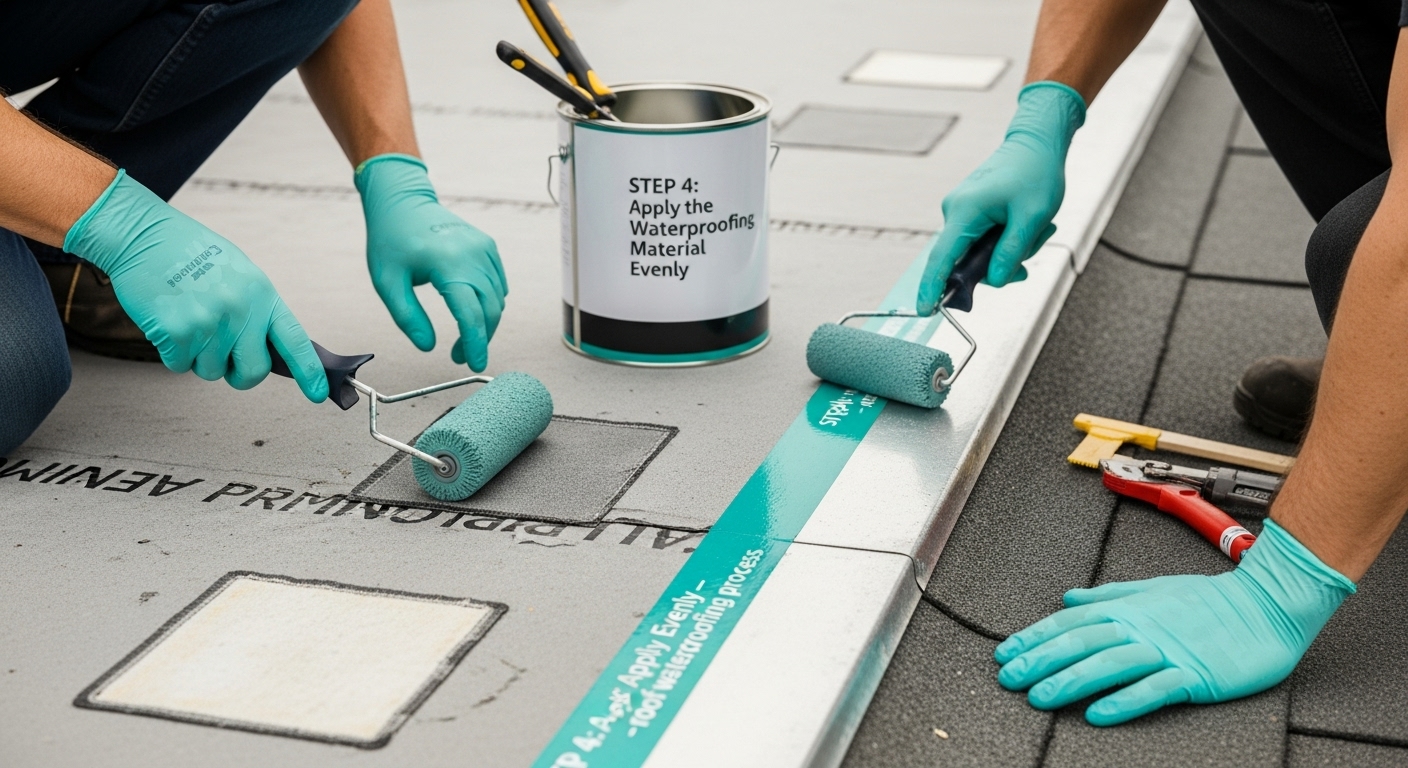
Step 4: Apply the Waterproofing Material Evenly
Applying waterproofing material represents the critical moment where your meticulous preparation transforms into robust protection. Precision and consistency are paramount during this phase, as uneven application can create vulnerable weak points that compromise your entire waterproofing strategy.
Start by selecting the most appropriate application tools for your specific waterproofing material. Liquid membranes typically require specialised rollers or spraying equipment that ensures uniform coverage. Consider using long handled rollers for larger surface areas, which provide consistent pressure and help maintain an even application thickness. For smaller or more intricate roof sections, specialised brushes or squeegees might offer better control and precision.
Temperature and environmental conditions play a crucial role in successful application. Choose a dry day with moderate temperatures, typically between 10 and 25 degrees Celsius. Avoid applying waterproofing materials during direct sunlight or extreme humidity, as these conditions can negatively impact material adhesion and curing processes. Work systematically, starting from the lowest point of the roof and progressing upwards to prevent creating unnecessary pooling or uneven distribution.
According to Professional Roof Repair and Waterproofing Association, critical application guidelines include:
- Maintaining consistent material thickness
- Avoiding air bubbles and gaps
- Ensuring complete surface coverage
- Allowing proper curing time between layers
- Checking for uniform material distribution
Apply the waterproofing material in multiple thin layers rather than a single thick coat. This approach promotes better adhesion, reduces the likelihood of air pockets, and ensures more uniform coverage. Use a systematic overlapping technique, ensuring each pass slightly covers the previous application to eliminate potential gaps.
 Pay extra attention to critical areas such as roof edges, corners, and potential penetration points like chimneys or ventilation units.
Verify your application by conducting a thorough visual inspection. Look for any missed spots, uneven areas, or potential thin patches. Some advanced waterproofing materials change color when properly applied, providing an additional quality control mechanism. After application, allow sufficient curing time as specified by the manufacturer before subjecting the surface to any additional stress or environmental exposure. Learn more about our comprehensive Pro Waterproofing techniques for optimal roof protection.
Step 5: Allow Proper Curing Time
Curing represents the often overlooked yet critically important phase of the waterproofing process. Rushing this stage can completely undermine all your previous meticulous preparation and application efforts. Think of curing as the critical transformation period where your waterproofing material transitions from a liquid application to a robust, protective membrane.
Understand that different waterproofing materials require unique curing conditions. Liquid membranes, polyurethane coatings, and bituminous solutions each demand specific environmental parameters to achieve optimal performance. Temperature, humidity, and air circulation play pivotal roles in determining the effectiveness of your curing process. Ideal curing conditions typically involve stable temperatures between 10 and 25 degrees Celsius with moderate humidity levels. Avoid applying waterproofing materials during periods of extreme weather fluctuations or expected precipitation.
Create a controlled environment that supports optimal curing. This might involve temporarily covering the roof to protect the newly applied waterproofing material from direct sunlight, unexpected rain, or debris. Use breathable protective coverings that allow moisture to escape while preventing external contaminants from interfering with the curing process. Monitor the surface carefully, looking for signs of proper adhesion, color changes, or texture modifications that indicate successful curing.
According to Professional Roof Repair and Waterproofing Association, critical curing considerations include:
- Maintaining consistent environmental conditions
- Avoiding mechanical stress during curing
- Monitoring material transformation
- Preventing moisture interference
- Allowing manufacturer recommended curing duration
Patience becomes your greatest ally during this phase. Resist the temptation to test or stress the newly applied waterproofing material before it has fully cured. Each manufacturer provides specific guidelines for curing duration, which can range from 24 to 72 hours depending on the product and environmental conditions. Use this time to document your application process, take photographs, and prepare for final inspection. Consider using moisture meters or infrared thermal cameras to verify the curing progression and identify any potential weak points.
Successful curing transforms your waterproofing material from a liquid application to a robust, protective barrier. By investing time and attention during this critical phase, you ensure long lasting protection for your property. Learn more about our comprehensive Pro Waterproofing approach to achieving superior roof protection.
Step 6: Inspect and Verify Waterproofing Effectiveness
The final verification of your waterproofing application represents the critical moment that validates all your previous efforts. Thorough inspection determines whether your waterproofing investment will provide long lasting protection or potentially leave your property vulnerable to future damage. This step transforms your technical application into a proven protective system.
This checklist table summarises essential verification steps and tools needed to properly inspect and validate your roof waterproofing effectiveness following completion.
| Verification Step | Description | Recommended Tool |
|---|---|---|
| Visual Surface Examination | Detailed inspection for cracks, bubbles, uneven areas | Magnifying glass/eyes |
| Standing Water Test | Pool water for 24-72 hours to check for penetration | Controlled pooling setup |
| Moisture Content Measurement | Gauge surface moisture to spot hidden leaks | Moisture meter |
| Adhesion Strength Verification | Test for strong bonding of material to surface | Manual/probe check |
| Thermal Imaging Analysis | Identify invisible moisture pockets via temperature changes | Infrared thermal camera |
Begin with a comprehensive visual inspection, carefully examining every inch of the treated surface. Look for subtle indicators of potential weakness such as tiny bubbles, hairline cracks, or uneven material distribution. Use natural lighting to your advantage, positioning yourself at different angles to catch even the most minute surface irregularities. Professional inspectors often recommend using high powered magnification tools to detect microscopic imperfections that might escape casual observation.
Implement practical testing methods to validate your waterproofing effectiveness. The standing water test remains one of the most reliable verification techniques. Create controlled water pooling areas on your roof surface, allowing water to remain for 24 to 72 hours. Monitor these areas meticulously, checking for any signs of moisture penetration, color changes, or surface deformation. This method simulates real world water exposure conditions and provides concrete evidence of your waterproofing performance.
According to Professional Roof Repair and Waterproofing Association, critical verification steps include:
- Comprehensive visual surface examination
- Standing water penetration testing
- Moisture content measurement
- Adhesion strength verification
- Thermal imaging analysis
Utilise advanced diagnostic tools to enhance your inspection process. Infrared thermal cameras can reveal hidden moisture pockets invisible to the naked eye. These sophisticated devices detect temperature variations that indicate potential water infiltration points.
Moisture meters provide precise readings of surface moisture content, offering quantitative data about your waterproofing effectiveness. Professional grade equipment transforms your inspection from a subjective assessment to a scientifically validated verification.
Document your entire inspection process meticulously. Photograph each section of the roof, record your testing methodologies, and note any observations or potential areas of concern. This documentation serves multiple purposes: it provides a baseline for future inspections, creates a record of your waterproofing application, and can be valuable for insurance or property maintenance purposes. Learn more about our comprehensive Pro Waterproofing inspection techniques to ensure your roof remains protected.
Secure Your Roof with Professional Waterproofing Solutions
Are you worried about persistent leaks, hidden moisture, or costly future repairs? The article has shown that a single missed vulnerability or incorrect material choice during the roof waterproofing process can expose your property to serious water damage and ongoing frustration. At Pro Waterproofing, we understand that effective waterproofing requires meticulous assessment, premium materials, and flawless application. You deserve peace of mind that your roof is fully protected.

Do not wait until the next heavy rainfall or visible stain endangers your investment. Choose a team that uses proven inspection methods and advanced materials to deliver reliable, long-term results. Visit Pro Waterproofing to request a consultation, explore tailored solutions for South African properties, or find out more about comprehensive services to protect your roof for years to come. Take the step today—secure lasting safety and value for your property.
Frequently Asked Questions
What is the first step in the roof waterproofing process?
Before starting the waterproofing process, it is essential to assess the current condition of your roof. This includes a visual inspection for water damage, identifying vulnerable areas, and documenting any issues for reference.
How can I choose the right waterproofing material for my roof?
Selecting the appropriate waterproofing material depends on factors such as your roof’s current condition, its material type, and the local climate. Common options include liquid membranes, bituminous coatings, and polyurethane solutions, each suited for different roofing needs.
Why is surface preparation critical before applying waterproofing material?
Thorough surface preparation ensures maximum adhesion and effectiveness of the waterproofing material. This involves cleaning the surface, repairing imperfections, and applying a suitable primer to create the best bonding surface.
How can I verify the effectiveness of my waterproofing application?
To check for effectiveness, conduct a comprehensive visual inspection and perform tests such as the standing water test. Using tools like moisture meters and infrared thermal cameras can also help identify potential water infiltration spots.