
Water intrusion ranks among the top threats to property value for homeowners in Gauteng and Western Cape, with British research showing over 60 percent of homes suffer water-related issues every year. Protecting your investment means understanding exactly where your building is vulnerable to leaks and moisture damage. This waterproofing checklist guides you through the crucial steps that help reduce risks, safeguard structural integrity, and keep your home’s value secure in the South African climate.
Table of Contents
- Step 1: Evaluate Vulnerable Areas Around Your Home
- Step 2: Assess And Clear Surfaces For Waterproofing
- Step 3: Select Appropriate Waterproofing Materials
- Step 4: Apply Waterproofing Solutions Effectively
- Step 5: Verify Coverage And Inspect For Missed Spots
- Step 6: Monitor Results And Schedule Regular Checks
Quick Summary
| Key Point | Explanation |
|---|---|
| 1. Identify vulnerable areas | Examine foundations, roof edges, and joints to spot potential water damage risk zones early on. |
| 2. Prepare surfaces thoroughly | Clean surfaces and repair any existing damage to ensure effective waterproofing adhesion. |
| 3. Choose suitable waterproofing materials | Select materials based on surface type and local climate to maximise protection and durability. |
| 4. Inspect application for missed spots | Conduct a detailed assessment post-application to ensure uniform coverage and integrity of the waterproofing treatment. |
| 5. Schedule regular maintenance checks | Establish a monitoring routine to track the condition of waterproofed areas and address any emerging issues promptly. |
Step 1: Evaluate vulnerable areas around your home
Detecting potential water damage risk zones in your home requires a systematic and thorough approach. Understanding where moisture can infiltrate helps prevent costly structural damage and protects your property’s integrity.
Start by examining key vulnerable areas that are most prone to water penetration. Focus on external building surfaces like foundations, roof edges, window frames, and exterior wall joints. Check your basement and crawl spaces for signs of existing moisture seepage. Walls adjacent to ground level are particularly susceptible to dampness, as water can easily penetrate substrates through capillary action and soil moisture transfer.
Pay special attention to horizontal and vertical surfaces that connect different structural elements. Balconies, retaining walls, and areas where different building materials meet create natural weak points for water intrusion. Look for early warning signs like discoloured paintwork, peeling wallpaper, white salt deposits, or subtle mould growth. These indicators suggest underlying moisture problems that require immediate investigation.
Expert Tip: Keep a detailed moisture map of your home by photographing and documenting potential problem areas during your inspection for future reference and tracking changes over time.
Step 2: Assess and clear surfaces for waterproofing
Preparing surfaces for waterproofing is a critical step that determines the effectiveness and longevity of your protective treatment. This process requires meticulous attention to detail and careful evaluation of your surfaces before applying any waterproofing materials.
Begin by thoroughly cleaning and inspecting the surfaces you intend to waterproof. Remove all debris, dust, and loose materials that could compromise the waterproofing application, ensuring a smooth and stable base. Check for existing cracks, uneven areas, or previous moisture damage that might require repair. You will want to verify the surface temperature and humidity levels, as these factors significantly impact the adhesion and performance of waterproofing products.
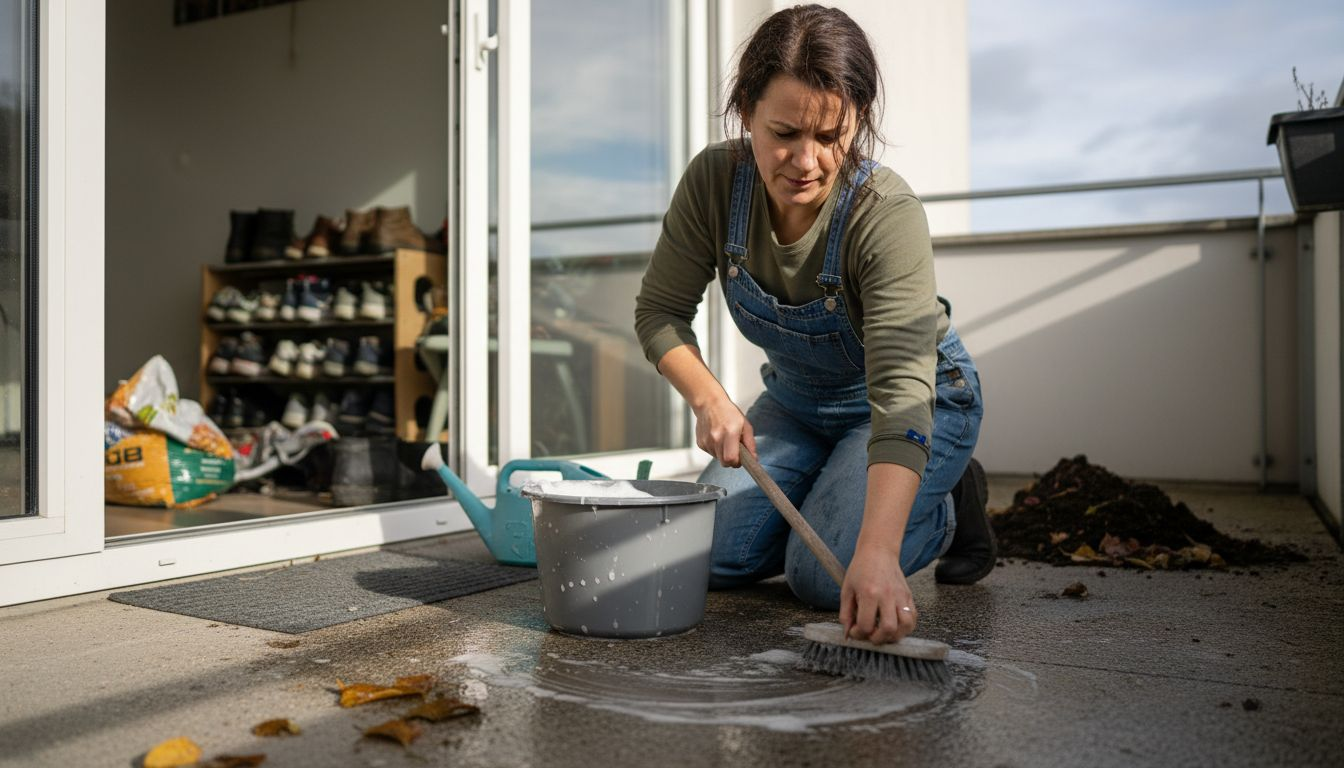
Carefully examine each area for potential issues like mould, mildew, or structural weaknesses. Follow strict safety and preparation standards to ensure a comprehensive assessment. Use appropriate cleaning tools and solutions specific to the surface material whether it is concrete, wood, or masonry. Pay special attention to joints, seams, and areas where different building materials intersect, as these are typically the most vulnerable points for water penetration.
Expert Tip: Always conduct a moisture test on surfaces before waterproofing to confirm they are sufficiently dry and ready for treatment.
Step 3: Select appropriate waterproofing materials
Choosing the right waterproofing materials is crucial for protecting your property from moisture damage and ensuring long term structural integrity. Your selection must consider multiple factors including surface type, local climate conditions, and specific environmental challenges.
Waterproofing techniques fundamentally fall into two primary categories: integral treatments that modify material composition and surface treatments applied externally. Integral methods like water repellents and crystalline admixtures work by changing the concrete’s internal structure, while surface treatments involve protective coatings and membranes. The National Certificate in Waterproofing recommends considering heat-fused, reinforced, and synthetic systems that comply with South African National Standards, taking into account local environmental conditions and substrate requirements.
Evaluate materials based on their durability, application complexity, and maintenance needs. Consider factors such as substrate porosity, expected water exposure, temperature fluctuations, and potential structural movement. Different surfaces like concrete, wood, or masonry will require specific waterproofing approaches, so match your material selection precisely to the surface characteristics and anticipated environmental stress.
Here’s a comparison of common waterproofing material types and their typical applications:
| Material Type | Best Suited For | Key Advantage | Typical Limitations |
|---|---|---|---|
| Bituminous Membrane | Flat roofs and terraces | Excellent flexibility | UV exposure may degrade |
| Cementitious Coating | Basements, water tanks | Easy to apply, cost-effective | Low flexibility, cracks over time |
| Liquid Polyurethane | Balconies, complex shapes | Seamless finish, high resistance | Sensitive to substrate moisture |
| Sheet Membrane | Foundation walls, tunnels | Consistent thickness, fast install | Requires skilled application |
| Crystalline Admixture | Concrete structures, slabs | Permanent waterproofing | Only works for new concrete |
Expert Tip: Consult a professional waterproofing specialist to confirm material compatibility and receive tailored recommendations for your specific property.
Step 4: Apply waterproofing solutions effectively
Successful waterproofing requires precision, patience, and a methodical approach to ensure complete protection for your property. Understanding the correct application techniques will significantly enhance the longevity and effectiveness of your waterproofing treatment.
Effective waterproofing application involves carefully following manufacturer instructions and understanding specific environmental conditions. Begin by selecting the appropriate application method whether brushing, rolling, or spraying, which depends on your chosen material and surface type. Pay close attention to coverage techniques ensuring uniform application without gaps or thin spots. When working with specialised materials like polymer-modified cement-based mortars, precise mixing and layering become critical to achieving optimal results.
Maintain consistent environmental conditions during application. Avoid applying waterproofing solutions in extreme temperatures or high humidity, as these factors can compromise material performance. Work systematically across surfaces, overlapping application areas slightly to guarantee complete coverage. Allow sufficient curing time between layers and follow manufacturer recommended drying periods to maximise material bonding and water resistance.

Expert Tip: Use a moisture metre to verify surface dryness before beginning your waterproofing application to prevent potential adhesion problems.
Step 5: Verify coverage and inspect for missed spots
After applying waterproofing solutions, a meticulous inspection is crucial to guarantee complete protection and identify any potential vulnerabilities in your application. This final verification step ensures the integrity of your waterproofing treatment and prevents future moisture related issues.
Surface inspection requires a systematic approach to examining the entire waterproofed area for consistent coverage and potential weaknesses. Begin by performing a comprehensive visual assessment in good lighting conditions, looking carefully for thin spots, air bubbles, or areas with incomplete material application. Pay particular attention to transition zones like corners, joints, and edges where waterproofing materials often fail to create a seamless seal. Sheet-applied membranes demand extra scrutiny at junction points to confirm smooth transitions and eliminate potential entry points for moisture.
Use multiple inspection techniques to validate your waterproofing application. Walk the surface systematically, applying gentle pressure to check for uniform thickness and consistent material coverage. Consider using a moisture metre or specialised detection tools to identify hidden gaps or inconsistencies not visible to the naked eye. Document your findings and be prepared to reapply materials in areas showing incomplete coverage or potential weakness.
This summary outlines key inspection tools and what they reveal during waterproofing checks:
| Inspection Tool | Reveals | When to Use |
|---|---|---|
| Moisture metre | Hidden moisture in substrates | Before application, final check |
| Bright torch | Thin spots, surface variations | Daylight and detailed inspection |
| Visual assessment | Bubbles, cracks, discolouration | Overall coverage review |
| Manual pressure | Material thickness, adhesion | Post-curing, pre-completion |
Expert Tip: Conduct your inspection during daylight hours and use a bright torch to help highlight subtle variations in material application and surface texture.
Step 6: Monitor results and schedule regular checks
Successful waterproofing is an ongoing process that requires consistent attention and periodic evaluation to maintain its protective capabilities. Your initial application is just the beginning of a comprehensive moisture protection strategy for your property.
Regular monitoring involves implementing systematic inspection protocols to ensure the continued effectiveness of your waterproofing treatment. Establish a structured schedule for checking treated surfaces at least twice yearly and after significant weather events. Look for early warning signs such as discolouration, moisture accumulation, or subtle material degradation. Developing a structured monitoring plan aligned with South African construction safety standards helps maintain system integrity and identify potential issues before they escalate.
Document each inspection meticulously, recording observations about material condition, potential stress points, and environmental factors that might impact waterproofing performance. Take photographs to track changes over time and create a comprehensive maintenance history. Be proactive about addressing minor imperfections immediately to prevent them from developing into more significant structural vulnerabilities. Consider engaging a professional waterproofing specialist for comprehensive annual assessments that can provide expert insight into your property’s moisture protection needs.
Expert Tip: Create a dedicated digital or physical log to track your waterproofing maintenance history, including dates of application, inspection results, and any remedial work performed.
Protect Your Home with Expert Waterproofing Solutions from Pro Waterproofing
Water damage poses a serious threat to your property’s safety and value, as highlighted in the “Waterproofing Checklist for Homeowners: Complete Guide.” Identifying vulnerable areas, selecting the right materials, and ensuring thorough application can feel overwhelming when tackling waterproofing on your own. Don’t let uncertainty or delays put your home at risk of costly repairs due to moisture intrusion or structural weakness.
Take charge today with the trusted professionals at Pro Waterproofing. We specialise in delivering comprehensive waterproofing services matched perfectly to your home’s unique needs. Our expertise ensures every surface is prepared and protected using materials suited for South African conditions, guiding you through every step from assessment to ongoing monitoring. Learn more about common challenges and solutions in our Uncategorized – Pro Waterproofing section.

Act now to safeguard your investment and prevent future damage. Visit Pro Waterproofing to request a personalised quote, explore trusted waterproofing strategies, and connect with specialists committed to quality and lasting results. Start your journey towards a dry, secure home by exploring our expert guidance and contacting us today.
Frequently Asked Questions
What are the main vulnerable areas in my home that need waterproofing?
Identifying vulnerable areas is crucial for effective waterproofing. Focus on external surfaces like foundations, roof edges, window frames, and areas where different materials meet. Inspect these zones regularly to ensure they remain dry and protected from moisture infiltration.
How can I prepare surfaces for waterproofing?
To prepare surfaces, begin by thoroughly cleaning them to remove debris, dust, and loose materials. Repair any existing cracks and ensure the surface is dry before applying waterproofing products. This preparation maximises adhesion and overall effectiveness.
What types of waterproofing materials should I consider?
Selecting the right waterproofing materials depends on your surface type and the environmental conditions. Common options include bituminous membranes for flat roofs, cementitious coatings for basements, and liquid polyurethane for complex shapes. Consider each material’s durability and application requirements before making a choice.
How do I apply waterproofing solutions effectively?
Apply waterproofing solutions according to the manufacturer’s instructions, using the method best suited for the material and surface. Ensure even coverage without thin spots and allow adequate drying time between layers. Systematic application improves protection and overall performance.
How often should I inspect my waterproofing efforts?
Regular inspections are essential to maintain waterproofing effectiveness. Schedule to check treated surfaces at least twice a year and after significant weather events. Look for signs of moisture or material degradation to address issues before they escalate.
What should I do if I find missed spots after waterproofing?
If you discover missed spots during your inspection, reapply waterproofing material to those areas immediately. Ensure thorough coverage to maintain protection against moisture. Conduct another check after reapplication to confirm complete sealing.