Even a tiny leak can lead to thousands in property damage if ignored, according to home repair experts. Keeping your roof watertight matters for your peace of mind and your wallet. A careful approach ensures every crack and joint is sealed so your home stays dry no matter the weather. This guide breaks down the practical steps you need for strong, lasting roof waterproofing.
Quick Summary
| Key Point | Explanation |
|---|---|
| 1. Conduct a thorough roof inspection | Inspect your roof for signs of damage and weak points to prevent future water issues. |
| 2. Prepare surfaces meticulously | Clean and repair roof surfaces before waterproofing to ensure proper adhesion and protection. |
| 3. Choose appropriate waterproofing materials | Select materials tailored to your roof type and environmental conditions for optimal performance. |
| 4. Seal all joints and penetrations | Pay attention to all critical junctions and potential leak points to create a watertight barrier. |
| 5. Perform a comprehensive final inspection | Verify all areas are properly sealed and functioning to ensure long-lasting waterproof protection. |
Table of Contents
- Step 1: Assess Roof Condition And Identify Risk Areas
- Step 2: Prepare Surfaces For Waterproofing Application
- Step 3: Select And Apply The Right Waterproofing Materials
- Step 4: Seal Critical Joints And Penetrations Thoroughly
- Step 5: Inspect And Test Waterproofed Areas For Complete Coverage
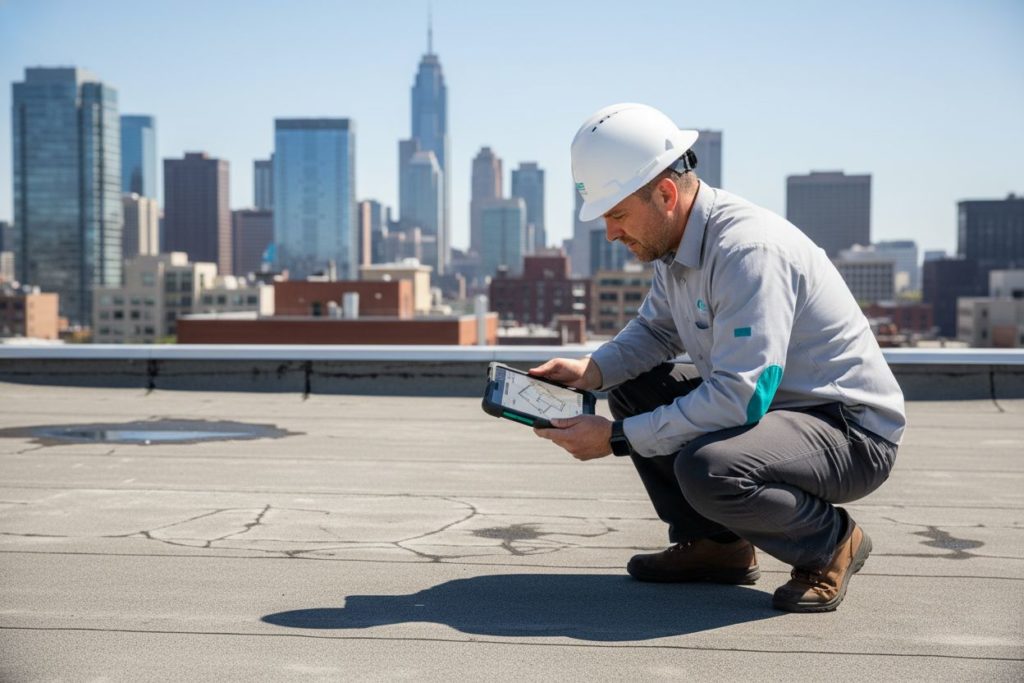
Step 1: Assess Roof Condition and Identify Risk Areas
Before you start any waterproofing project, thoroughly understanding your roof’s current condition is crucial. This initial assessment helps you pinpoint potential vulnerabilities and prevent future water damage.
Begin by performing a comprehensive visual inspection of your entire roof surface. Look carefully for signs of wear and damage like hairline cracks, uneven surfaces, rust spots on metal roofing, or areas where water might pool. According to expert insights from SealPro Coatings, a meticulous inspection is key especially for metal and concrete roofs.
For concrete roofs, pay special attention to drainage patterns. Check if water flows smoothly towards outlets or creates stagnant pools. Inspect all connection points where different roof sections meet and look for potential weak spots. SealPro’s process recommends carefully examining outlets and ensuring proper shaping for effective water runoff.
Pro Tip: Conduct your roof assessment on a clear day with good natural light. Shadows can help reveal subtle surface imperfections that might be missed during quick glances.
If you have a metal roof, scrutinise each sheet and connection point. Check for loose screws, damaged sheeting sections, and any visible rust development. These areas are potential entry points for water and require immediate attention before waterproofing begins.
For safety and accuracy, consider using binoculars or a drone for initial inspection if your roof pitch is steep. Taking clear photographs can help you document and track potential problem areas over time. Read more about thorough roof inspections to ensure you don’t miss critical details.
Once you have completed your detailed assessment, you will be well prepared to move forward with targeted waterproofing strategies tailored specifically to your roof’s unique conditions.
Step 2: Prepare Surfaces for Waterproofing Application
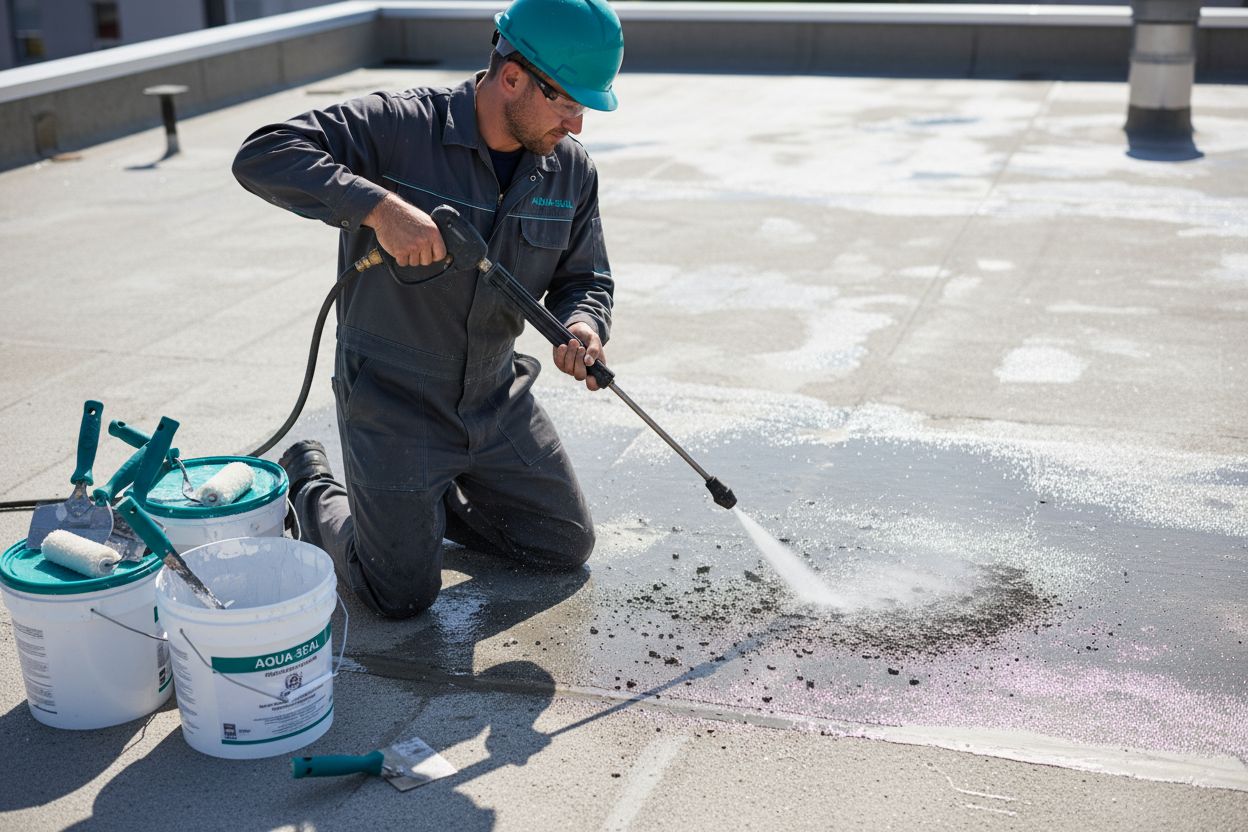
Before applying any waterproofing materials, proper surface preparation is absolutely critical. Your goal in this step is to create a clean, stable foundation that will ensure maximum adhesion and long term protection for your roof.
Start by thoroughly cleaning the entire surface. According to SealPro Coatings, this means removing all old waterproofing materials, dust, and debris. For concrete roofs, use a combination of sweeping and high pressure washing to strip away loose particles and create a pristine working surface.
If you have a concrete roof, carefully inspect for any cracks or cavities. Fill these imperfections completely to prevent future water penetration. Pay special attention to drainage shaping ensure water will flow smoothly away from your roof surface. This step prevents potential pooling that could compromise your waterproofing efforts.
Pro Tip: When working with metal roofs, use a specialized rust converter primer on any corroded areas before applying waterproofing materials.
For metal roofing surfaces, the preparation process requires additional precision. Explore our detailed waterproofing workflow to understand the nuanced approach. Degrease the entire surface using pressure washing, removing all contaminants that might prevent proper coating adhesion. SealPro recommends specifically priming rusted or Chromadek areas with a rust converter primer to create an optimal surface for waterproofing application.
Remember that patience during surface preparation directly translates to the effectiveness and longevity of your waterproofing solution. Take your time and do not rush through these critical initial steps. A meticulously prepared surface will provide significantly better protection against water infiltration.
With your surface now clean and primed, you are ready to move forward to the actual waterproofing application process.
![]()
Here’s a comparison of typical roof types and their key waterproofing considerations:
| Roof Type | Common Issues | Preparation Steps | Recommended Materials |
|---|---|---|---|
| Concrete Roof | Cracks Ponding |
Clean & pressure wash Repair cracks |
Bituminous membranes Polyurethane coatings |
| Metal Roof | Rust Loose screws Damaged sheets |
Degrease Prime rust spots Tighten fasteners |
Rust converter primers Liquid membranes |
Step 3: Select and Apply the Right Waterproofing Materials
Choosing the right waterproofing materials is like selecting the perfect armour for your roof. Your selection will determine how effectively your roof withstands moisture, UV exposure, and varying weather conditions.
According to Rooftite Projects, different materials offer unique advantages for specific roofing scenarios. For concrete roofs exposed to intense sunlight and rain, bituminous membranes provide excellent UV and moisture resistance. These robust materials create a seamless protective barrier that can handle South Africa’s challenging climate.
If your roof has complex geometries or multiple penetration points, consider liquid applied seamless membranes. These adaptable solutions conform perfectly to irregular surfaces, eliminating potential weak spots where water might infiltrate. Polyurethane coatings are another excellent option, offering remarkable flexibility and rapid drying times.
Pro Tip: Always match your waterproofing material to your specific roof substrate and environmental conditions for maximum effectiveness.
For long term durability, EPDM rubber membranes present an outstanding choice. These synthetic rubber materials provide exceptional longevity and can withstand significant temperature variations. Learn more about our comprehensive waterproofing process to understand material selection nuances.
The Sicon Group highlights additional sophisticated options like torch-on bitumen membranes and reflective roof coatings. Reflective coatings are particularly smart for areas with intense sunlight, as they help reduce heat absorption and potentially lower cooling costs.
When applying your chosen material, follow manufacturer instructions meticulously. Ensure surface preparation is complete, ambient temperatures are appropriate, and you have all necessary application tools. Careful application is just as critical as material selection.
With your waterproofing materials expertly selected and ready for application, you are now prepared to create a robust protective shield for your roof.
Step 4: Seal Critical Joints and Penetrations Thoroughly
Joints and penetrations are the weakest points in any roof waterproofing system. Your goal now is to create an impenetrable barrier that prevents water from finding even the tiniest entry point.
According to SealPro’s technical recommendations, reinforcing joints requires a strategic approach. For concrete roofs, this means using embedded mesh and specialized membranes to strengthen settlement cracks and vulnerable intersection areas. Pay special attention to parapet connections where different surfaces meet.
Metal roofs demand even more precise sealing techniques. The Sicon Group emphasises comprehensive coverage of all potential leak sources including roof overlaps, fixing points, fastener locations, and flashing interfaces. Each connection point represents a potential water entry zone that requires meticulous treatment.
Pro Tip: Use reinforcement materials like embedded mesh to create additional strength at critical junction points.
Start by thoroughly cleaning each joint and penetration area. Remove any old sealant, dust, or debris that might compromise adhesion. For areas around pipes, vents, or other roof penetrations, use specialized waterproofing compounds that can flex with temperature changes and building movement.
Explore our comprehensive waterproofing process to understand the nuanced approach to sealing complex roof surfaces. Consider using torch-on systems or liquid coatings specifically designed for creating seamless protective layers around challenging roof features.
When applying sealants, ensure complete coverage without air pockets or gaps. Work methodically and patiently, understanding that these small areas can make or break your entire waterproofing effort. A few extra minutes spent carefully sealing joints can save thousands in potential water damage repairs.
With critical joints and penetrations now thoroughly sealed, you have dramatically improved your roof’s resistance to water infiltration.
Step 5: Inspect and Test Waterproofed Areas for Complete Coverage
Your waterproofing project is nearly complete, but the final step of thorough inspection is crucial to guaranteeing long-term protection. This is your opportunity to verify that every inch of your roof has been sealed effectively.
According to SealPro, a final topcoat application like their HydroSeal HF provides an excellent opportunity for comprehensive visual inspection. Look for consistent coverage, paying special attention to areas around joints, penetrations, and complex geometric features. UV-stable finishes can help reveal any potential gaps or inconsistencies in your waterproofing application.
Begin your inspection by walking the entire roof surface systematically. Use natural daylight to help identify subtle variations in coating thickness or potential missed spots. Check for any bubbling, cracking, or uneven application that might compromise your waterproofing integrity.
Pro Tip: Use chalk or marking tape to highlight areas that require additional attention during your initial walkthrough.
Understand the nuances of waterproofing inspection to ensure you do not miss critical details. Rooftite recommends implementing a bi-annual inspection routine, which means checking not just immediately after application but also periodically to maintain long-term protection.
Consider performing a water test to validate your waterproofing. Create controlled water flow across different roof sections and observe how water moves and whether any leakage occurs. Pay particular attention to drainage points, ensuring water moves efficiently and does not pool in any areas.
Dont forget to inspect associated elements like gutters, downspouts, and roof edges. These areas often get overlooked but are critical to your roofs overall water management system. Remove any debris and check for proper alignment and functionality.
With a meticulous inspection complete, you have now taken the final step in ensuring a robust, leak-free roofing system that will protect your property for years to come.
Secure Your Roof From Hidden Water Risks
Have you noticed early warning signs on your roof, such as cracks, rust, or pooling water? Following each step in our “Roof Waterproofing Checklist” can be overwhelming, especially when missing small details could lead to costly leaks and structural damage. Many South African property owners underestimate the importance of thorough preparation, the right materials, and professional joint sealing. Ignoring these critical points puts your investment at risk.

Take action today and get peace of mind by connecting with the experts at Pro Waterproofing. If you want tailored advice or professional assistance your next step is simple. Visit our Uncategorized – Pro Waterproofing section to explore reliable solutions or request a personalised quote directly from our homepage. Our specialists are ready to guide you and help you achieve a truly leak-free roof. Do not wait until the next rainy season exposes hidden weaknesses—secure expert waterproofing now.
Frequently Asked Questions
How can I assess the condition of my roof before waterproofing?
To assess your roof’s condition, perform a comprehensive visual inspection to identify signs of wear, such as cracks, rust, and pooling water. Document any areas of concern and consider using binoculars or a drone for high or steep roofs to capture detailed images.
What steps should I take to prepare my roof for waterproofing?
Begin by thoroughly cleaning the roof surface to remove old waterproofing materials, dust, and debris. Ensure you fill any cracks completely to prevent water penetration and shape drainage areas for effective water runoff.
What types of waterproofing materials are best for different roof types?
Select waterproofing materials based on your roof type: for concrete roofs, consider bituminous membranes or polyurethane coatings, while metal roofs may benefit from liquid membranes or rust converter primers. Always match the material to the specific substrate and environmental conditions to ensure long-lasting protection.
How do I seal joints and penetrations effectively during the waterproofing process?
Seal critical joints and penetrations by cleaning the areas thoroughly and using specialized waterproofing compounds that can flex with building movement. Apply reinforcement materials, such as embedded mesh, for added strength and ensure complete coverage to prevent water entry.
What should I inspect after applying waterproofing to ensure coverage?
Conduct a thorough inspection of the entire roof surface, focusing on joints, penetrations, and areas with complex geometries. Look for any inconsistencies in coating thickness and consider performing a water test to check for leaks and drainage effectiveness.
How often should I inspect my waterproofed roof for maintenance?
Implement a bi-annual inspection routine to maintain your waterproofing system effectively. Check your roof for any signs of wear or failure every six months, particularly after heavy storms or adverse weather conditions.