
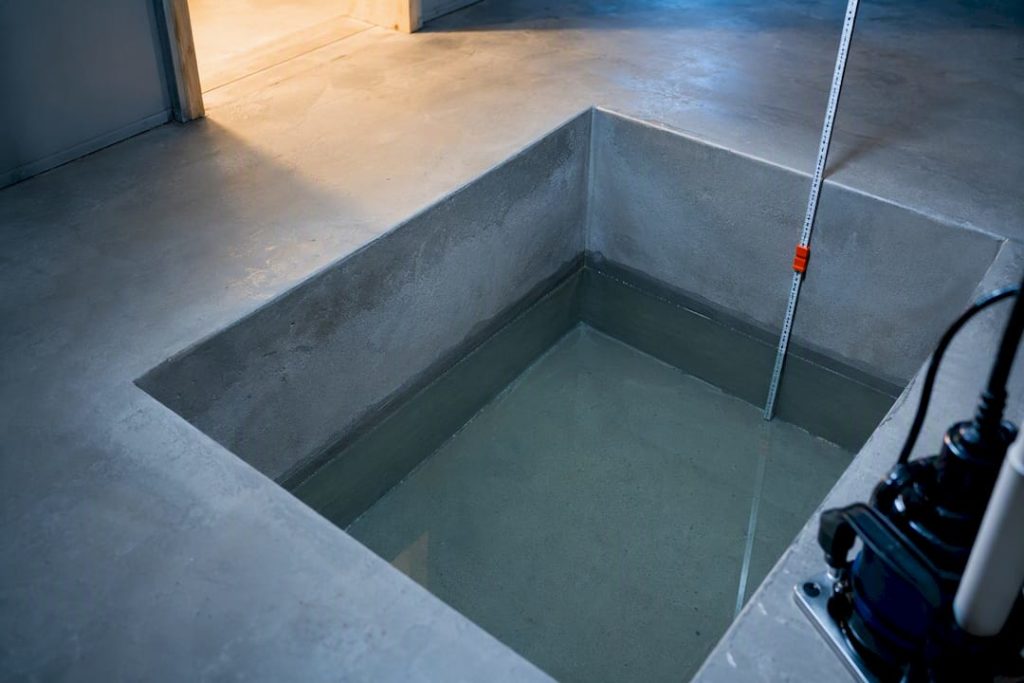
Yes, if your sump is concrete or sits below the water table, it needs waterproofing. The reliable sequence is repair first: fix cracks and joints, apply a crystalline or cementitious system with compatible coatings, then confirm the work with a water‑fill test before you trust it. Skip the repair stage and even the best coating will fail early. Book an inspection before choosing a product.
TL;DR:
- Proper sump waterproofing requires fixing cracks and joints before applying a crystalline or cementitious coating, with verification through staged water tests.
- Crystalline systems are preferred for below-water-table sumps because they seal from within the concrete, especially effective against external water pressure.
- Contractors should provide detailed, written scopes that separate structural repairs from coating application and include a water‑fill test for reliability.
- Costs depend mainly on repair scope and accessibility rather than the product, with crystalline systems lasting longer and needing less frequent reapplications.
- Skipping the water‑fill test or neglecting repair stages often leads to early failure, making proper assessment and repair essential.
Table of Contents
- What are the common sump waterproofing methods?
- How do you waterproof a sump step by step?
- How do you know a sump needs waterproofing?
- How do you choose a waterproofing contractor?
- What does sump waterproofing cost and how long does it last?
- Field perspective: what most owners get wrong
- How Pro Waterproofing can help
- Further technical reading
- Sources
- FAQ
What are the common sump waterproofing methods?
Most sumps fail not because the wrong product was chosen, but because the wrong method was matched to the wrong problem. Each system below solves a different failure mode.
- Cementitious slurry systems. Brushed or trowelled onto clean concrete, these are the workhorse choice for general sump protection. They’re cheap, easy to apply, and forgiving on slightly uneven substrates, but they lack flexibility and can crack if the structure moves.
- Crystalline (integral) admixtures. These react with moisture inside the concrete to grow needle‑like crystals that block capillary paths, which makes them the preferred option for negative‑side pressure, meaning water pushing in from outside the tank wall. They’re often the best fit for buried sumps where you cannot dig up the exterior.
- Polyurethane and epoxy coatings. Used where chemical exposure, high flexibility, or a fast‑curing membrane is needed. Epoxy handles chemical resistance well; PU tolerates minor structural movement better.
- Sealants, water bars and hydrophilic strips. These target joints and pipe penetrations specifically, the two weakest points in any sump. A poorly lapped water bar is one of the most common reasons leaks return after a “successful” waterproofing job.
- Factory‑made polymer sumps. For badly deteriorated or repeatedly failing concrete sumps, replacing the structure with a pre‑moulded polymer unit is sometimes more practical than continuing to chase leaks.
Crystalline systems, in particular, are widely favoured for below‑water‑table tanks because they seal from within the concrete mass rather than sitting on the surface, as detailed in this technical guide on tank waterproofing.
How do you waterproof a sump step by step?
Waterproofing a sump properly is less about the product and more about sequence. Do the steps out of order and the coating hides a problem instead of solving it.
- Clean and isolate. Pump out standing water, remove debris, and shut off any inflow so the surface can be inspected and dried.
- Document existing damage. Photograph cracks, stains and active weeps before doing anything else, so you can confirm afterwards whether the repair actually worked.
- Repair structural defects first. Rout out and fill cracks, then address every joint. This is where water bars and puddle flanges matter most: poorly lapped water bars and badly sealed pipe sleeves cause most leak recurrence, so give this step more attention than the coating itself.
- Detail penetrations. Fit puddle flanges around pipes and sleeve any new penetrations with a compatible sealant collar.
- Prepare the substrate. Crystalline systems need a saturated‑surface‑dry substrate, no standing water, no laitance. PU and epoxy systems generally need a dry, mechanically roughened surface. Follow the manufacturer’s moisture readings, not guesswork.
- Apply the system in layers. Two coats minimum for cementitious and crystalline systems, with the recommended overlap and cure time between coats, typically 24 hours per coat depending on temperature and humidity.
- Cure fully before testing. Rushing this step is the single biggest cause of a failed water‑fill test.
- Run the water‑fill test. Fill the sump in stages, allowing the concrete to absorb moisture at each lift rather than filling in one go, then monitor the level over roughly a week. A staged fill avoids false positives caused by initial absorption and reveals genuine leaks that a quick overnight check would miss.
Pro Tip: Mark the water level with a grease pencil at the start of the fill test and check it at the same time each day. A drop of more than a few millimetres over 24 hours after the first two days usually points to an active leak, not absorption.
How do you know a sump needs waterproofing?
Some signs are urgent. Others just need monitoring. Knowing which is which saves you from either ignoring a real problem or paying for structural repairs you don’t need yet.
External indicators include damp patches around the sump perimeter, rising ground damp on nearby walls, and staining that tracks down from a joint line. Internal indicators are cloudy or discoloured water, algae growth on the walls, and a water level that drops faster than evaporation or usage explains.
Quick field checks are straightforward:
- Isolate the sump and watch the water level for 24 to 48 hours.
- Run a torch along every joint and pipe entry looking for active weeps.
- Press gently on any crack to check if it’s moving or hollow underneath.
Roughly a third of long‑term sump failures trace back to a joint or penetration that was never properly detailed in the first place, according to guidance from Birla Opus on sump waterproofing. If a crack is wider than a few millimetres, growing, or accompanied by visible displacement, treat it as structural and bring in an engineer before applying anything.
How do you choose a waterproofing contractor?
A quote is only as good as the scope behind it. Before you compare prices, compare what each contractor is actually proposing to do.
Run through this checklist:
- Ask for proof of licensing, insurance, and at least two local references for sump or tank work specifically, not just general waterproofing.
- Request photographed case studies of similar negative‑side pressure jobs.
- Ask directly: what system do you use for negative‑side pressure, and why?
- Ask whether they perform a documented water‑fill test, and whether it’s included in the price or billed separately.
- Get a written scope that clearly separates structural crack and joint repair from the coating application, with cure and test stages listed as distinct line items.
Pro Tip: A contractor who quotes a single lump sum with no breakdown between repair and coating is often planning to skip the repair stage. Ask for the split before you sign anything.
Contractors who build a documented hydrostatic test and a specific, project‑backed warranty into their proposal tend to deliver more reliable results than those offering a vague “lifetime guarantee” with no test attached, a pattern confirmed in Pro Waterproofing’s owner guide. Treat a missing site visit, a one‑line scope, or an unwillingness to test as red flags, not minor omissions.
What does sump waterproofing cost and how long does it last?
Price depends less on the product and more on how much repair the concrete needs before any coating goes on. A sump with sound concrete and a couple of joint issues costs far less to treat than one with active structural cracking, restricted access, or a pump that needs to be removed and reinstated.
Main cost drivers include the volume of crack and joint repair, access difficulty, the system chosen, whether structural work is needed, and whether a proper water‑fill test is included.
On durability, cementitious systems typically need recoating every few years in harsh conditions, while crystalline systems tend to last longer because they work within the concrete rather than sitting on top of it. PU and epoxy coatings vary widely depending on exposure and installation quality. None of these figures are guarantees, they’re practical expectations that shift with water pressure, chemical exposure, and workmanship.
A simple maintenance routine protects the investment either way:
- Inspect twice a year, ideally before and after the wettest season.
- Clean outlets, covers, and pump inlets so debris doesn’t mask a developing leak.
- Check seals around penetrations and recoat according to the manufacturer’s interval, not on a guess.
Field perspective: what most owners get wrong
Every sump I’ve seen fail early failed for the same reason: someone applied a coating over a joint or crack that was never properly repaired. The coating looked fine for a season, then the underlying defect reopened and pushed water straight through it.
The water‑fill test gets skipped more than any other step, because it takes time and the sump looks dry the day the work finishes. That’s not proof. A staged fill over a week is the only way to know the repair holds under real pressure. If a sump has failed waterproofing twice already, or the concrete itself is crumbling, stop patching it. A factory‑made replacement sump is usually cheaper than a third round of repairs.
— Eben
How Pro Waterproofing can help
If you’d rather have someone assess the sump properly than guess between products, that’s what Prowaterproofing does. Site inspections identify which joints and cracks need repair before any coating is discussed, so the quote reflects the actual condition of your sump, not a generic price list.

A proper quote from Prowaterproofing separates structural repair from coating work, includes a water‑fill test as verification, and sets out warranty terms tied to that specific job rather than a blanket promise. If you’re dealing with a sump that’s already shown damp patches or a dropping water level, or you’re managing a commercial property with multiple sumps to check, request a site assessment through Prowaterproofing’s contact page and get a repair‑first scope in writing before any work starts.
Further technical reading
For deeper technical detail, see this guide on basement sump systems, the colloidal silica case study for negative‑pressure repairs, and interior versus exterior waterproofing approaches.
Sources
- Waterproofing STP Tanks: Watertight Both Ways, Joints, Coatings and the Water‑Fill Test — Studio Matrx
- Sump waterproofing: Why it is essential for long-term protection — Birla Opus
- Concrete water‑trap tanks waterproofed – Spraylock Africa
FAQ
How do you waterproof a sump?
Repair every crack, joint and pipe penetration first, apply a crystalline or cementitious system with a compatible coating, then confirm the work with a staged water‑fill test before relying on it.
How do you stop water leakage from a sump?
Trace the leak to a joint, crack or penetration using a torch and a 24 to 48 hour water level check, then repair that specific defect rather than recoating the whole surface, since surface coatings rarely fix a joint failure underneath.
How can you waterproof a damp cellar?
The same repair‑first principle applies: fix joints and cracks, choose a crystalline system for below‑ground walls under pressure, and verify with monitored testing rather than assuming a coating alone has solved it. Pro Waterproofing’s guide on stopping water seepage through basement walls covers the wall‑specific detailing.
What is a sump?
A sump is a pit, typically concrete, built to collect groundwater or wastewater, often paired with a pump that removes the water before it can rise into a basement or foundation area.
How much does sump waterproofing typically cost?
Costs vary with the amount of crack and joint repair needed, access difficulty, and the system chosen, so current pricing is best confirmed through a site assessment rather than a fixed figure.