Nearly half of British-inspired homes in Gauteng battle recurring moisture issues every rainy season. Water damage weakens foundations, ruins walls, and quickly turns a safe haven into a costly project. Learning where to start and how to tackle problem zones yourself can help homeowners restore comfort and cut expensive repairs. Discover which household areas need the most attention and how your DIY efforts can improve property value and peace of mind.
Table of Contents
- Step 1: Identify Key Areas for Waterproofing
- Step 2: Gather Essential Tools and Materials
- Step 3: Prepare Surfaces for Treatment
- Step 4: Apply Waterproofing Products Correctly
- Step 5: Inspect and Test for Water Tightness
Quick Summary
| Key Point | Explanation |
|---|---|
| 1. Identify Vulnerable Areas | Focus on foundations, basements, and walls to prevent moisture entry. Inspect for visible cracks, stains, or signs of dampness. |
| 2. Gather High-Quality Materials | Use specialised waterproofing membranes, sealants, and appropriate tools for effective treatment. Invest in professional-grade products for durability. |
| 3. Prepare Surfaces Thoroughly | Clean and repair all surfaces to ensure optimal adhesion of waterproofing materials. Check for moisture and structural damage before application. |
| 4. Apply Products With Precision | Follow application guidelines closely, applying multiple layers while checking for uniform coverage and potential air pockets. |
| 5. Inspect for Water Tightness | Conduct systematic tests to verify waterproofing effectiveness, documenting any issues and marking areas for immediate attention. |
Step 1: Identify Key Areas for Waterproofing
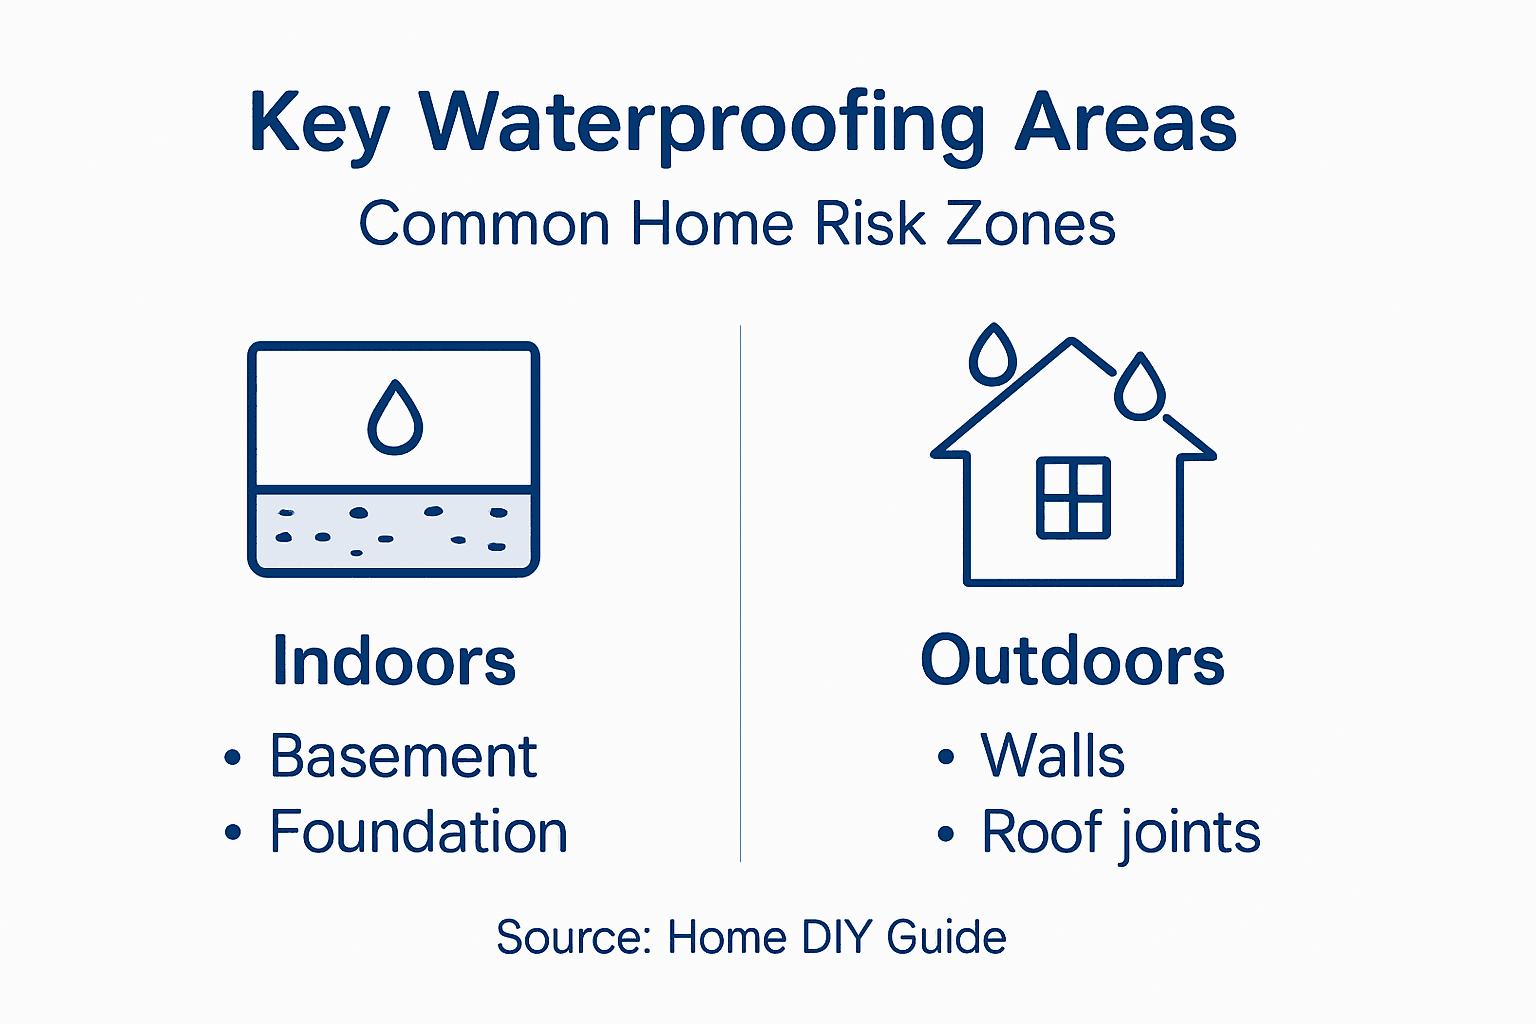
Identifying vulnerable zones in your home represents the critical first stage of effective waterproofing. Homeowners in Gauteng must strategically survey their property to pinpoint potential moisture entry points before implementing protective measures.
The most vulnerable areas typically include foundations, basements, exterior walls, roof interfaces, window frames, and underground spaces. Understanding waterproofing methods helps homeowners recognise structural weaknesses that might compromise their property’s integrity. Foundation walls frequently experience water penetration due to soil moisture and drainage issues, making them a priority for inspection. Check for visible cracks, signs of dampness, or efflorescence which indicates water movement through masonry.
Carefully examine exterior wall surfaces for hairline fractures, particularly around window and door frames where sealants degrade over time. Basement areas require meticulous assessment since they sit below ground level and experience significant hydrostatic pressure. Look for water stains, mould growth, or musty odours that signal potential moisture infiltration.
Here is a summary of typical problem areas and the risks they pose:
| Area of Home | Main Risk | Signs of Moisture Issues |
|---|---|---|
| Foundations | Structural weakening | Cracks, dampness, efflorescence |
| Basements | Rising damp, mould growth | Stains, musty odours, mould |
| Exterior Walls | Surface degradation | Hairline fractures, peeling paint |
| Roof Interfaces | Water pooling, leaks | Stains, drips, damaged sealant |
| Window Frames | Sealant failure, ingress | Condensation, cracking, flaking |
Expert Advice: Conduct a comprehensive property survey during dry weather to accurately identify potential water entry points without rainfall masking underlying issues.
Step 2: Gather Essential Tools and Materials
Preparing for a successful waterproofing project requires careful selection of specialised equipment and high-quality materials. Your toolkit will determine the effectiveness and durability of your home protection strategy.
For comprehensive waterproofing, you will need flexible waterproofing membrane systems alongside various application tools. Key materials include liquid-applied membranes, cementitious waterproofing compounds, joint sealants, and protective coatings. Essential tools comprise sturdy trowels, paint rollers, brushes, protective gloves, safety goggles, scrapers, cleaning cloths, and a reliable ladder for accessing higher surfaces. Consider purchasing specialised waterproofing sealants designed specifically for masonry and concrete surfaces common in Gauteng properties.
Compare key waterproofing material types and their primary advantages:
| Material Type | Durability Level | Typical Use Case |
|---|---|---|
| Liquid-applied membrane | High | Roofs, exterior walls |
| Cementitious compounds | Moderate | Basements, foundation walls |
| Joint sealants | Variable | Around windows and door frames |
| Protective coatings | High | Concrete surfaces, exposed areas |
Organise your workspace by laying out materials systematically and ensuring proper ventilation. Measure and prepare your work area meticulously before commencing application to guarantee thorough coverage and optimal results. Purchase materials from reputable suppliers and check compatibility between different waterproofing products to prevent potential chemical interactions.
Expert Advice: Invest in professional-grade materials and tools rather than cheap alternatives to ensure long-lasting waterproofing protection.
Step 3: Prepare Surfaces for Treatment
Preparing surfaces correctly is the foundation of successful waterproofing. Your meticulous approach will determine how effectively protective materials bond and perform against moisture infiltration.
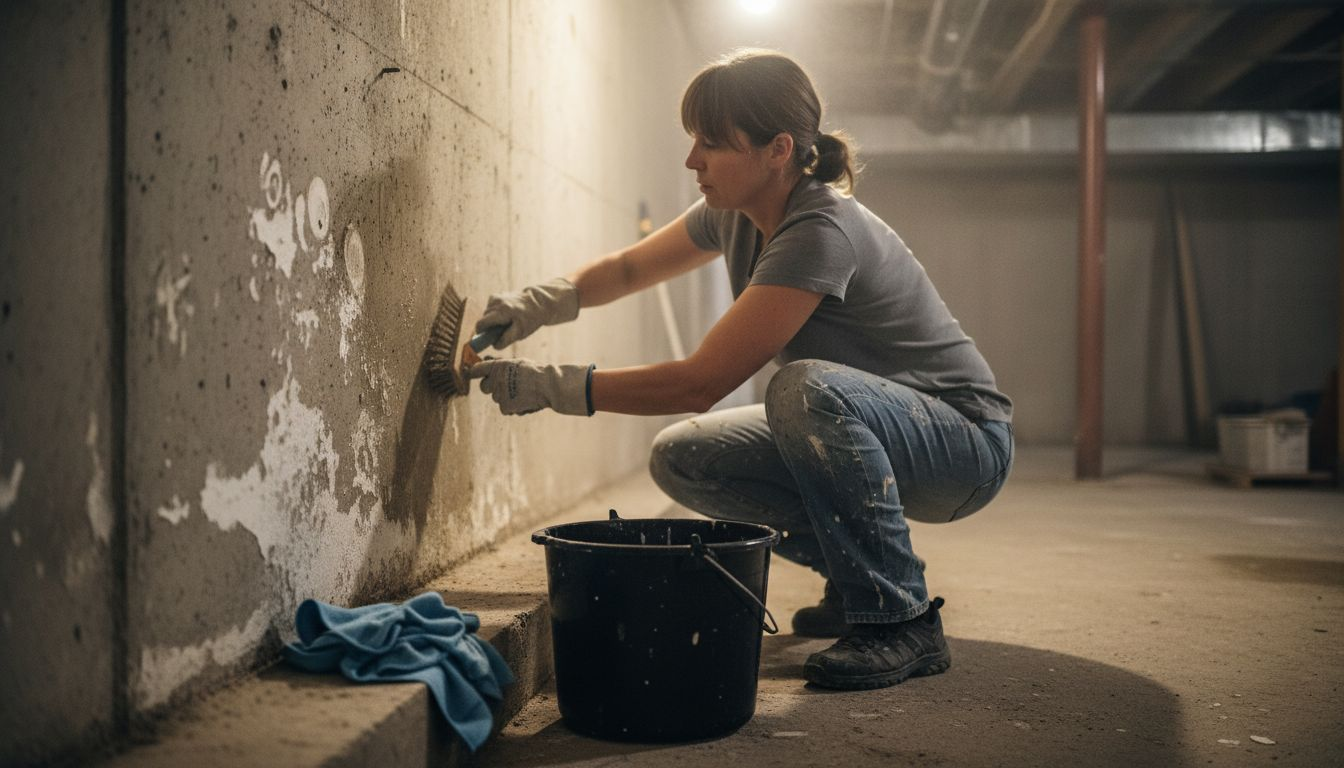
Begin by thoroughly cleaning surfaces for waterproofing. Remove all dirt, loose paint, debris, and contaminants using wire brushes, pressure washers, or specialised cleaning solutions. Inspect surfaces carefully for structural damages such as hairline cracks, chips, or uneven areas that require repair before waterproofing. Use appropriate masonry fillers or concrete repair compounds to address these imperfections ensuring a smooth substrate.
Measure moisture levels using specialised testing equipment to confirm surfaces are completely dry. Any residual moisture can compromise the adhesion and effectiveness of waterproofing treatments. Pay special attention to areas with previous water damage, ensuring complete restoration and preparation. Work systematically across different surface types including concrete walls, foundations, and exterior surfaces, adapting your preparation technique to each specific material.
Expert Advice: Allow sufficient drying time after cleaning and repairs before applying any waterproofing materials to guarantee optimal product performance.
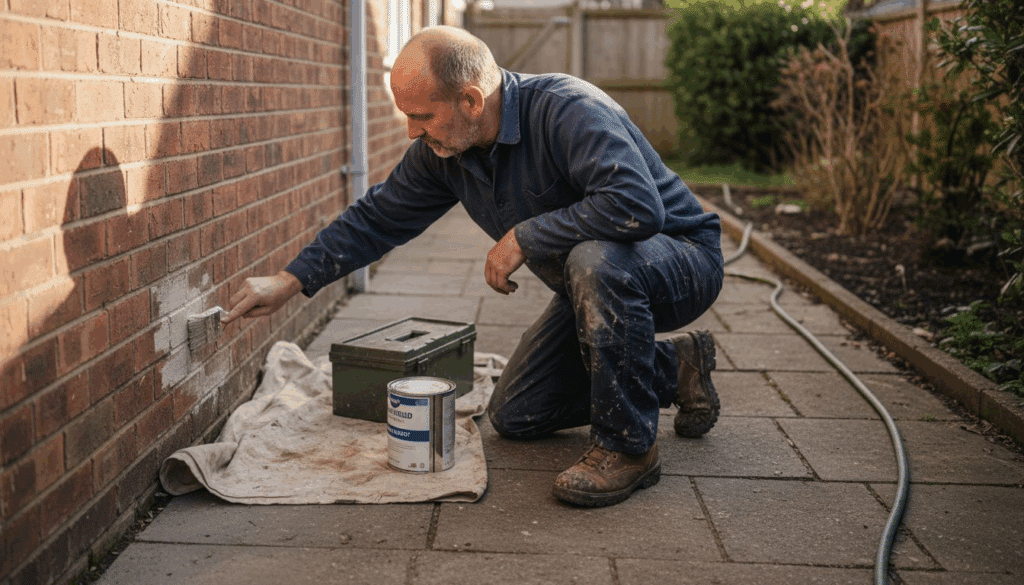
Step 4: Apply Waterproofing Products Correctly
Applying waterproofing products requires precision and careful technique to create an effective moisture barrier. Your methodical approach will determine the long term protection of your property against water damage.
Follow the waterproofing application process meticulously by starting with flexible membranes and liquid applied coatings. Work systematically across surfaces ensuring seamless coverage particularly around joints, edges, and potential penetration points. Apply multiple layers with recommended drying intervals between coats to build a comprehensive protective barrier. Use rollers and brushes to spread materials evenly avoiding air pockets or uneven application that could compromise waterproofing effectiveness.
Pay close attention to manufacturer guidelines for each specific product. Some materials require specific temperature ranges or humidity conditions for optimal performance. Work in consistent sections checking your progress and maintaining a wet edge to ensure uniform coverage. For complex areas like corners and intersections, use specialised techniques such as overlapping membrane edges or applying additional reinforcement strips to create a continuous protective layer.
Expert Advice: Test a small inconspicuous area first to confirm product compatibility and application technique before treating larger surface areas.
Step 5: Inspect and Test for Water Tightness
Validating the effectiveness of your waterproofing efforts is crucial to ensuring comprehensive home protection. A thorough inspection will reveal whether your application meets the necessary standards for moisture resistance.
Proceed with systematic waterproofing inspection techniques by conducting comprehensive water tightness tests. For flat surfaces, implement the ponding method where you create a controlled water pool to check for potential leakage. On vertical surfaces, use a garden hose to simulate heavy rainfall conditions and carefully observe any water penetration signs. Examine seals, joints, and flashing meticulously to confirm they remain intact and functional.
Document your findings systematically by photographing any suspicious areas and measuring the extent of potential water ingress. Pay special attention to complex architectural features such as window frames, roof interfaces, and foundation transitions where water might find unexpected entry points. If you detect any compromised sections, mark them for immediate remedial treatment to prevent future water damage.
Expert Advice: Conduct your water tightness tests during dry weather conditions to ensure accurate and controlled assessment of your waterproofing application.
Secure Your Home with Expert Waterproofing Support
DIY waterproofing offers valuable techniques to protect your property from moisture damage but identifying key problem areas and applying products correctly can be challenging. Issues like foundation cracks, ineffective sealants, or poor surface preparation require professional insight to ensure lasting protection. If you want to avoid costly repairs and gain peace of mind, trust specialists who understand the complexities of waterproofing in Gauteng and across South Africa.

Explore reliable solutions tailored for every vulnerable zone in your home by visiting Uncategorized – Pro Waterproofing. Take the next confident step—connect with industry experts at Pro Waterproofing today to secure a thorough assessment and durable waterproofing that stands the test of time.
Frequently Asked Questions
What are the key areas to inspect for DIY waterproofing?
Identifying vulnerable areas such as foundations, basements, exterior walls, roof interfaces, and window frames is essential for effective DIY waterproofing. Conduct a thorough inspection looking for visible cracks, dampness, and other signs of moisture issues before starting your waterproofing project.
How do I prepare surfaces before applying waterproofing products?
To prepare surfaces correctly, start by cleaning them thoroughly to remove dirt and debris. Use wire brushes or pressure washers, and check for any structural damages that need repairing before applying waterproofing materials.
What materials do I need for a DIY waterproofing project?
For a successful DIY waterproofing project, gather materials like flexible waterproofing membranes, joint sealants, and protective coatings. Purchase quality tools such as trowels, brushes, and protective gear to ensure effective application and durability of the waterproofing layer.
How do I apply waterproofing products correctly?
Apply waterproofing products by starting with flexible membranes and ensuring even coverage across surfaces. Work systematically in sections, apply multiple layers as per manufacturer guidelines, and focus on potential water entry points such as joints and edges for comprehensive protection.
What should I do after applying waterproofing materials?
After applying waterproofing materials, conduct a thorough inspection and execute water tightness tests to confirm the effectiveness of your waterproofing efforts. Check for any signs of water penetration, and address any compromised areas immediately to prevent future damage.
How can I ensure my waterproofing is effective in the long term?
To ensure long-term effectiveness, maintain regular checks on key areas for signs of wear or water ingress. Schedule inspections twice a year and after heavy rainfall to identify any issues early and perform necessary maintenance or repairs as needed.