
Over 40 percent of british homeowners face water damage issues each year, making waterproofing a top concern for property maintenance. Moisture can sneak in through hidden cracks and neglected joints, leading to costly repairs and long term damage. By taking a careful, step by step approach to waterproofing, you can protect your investment and create a more secure living space. This guide explains how to assess, prepare, and treat surfaces for lasting protection.
Table of Contents
- Étape 1: Assess Surfaces And Identify Problem Areas
- Étape 2: Clean And Prepare All Targeted Surfaces
- Étape 3: Select And Apply Suitable Waterproofing Products
- Étape 4: Seal Joints And Vulnerable Points Thoroughly
- Étape 5: Inspect The Finished Job For Leaks And Flaws
Quick Summary
| Essential Insight | Detailed Explanation |
|---|---|
| 1. Conduct a thorough surface assessment | Inspect all potential moisture entry points and document areas showing signs of water damage to prevent costly repairs. |
| 2. Ensure proper cleaning and preparation | Clean surfaces meticulously and repair any cracks to enhance adhesion of waterproofing materials for long-lasting results. |
| 3. Choose suitable waterproofing products | Select products tailored to your specific surface and environment; check compatibility and apply techniques as instructed. |
| 4. Seal joints and vulnerable points | Identify and effectively seal joints and penetration areas to eliminate weak spots that may allow moisture infiltration. |
| 5. Perform a detailed final inspection | Inspect the waterproofed areas under various conditions, documenting potential issues, to ensure optimal moisture protection. |
Étape 1: Assess surfaces and identify problem areas
Successful waterproofing starts with a meticulous surface assessment. Your goal in this stage is to carefully inspect every potential moisture entry point and understand the specific vulnerabilities of your property’s exterior and interior surfaces.
Begin by conducting a comprehensive visual inspection of walls, roofs, foundations, and other structural elements. Look for telltale signs of water damage such as discolouration, peeling paint, hairline cracks, efflorescence (white powdery residue), or damp patches. Pay special attention to areas around windows, doors, joints, and potential structural interfaces where water might penetrate. Use a bright torch to illuminate darker areas and examine surfaces from multiple angles.
One critical tip: document everything. Take clear photographs of each problem area and create a detailed sketch or map of your findings. This documentation will not only help you track potential issues but also serve as valuable evidence if you need professional intervention later. Remember that early detection of moisture problems can save you thousands in potential repair costs and prevent significant structural damage.
Once you have completed your assessment, you will be ready to move on to the next crucial step of planning your waterproofing strategy.
Étape 2: Clean and prepare all targeted surfaces
Surface preparation is a critical precursor to successful waterproofing, ensuring that your protective layers adhere correctly and perform optimally. Your primary objective in this stage is to transform your surfaces into pristine canvases ready for waterproofing treatment.
Start by thoroughly cleaning all targeted surfaces using appropriate methods. Remove loose debris, dust, and contaminants with stiff brushes, industrial vacuum cleaners, or pressure washers depending on the surface type. For concrete and masonry, eliminate any existing loose paint, efflorescence, or deteriorating material. Pay special attention to creating a completely dry substrate, as moisture can significantly compromise waterproofing effectiveness. Utilise professional surface preparation tools to ensure a uniform, clean surface that will provide maximum adhesion for waterproofing membranes.
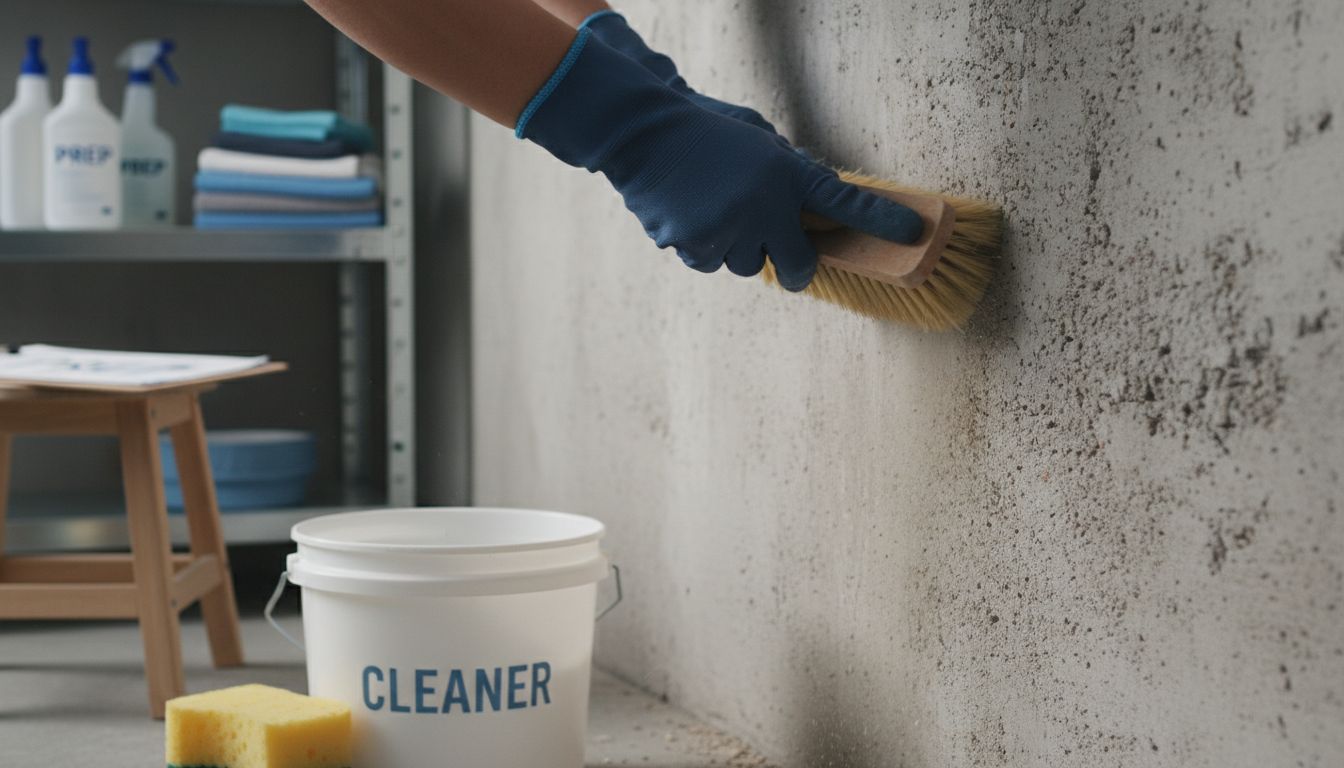
A critical tip to remember is to repair any existing cracks or structural imperfections before applying waterproofing materials. Use appropriate fillers, sealants, or repair compounds to create a smooth, structurally sound surface. This preparatory work might seem time consuming, but it is fundamental to preventing future moisture penetration and ensuring the longevity of your waterproofing solution.
With your surfaces meticulously cleaned and prepared, you are now ready to move forward with applying your chosen waterproofing treatment.
Étape 3: Select and apply suitable waterproofing products
Choosing the right waterproofing product is crucial to protecting your property from moisture damage. Your objective is to select a solution that matches your specific surface requirements and environmental conditions.
Waterproofing systems vary widely including cementitious coatings, liquid membranes, and bituminous treatments. Consider local climate and surface characteristics when making your selection. For concrete surfaces, opt for penetrative sealants that bond chemically with the material. Masonry walls might require flexible liquid membranes that can accommodate slight structural movements. When applying your chosen product, work systematically from bottom to top, ensuring complete and even coverage.
A critical tip is to always test your waterproofing product on a small, inconspicuous area first. This allows you to verify compatibility with your specific surface and confirm the application technique. Wear protective gear, follow manufacturer instructions precisely, and allow adequate drying time between coats. Some products require multiple applications to achieve optimal protection.
Choosing the right waterproofing solution can mean the difference between a protected structure and potential water damage. With your product applied carefully and correctly, you are now prepared for the next stage of your waterproofing project.
Étape 4: Seal joints and vulnerable points thoroughly
Joints and vulnerable points represent critical weak spots in any waterproofing strategy. Your goal is to meticulously identify and seal these potential entry points for moisture, preventing water infiltration that could compromise your entire waterproofing effort.
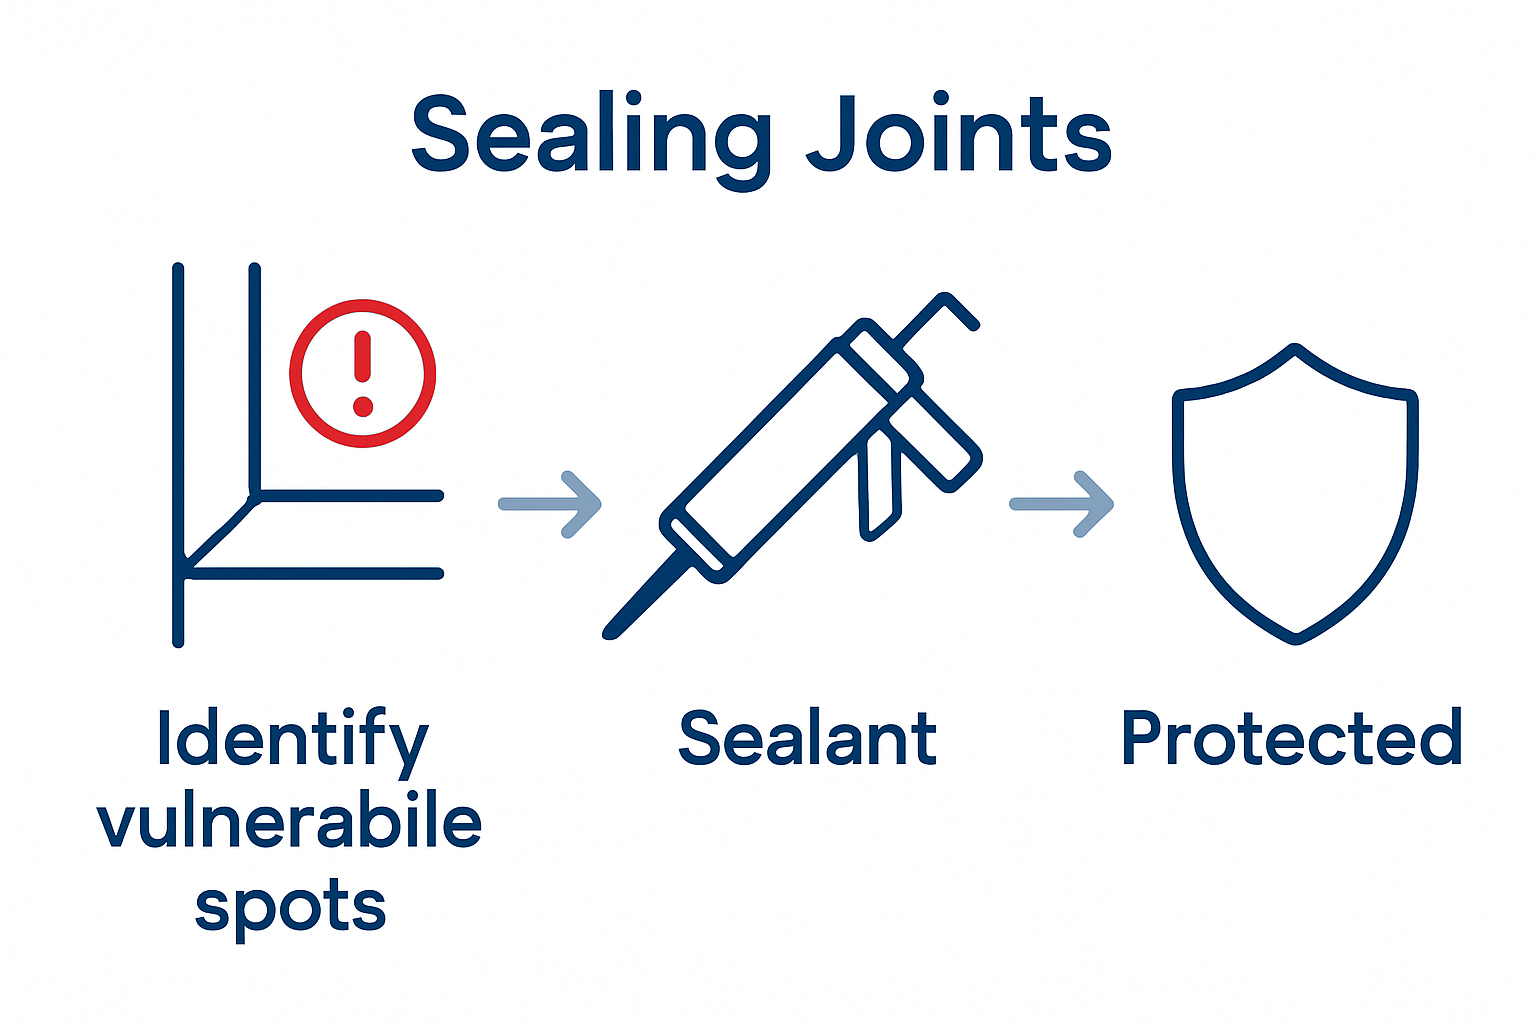
Hydrophilic sealant profiles are essential for addressing construction joints, expansion joints, and other potential water entry zones. Focus on areas where different building materials meet such as wall and floor interfaces, pipe penetrations, window frames, and structural connections. Apply specialised sealants generously but precisely, ensuring complete coverage without leaving any gaps. Pay particular attention to corners, edges, and intersections where water might exploit even the smallest openings.
A critical tip is to work methodically and inspect your work carefully after application. Use a bright torch to illuminate potential missed spots and run your fingers gently along sealed areas to feel for any inconsistencies. Some sealants require multiple applications or specific curing conditions, so always follow manufacturer instructions meticulously.
Sealing roof cracks effectively requires patience and precision. With your joints and vulnerable points thoroughly sealed, you have significantly enhanced your structure’s resistance to water intrusion.
Étape 5: Inspect the finished job for leaks and flaws
The final stage of your waterproofing project involves a meticulous inspection to confirm the effectiveness of your work. Your goal is to identify any potential weaknesses or missed spots that could compromise the entire waterproofing system.
Begin your inspection during different weather conditions if possible. On a dry day, use a bright torch to examine every sealed area carefully, looking for tiny cracks, uneven applications, or gaps. During light rain, observe how water interacts with your newly waterproofed surfaces. Check for roof leak indicators such as water pooling, irregular moisture patterns, or signs of seepage. Pay special attention to previously problematic areas like joints, corners, and penetration points.
A critical tip is to be patient and thorough. Run your hands gently over sealed surfaces to feel for irregularities that might not be visible. Use a moisture metre if available to detect hidden dampness. Take clear photographs of your inspection process as documentation. Any small imperfections you discover now can be quickly addressed before they become significant problems.
Understanding waterproofing inspection techniques will help you maintain your property’s integrity. With a comprehensive final check complete, you have significantly increased your structure’s protection against potential water damage.
Protect Your Property with Expert Waterproofing Solutions
Facing the challenges of DIY waterproofing can be overwhelming with the need to assess every surface, prepare them perfectly, select the right products and seal every vulnerable joint flawlessly. If you have encountered cracked walls, persistent leaks or struggle to achieve lasting protection from moisture it is crucial to rely on proven know-how and professional guidance to secure your home or building. This article has shown how critical each step is but you do not have to face all these complex tasks alone.

Explore reliable, expert advice and tailored waterproofing services at Pro Waterproofing. Our team understands the importance of quality workmanship, licensed contractors and durable solutions that truly prevent costly damage. Start with our insightful content in the Uncategorized – Pro Waterproofing category and take confident steps towards a leak-free property today. Don’t wait until small cracks become expensive repairs, visit https://prowaterproofing.co.za now and connect with trusted professionals who can bring peace of mind to your waterproofing project.
Frequently Asked Questions
What are the first steps in the DIY waterproofing process?
To begin, conduct a thorough assessment of all surfaces to identify problem areas where moisture may enter. Look for signs of water damage and document your findings with photographs and notes for future reference.
How do I prepare surfaces for waterproofing?
Surface preparation involves cleaning all targeted areas to ensure proper adhesion of waterproofing materials. Remove dust and debris using brushes or pressure washers, and make sure the surfaces are completely dry before applying any products.
What types of waterproofing products should I consider?
Select products based on the specific surface type, such as cementitious coatings for concrete or flexible liquid membranes for masonry. Always test the product on a small area first to ensure compatibility before full application.
How can I effectively seal joints and vulnerable points?
Use hydrophilic sealants to thoroughly seal construction joints, pipe penetrations, and other vulnerable spots. Ensure complete coverage by applying sealants generously and working methodically to eliminate any gaps that may allow moisture in.
What should I do after applying the waterproofing treatment?
Once the application is complete, inspect the surfaces for any leaks or flaws. Conduct this inspection during various weather conditions to ensure effectiveness and address any small issues before they escalate into larger problems.
How can I maintain my waterproofed area?
To maintain your waterproofed surfaces, regularly inspect them for wear or damage, especially after heavy rain. Address any issues promptly to preserve the effectiveness of your waterproofing solution for the long term.