

TL;DR:
- Waterproofing lift pits in South Africa is legally mandatory due to safety and liability concerns, requiring proper systems and detailing. Proper inspection, diagnosis, and professional installation using suitable methods like crystalline admixtures or torch-applied membranes ensure long-term, compliant solutions. A detailed site survey and written scope from experienced contractors help prevent costly failures and legal issues.
For most South African lift pits, the right approach is a system combining crystalline admixtures or torch-applied tanking for new construction, and resin injection or polymer-modified cementitious coatings for remedial work. Both SANS 1545 and the Occupational Health & Safety Act treat water leakage in a lift pit as a reportable defect that can trigger immediate shutdown. Prowaterproofing works with building owners and facilities managers across South Africa to specify, install and warrant the correct system for each situation.
Three actions to take right now:
- Inspect the pit today. Check for standing water, efflorescence, rust staining on equipment and any active seepage at floor-to-wall junctions or around cable penetrations.
- Stop temporary ingress risk. If water is present, isolate the lift from service until a competent person confirms electrical and hydraulic equipment is safe.
- Commission a specialist survey and written scope. A written scope protects you legally and gives contractors a basis for a like-for-like quote.
Table of Contents
- Why does elevator pit waterproofing matter in South Africa?
- How to inspect and diagnose elevator pit water ingress on site
- What are the proven waterproofing methods for elevator pits?
- Why does elevator-pit waterproofing fail?
- What affects cost and project timeline in South Africa?
- How do you choose the right waterproofing contractor?
- How Prowaterproofing approaches a lift pit project
- Key takeaways
- The detail most owners miss
- Get a site survey and written scope from Prowaterproofing
- Useful sources for specification and compliance
Why does elevator pit waterproofing matter in South Africa?
The short answer: it is a legal obligation, not a maintenance preference. Under the Lift, Escalator and Passenger Conveyor Regulations, water leakage is explicitly listed among the critical defects that must be reported to the Department of Labour and that require the lift to be taken out of service. SANS 1545-1 (electric lifts) and SANS 1545-2 (hydraulic lifts) both require installations to comply with the National Building Regulations, which in turn reference SANS 10021 for waterproofing systems and detailing.
Beyond compliance, the practical consequences of a wet pit are severe:
- Electrical hazard. Control panels, limit switches and motor wiring sitting in a damp pit are a shock and fire risk.
- Hydraulic system corrosion. On hydraulic lifts, standing water accelerates corrosion of the cylinder and pipework, leading to costly replacement.
- Operational shutdown. A competent lift service provider who identifies water ingress during a routine examination is legally required to report it and can recommend immediate stoppage.
- Liability exposure. If a person is injured and an uninspected wet pit is found, the building owner faces direct liability under the OHS Act.
For a fuller picture of how waterproofing regulations apply to South African properties, the compliance obligations are worth reviewing before you tender any repair work.
How to inspect and diagnose elevator pit water ingress on site
A thorough inspection before specifying any repair saves money and avoids choosing the wrong system. Work through this sequence:
- Visual check. Look for standing water, tide marks, efflorescence (white salt deposits), rust staining on the pit ladder and equipment bases, and active seepage at corners, construction joints and cable/pipe penetrations.
- Smell test. A persistent musty or sulphurous odour suggests prolonged moisture retention, often in the floor slab or behind the wall face.
- Electrical and equipment level check. Confirm that control gear, buffers and hydraulic components are above any water line. If not, isolate the lift before proceeding.
- Moisture metre reading. Take substrate moisture readings at multiple points on the floor and walls. Readings above 7% on concrete indicate active moisture migration and will affect system selection.
- Hammer-sounding. Tap the wall and floor surfaces systematically. A hollow sound indicates delamination or voids behind the render or screed, which must be cut out before waterproofing.
- Dye or tracer test. Where the water source is unclear, a dye test in adjacent drainage or a tracer gas test through the slab can confirm whether the source is groundwater, a burst pipe or surface drainage failure.
- Pressure or flow test. On active seepage points, a pressure test on nearby drainage lines rules out a broken drain as the source before you commit to a structural waterproofing specification.
When to stop the lift immediately: if water is in contact with electrical equipment, if the pit floor has standing water more than 50 mm deep, or if the competent lift service provider identifies the condition as a critical defect, the lift must be taken out of service. Temporary dewatering by pump is acceptable as a holding measure, but it is not a repair.
What are the proven waterproofing methods for elevator pits?
The six main systems used in South Africa each suit a different combination of project type, access, substrate condition and budget. Understanding where each one works best prevents costly rework.
Crystalline admixtures (integral waterproof concrete)
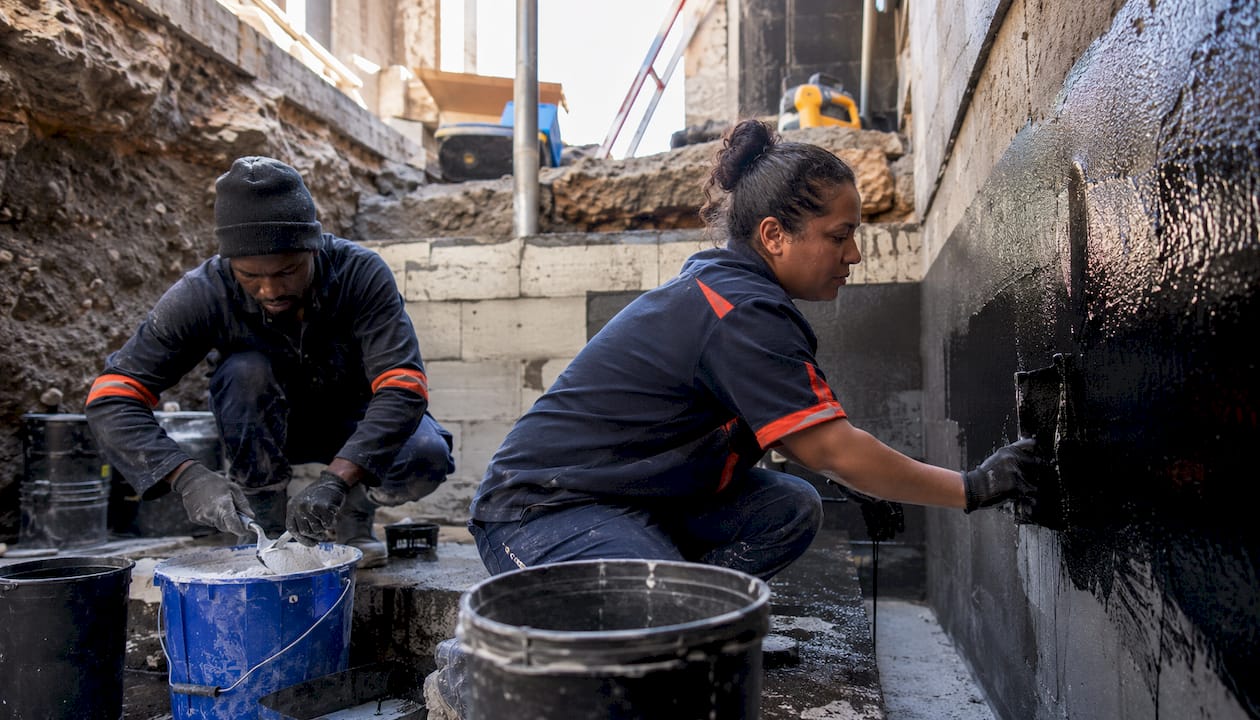
Added at the ready-mix batching stage, crystalline admixtures react with water and cement to form insoluble crystals that block capillary pores and can seal cracks up to 0.4 mm. The self-sealing property is the key advantage: minor shrinkage cracks that form during curing are addressed by the admixture itself. Specify manufacturer dosing rates and placement controls in the contract, and include a hold point at batching for the waterproofing contractor to verify the mix. Best suited to new-build pits where the concrete is cast in situ.
Torch-applied bitumen tanking (dual-layer membrane)
The most widely specified positive-side system for new-build and major refurbishment in South Africa. A typical specification runs one layer of a 3 mm base sheet under a 4 mm cap sheet, with horizontal side laps of 75 mm and end laps of 100 mm; vertical side laps are 100 mm with 150 mm end laps. Substrate moisture must be at or below 7% before torch-on application. Internal corners require 100 x 100 mm gusset strips, and the membrane must extend at least 150 mm above finished ground level. A protection board goes on before backfilling. This system offers excellent hydrostatic resistance and long service life, but it demands external access and a dry substrate.
Polymer-modified cementitious coatings (negative-side)
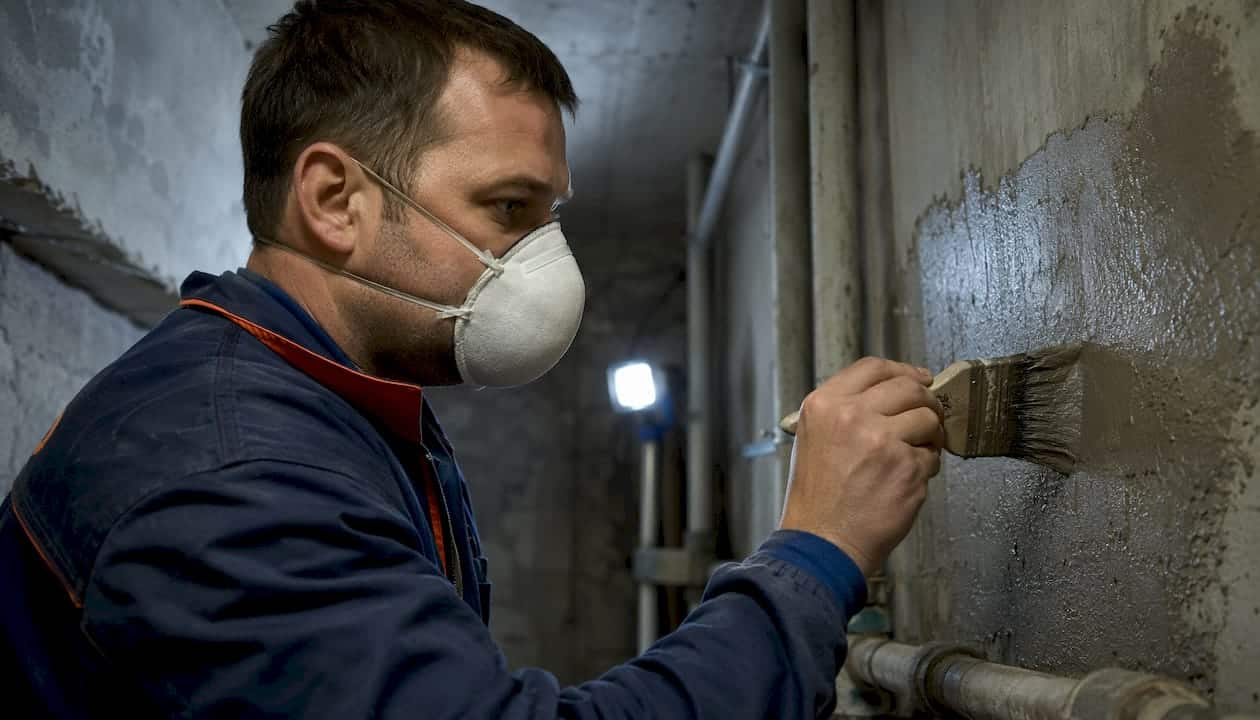
When external access is impossible, a polymer-modified cementitious coating applied from inside the pit is often the only practical route. Applied in two or three coats to a mechanically prepared, clean substrate, these coatings form a rigid barrier that resists hydrostatic pressure from the outside. The critical variable is substrate preparation: any loose material, contamination or active seepage point must be treated with a hydraulic plug compound before the coating goes on. Success rates drop sharply when preparation is rushed.
Resin and grout injection (polyurethane or epoxy)
Used for active crack sealing and joint repair, typically as part of a wider remedial system rather than a standalone solution. Polyurethane resins expand on contact with water to fill voids and cracks; epoxy resins are used where structural bonding is needed. Injection is precise work: packers are drilled at intervals along the crack or joint, and the resin is pumped under controlled pressure. This method suits pits with localised active leaks at construction joints or penetrations, and it is often combined with a cementitious coating over the whole surface.
Polyurea and fluoropolymer coatings
Fast-curing, high-elongation coatings that can bridge minor movement and provide a seamless barrier. Polyurea is spray-applied and cures in seconds, which makes it attractive for tight programme constraints. The surface preparation requirement is demanding (typically blast-cleaned or mechanically abraded to a clean, dry profile), and the material cost is higher than cementitious systems. Suited to pits where movement is anticipated or where a very fast return to service is needed.
Cavity drainage and sump systems
Rather than resisting water, a cavity drainage system manages it: a dimple membrane lines the pit walls and floor, channelling any ingress to a sump where a pump discharges it. This approach accepts that water will enter and controls where it goes. It is appropriate where the structure cannot be dried out sufficiently for a bonded system, or where the hydrostatic load is too high for a coating. The ongoing maintenance requirement (pump servicing, power supply continuity) must be factored into the whole-life cost.
Comparison of main methods
| Method | Best for | Application side | Hydrostatic resistance | Cure / downtime | Warranty / service life | Cost level | Repairability |
|---|---|---|---|---|---|---|---|
| Crystalline admixture | New build | Positive (integral) | High | Cast with concrete | — | Low | Self-sealing |
| Torch-applied tanking | New build / major refurb | Positive (external) | Very high | 3–5 days | — | Medium | Requires excavation |
| Cementitious coating | Remedial | Negative (internal) | Medium–high | 3–7 days | — | Low–medium | Patch-repairable |
| Resin/grout injection | Remedial (localised) | Negative (internal) | High at joint | 1–2 days | — | Medium | Re-injectable |
| Polyurea coating | Remedial / fast-track | Negative (internal) | High | Hours | — | High | Specialist repair |
| Cavity drainage + sump | Remedial (high water table) | Negative (managed) | N/A (managed) | 2–4 days | Pump-dependent | Medium | Pump replacement |
Pro Tip: For new-build pits, specify crystalline admixture in the concrete mix AND a torch-applied membrane on the external face. The two systems work together: the admixture handles hairline cracks the membrane cannot bridge, and the membrane handles hydrostatic head the admixture alone cannot resist at high water-table sites.
Why does elevator-pit waterproofing fail?
Most failures do not happen in the middle of a wall. They happen at interfaces: floor-to-wall junctions, internal corners, construction joints and penetrations. Knowing the failure modes lets you write better specifications and run better quality checks on site.
- Poor substrate preparation. Loose render, laitance, oil contamination or active seepage not treated before application. The coating or membrane debonds and water tracks behind it. Check: require a written substrate acceptance report before any waterproofing material is applied.
- Bridged or missing DPC. A damp-proof course covered by plaster or screed allows moisture to bypass the barrier entirely. SANS 10021 is explicit: plaster must not be applied across a DPC membrane.
- Inadequate corner and penetration detailing. Flat membranes applied into a sharp internal corner will bridge the void and crack under hydrostatic pressure. The fix is a 100 x 100 mm gusset fillet at every internal corner, installed before the main membrane layer.
- Insufficient lap and termination. Torch-on membranes with laps below the specified minimums (75 mm horizontal, 150 mm vertical termination above ground) allow water to track between layers. Measure laps during installation, not after.
- Movement joints left untreated. Construction joints between the floor slab and walls are the most common entry point for water. A PVC dumbbell waterstop cast into the joint, combined with a sealant rebate at the surface, is the correct detail.
- No protection board before backfilling. Backfill aggregate can puncture or abrade a membrane during compaction. An Abe Drain G drainage layer or pressed wood protection board must go on before any fill is placed.
- Unchanged hydrostatic load. If the drainage around the pit is not addressed, a remedial coating will eventually fail under sustained pressure. Fit an agricultural drain at the base of the external wall and connect it to a suitable discharge point.
Pro Tip: Treat waterstops and corner gussets as primary structural details, not finishing items. Photograph every gusset, waterstop and penetration seal before the next layer goes on. That photographic record is your proof of workmanship if a warranty claim arises later.
What affects cost and project timeline in South Africa?
The project sequence for any elevator pit waterproofing job follows a fixed logic, and each stage has cost and time implications worth understanding before you budget.
Typical project sequence:
- Survey and scope. Moisture readings, hammer-sounding, source identification and a written specification. Allow 1–2 days.
- Temporary works and dewatering. Pump hire, temporary lighting and confined-space access setup. Cost varies with depth and water volume.
- Substrate preparation. Cutting out hollow areas, treating active seeps with hydraulic plug, mechanical abrasion or blast-cleaning. This is often the most labour-intensive stage and the one most frequently underpriced.
- Primary waterproofing application. Membrane, coating or injection as specified. Typically a few days for a standard pit.
- Protection and drainage. Protection board, drainage layer and agricultural drain installation before backfill.
- Commissioning and testing. Adhesion pull-off tests, moisture readings, flood test where applicable, and warranty documentation.
Key cost drivers in South Africa:
- Access constraints (depth, confined-space requirements, working around live equipment)
- Extent of substrate repair needed before waterproofing can begin
- Positive-side (external excavation) versus negative-side (internal only) approach
- Pump and sump installation for cavity drainage systems
- Specialist resin injection for active joints
- Contractor accreditation level and manufacturer warranty tier
Commissioning items to specify in the contract: adhesion pull-off test results, substrate moisture readings before and after application, a flood test where the pit geometry allows, photographic record of all critical details, and a written performance warranty tied to the named installer.
How do you choose the right waterproofing contractor?
The wrong contractor is a bigger risk than the wrong system. A competent contractor will tell you which system suits your pit; an incompetent one will sell you whatever they know how to apply.
- Verify accreditation. Manufacturer approvals for the specific system proposed are non-negotiable. Warranties are voided if an accredited applicator did not install the system.
- Confirm specialised experience. Ask for evidence of at least five years of lift pit and basement waterproofing work specifically, not general building waterproofing. Request case studies with before-and-after photographs.
- Demand a written scope and warranty. A scope that says “waterproof lift pit” is not a scope. It should name the system, specify lap sizes, detailing requirements, protection layers and commissioning tests. The warranty should name the installer, the system and the performance standard.
- Ask how they will locate the water source. A contractor who goes straight to a solution without diagnosing the source is guessing. The answer should describe a diagnostic process.
- Ask about their approach to corners and penetrations. The answer should mention gussets, waterstops and the specific detailing for cable and pipe penetrations. Vague answers here are a red flag.
- Ask for their commissioning and testing plan. Flood tests, adhesion tests and moisture readings should be standard deliverables, not extras.
- Check references. Ask for contact details of two or three recent clients with similar projects. Call them.
Industry guidance consistently warns against quick-fix patches and contractors who cannot demonstrate a system-level approach. A wet pit treated with a single coat of cementitious slurry over an unprepared substrate will fail within months.
How Prowaterproofing approaches a lift pit project
The following illustrates the typical workflow Prowaterproofing follows on a remedial lift pit project, from initial survey to client handover.
Scenario: A commercial building in Johannesburg with a hydraulic lift. The pit has recurring water ingress at the floor-to-wall junction and around the hydraulic cylinder penetration. Previous patch repairs have failed.
Stepwise method:
- Site survey. Moisture metre readings across all surfaces, hammer-sounding to identify delaminated areas, dye test to confirm groundwater as the source (not a broken drain). Written report with photographic record issued to the client.
- Temporary works. Submersible pump installed to dewater the pit. Lift isolated from service. Confined-space entry procedure established.
- Substrate preparation. All delaminated render cut back to sound concrete. Active seep at the cylinder penetration treated with a hydraulic plug compound. Surfaces mechanically abraded to a clean, open profile.
- Primary waterproofing. Polyurethane resin injection at the floor-to-wall construction joint using drilled packers at 200 mm centres. Polymer-modified cementitious coating applied in two coats to all surfaces, with a 100 x 100 mm gusset at every internal corner. Cylinder penetration sealed with a purpose-made collar and flexible sealant.
- Protection. Drainage layer fixed to walls before any reinstatement of screed or equipment bases.
- Commissioning. Adhesion pull-off tests at three locations, substrate moisture readings recorded, photographic record of all critical details. Written performance warranty issued.
Handover items the client receives:
- Manufacturer datasheets for every product used
- Adhesion test and moisture reading records
- Photographic record of corners, penetrations and joints
- Written performance warranty tied to the named installer
- Maintenance guidance covering inspection intervals and early warning signs
For waterproofing assurance on your own project, the same documentation standards apply regardless of system chosen.
Key takeaways
A system approach combining the right primary method with correct detailing, drainage and commissioning is the only reliable route to a dry, compliant lift pit in South Africa.
| Point | Details |
|---|---|
| Regulatory obligation | SANS 1545 and the OHS Act classify water ingress as a critical defect requiring immediate action and potential lift shutdown. |
| System selection | New-build pits suit crystalline admixtures or torch-applied tanking; remedial work typically requires resin injection or cementitious coatings from the negative side. |
| Detailing is critical | Failures occur at corners, joints and penetrations; specify 100 x 100 mm gussets, waterstops and protection boards in every contract. |
| Contractor accreditation | Manufacturer-approved installers are required for warranty validity; demand written warranties and case studies before appointing. |
| Prowaterproofing | Prowaterproofing provides site surveys, written scopes, system installation and warranted handover documentation for lift pit projects across South Africa. |
The detail most owners miss
Water in a lift pit is almost never a single-point failure. The crack or joint that is visibly leaking is usually the symptom; the cause is a combination of inadequate original detailing, drainage that was never installed, and a substrate that was never properly prepared. What I see repeatedly on remedial projects is that a previous contractor treated the visible wet patch and left everything else untouched. Six months later the water finds the next weakest point, and the owner is back to square one.
The practical recommendation I would give any building owner today: before you accept any quote, ask the contractor to show you their detailing drawings for the corners and the construction joint. If they do not have them, or if the drawings show a flat membrane applied directly into a sharp corner with no gusset, walk away. That detail alone predicts whether the repair will last five years or twenty. A system that costs 30% more but includes correct corner detailing, a drainage layer and a commissioning test is almost always cheaper over ten years than the cheapest quote repeated twice.
The drawbacks of negative-side waterproofing are real, but they are manageable with the right preparation. The drawbacks of poor detailing are not.
Get a site survey and written scope from Prowaterproofing
A wet lift pit carries legal, safety and financial consequences that compound quickly. Prowaterproofing offers specialist site surveys, written waterproofing scopes, system installation and full handover documentation for lift pit projects across South Africa, covering both new-build specifications and remedial repairs.

A typical survey covers moisture readings, source diagnosis, a recommended system with product datasheets, a provisional programme and a written warranty outline. You get a clear, comparable scope before you commit to any work.
Request a site survey and quote directly through the Prowaterproofing website. Bring the written scope to any contractor you consider, and use it as the basis for a like-for-like comparison.
Useful sources for specification and compliance
The following references are worth having on file when tendering or specifying lift pit waterproofing work in South Africa.
| Source | Why it matters |
|---|---|
| SANS 1545-1 and SANS 1545-2 (SABS) | Defines safety rules for electric and hydraulic lifts; water leakage is a listed critical defect. |
| SANS 10021: Waterproofing of buildings (SABS) | Covers membranes, bituminous felts, polyolefin sheets, joint control and waterstops; the primary specification reference for any South African waterproofing contract. |
| OHS Act: Lift, Escalator and Passenger Conveyor Regulations | Sets out the legal obligation to report and rectify water leakage as a critical defect; essential reading for building owners and facilities managers. |
| a.b.e. lift pit tanking methodology and details | Practical installation methodology including gusset sizing, lap dimensions, protection board and drainage layer specification. |
| Derbigum lift pit waterproofing specification | Detailed torch-on membrane specification with substrate moisture limits, lap sizes and contractor accreditation requirements. |
| CWS Admix crystalline waterproofing datasheet | Product data for crystalline admixtures including crack-sealing capability and dosing guidance for new-build concrete. |
| AfriSam waterproofing guidance | Practical guidance on DPC installation, rising damp treatment and the importance of contractor experience; useful for procurement criteria. |
| South African waterproofing standards guide (Prowaterproofing) | Owner-focused summary of SANS obligations and recommended practices for South African projects. |