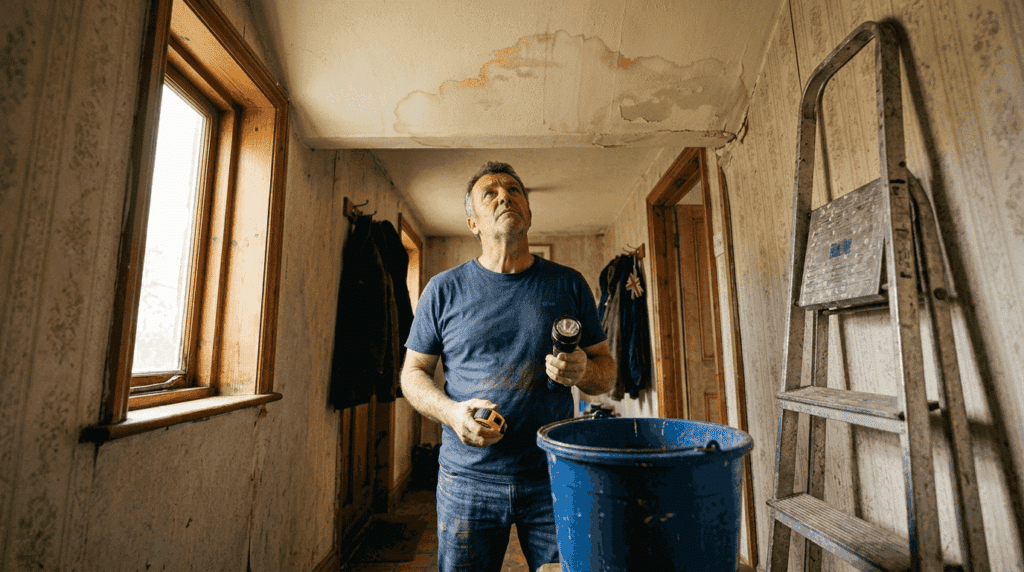
Water stains on your ceiling are more than just an eyesore; they signal underlying moisture problems that can compromise your home’s structural integrity. Whether caused by a leaky roof, faulty plumbing, or condensation issues, these unsightly marks demand prompt attention. Left untreated, water damage spreads, potentially leading to costly repairs and health hazards from mould growth. This comprehensive guide walks you through diagnosing, repairing, and preventing ceiling water stains, empowering South African homeowners to restore their ceilings effectively and protect their properties from future damage.
Table of Contents
- Understanding Water Stains On Ceilings And Their Causes
- Preparing To Fix Your Stained Ceiling: Tools, Materials, And Safety
- Step By Step Process To Fix Water Stains On Your Ceiling
- Comparing Common Methods To Treat Water Stains On Ceilings
- Prevention Tips To Avoid Future Water Stains On Ceilings
- Pro Waterproofing Solutions For Lasting Ceiling Protection
- Frequently Asked Questions
Key takeaways
| Point | Details |
|---|---|
| Different stains need specific treatments | Fresh stains respond to simple cleaning, whilst old or mould stains require stronger solutions or professional help. |
| Quick action yields better results | Addressing fresh water stains immediately prevents deeper penetration and reduces repair complexity. |
| Mould stains pose health risks | Dark, fuzzy patches with musty odours indicate mould requiring professional assessment and remediation. |
| Prevention stops recurrence | Regular leak repairs, proper ventilation, and routine inspections keep ceilings stain free long term. |
| Proper materials ensure lasting repair | Using stain blocking primers and matching paint prevents bleed through and maintains a uniform ceiling appearance. |
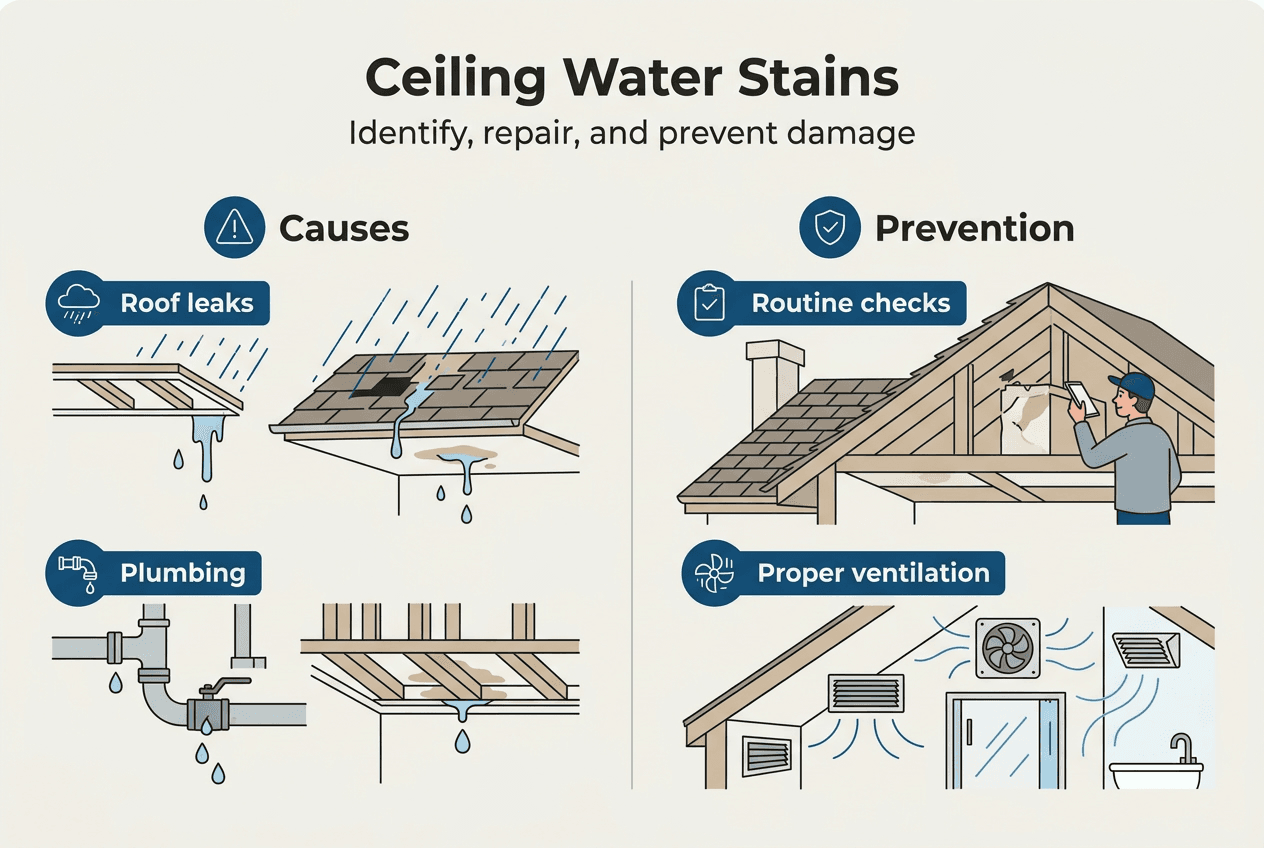
Understanding water stains on ceilings and their causes
Water stains appear when moisture penetrates ceiling materials, leaving behind mineral deposits and discolouration that range from faint yellow rings to dark brown patches. The severity and appearance of these stains depend on the water source, duration of exposure, and ceiling material composition. Understanding what causes these marks is the first step toward effective repair and prevention.
Several common culprits lead to ceiling water damage in South African homes:
- Roof leaks from damaged tiles, cracked flashing, or deteriorated seals allow rainwater to seep through and stain ceilings below
- Plumbing leaks from pipes running through ceiling spaces or above floor levels drip onto ceiling materials over time
- HVAC condensation occurs when air conditioning units or ductwork produce excess moisture that accumulates on ceiling surfaces
- Bathroom moisture from inadequate ventilation causes steam to condense on ceilings, particularly in homes without proper exhaust fans
Identifying the specific source of moisture is crucial before attempting repairs. A stain near a bathroom typically indicates ventilation issues, whilst marks directly below an upper floor suggest plumbing problems. Stains appearing after heavy rain point to roof damage. Each source requires a different repair approach, and fixing the stain without addressing the underlying cause guarantees recurrence.
Recognising signs of water damage early prevents minor issues from escalating into major structural problems. Fresh stains appear lighter and may feel damp to touch, whilst older stains darken and develop hard, crusty edges. Dark patches with fuzzy growth indicate mould, a serious health hazard requiring immediate professional attention. By understanding these signs you need waterproofing, you can take swift action to protect your home.
Preparing to fix your stained ceiling: tools, materials, and safety
Successful ceiling stain repair begins with proper preparation. Gathering the right tools and materials before starting saves time and ensures you can complete the job without interruption. Safety equipment protects your health, particularly when dealing with older stains that may harbour mould or require working at height.
Essential supplies for ceiling stain repair include:
- Cleaning agents such as mild detergent, white vinegar, or commercial stain removers depending on stain severity
- Stain blocking primer specifically formulated to seal water stains and prevent bleed through
- Ceiling paint matching your existing colour and finish for seamless repairs
- Scraper or putty knife for removing loose material and flaking paint
- Protective gear including safety goggles, dust mask or respirator, and rubber gloves
- Step ladder or scaffolding for safe ceiling access
- Drop cloths to protect flooring and furniture from drips and debris
- Sponges, clean cloths, and a paint roller with extension pole
Pro Tip: Test your cleaning solution on a small, inconspicuous area first to ensure it doesn’t damage or discolour your ceiling material.
Before beginning repairs, assess your stain type and severity. Different types of water stains require different approaches. Fresh stains respond well to simple cleaning, old stains need stronger solutions, and mould stains pose health risks requiring professionals. This table helps you categorise your stain:

| Stain type | Appearance | Treatment approach |
|---|---|---|
| Fresh stain | Light yellow or brown, slightly damp | Clean with mild detergent or vinegar solution |
| Old stain | Dark brown with hard edges, completely dry | Use commercial stain remover and strong primer |
| Mould stain | Dark patches with fuzzy growth, musty smell | Professional assessment and remediation required |
| Mineral deposit | White or grey crusty buildup | Scrape gently then clean and seal |
Safety considerations are paramount when working overhead. Always use a sturdy ladder positioned on level ground, and never overreach. Wear protective eyewear to shield your eyes from falling debris and cleaning solutions. If you suspect mould, a proper respirator is essential to avoid inhaling spores. For extensive damage or suspected structural water damage, consult professionals before proceeding.
Understanding how to prepare for waterproofing helps you recognise when DIY repairs are sufficient and when professional intervention is necessary. Proper preparation increases your chances of achieving a lasting, professional looking repair.
Step by step process to fix water stains on your ceiling
Once you’ve identified the cause, gathered supplies, and assessed the stain severity, you’re ready to begin the repair process. Following these steps systematically ensures thorough treatment and prevents the stain from reappearing through your fresh paint.
-
Clean the stained area thoroughly. For fresh stains, mix equal parts white vinegar and warm water in a spray bottle. Spray the solution onto the stain and let it sit for 10 minutes before gently scrubbing with a soft sponge. For stubborn marks, use a commercial ceiling cleaner following manufacturer instructions. Address fresh water stains immediately for best results, as older stains become increasingly difficult to remove.
-
Remove loose or flaking material. Use a scraper to gently remove any peeling paint, bubbled plaster, or crumbling ceiling material. Work carefully to avoid enlarging the damaged area. Wipe away dust and debris with a damp cloth, then allow the area to dry completely. Rushing this step leads to poor primer adhesion and eventual repair failure.
-
Apply stain blocking primer. This critical step prevents the water stain from bleeding through your new paint. Use an oil based or shellac based primer specifically designed for water stains. Apply a generous coat covering the entire stained area plus 5 to 10 centimetres beyond the visible mark. Allow the primer to dry according to product specifications, typically 2 to 4 hours.
-
Repaint the repaired section. Once the primer is completely dry, apply ceiling paint that matches your existing finish. Most ceilings require two coats for uniform coverage. Use a roller for large areas and a brush for edges and corners. Feather the paint edges into the surrounding ceiling to blend the repair seamlessly.
-
Monitor the repaired area. Check the ceiling regularly over the following weeks for any signs of stain recurrence or new moisture. If the stain reappears, the underlying leak hasn’t been fully addressed and requires further investigation. Maintaining waterproofed areas through regular inspections catches problems early.
Pro Tip: Take photos of your ceiling before and after repair to document the damage and track any changes over time, which helps identify recurring leak patterns.
Patience is essential throughout this process. Rushing any step, particularly drying times, compromises the repair quality and may require you to start over. Proper execution creates a lasting fix that restores your ceiling’s appearance and protects against future damage.
Comparing common methods to treat water stains on ceilings
Homeowners have several treatment options when addressing ceiling water stains, each with distinct advantages and limitations. Choosing the right method depends on stain age, severity, ceiling material, and your budget. Understanding these options helps you make an informed decision.
| Treatment method | Best for | Effectiveness | Cost | Application difficulty |
|---|---|---|---|---|
| Vinegar solution | Fresh, light stains | Moderate for new stains, low for old | Very low | Easy |
| Commercial stain remover | Stubborn or old stains | High for most stains | Moderate | Moderate |
| Oil based primer | All stain types before painting | Very high for blocking bleed through | Moderate | Moderate |
| Shellac based primer | Severe stains and odour sealing | Highest, blocks tannins and odours | Higher | Moderate to difficult |
| Professional remediation | Mould stains or extensive damage | Highest, addresses health and structure | Highest | N/A (professional service) |
Vinegar offers an inexpensive, non toxic first line of defence against fresh water stains. Its mild acidity breaks down mineral deposits and light discolouration without harsh chemicals. However, vinegar lacks the strength to tackle deeply penetrated or aged stains, making it suitable only for immediate treatment of minor marks.
Commercial stain removers contain stronger cleaning agents that penetrate deeper into ceiling materials. These products work well on stubborn stains that resist vinegar treatment, though they cost more and may require ventilation during use. Always follow safety instructions and test on an inconspicuous area first.
Oil based primers represent the gold standard for preventing stain bleed through. These primers create an impermeable barrier between the water stain and your finish paint, ensuring the discolouration doesn’t reappear. Whilst more expensive than water based alternatives, oil based primers prove essential for lasting repairs. Shellac based primers offer even stronger sealing properties, particularly valuable for severe stains or when odour control is necessary.
Different water stains require different treatments; mould stains have health risks requiring specific approaches. Never attempt to clean mould stains yourself, as disturbing mould releases spores into your home’s air. Professional remediation safely removes mould, treats affected areas with antimicrobial solutions, and addresses the moisture source to prevent regrowth.
Key factors when selecting your treatment method:
- Stain age and severity determine which cleaning approach will succeed
- Ceiling material composition affects product compatibility and absorption
- Health considerations, particularly with mould or chemical sensitivities, may limit options
- Budget constraints influence whether you tackle repairs yourself or hire professionals
- Time availability impacts your ability to complete multi step processes requiring drying time between stages
For most homeowners, a combination approach works best: clean with appropriate solutions, seal with quality primer, and finish with matching paint. This waterproofing strategy addresses both the visible stain and underlying moisture issues for comprehensive protection.
Prevention tips to avoid future water stains on ceilings
Repairing water stains solves the immediate problem, but prevention ensures you won’t face the same issue repeatedly. Proactive maintenance and moisture control protect your ceilings long term whilst safeguarding your home’s structural integrity and indoor air quality.
Implement these prevention strategies to keep ceilings stain free:
- Fix leaks promptly at the first sign of moisture. Inspect your roof annually, checking for damaged tiles, cracked flashing, and deteriorated seals. Address plumbing leaks immediately, even minor drips, as they compound over time.
- Ensure adequate ventilation throughout your home. Install exhaust fans in bathrooms and kitchens, and use them during and after activities that generate moisture. Open windows regularly to promote air circulation and reduce humidity buildup.
- Conduct regular ceiling inspections, particularly after heavy rain or in areas above bathrooms and kitchens. Look for discolouration, soft spots, or peeling paint that signal developing moisture problems.
- Maintain proper attic ventilation to prevent condensation from temperature differentials. Ensure insulation doesn’t block ventilation paths, and consider adding vents if your attic feels excessively warm or humid.
- Service HVAC systems regularly to prevent condensation issues. Clean or replace air filters as recommended, and have professionals inspect ductwork for leaks or excessive moisture accumulation.
Pro Tip: Keep a moisture metre handy to test suspicious ceiling areas. Readings above 17% indicate active moisture problems requiring immediate attention.
Mould related stains pose serious health risks and often require ceiling replacement. Preventing mould growth through moisture control proves far less expensive and disruptive than remediation. If you notice musty odours, visible mould growth, or experience unexplained respiratory symptoms, seek professional assessment immediately.
Consider waterproofing solutions for particularly vulnerable areas. Bathrooms, kitchens, and rooms below flat roofs benefit from protective treatments that create moisture barriers. These key signs your property needs waterproofing help you identify areas requiring professional attention before damage occurs.
Prevention extends beyond your ceiling to encompass your entire home’s moisture management system. Proper guttering directs water away from your foundation, reducing basement moisture that can travel upward through your home’s structure. Landscaping should slope away from your house, preventing water pooling near walls. These comprehensive measures work together to protect every surface from water damage.
Regular maintenance schedules keep prevention efforts on track. Set calendar reminders to inspect your roof twice yearly, clean gutters quarterly, and check ceiling conditions monthly. This systematic approach catches small issues before they become expensive problems, saving you money and preserving your home’s value.
Pro waterproofing solutions for lasting ceiling protection
Whilst DIY repairs handle many ceiling water stains effectively, some situations demand professional expertise. Extensive damage, recurring stains despite repairs, or suspected mould growth indicate it’s time to call specialists who can address root causes and implement comprehensive solutions.

Pro Waterproofing offers expert services tailored to South African homes, providing thorough leak detection, professional remediation, and long term protective treatments. Their experienced team identifies moisture sources that homeowners often miss, from subtle roof damage to hidden plumbing issues. By addressing problems at their source rather than just treating symptoms, professional waterproofing prevents stains from returning and protects your home’s structural integrity. Whether you need emergency leak repair, comprehensive moisture assessment, or preventive waterproofing for vulnerable areas, partnering with specialists ensures your ceiling stays pristine and your home remains safe from water damage.
Frequently asked questions
How can I tell if a water stain on my ceiling is due to mould?
Mould stains typically appear as dark, fuzzy patches rather than smooth discolouration, and they’re often accompanied by a distinctive musty odour. If you notice these characteristics, avoid disturbing the area and contact a professional for proper assessment. Mould testing determines the type and extent of growth, guiding safe remediation strategies.
Is it safe to clean water stains on the ceiling myself?
Fresh and minor water stains without mould can usually be cleaned safely using proper protective equipment like goggles, gloves, and masks. However, if you suspect mould, see extensive damage, or feel uncomfortable working at height, professional remediation is the safer choice. Never attempt DIY mould removal, as improper handling spreads spores throughout your home.
How long does it take to repair water stains on a ceiling?
Minor stains can typically be cleaned, primed, and painted within 6 to 8 hours, though you’ll need to spread this over 1 to 2 days to allow proper drying between steps. Severe damage or mould affected areas may require several days to weeks, including time for leak repairs, material replacement, antimicrobial treatment, and multiple primer and paint coats. Rushing the process compromises repair quality.
Will the water stain come back after I paint over it?
Stains often bleed through regular paint if you skip proper preparation steps, particularly using stain blocking primer. Always clean thoroughly, apply quality oil based or shellac based primer, and most importantly, fix the underlying leak before painting. Without addressing the moisture source, stains inevitably return regardless of how well you paint.
When should I call a professional instead of fixing ceiling stains myself?
Call professionals immediately if you notice mould growth, experience recurring stains despite repairs, see structural damage like sagging or cracking, or find water stains covering large ceiling areas. Professional assessment is also wise if you cannot locate the leak source or if stains appear near electrical fixtures, where moisture poses safety hazards.