
Rainwater stains on a Johannesburg living room ceiling or a persistent musty smell in a Cape Town apartment can quickly turn from annoyance to emergency. In Gauteng and Western Cape, unpredictable storms often expose hidden vulnerabilities in roofs, making swift action vital for preventing costly water damage. By gathering the right inspection tools and following a careful approach, you can turn early detection of leaks into peace of mind and protect your property investment.
Table of Contents
- Step 1: Prepare Your Roof Inspection Tools
- Step 2: Inspect Interior Signs Of Roof Leaks
- Step 3: Examine External Roof Surfaces Thoroughly
- Step 4: Test Leak-Prone Areas During Rainfall
- Step 5: Verify Findings And Document Leak Locations
Quick Summary
| Key Point | Explanation |
|---|---|
| 1. Assemble essential inspection tools | Gather tools such as a sturdy ladder, safety harness, and moisture meter to ensure a safe and effective roof inspection. |
| 2. Look for interior leak signs | Carefully inspect ceilings, walls, and attics for water stains, mould, or dampness to detect leaks early and prevent damage. |
| 3. Conduct thorough external examination | Examine roof surfaces for damaged shingles, flashing, and gutter blockages to identify potential leak sources before they escalate. |
| 4. Test during rainfall for accuracy | Evaluate how water flows during rain to uncover hidden leaks and vulnerabilities not visible during dry inspections. |
| 5. Document findings systematically | Create detailed sketches and notes, including photos and moisture readings, to aid in planning repairs and tracking issues over time. |
Step 1: Prepare your roof inspection tools
Before climbing up to assess potential roof damage, you’ll need a comprehensive set of tools to conduct a thorough and safe inspection. Proper preparation is crucial for identifying potential leaks and preventing unnecessary risks.
Here are the essential tools you’ll want to gather before starting your roof inspection:
- Sturdy ladder with adjustable height
- Safety harness and fall protection equipment
- Digital moisture meter to detect hidden dampness
- Powerful flashlight with extra batteries
- Digital camera or smartphone for documenting damage
- Binoculars for initial ground-level assessment
- Measuring tape to record dimensions of potential problem areas
Safety must be your primary concern during roof inspections. Specialized safety equipment is critical for preventing accidents and ensuring a comprehensive assessment. Professional roof inspectors recommend using personal fall arrest systems and checking all equipment for potential wear or damage before beginning your inspection.
Proper tool selection can mean the difference between a successful roof leak identification and a potentially dangerous situation.
Top tip: Always have a professional partner present or notify someone about your roof inspection plans for added safety and emergency support.
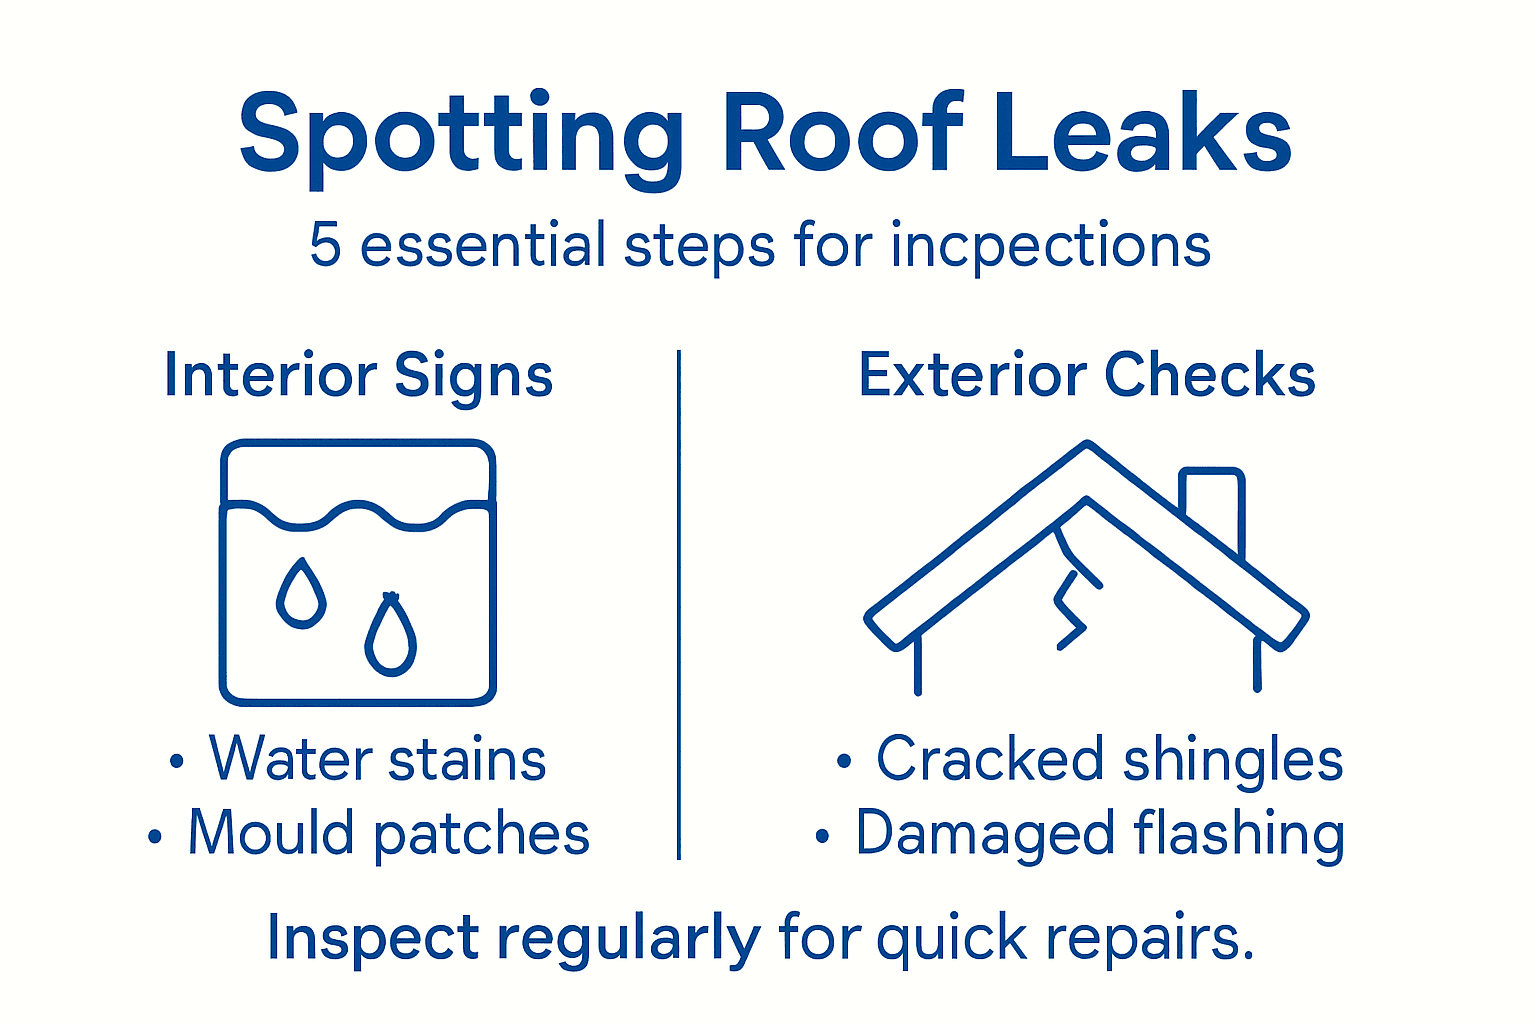
Step 2: Inspect interior signs of roof leaks
Understanding the interior indicators of roof leaks is crucial for early detection and preventing extensive water damage to your home. A systematic interior inspection can reveal subtle signs of water infiltration that might otherwise go unnoticed.
Begin your investigation by methodically examining key areas where roof leaks typically manifest. Interior water damage signs include specific visual markers that can help pinpoint potential roof problems:
- Water stains on ceilings and walls
- Discoloured patches or yellowing
- Peeling paint or wallpaper
- Mould or mildew growth in unusual locations
- Damp or musty odours in specific rooms
- Bubbling or warped ceiling materials
- Visible moisture around electrical outlets
Pay special attention to your attic space, as it often provides the most direct evidence of roof leakage. Look for damaged insulation, dark spots on wooden structures, and areas of moisture accumulation. When examining walls and ceilings, use natural and artificial lighting to help reveal subtle discolourations that might indicate water penetration.
Water stains are not just cosmetic issues – they are clear warning signs of potential structural damage that require immediate attention.
Top tip: Use a bright torch and move systematically through rooms, checking each area carefully to ensure no potential leak signs are missed.
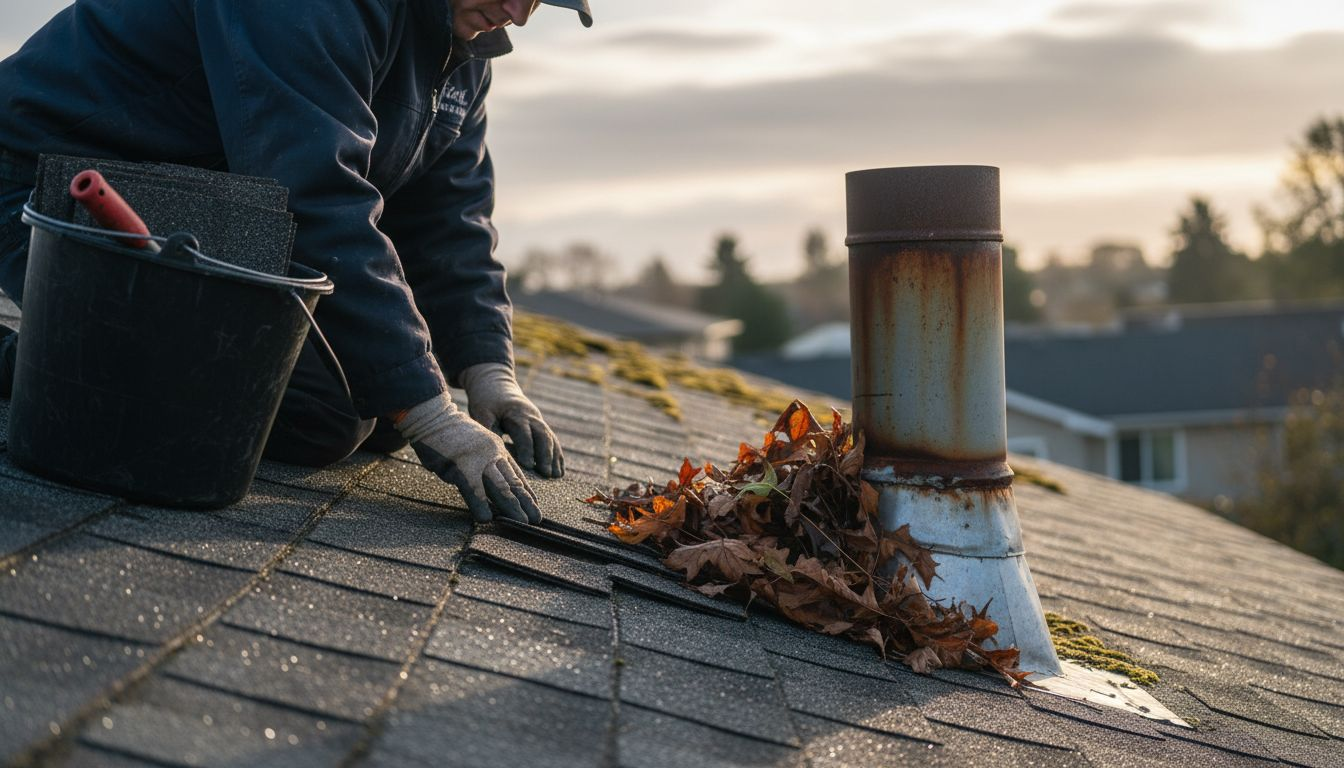
Step 3: Examine external roof surfaces thoroughly
Examining your roof’s external surfaces requires a methodical and comprehensive approach to identify potential leak sources before they become significant problems. Systematic visual roof inspection involves carefully assessing every accessible component of your roof’s exterior structure.
Begin your external roof examination by focusing on these critical areas:
- Roof shingles or tiles for signs of damage
- Metal flashing around chimneys and vents
- Gutter system for blockages or improper drainage
- Roof edges and seam connections
- Skylights and external penetration points
- Roof membrane for cracks or wear
- Downspouts and their connection points
Look specifically for indicators of potential water infiltration such as cracked or curling shingles, granule loss on asphalt tiles, rust on metal components, and areas where water might pool. Pay special attention to low-slope sections where water drainage could be compromised. Carefully examine the condition of seals around any roof penetrations like chimneys, satellite dishes, or ventilation systems.
Here’s a summary comparing interior versus exterior roof leak detection methods:
| Aspect | Interior Inspection | Exterior Inspection |
|---|---|---|
| Primary Purpose | Spot water damage and infiltration indoors | Identify visible roof defects and vulnerabilities |
| Typical Signs Observed | Stains, mould, and damp odours | Broken tiles, damaged flashing, clogged gutters |
| Tools Often Needed | Torch, moisture metre, notepad | Ladder, binoculars, camera, safety equipment |
| Safety Considerations | Electrical dangers and confined spaces | Fall hazards and slippery surfaces |
External roof damage often begins subtly – catching small issues early can prevent costly repairs later.
Top tip: Conduct your external roof inspection during daylight hours and after rainfall to identify moisture-related problems more effectively.
Step 4: Test leak-prone areas during rainfall
Testing your roof during active rainfall provides the most direct method for identifying hidden leak points and understanding how water interacts with your roof’s surface. Hydrologic rainfall analysis reveals critical insights about potential water infiltration paths that may not be visible during dry conditions.
During rainfall, systematically assess these key areas:
- Roof valleys and junction points
- Chimney and vent surrounds
- Skylight perimeters
- Guttering and downspout connections
- Roof edge and fascia regions
- Flat or low-slope roof sections
- Areas near previous repair work
Pay close attention to water flow patterns, looking for signs of pooling, unexpected drainage routes, or areas where water seems to penetrate rather than run off smoothly. Watch for immediate water staining, dripping inside the property, or moisture accumulation that indicates potential leak sources. Use a notepad to document specific locations where water behaves unusually.
Rainfall testing provides real-time evidence of your roof’s vulnerabilities that visual inspections might miss.
Top tip: Wear waterproof clothing and bring a reliable torch to help you observe water movement carefully during the inspection.
Step 5: Verify findings and document leak locations
Transforming your visual observations into a comprehensive record is crucial for effective roof leak repair planning. Systematic documentation techniques help translate your inspection findings into actionable insights for future repairs.
Documentation of your roof leak investigation should include:
- Precise location sketches
- High-resolution digital photographs
- Moisture metre readings
- Date and time of inspection
- Weather conditions during assessment
- Detailed written descriptions
- Measurements of affected areas
Prepare a detailed report that includes not just the locations of potential leaks, but also their characteristics. Note the size, shape, and potential source of each leak point. If possible, create a digital map or floor plan marking exactly where water penetration occurs. This comprehensive approach helps professionals understand the extent of damage and plan targeted repairs.
The table below outlines the main benefits of systematic documentation during roof inspections:
| Documentation Feature | Benefit |
|---|---|
| Precise sketches and photos | Helps professionals locate and assess damage accurately |
| Moisture and weather records | Tracks leak development over time |
| Detailed written descriptions | Supports targeted repair and insurance claims |
| Digital backups | Prevents data loss and ensures information is always accessible |
Accurate documentation transforms random observations into a strategic repair roadmap.
Top tip: Use a waterproof notebook and create digital backups of all documentation to ensure your findings are preserved.
Protect Your Roof From Leaks With Expert Waterproofing Solutions
Identifying roof leaks early through thorough inspections is crucial to avoid costly structural damage and persistent damp issues. If the detailed steps in this guide have revealed signs of concern in your home or commercial property, it is essential to act swiftly with professional help. At Pro Waterproofing, we specialise in effective waterproofing services tailored to safeguard your property against water infiltration and related damage.

Do not let small leaks escalate into expensive repairs. Visit our Uncategorized category to explore expert advice and discover how our professional team can help you implement lasting solutions. Our customer-focused approach puts your safety and property value first, with licensed specialists ready to assess, repair and protect. Contact us today at Pro Waterproofing to get a quote and secure your home or business against water damage before it worsens.
Frequently Asked Questions
How can I prepare for a roof leak inspection?
To prepare for a roof leak inspection, gather essential tools like a sturdy ladder, safety harness, and a moisture meter. Begin by ensuring you have everything ready to conduct a thorough and safe assessment of potential roof damage.
What are the signs of roof leaks to look for inside my home?
Common signs of roof leaks include water stains on ceilings and walls, discoloured patches, and mould growth. Inspect these areas carefully to catch leaks early and mitigate further damage.
What should I examine on the roof’s exterior for leaks?
During an external roof inspection, focus on shingles, flashing, gutters, and roof edges for any visible damage. Look for cracked tiles, rust, or areas where water could pool, as these can indicate potential leak sources.
How do I test for roof leaks during rainfall?
To test for roof leaks during rainfall, assess critical areas like roof valleys and chimneys as water flows over them. Look for pooling water or indoor dripping to directly identify leak points while the rain is occurring.
Why is documentation important in identifying roof leaks?
Documentation is vital because it records precise leak locations and conditions during your inspection. Use sketches, photographs, and notes to create a comprehensive report, assisting repair professionals in understanding the extent of damage for effective repairs.
What tools do I need for a thorough roof inspection?
Essential tools for a roof inspection include a digital moisture meter, flashlight, measuring tape, and a high-quality camera. Ensure you have these tools at hand to effectively identify and document any potential leak sources.
Recommended
- Roof Leaks Issues And How To Find Them: What To Look Out For
- Inspecting a house: Check the roof’s condition
- 7 Clear Examples of Leaky Roofs Every Owner Should Know
- Roof Leaks Causes Explained: Key Issues in South Africa
- How to Manage Property Damages for South African Landlords – Rental Income Insurance