
Up to 60 percent of homes in Gauteng struggle with recurring damp each rainy season, often leading to expensive repairs and long term structural concerns. If you have ever worried about protecting your property like a British homeowner who expects top waterproofing standards, you know that methodical preparation is just as important as choosing the right contractor. You will discover smart ways to inspect surfaces, safeguard your belongings, and verify every step before any expert begins work.
Table of Contents
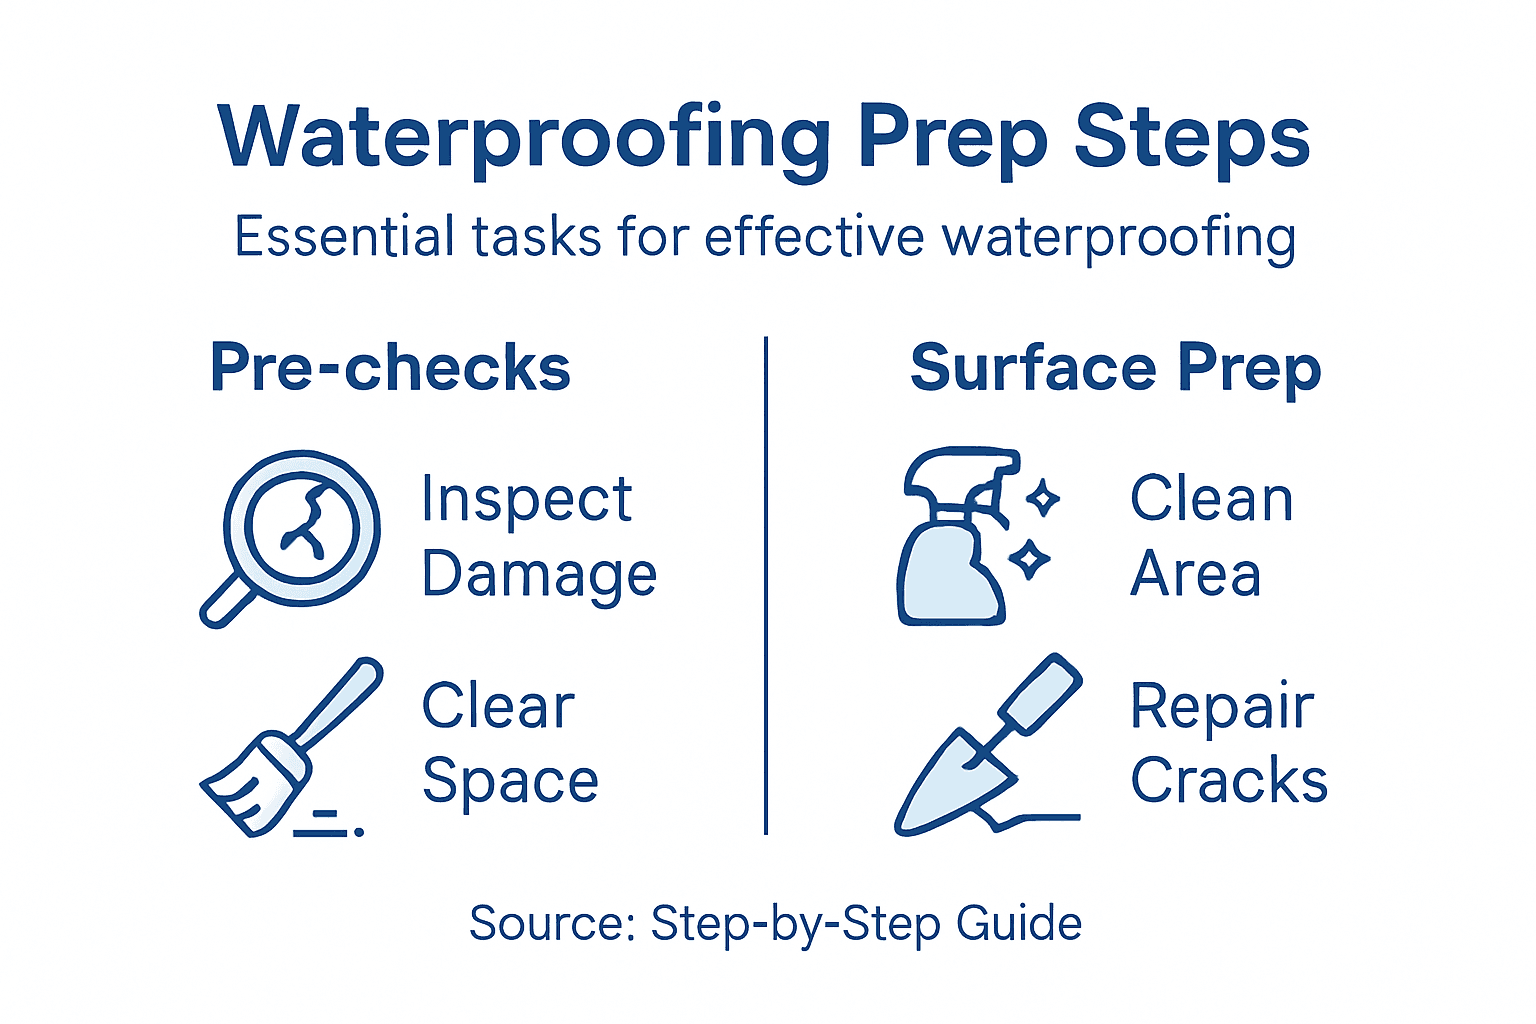
- Step 1: Inspect All Surfaces For Existing Damage
- Step 2: Clear The Area And Remove Belongings
- Step 3: Clean And Dry Surfaces Thoroughly
- Step 4: Repair Any Structural Flaws Or Cracks
- Step 5: Verify Readiness For Professional Waterproofing
Quick Summary
| Key Point | Explanation |
|---|---|
| 1. Inspect surfaces for damage | Carefully check for cracks, discolouration, and peeling paint to identify water vulnerabilities before waterproofing starts. |
| 2. Clear work area of belongings | Remove furniture and items or cover them to prevent damage during the waterproofing process. |
| 3. Clean and dry thoroughly | Ensure surfaces are clean, dry, and free of contaminants for effective adhesion before applying waterproofing treatment. |
| 4. Repair structural issues | Address any cracks or weaknesses in surfaces using the appropriate sealing materials to prevent future leaks. |
| 5. Verify preparations with professionals | Confirm that all preparatory steps are complete and meet professional standards before engaging waterproofing contractors. |
Step 1: Inspect all surfaces for existing damage
Before applying any waterproofing treatment, conducting a comprehensive surface inspection is paramount. You’ll want to methodically examine every potential area of water vulnerability, checking for signs of structural compromise or previous moisture damage.
Start by visually scanning the entire surface area, paying close attention to potential weak points. Professional waterproofing experts recommend examining walls, roofs, foundations, and other critical surfaces for telltale signs like hairline cracks, discolouration, peeling paint, or efflorescence. Use natural light or a bright torch to highlight subtle imperfections that might otherwise go unnoticed. Run your hands gently across surfaces to feel for uneven textures or soft spots that could indicate underlying moisture problems.
Documenting your findings becomes crucial at this stage. Photograph each area of concern, measuring and noting the precise location and dimensions of any damage. This documentation will help you develop a targeted repair strategy before waterproofing and serve as a valuable reference for future maintenance.
Here’s a summary of key signs of water vulnerability and how each affects surface integrity:
| Sign of Damage | What to Look For | Potential Impact |
|---|---|---|
| Hairline cracks | Fine lines on walls or floors | Can develop into major leaks |
| Discolouration | Yellow or brown patches | Indicates past moisture exposure |
| Peeling paint | Bubbling or flaking surfaces | Impairs membrane adhesion |
| Efflorescence | White powdery residue | Mineral salts, shows ongoing damp |
| Uneven textures | Soft or rough spots | Suggests hidden structural issues |
Expert Recommendation: Always use a moisture meter to quantify hidden dampness in surfaces that appear structurally sound from the outside.
Step 2: Clear the area and remove belongings
Preparing your workspace is a critical step before waterproofing begins. Your goal is to create an unobstructed environment that allows professionals to work efficiently and protects your valuable belongings from potential damage or contamination.
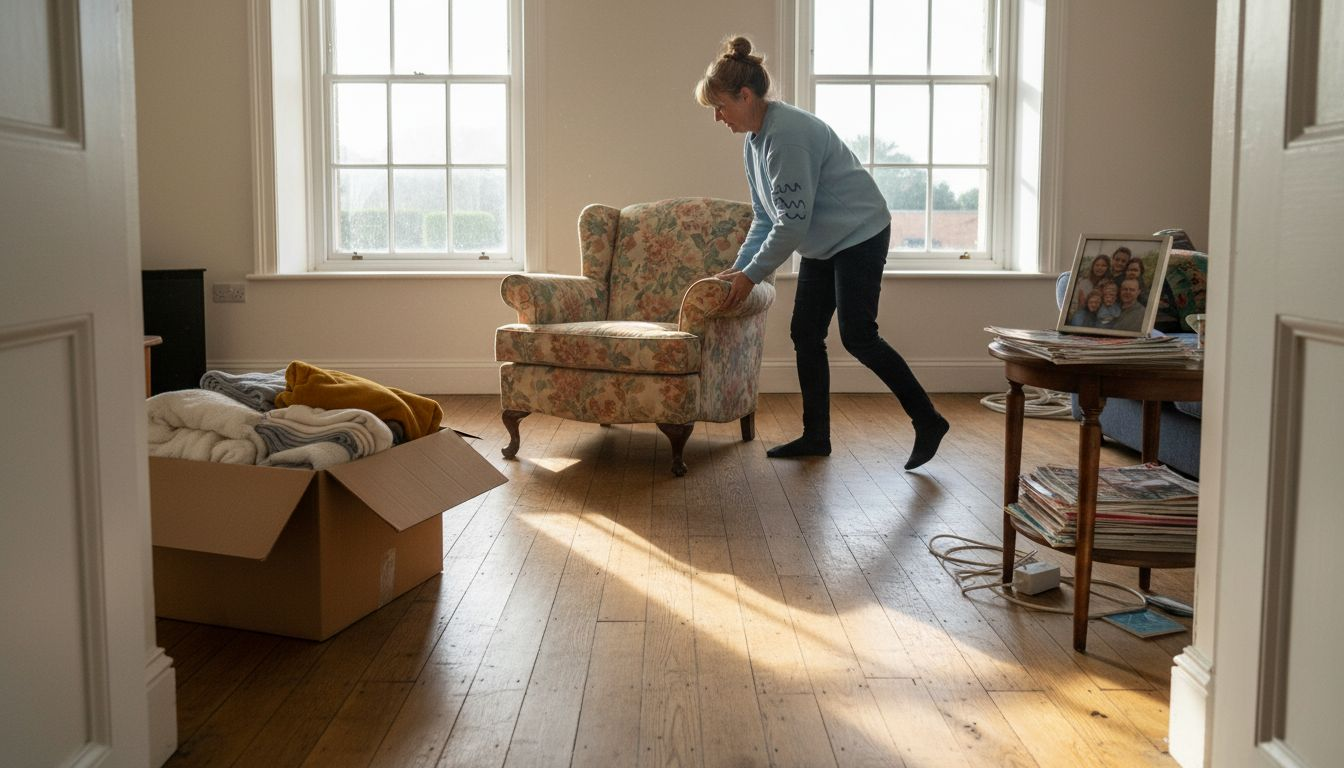
National waterproofing regulations recommend systematically clearing the entire work area. Start by removing all furniture, electronics, artwork, and personal items from the space. If you are working in a room or on a surface that cannot be completely emptied, use sturdy plastic sheeting to cover remaining items thoroughly. Ensure you pack delicate items carefully and move them to a safe location away from the work zone. Pay special attention to items near walls or surfaces being treated such as electronic equipment, fabric furnishings, or decorative objects that might be sensitive to moisture or dust.
Organise your removed belongings in a clean, dry area where they will remain undisturbed during the waterproofing process. Label storage containers or boxes if needed to maintain organisation. Consider creating a simple inventory list of items you have moved to help you replace everything precisely after the work is completed.
Expert Recommendation: Create a designated staging area for your belongings that is at least 3 metres away from the waterproofing work zone to prevent accidental contamination or damage.
Step 3: Clean and dry surfaces thoroughly
Before applying any waterproofing treatment, preparing your surfaces through meticulous cleaning and drying is absolutely essential. This crucial step ensures optimal adhesion and long lasting protection for your property.
National waterproofing standards emphasise removing all contaminants that could compromise the waterproofing membrane. Begin by using a heavy duty degreaser or specialised cleaning solution appropriate for your specific surface type. For concrete surfaces, use a pressure washer to eliminate dirt, dust, and loose particles. When working with painted or delicate surfaces, opt for gentler cleaning methods like soft brushes and mild detergent solutions. After cleaning, allow sufficient time for complete drying use industrial fans or dehumidifiers to accelerate the process. Moisture content should be below 5 percent before proceeding with waterproofing application.
Inspect the surface carefully after cleaning to ensure no residual contaminants remain. Check for any remaining dust, grease spots, or subtle imperfections that might interfere with the waterproofing membrane. Use lint free cloths for final surface preparation and consider using a moisture metre to confirm absolute dryness.
For quick reference, here’s how different cleaning methods align with surface types and risk minimisation:
| Cleaning Method | Suitable Surface | Risk Minimised |
|---|---|---|
| Pressure washing | Concrete, masonry | Removes deep dirt, prevents adhesion loss |
| Mild detergent | Painted, delicate surfaces | Avoids damage, keeps finish intact |
| Degreaser solution | Oily/greasy spots | Eliminates oils, ensures full membrane bond |
| Soft brushing | Decorative objects, corners | Protects fragile items, cleans details |
Expert Recommendation: Always test your cleaning solution on a small inconspicuous area first to verify it will not damage the surface material.
Step 4: Repair any structural flaws or cracks
Before waterproofing can begin, identifying and repairing structural weaknesses is crucial to ensuring a robust and effective protection system. Your goal is to create a solid foundation that will prevent future water infiltration and potential damage.
Structural integrity research highlights the importance of addressing even minor cracks and imperfections. Start by carefully examining the surface for hairline cracks, structural shifts, or areas of potential water entry. For smaller cracks less than 3mm wide, use a high quality epoxy or polyurethane injection sealant that can penetrate deeply and create a permanent seal. Larger cracks or structural damages may require professional assessment and more comprehensive repair techniques such as concrete patching or structural reinforcement.
When addressing structural flaws, work systematically and ensure complete coverage. Clean the crack thoroughly using a wire brush to remove any loose debris or contaminants. Apply repair materials according to manufacturer instructions, paying close attention to curing times and environmental conditions. For more significant structural issues, consider consulting a professional structural engineer who can provide detailed recommendations specific to your property’s unique challenges.
Expert Recommendation: Photograph all repairs and keep detailed documentation to track the progression of your surface restoration efforts.
Step 5: Verify readiness for professional waterproofing
Before inviting professional waterproofing contractors onto your property, you must ensure every preparation step has been completed meticulously. This final verification stage confirms that your surfaces are primed and ready for expert treatment.
Professional competency verification requires checking the credentials and registration status of potential waterproofing specialists. Request documentation confirming their professional qualifications, including certifications from recognised industry bodies like the National Home Builders Registration Council. Confirm their insurance coverage, past project portfolios, and specific experience with your type of property and surface requirements. Carefully review their proposed methodology, ensuring it matches the specific preparation work you have already completed.
Take time to compile all your documentation from previous preparation steps. This includes your detailed surface inspection reports, photographs of repairs, moisture metre readings, and cleaning records. Create a comprehensive file that demonstrates your thorough preparation, which will help the waterproofing professionals understand the exact condition of your surfaces and streamline their upcoming work.
Expert Recommendation: Arrange a preliminary site walkthrough with your chosen waterproofing contractor to jointly verify that all preparatory steps have been completed to professional standards.
Ensure Flawless Waterproofing with Expert Preparation Support
Preparing your surfaces thoroughly before waterproofing is critical to guarantee lasting protection against water damage. This guide highlights common challenges such as inspecting for hairline cracks, clearing belongings for a clean workspace, and repairing structural flaws. Property owners often worry about missing hidden damp spots or improper cleaning that can compromise membrane adhesion. By understanding these key steps, you gain confidence in securing your home or business from costly leaks and moisture issues.
If you want to move beyond preparation and connect with trusted professionals who truly understand the importance of comprehensive waterproofing readiness, explore the services in our Uncategorized – Pro Waterproofing section.

Take control now by visiting Pro Waterproofing to access expert guidance and request a consultation. With detailed inspections, advanced repair methods, and proven waterproofing solutions, you can protect your property with peace of mind. Start your waterproofing project today to avoid expensive repairs tomorrow.
Frequently Asked Questions
What should I inspect for before waterproofing my property?
Before waterproofing, conduct a thorough inspection for existing damage such as hairline cracks, discolouration, or uneven textures. Document your findings and take photographs to develop an effective repair strategy.
How do I prepare my space for waterproofing?
Clear the area by removing all furniture and sensitive items to prevent damage during the waterproofing process. Ensure a clean, unobstructed environment for professionals by covering any remaining belongings with sturdy plastic sheeting.
What cleaning methods should I use on surfaces before waterproofing?
Use appropriate cleaning methods for the surface type, such as pressure washing for concrete or mild detergent for painted areas. Aim to remove all contaminants to ensure optimal adhesion; let surfaces dry completely before proceeding.
How do I repair structural flaws before waterproofing?
Repair any structural flaws by sealing hairline cracks with a high-quality epoxy or polyurethane injection sealant. For larger cracks, consult a professional to ensure a comprehensive repair that will effectively prevent water infiltration.
How can I verify that my property is ready for waterproofing?
Verify your property’s readiness by compiling documentation of your preparatory steps, including inspection reports and photos of repairs. Arrange a preliminary walkthrough with your waterproofing contractor to confirm that all preparation work meets professional standards.