

TL;DR:
- Type C waterproofing, also known as drained protection, manages water entry by routing it to a sump and pump rather than blocking it externally. It tolerates minor substrate defects and is ideal for retrofit and existing basements where external excavation is impractical, but requires proper design, maintenance, and backup systems. Regular servicing and correct component selection are essential to prevent system failure and ensure long-term dryness.
Type C waterproofing, formally known as drained protection under BS 8102, is the most practical choice for most South African basement retrofits: it manages water that enters the structure by routing it through an internal cavity to a sump and pump, rather than trying to hold it back at the outer face. For new builds with manageable seepage and for existing basements where excavation is impractical, Type C is typically the right call. Where you have severe hydrostatic pressure, active structural cracking, or a basement that cannot be maintained, it is not.
Before you sign any contract, three items are non-negotiable:
- Design by a qualified waterproofing designer who can size drainage capacity for worst-case ingress, not just average conditions.
- Pump redundancy — a duplex arrangement with a high-level alarm and battery backup, not a single submersible left to chance.
- A written maintenance contract specifying service intervals, pump change-out schedules, and who responds when the alarm triggers.
The single most important action for any owner or project lead: commission a site survey and pump-capacity calculation before the specification is written.
Table of Contents
- What is Type C waterproofing and how does it work?
- What are the real benefits and limits of cavity-drain systems?
- What components does a Type C system actually need?
- When should you choose Type C, and when should you not?
- How is a Type C system installed?
- How do you commission and maintain a Type C system in South Africa?
- What standards and guarantees should you require in the contract?
- How do you choose a Type C contractor and avoid the common traps?
- Key takeaways
- The part most specifications get wrong
- Prowaterproofing: site survey to long-term maintenance for Type C projects
- Useful sources and further reading
What is Type C waterproofing and how does it work?
Type C is a drained protection system defined under BS 8102. The critical distinction is that it does not form a hydrostatic barrier at the outer face of the structure. Instead, it accepts that some water will penetrate and manages it by creating an internal void between the membrane and the substrate, collecting that water in perimeter drainage channels, and discharging it via a sump pump or, where site levels allow, by gravity.
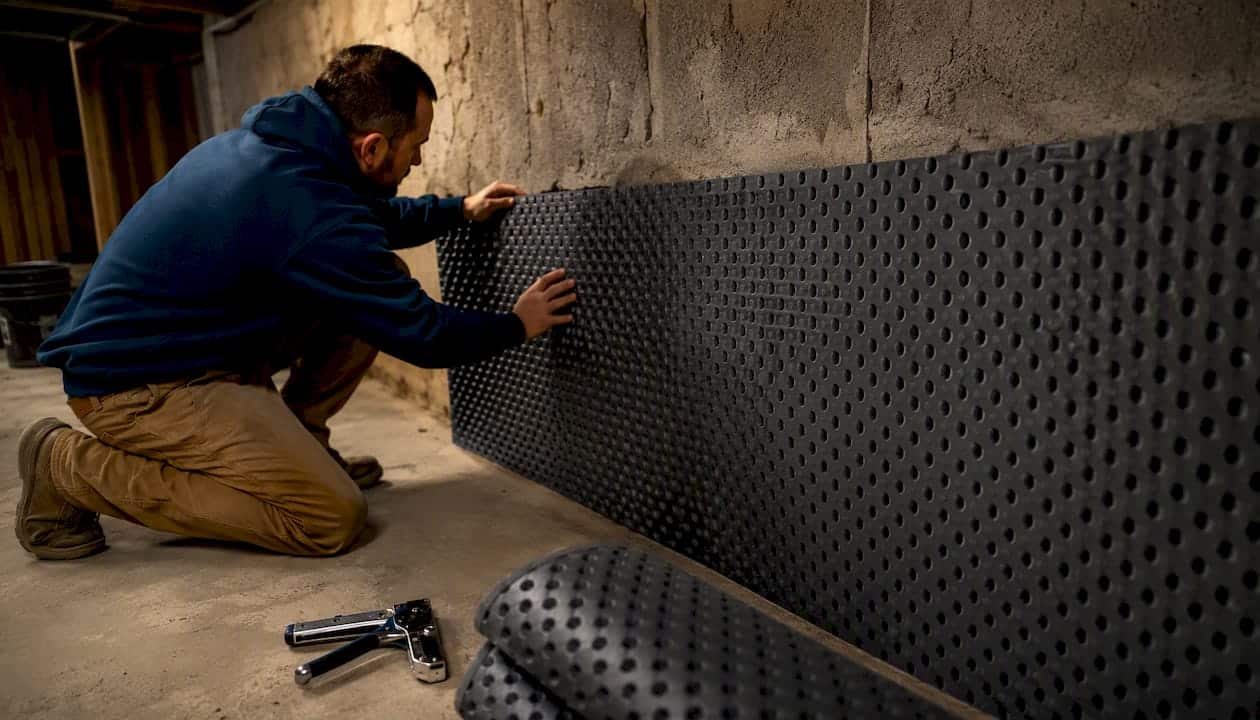
The mechanics are straightforward. A studded HDPE or polypropylene membrane is fixed to the wall and floor surfaces, its studs holding the membrane away from the substrate and forming a continuous drainage void. Water that passes through the structure enters this void, runs down to profiled perimeter channels at the floor-wall junction, and flows to a sump chamber. From the sump, a submersible pump discharges the water to a suitable drain or soakaway outside the structure.
How does this differ from the other two types?
- Type A (barrier protection) relies on an applied membrane or coating to prevent water entry entirely. It depends on the membrane’s integrity and bond. See Type A barrier protection explained for a full comparison.
- Type B (integral structural protection) uses the concrete structure itself as the barrier, typically through waterproof concrete admixtures or structural design. A detailed breakdown is available in this Type B guide.
- Type C (drained protection) manages water that has already entered, routing it away rather than stopping it at source.
Pro Tip: The single most common installation mistake is treating the membrane as a barrier. It is not. If you see a contractor taping every stud-membrane joint as though it must be watertight, ask them to explain their drainage design. A membrane with no functioning drainage channel below it is just a damp wall with plastic on it.
What are the real benefits and limits of cavity-drain systems?
Type C has become the most common choice for retrofit and existing basements precisely because it tolerates what other systems cannot. The substrate does not need to be perfectly dry or defect-free before installation. Minor cracks, honeycombing, and surface irregularities are managed rather than requiring full remediation first. Installation is faster than most Type A approaches, and the system remains accessible for inspection and repair throughout its life.
The practical benefits for South African projects:
- Tolerates minor substrate defects without full structural repair first.
- Suitable for retrofit where external excavation is cost-prohibitive or impossible.
- Maintainable: every component can be inspected, serviced, or replaced.
- Allows phased fit-out — the membrane goes in, then follow-on trades work behind it.
The limitations are equally concrete. Type C does not stop water; it manages it. The structure still provides primary resistance, and if that resistance fails catastrophically, the drainage system will be overwhelmed. Pumped systems depend on electricity and mechanical reliability. Convoluted basement geometries, flat soffits, and very low floor-to-ceiling heights can make membrane installation impractical.
For South African sites specifically, two issues recur. First, seasonal rainfall patterns in the Western Cape and KwaZulu-Natal mean that drainage capacity must be sized for peak wet-season ingress, not average annual conditions. Second, free lime leaching from new concrete is particularly aggressive in the first few years and can block channels and sumps faster than owners expect. Both issues are manageable with the right design, but they must be anticipated at specification stage, not discovered at the first service visit.
What components does a Type C system actually need?
Getting the component specification right is where most under-specified projects fail. The membrane is the visible part; the drainage, sump, and pump assembly is where the system either works or does not.
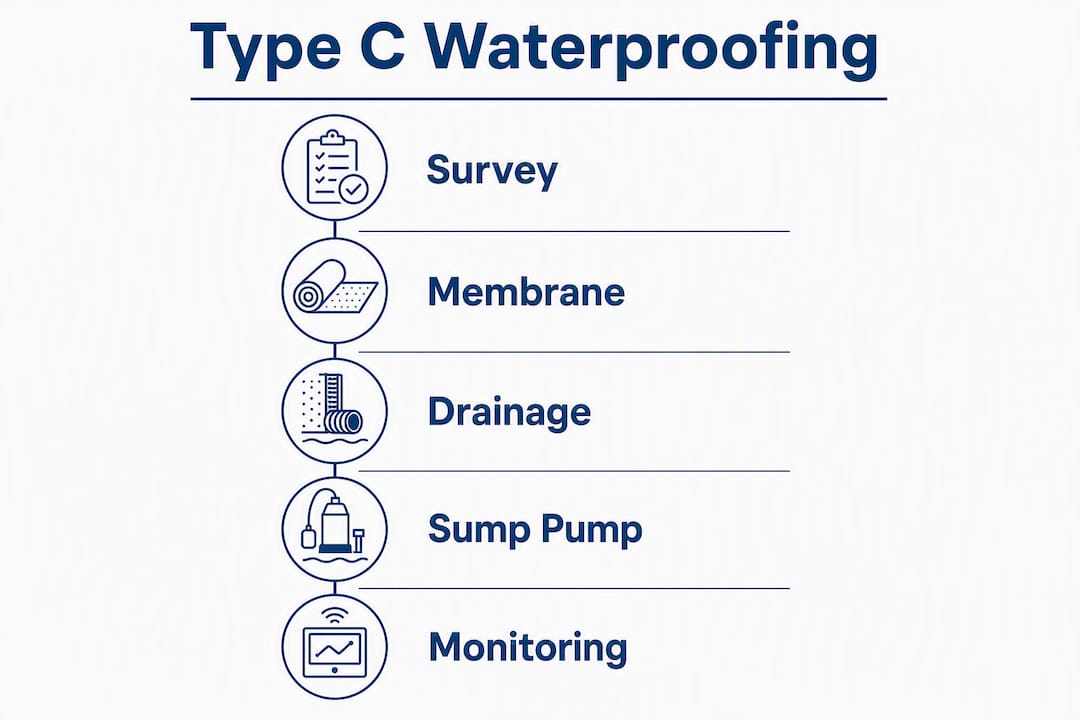
Wall and floor membranes
Studded membranes are manufactured in HDPE or polypropylene. Stud depth and profile geometry directly determine void volume per square metre and therefore how much water the cavity can hold before it reaches the perimeter channel. An 8mm stud membrane and a 20mm stud membrane are not interchangeable: the 20mm product creates substantially larger void capacity, reduces run-off concentration into channels, and changes whether modular drainage or conventional perimeter channels are the better choice. The Delta MS 20 is an example of a high-density polyethylene membrane with a deeper stud profile, certified for Type C drained protection under BS 8102:2022.
| Stud depth | Approximate void capacity | Typical application |
|---|---|---|
| 8mm | Lower void volume per m² | Walls with low ingress rates, limited headroom |
| 20mm | Higher void volume per m² | Floors and walls with higher ingress, longer channel runs |
Note: exact litres-per-m² figures vary by manufacturer profile. Always confirm with the product technical sheet before sizing channels and pumps.
Drainage channels and sumps
Profiled PVC perimeter channels sit at the floor-wall junction, collecting water from both the wall membrane and the floor void. Modular drainage options exist for more complex geometries. All channels must be sized to carry the calculated worst-case flow rate to the sump without backing up.
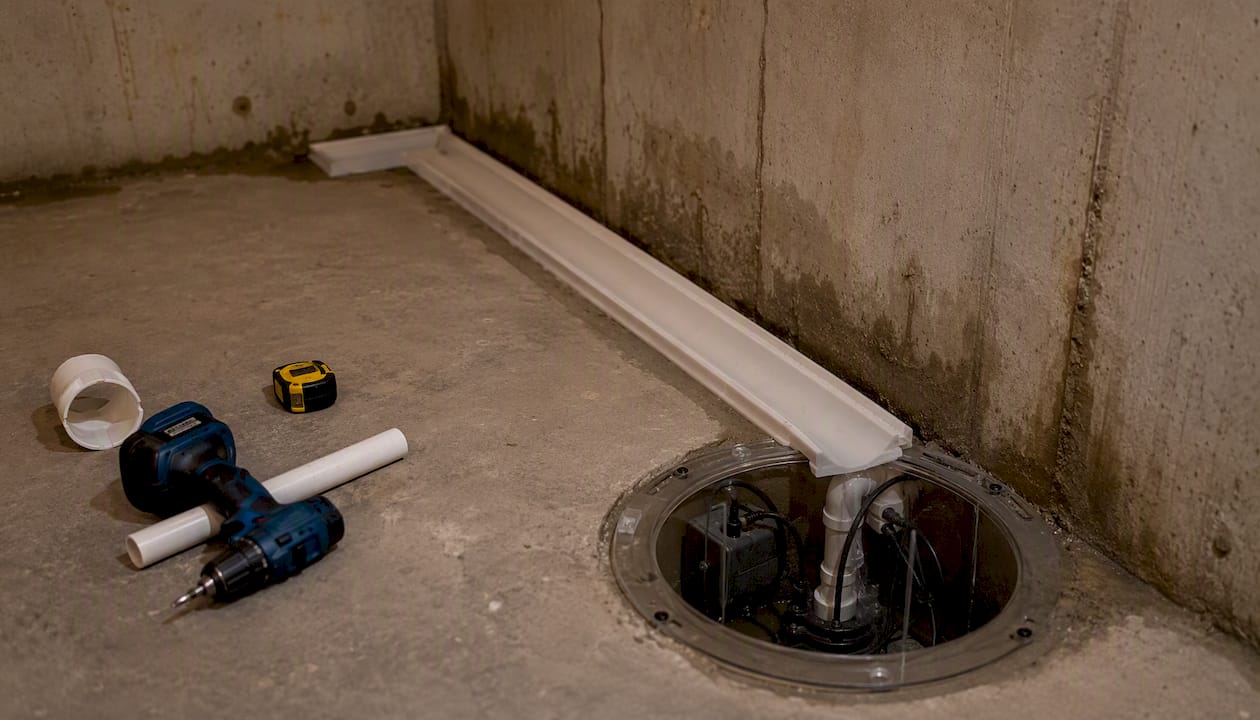
The sump chamber must be large enough to buffer peak inflow and allow the pump to cycle without short-cycling (which shortens pump life). Sump covers must be accessible and sealed to prevent odour and ground gas ingress.
Pumps, alarms and backup
Pumped systems must be engineered for worst-case ingress, not average conditions. A duplex pump arrangement — two pumps in the same sump, each capable of handling full duty — is the standard for any occupied basement. A high-level alarm and battery backup are not optional extras; they are the difference between a managed event and a flooded basement when the mains power fails during a storm.
Key items to specify:
- Submersible pumps rated for the calculated duty head and flow.
- Duplex arrangement with automatic duty/standby changeover.
- High-level float alarm with audible and remote notification.
- Battery backup capable of sustaining pump operation for a minimum period agreed with the designer.
- Inspection ports at regular intervals along channel runs.
When should you choose Type C, and when should you not?
The decision starts with a proper site assessment. Groundwater level, external drainage, surrounding topography, and any ground gas risk all need to be established before a membrane is specified. Skipping this step is the most expensive shortcut a project can take.
Type C suits:
- Existing basements where external waterproofing is impractical.
- New builds where the structural shell provides adequate primary resistance and seepage is manageable.
- Sites where the drainage discharge point (drain, soakaway, or pump-to-drain) can be reliably connected.
- Projects where long-term maintainability is a priority.
Type C is not appropriate where:
- Hydrostatic pressure is severe and the structure cannot provide adequate primary resistance.
- The basement geometry makes membrane installation impractical (very convoluted shapes, flat soffits with minimal headroom).
- There is no reliable discharge point for pumped water.
- The owner cannot commit to a maintenance programme — a Type C system without maintenance is a system waiting to fail.
For new builds, Type B integral protection may be more appropriate where the structural design can incorporate waterproof concrete from the outset. For a side-by-side view of interior versus exterior approaches, the interior vs exterior basement waterproofing guide covers the trade-offs clearly.
Pro Tip: Before any membrane goes on, carry out all structural repairs to severe cracks and apply an anti-lime coating to newly cast concrete surfaces. Free lime leaching from fresh concrete is most aggressive in the first months after casting, and an anti-lime treatment applied at this stage costs a fraction of what a blocked sump costs to clear at the three-month service.
How is a Type C system installed?
A well-run installation follows a clear sequence. Owners and site managers who understand it can spot poor workmanship before it is covered up.
Installation sequence
- Site survey and design sign-off — groundwater assessment, drainage capacity calculation, pump sizing, and drawing issue before any materials are ordered.
- Substrate preparation — clean, structurally sound surfaces; repair of active leaks and severe cracks; anti-lime treatment to new concrete.
- Wall membrane fixing — membranes fixed stud-out to walls using appropriate fixings and washers; joints lapped and sealed per manufacturer guidance; corners and internal angles detailed correctly.
- Floor membrane installation — floor membrane laid stud-up, lapped to wall membrane at the junction; floor-to-wall detail is the most critical joint in the system.
- Perimeter drainage channel installation — channels seated at the floor-wall junction, falls checked, and runs confirmed to reach the sump without low spots.
- Sump and pump installation — sump chamber set at the lowest point; pumps, alarms, and battery backup installed and wired; discharge pipework run to the agreed outlet.
- Commissioning and flood testing — system flushed, pumps run-tested, alarms triggered and verified, and all results documented.
- Handover — O&M manual, commissioning certificate, maintenance schedule, and parts list issued to the client.
What to check at handover
- Membrane continuity: no gaps at corners, penetrations, or service entries.
- Channel clearances: no debris, correct falls, all runs accessible.
- Sump access: cover removable, chamber clear, pump float moves freely.
- Pump test results: both pumps run independently, alarm triggers at the correct level, battery backup holds charge.
- All penetrations (pipes, cables) sealed with appropriate collars or mastic.
Protecting the membrane during follow-on trades matters more than most contractors admit. Foot traffic, dropped tools, and screed laying can all damage studded membranes. A protection board or temporary screed over the floor membrane before other trades work in the space is standard practice on well-managed sites. For a broader look at sequencing, this basement waterproofing steps guide covers the full project workflow.
How do you commission and maintain a Type C system in South Africa?
When Type C installations fail, the cause is almost always the discharge system, not the membrane. A pump that has never been serviced, a sump blocked with free lime, or an alarm battery that went flat two years ago — these are the real failure modes. Commissioning and maintenance are not afterthoughts.
Commissioning steps
- Flush the entire drainage system to remove construction debris and loose material.
- Run each pump individually and confirm correct operation and discharge.
- Test the high-level alarm: raise the float manually and confirm audible and remote alerts trigger.
- Test battery backup: isolate mains power and confirm the pump operates on battery.
- Record all test results, pump model numbers, installation dates, and discharge point details in the commissioning certificate.
- Issue the O&M manual to the client with the first service date pre-booked.
Service intervals
The first service should be within three months of commissioning. This is not a conservative recommendation; it is the interval at which free lime deposits from new concrete are most likely to have accumulated and before they consolidate into hard blockages. After that, an annual minimum applies, with more frequent visits where:
- Free lime or silt is present in significant quantities.
- The site is in a high-rainfall area (Western Cape winter months, KwaZulu-Natal summer storms).
- The basement is in commercial or high-occupancy use.
Maintenance checklist
- Clear inspection ports and check for sediment or lime deposits.
- Remove and clean the sump, checking for cracks or joint failures.
- Test both pumps under load.
- Replace pump if it has reached the manufacturer’s recommended change-out interval.
- Test alarm and battery backup.
- Record all findings and update the maintenance log.
Pro Tip: Design for access from the start. Sumps positioned in corners behind fitted furniture, or inspection ports covered by screed, are the single biggest cause of maintenance being skipped. Specify sump locations on the drawings before the fit-out is designed, not after. An accessible sump takes ten minutes to service; an inaccessible one takes a day to reach and costs accordingly.
For detailed guidance on sump selection and pump maintenance, this sump waterproofing guide covers the key decisions.
What standards and guarantees should you require in the contract?
South African building practice references BS 8102 as the primary technical standard for below-ground waterproofing, and SANS 10021 covers the waterproofing of buildings including basement and semi-basement applications. The South African Public Works PW 371-A specification invokes SANS 10021 and SANS 952 for film membranes, and requires materials to hold an active Agrément certificate or comply with the relevant BS EN standard. These references are the minimum baseline for any specification.
What to include in the contract specification:
- Named reference to BS 8102 and SANS 10021 as governing standards.
- Designer sign-off confirming drainage capacity calculation and pump sizing.
- Product Agrément certification or equivalent third-party approval for all membranes and drainage components.
- Commissioning records as a contractual deliverable, not an optional extra.
- O&M manual with maintenance schedule and parts list.
On guarantees, the distinction between product guarantee and workmanship warranty matters. A manufacturer’s product guarantee covers material defects; a contractor’s workmanship warranty covers installation. Both are needed, and neither is worth much without a maintenance condition attached. Most credible warranties require evidence of annual servicing to remain valid. Specify this explicitly: the warranty is conditional on maintenance being carried out at the intervals stated in the O&M manual, with records kept.
Documentary deliverables at handover:
- Commissioning certificate signed by the installer and, where required, a qualified engineer.
- Maintenance schedule with first service date confirmed.
- Parts list for all pumps, alarms, and drainage components.
- As-built drawings showing membrane layout, sump positions, and discharge routes.
- Warranty documents from both manufacturer and installer.
How do you choose a Type C contractor and avoid the common traps?
The questions you ask at pre-tender stage tell you more than any brochure. A contractor who cannot answer these clearly is not ready to design and install a Type C system.
Essential questions to ask
- Can you provide a drainage capacity calculation and pump sizing schedule for this project?
- How many Type C installations have you completed in the last three years, and can you provide references and photos?
- What pump arrangement do you specify as standard, and do you include battery backup?
- Do you offer a maintenance contract, and what does it cover?
- What is your response time if the alarm triggers out of hours?
- Who signs off the commissioning certificate, and what does it include?
- What product certification do your membranes and drainage components carry?
Red flags
- No commissioning records from previous projects.
- Pump sizing described as “standard” without reference to calculated ingress rates.
- No mention of pump redundancy or battery backup.
- Inspection ports not shown on drawings.
- Warranty offered without a maintenance condition.
- Vague answers about who designed the system versus who is installing it.
What to request in tender documents
- Drawings showing membrane layout, fixing details, floor-to-wall junctions, and penetration details.
- Sump chamber specification including dimensions, cover type, and pump model.
- Equipment schedule with pump duty ratings, alarm specification, and battery backup duration.
- Warranty wording in full, including any maintenance conditions.
- Method statement for installation sequence and protection of membranes during follow-on trades.
A contractor who provides all of this without being asked is demonstrating the level of competence the project needs. One who pushes back on any of it is telling you something useful before you have spent a rand.
For a broader view of what to watch for, these basement waterproofing tips cover the most common pitfalls owners encounter when appointing contractors.
Key takeaways
Type C cavity-drain waterproofing manages water through an engineered drainage system, and its long-term reliability depends entirely on pump design, maintenance discipline, and commissioning rigour, not on the membrane alone.
| Point | Details |
|---|---|
| Commission a site survey first | Groundwater level and drainage capacity must be calculated before any membrane is specified. |
| Specify pump redundancy | A duplex pump with battery backup and a high-level alarm is the minimum for any occupied basement. |
| First service within three months | Free lime from new concrete accumulates fastest in the first months; the early service prevents hard blockages. |
| Require commissioning records | A signed commissioning certificate and O&M manual are contractual deliverables, not optional extras. |
| Prowaterproofing for South African projects | Prowaterproofing provides site survey, design sign-off, installation, commissioning, and maintenance contracts for Type C systems across South Africa. |
The part most specifications get wrong
The conversation around Type C waterproofing tends to focus on membranes: which product, what stud depth, which brand. That focus is understandable but misplaced. The membrane is the least likely component to fail. It sits behind the wall, it does not move, and it does not have any working parts. What fails is the pump. What blocks is the sump. What gets skipped is the service.
On South African projects, the pattern repeats: a system is installed competently, commissioned adequately, and then handed over to an owner who has no maintenance contract and no clear understanding of what the alarm means when it sounds. Twelve months later, the sump is half-full of lime deposits, the standby pump has never been tested, and the battery backup went flat in the first winter. The membrane is fine. The basement is wet.
The fix is not a better membrane. It is a maintenance contract written into the original specification, a sump position that a plumber can reach without moving fitted furniture, and a commissioning certificate that actually records pump test results rather than just confirming the system was switched on.
Owners who insist on these three things before signing a contract will have a dry basement. Owners who focus on the membrane specification and treat maintenance as an afterthought will be calling a waterproofing contractor in three years to find out why the system is not working. The answer, almost every time, is that it was never properly maintained.
Prowaterproofing: site survey to long-term maintenance for Type C projects
The gap between a well-specified Type C system and a flooded basement is almost always a gap in service, not in materials. Prowaterproofing closes that gap by handling the full project lifecycle: site survey and groundwater assessment, drainage capacity calculation and design sign-off, supply and installation of membranes, channels, sumps and pumps, commissioning with documented flood testing, and ongoing maintenance contracts with scheduled service visits.

Every project comes with a commissioning certificate, an O&M manual, and a maintenance schedule with the first service date confirmed before handover. Warranty conditions are written to reflect actual maintenance requirements, not generic small print. For property owners, builders, and project managers who need a Type C installation done correctly in South Africa, the starting point is a site survey and pump-capacity appraisal. Contact Prowaterproofing to book yours.
Useful sources and further reading
The following references cover the standards, technical guidance, and South African regulatory context cited in this article.
- BS 8102 — BSI Group: The primary British Standard for protection of below-ground structures against water ingress. Referenced in South African practice as the governing technical standard for cavity-drain and other waterproofing system design.
- SANS 10021 — The waterproofing of buildings: The South African National Standard covering damp-proofing, vapour barriers, and basement waterproofing methods including below-ground applications. Consult this alongside BS 8102 for local compliance.
- PW 371-A General Specification — South African Public Works: Invokes SANS 10021 and SANS 952 for membrane materials and requires Agrément certification; useful for public-sector and government-funded projects.
- Property Care Association — Type C system guidance: Practitioner-level guidance on design, maintenance intervals, free-lime management, and commissioning requirements. One of the most practically useful references available.
- TT Waterproofing: South African waterproofing resources including local project examples and product references.
- Sealtek Cape: Additional South African technical literature and product pages for readers seeking local supplier references.