Cracked tiles and black mould spreading across your balcony aren’t just ugly. They signal failed waterproofing that’s quietly destroying your property’s structure. South Africa’s intense rainfall and temperature swings accelerate this damage, turning minor leaks into costly disasters. This guide arms you with proven techniques to waterproof under tiles properly, protecting your investment and health for over a decade.
Table of Contents
- Introduction To Under Tile Waterproofing
- Prerequisites And Preparation Before Waterproofing
- Selecting Suitable Waterproofing Membranes And Materials
- Step-By-Step Waterproofing Application Process
- Tiling Over Waterproofed Surfaces: Best Practices
- Common Mistakes And Troubleshooting Waterproofing Failures
- Expected Outcomes, Longevity, And Maintenance
- Safety And Environmental Considerations
- Upgrade Your Property With Expert Waterproofing Solutions
- Frequently Asked Questions
Key takeaways
| Point | Details |
|---|---|
| Lifespan boost | Proper waterproofing extends tiled surfaces by over 10 years compared to unprotected areas. |
| Preparation priority | Thorough surface cleaning, crack repair, and priming ensure membrane adhesion and long-term durability. |
| Flexible membranes | Corner reinforcement and flexible membranes prevent up to 40% of leaks in outdoor tiled areas. |
| Curing discipline | Minimum 3-day cure prevents membrane dilution and adhesion failure during rainy seasons. |
| Tile compatibility | Rapid-setting adhesives and slip-resistant tiles ensure strong, lasting bond over waterproofed surfaces. |
Introduction to under tile waterproofing
Water damage and mould aren’t optional risks in South African homes. They’re guaranteed outcomes when waterproofing fails. Your tiled bathroom, balcony, or patio faces relentless assault from intense summer downpours and winter temperature drops that crack substrates and compromise membranes.
South Africa’s climate creates the perfect storm for waterproofing challenges. Coastal humidity attacks adhesion. Inland temperature swings cause expansion and contraction. Heavy rains test every weak point in your installation.
Most tile failures trace back to preventable mistakes:
- Missing corner reinforcement that channels water straight through joints
- Poor substrate preparation leaving gaps where moisture accumulates
- Skipped priming that sabotages membrane adhesion
- Rushed curing that washes away protection before it sets
Skipping corners and reinforcement increases leak risk by up to 40% in South African outdoor tiled areas. That statistic represents thousands of rands in avoidable repairs.
When waterproofing fails, consequences multiply fast. Mould colonies release spores that trigger respiratory problems. Water seeps into walls and floors, weakening structural integrity. Tiles lift and crack as moisture expands beneath them during freeze cycles.
You can prevent all of this. Understanding external tiled area waterproofing challenges specific to South Africa puts you ahead of most property owners who learn these lessons through expensive damage.
Prerequisites and preparation before waterproofing
Your waterproofing membrane is only as strong as the surface beneath it. A clean, dry, structurally sound substrate isn’t negotiable. It’s the foundation your entire installation depends on.
Surface preparation includes cleaning, repairing cracks, and priming the substrate to ensure optimal adhesion of waterproofing membranes like TAL SUPERFLEX for tiled wet areas. Skip this step and watch your expensive membrane peel away within months.
Start by removing all loose material, dust, oil, and previous coatings. Wire brushes and pressure washers are your friends here. Fill cracks wider than 1mm with suitable repair mortar. Let repairs cure fully before proceeding.
Primer selection matters enormously. TAL FLOOR PRIMER works for most surfaces. For smoother substrates, TAL FLOORKEY slurry provides mechanical key. Wrong primer choice causes adhesion failure that no amount of careful membrane application can overcome.
| Material/Tool | Purpose | Notes |
|---|---|---|
| Primer (TAL FLOOR PRIMER) | Seals substrate and improves adhesion | Apply evenly; allow to dry completely |
| Waterproof membrane | Creates impermeable barrier | Two coats minimum at specified coverage |
| Reinforcement mesh | Strengthens corners and joints | Embed fully in membrane |
| Brushes and rollers | Application tools | Clean thoroughly between coats |
| Crack filler | Repairs substrate damage | Cure before membrane application |
Pro Tip: Test your substrate’s moisture content before starting. Press a plastic sheet flat against the surface overnight. Condensation underneath means the substrate is too wet for membrane application.
Waterproofing contractors in South Africa emphasise that rushed preparation causes most common waterproofing failures. Investing time here saves you from complete reinstallation later. Your substrate should feel solid, clean, and slightly rough to the touch when you’re done.
Don’t start waterproofing until you’ve gathered all materials and confirmed weather will stay dry for at least four days. Rain during application or curing destroys your work completely. Check surface preparation guidelines for your specific membrane product before beginning.
Selecting suitable waterproofing membranes and materials
Not all waterproofing membranes handle South African conditions equally. Your choice determines whether your installation lasts 5 years or 20. Three main types dominate the market, each with distinct advantages.
Polyurethane membranes offer exceptional flexibility and seamless application. They stretch with substrate movement, crucial for coastal areas where salt and humidity cause expansion. Their chemical resistance and UV stability make them ideal for exposed balconies and roofs.
Cementitious membranes like a.b.e. dura.flex provide excellent crack bridging capability. Waterproofing membranes such as a.b.e.® dura.flex applied in two coats at 4kg/m2 with embedded ecofelt membranes in corners provide a flexible, crack-bridging waterproof barrier under tiles. They’re easier to apply for DIYers and bond well to most substrates.
Torch-on membranes require professional installation but deliver robust protection for high-traffic areas. Heat application creates strong adhesion, though weather dependency makes scheduling tricky.
| Membrane Type | Best For | Lifespan | Application Difficulty |
|---|---|---|---|
| Polyurethane | Coastal balconies, exposed areas | 15-20 years | Moderate |
| Cementitious (a.b.e. dura.flex) | Indoor wet areas, DIY projects | 10-15 years | Easy |
| Torch-on bitumen | High-traffic outdoor areas | 12-18 years | Professional required |
| Liquid rubber | Complex shapes, detail work | 10-15 years | Moderate |
Pro Tip: Choose membranes with SABS certification specific to South African climate zones. Generic international products often fail because they’re not tested against our unique UV intensity and temperature ranges.
Consider your specific environment. Coastal properties need maximum salt and moisture resistance. Inland installations must handle extreme temperature cycling. Shaded areas prioritise mould resistance over UV stability.
Professional waterproofing advice helps you match membrane properties to your exact conditions. Review a.b.e. dura.flex membrane application specifications carefully. The right membrane makes the difference between years of protection and expensive early failure.
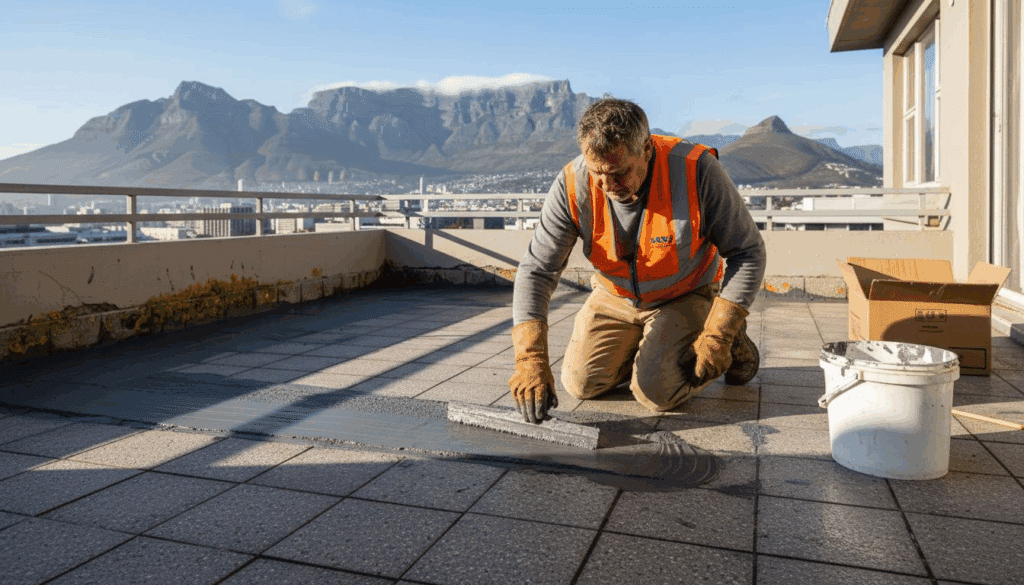
Step-by-step waterproofing application process
Precise application technique separates successful waterproofing from costly failures. Follow these steps exactly. Shortcuts create leak paths that compromise your entire installation.
- Clean your prepared substrate one final time. Remove any dust that settled during preparation. The surface must be completely dry.
- Apply primer evenly using a brush or roller. Cover all areas including corners and edges. Let primer dry according to manufacturer specifications, typically 2-4 hours.
- Mix your waterproofing membrane thoroughly. Lumps create thin spots that leak. Follow mixing ratios precisely.
- Apply the first membrane coat at specified coverage rate. Work from highest to lowest point. Brush or roll in one direction to avoid air bubbles.
- While first coat is still wet, embed reinforcement mesh at all corners, joints, and penetrations. Press firmly to eliminate air pockets. Mesh should be fully encapsulated.
- Allow first coat to cure until touch-dry, usually 4-6 hours. Do not proceed if rain threatens.
- Apply second membrane coat perpendicular to first coat direction. This ensures complete coverage of any microscopic gaps. Maintain specified coverage rate.
- Protect the cured membrane from foot traffic and debris. A minimum curing time of 3 days is essential to prevent dilution and run-off of waterproofing membranes like TAL SUPERFLEX, especially critical during South Africa’s rainy seasons.
“The 3-day cure period isn’t negotiable. Rain during this window dilutes uncured membrane, creating invisible weak points that leak months later. Schedule your work around weather forecasts, not convenience.”
Adverse weather demands patience. If rain arrives before curing completes, your membrane may wash away or develop adhesion problems. Check weather forecasts for a full week ahead before starting.
Corners and joints need extra attention. These high-stress areas experience the most movement and water concentration. Double-layer your mesh reinforcement here. Ensure membrane builds up slightly thicker than field areas.

Test your cured membrane before tiling. Pour water on the surface and check underneath after 24 hours. Any moisture indicates application failure requiring remediation. Understanding curing times and waterproofing performance prevents premature tile installation disasters.
Consult waterproofing membrane application guidelines for product-specific requirements. Each membrane has unique application parameters you must follow exactly.
Tiling over waterproofed surfaces: best practices
Your waterproofing membrane is now protecting your substrate. Tile installation must preserve this protection while creating a durable, attractive finish. Wrong techniques puncture membranes or create lift that destroys both layers.
Tile selection impacts long-term performance significantly. Using slip-resistant, textured tiles combined with rapid-setting adhesives improves adhesion on waterproofed surfaces and reduces tile lift in South African outdoor environments. Smooth tiles on outdoor surfaces become dangerously slippery when wet.
Adhesive compatibility prevents most tiling failures. Standard cement-based adhesives don’t bond well to flexible membranes. Rapid-setting polymer-modified adhesives create the mechanical and chemical bond needed. They accommodate membrane flexibility without cracking.
Grout selection and application seal the final gaps. Flexible grouts move with your membrane without cracking. Epoxy grouts provide superior water resistance but cost more and require careful application. Standard cement grouts need regular sealing to maintain water resistance.
Follow these critical rules when tiling:
- Use notched trowel to create even adhesive ridges that ensure full tile back coverage
- Press tiles firmly with slight twisting motion to eliminate air pockets beneath
- Maintain consistent joint widths using spacers for even grout coverage
- Allow adhesive to cure fully before grouting, typically 24 hours minimum
- Apply grout in multiple passes, pressing firmly into joints
- Clean tiles immediately after grouting to prevent haze buildup
- Seal grout lines after curing to maximise water resistance
Thermal expansion matters in South Africa’s temperature extremes. Choose adhesives rated for expected temperature ranges. Adhesive and tile selection guidance helps match products to your climate zone. Mismatched thermal expansion coefficients cause tiles to pop off months after installation.
Movement joints accommodate structural shifts without cracking tiles. Space them every 3-4 metres in large areas. Fill with flexible sealant, not rigid grout. Review tile and adhesive recommendations specific to waterproofed substrates before purchasing materials.
Common mistakes and troubleshooting waterproofing failures
Even experienced installers make mistakes that compromise waterproofing. Recognising these errors early lets you fix them before they cause expensive damage. Most failures trace back to a handful of preventable problems.
Skipping surface prep leads to adhesion failure; neglecting corner reinforcement causes leaks; applying membrane wet results in dilution and peeling. These aren’t rare occurrences. They represent the majority of waterproofing failures in South African properties.
Common installation mistakes include:
- Applying membrane to damp or dirty substrates that prevent proper adhesion
- Working during unsuitable weather when rain or extreme heat compromises curing
- Missing corners, penetrations, or joints where water concentrates
- Using incompatible primers or adhesives that don’t bond to your membrane type
- Insufficient membrane thickness from inadequate coverage or single coat application
- Starting tile installation before membrane fully cures
Consequences appear gradually or suddenly. Leaks might not show for months until heavy rain tests weak points. Mould growth starts invisibly inside walls before blooming on surfaces. Tiles lift when water trapped beneath expands during temperature changes. Structural damage accelerates once water reaches reinforcing steel or timber framing.
Remediation depends on failure type and severity. Minor adhesion problems in small areas allow patch repairs. Embed additional mesh and apply fresh membrane coats, feathering edges into existing material. Extensive failures require complete removal and reinstallation.
Pro Tip: Conduct quarterly inspections of your waterproofed areas. Look for grout cracks, tile movement, or water stains. Fixing minor damage immediately prevents escalation into major repairs costing thousands.
Prevention beats repair every time. Follow manufacturer specifications exactly. Don’t substitute materials or skip steps to save time or money. Understanding common waterproofing mistakes and fixes helps you avoid joining statistics of waterproofing failure risks in South Africa.
Document your installation with photos at each stage. This record helps diagnose problems later and proves proper installation if warranty claims become necessary. Consult the failures troubleshooting guide when problems appear.
Expected outcomes, longevity, and maintenance
Properly executed waterproofing transforms your tiled areas from maintenance nightmares into durable, trouble-free surfaces. Setting realistic expectations helps you recognise success and catch problems early.
Proper waterproofing extends tiled balcony lifespan by over 10 years compared to unprotected areas prone to damage and mould. That’s over a decade of avoided repairs, health problems, and property value loss.
You’ll notice immediate benefits. Water beads and runs off instead of soaking in. Cleaning becomes easier without mould constantly returning. Tiles stay firmly bonded instead of loosening from moisture damage. Musty smells disappear as trapped moisture can no longer feed mould colonies.
Longevity depends on maintenance discipline. Even the best waterproofing needs regular attention. Neglected areas fail prematurely despite perfect initial installation.
Implement these maintenance practices:
- Inspect grout lines and tile edges every three months for cracks or gaps
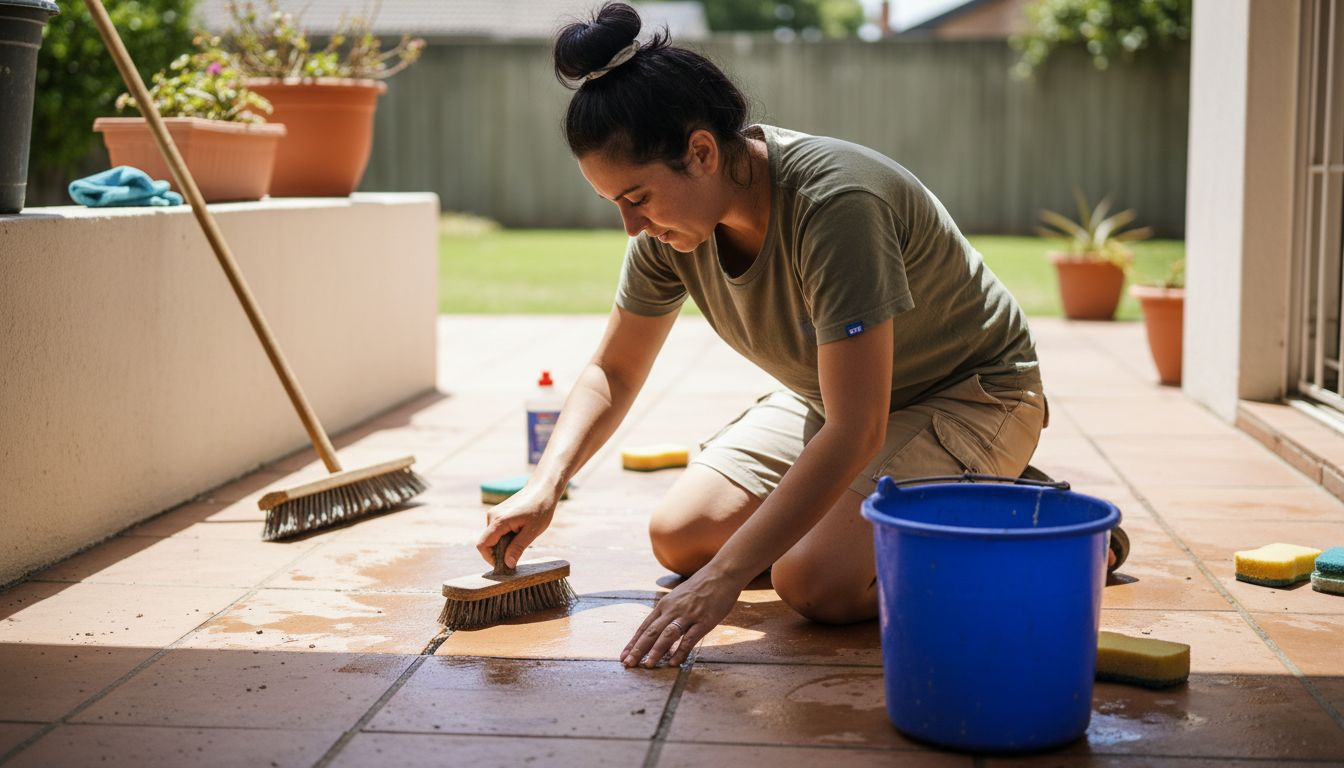
- Clean tiled surfaces regularly using pH-neutral cleaners that won’t degrade sealants
- Reseal grout joints annually or when water stops beading on the surface
- Address any tile damage immediately before water penetrates to the membrane
- Avoid heavy impacts that can puncture membranes through tiles
- Keep drainage outlets clear so water doesn’t pond on surfaces
- Check membrane edges and transitions for lifting or separation
Your waterproofing warranty depends on proper maintenance. Most manufacturers void coverage if you neglect recommended care. Document your maintenance activities with dated photos.
Expect minor grout repairs every few years. Grout is sacrificial, designed to crack before tiles do. Regrouting costs far less than replacing failed waterproofing and tiles. Maintenance and lifespan advice from professionals helps you budget for long-term care.
Professional inspections every 5 years catch deterioration before it becomes critical. Small membrane repairs extend your installation’s life significantly. Review waterproofing longevity study data to understand realistic performance expectations for your membrane type and environment.
Safety and environmental considerations
Waterproofing chemicals protect your property but can harm you if mishandled. Proper safety measures aren’t optional extras. They prevent injuries and long-term health problems during installation.
Use of personal protective equipment during application; ensure ventilation in confined spaces; handle and dispose chemicals properly. These precautions protect you from chemical burns, respiratory damage, and skin sensitisation.
Essential safety equipment includes:
- Chemical-resistant gloves that cover forearms during mixing and application
- Respirator or mask rated for organic vapours, especially in enclosed spaces
- Eye protection to prevent splashes reaching eyes
- Long sleeves and trousers covering skin completely
- Non-slip footwear suitable for wet surfaces
- First aid kit with eye wash and burn treatment supplies nearby
Ventilation matters critically for indoor applications. Many membranes release fumes during curing that cause headaches, dizziness, or worse in confined spaces. Open windows and use fans to maintain airflow. Consider air-supplied respirators for basement or bathroom work.
“Personal protective equipment isn’t negotiable whether you’re a professional installer or weekend DIYer. Chemical burns from waterproofing products can cause permanent damage. Your health is worth more than the cost of proper safety gear.”
Chemical disposal follows strict regulations. Never pour leftover membrane or cleaning solvents down drains. They contaminate water systems and damage pipes. Contact your municipality for hazardous waste collection schedules. Store partially used containers in cool, dry locations away from children and pets.
Environmental responsibility extends beyond disposal. Choose low-VOC membranes when possible. They reduce air pollution and health risks without sacrificing performance. Some water-based membranes offer similar protection to solvent-based products with fewer environmental impacts.
Read material safety data sheets before starting. They detail specific hazards and emergency procedures for each product. Keep these documents accessible during application. Emergency services need this information if accidents occur.
Consult waterproofing safety best practices for comprehensive guidance on protecting yourself and the environment throughout your waterproofing project.
Upgrade your property with expert waterproofing solutions
You now understand what proper waterproofing demands. The techniques, materials, and discipline required separate successful installations from expensive failures. Professional expertise accelerates your success while avoiding costly mistakes.

Pro Waterproofing delivers certified waterproofing solutions engineered for South African climates. Our membrane installations protect homes from Cape Town’s coastal humidity to Johannesburg’s temperature extremes. We match materials to your specific environment, ensuring maximum durability.
Expert guidance on choosing waterproofing solutions saves you from trial and error. Our expert residential waterproofing solutions combine proven techniques with quality materials for installations that last decades.
Every property faces unique waterproofing challenges. Substrate condition, exposure, usage patterns, and budget all influence optimal approaches. Pro Waterproofing consultations identify your specific needs and design solutions that deliver long-term protection.
Contact us for professional assessment and quotation. Protect your investment with waterproofing that works.
Frequently asked questions
What is the best waterproof membrane for South African coastal balconies?
Polyurethane membranes excel in coastal environments due to exceptional elasticity and resistance to salt and moisture. They accommodate structural movement from temperature cycling and humidity changes better than rigid alternatives. Expect 15-20 year lifespan when properly installed and maintained.
How long should I wait before tiling after applying a waterproofing membrane?
Minimum curing time is 72 hours before tiling begins. This ensures complete adhesion and protects against rain dilution during South Africa’s unpredictable weather. Rushing this step causes adhesion failure and membrane compromise. Understanding curing time for waterproofing membranes prevents premature installation disasters.
What maintenance is recommended to prolong waterproofed tile lifespan?
Inspect tiled areas quarterly for cracks, loose tiles, or grout damage. Clean surfaces with pH-neutral cleaners that don’t degrade sealants. Reseal grout joints annually or when water absorption increases. Address any damage immediately before moisture penetrates to the membrane layer.
Can I apply waterproofing membrane in rainy weather?
Never apply waterproofing during rain or to wet substrates. Membrane dilution and adhesion failure occur when moisture contacts uncured material. Rain during the critical 3-day curing period washes away protection or creates weak points that leak later. Schedule work only when forecasts show four consecutive dry days.