
Cracked tiles and persistent damp patches under your beautiful bathroom or balcony floor signal a hidden problem: inadequate waterproofing beneath the tiles. Water seeps through grout lines, penetrates substrates, and causes structural damage that costs thousands to repair. This guide walks you through proven waterproofing methods tailored for Gauteng and Western Cape homes, covering surface preparation, membrane application, curing protocols, and critical mistakes to avoid for lasting protection.
Table of Contents
- Prerequisites And Surface Preparation
- Waterproofing Membrane Selection And Application
- Handling Corners, Joints, And Interfaces
- Expected Timelines And Curing Periods
- Common Mistakes And Failure Points
- Alternative Waterproofing Systems And Tradeoffs
- Cost Considerations And Expected Outcomes
- Protect Your Property With Expert Waterproofing Solutions
Key Takeaways
| Point | Details |
|---|---|
| Surface preparation determines success | Clean, smooth, primed substrates ensure proper membrane adhesion and prevent future failures. |
| Membrane compatibility matters critically | Use waterproofing compounds compatible with cementitious tile adhesives to avoid bonding failures. |
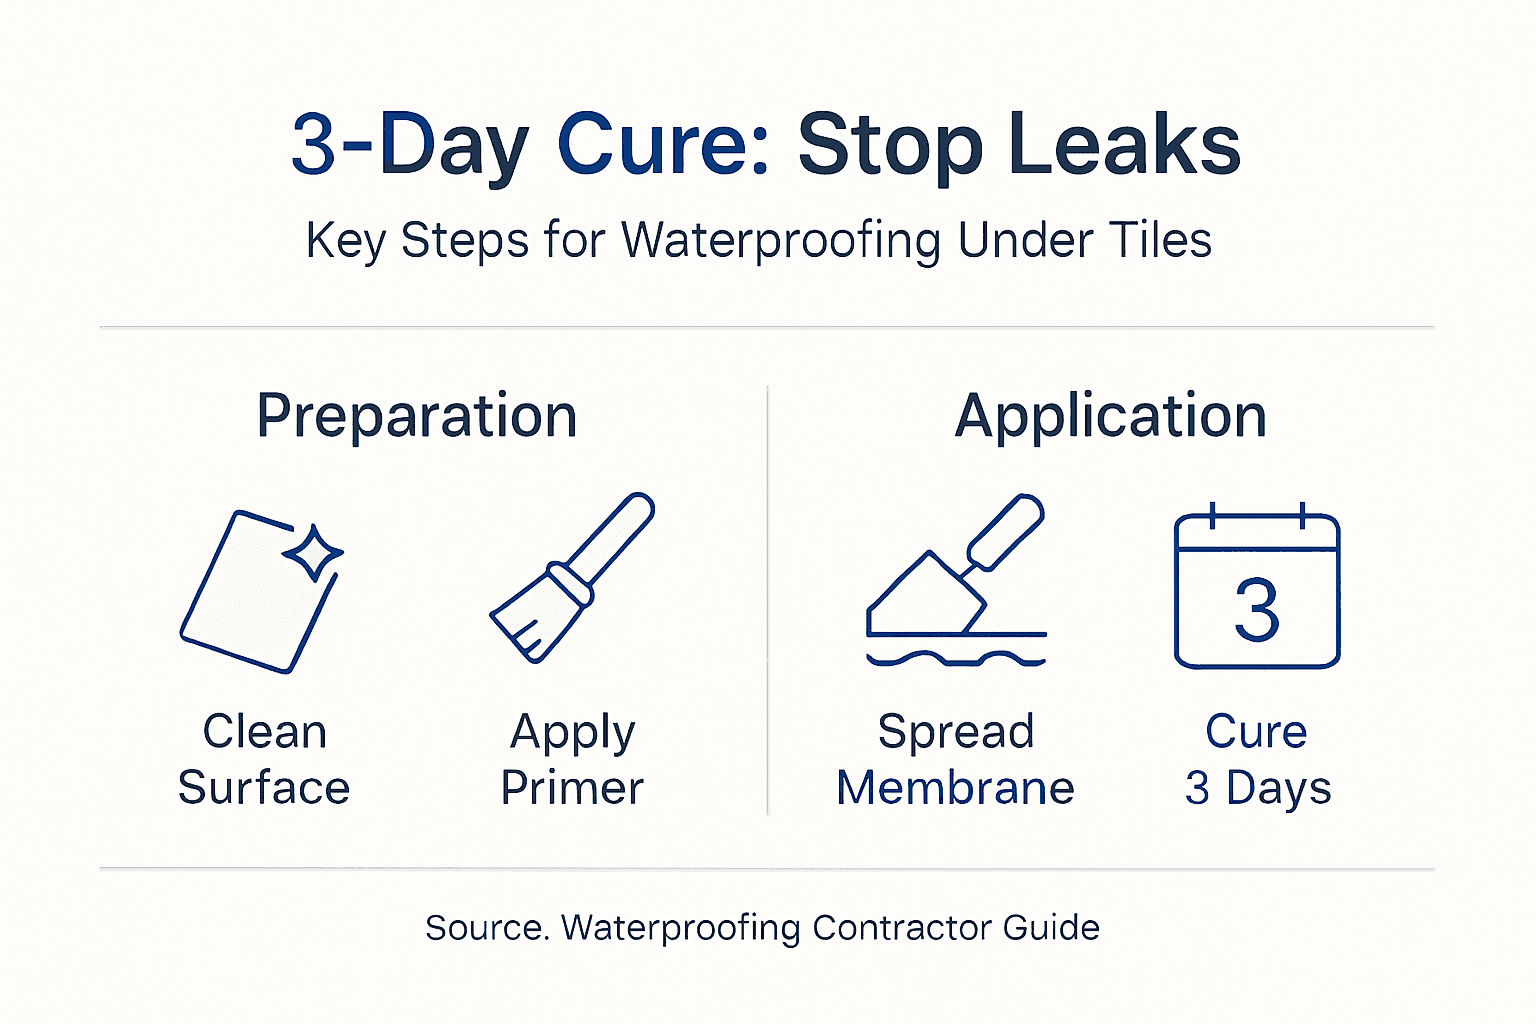
| Curing cannot be rushed | Allow minimum 3 days drying time before tiling to ensure membrane integrity and adhesion. |
| Vulnerable areas need reinforcement | Corners, joints, and interfaces require saturated ecofelt overlaps of at least 100 mm. |
| Common mistakes cost thousands | Punctured membranes and skipped surface prep lead to expensive repairs and tile replacement. |
Prerequisites and Surface Preparation
Before any waterproofing membrane touches your substrate, proper surface preparation determines whether your system lasts decades or fails within months. South African contractors see repeated failures traced back to rushed or inadequate surface treatment.
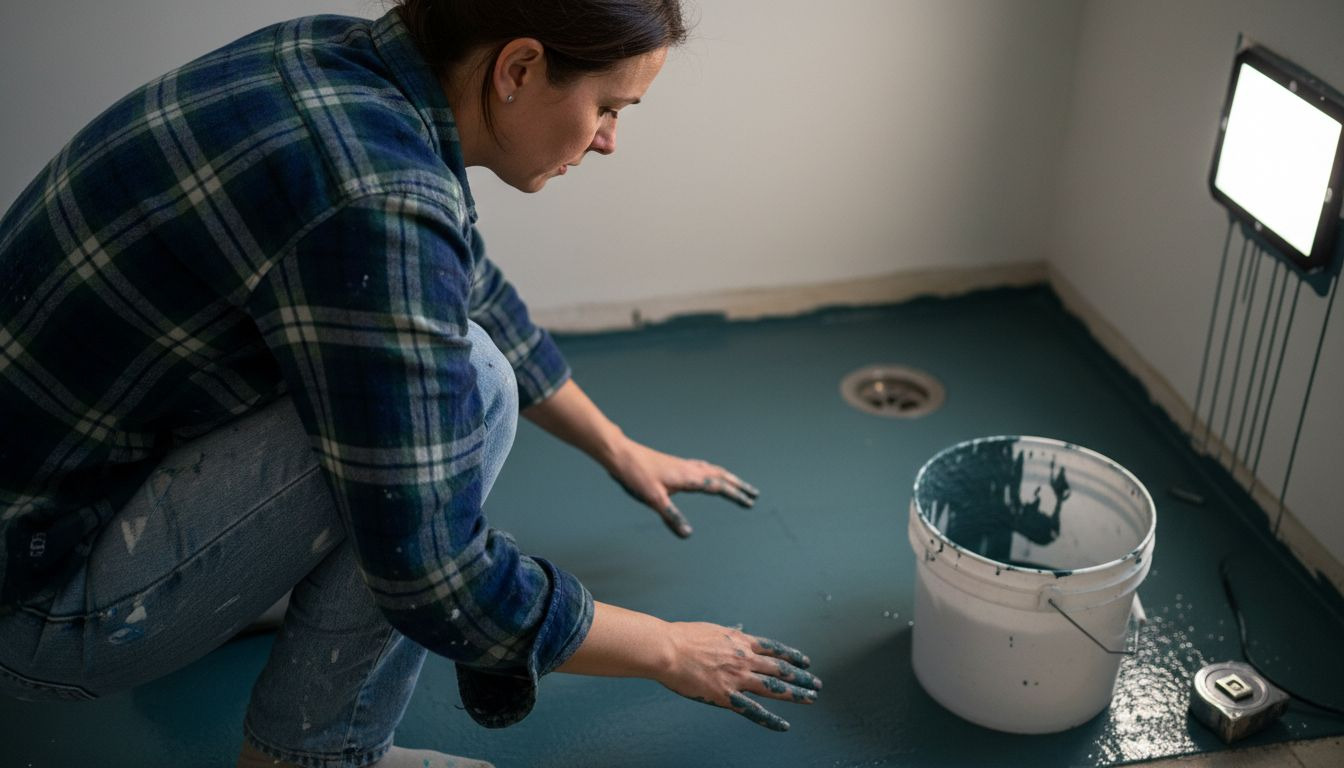
Start by removing all dust, grease, oil, and loose particles from the concrete or screed substrate. A clean surface allows chemical bonding between membrane and substrate. Next, repair every crack, void, or defect you find. Fill holes with appropriate repair mortar and grind down high spots to create a smooth, even plane.
Porous or rough substrates benefit enormously from primer application. Primers seal the surface, reduce absorption, and enhance membrane adhesion. Your substrate should have a fine float finish without sharp protrusions that could puncture the membrane during application or tile installation. Sharp edges and voids create stress points where membranes tear or lift over time.
Pro Tip: Run your hand across the prepared surface. If you feel rough spots or see dust on your palm, keep cleaning. The substrate should feel almost smooth to touch before membrane application begins.
For comprehensive guidance on preparing surfaces correctly, review these essential waterproofing tips for homeowners before starting work.
Waterproofing Membrane Selection and Application
Choosing compatible waterproofing membranes prevents the adhesive failures that plague many tiled wet areas. Select flexible waterproofing slurries specifically designed to work with cementitious tile adhesives. According to expert advice by TAL, using waterproofing compounds compatible with cementitious tile adhesives avoids priming or bonding failure between membrane and tiles.
Proper application requires methodical attention to coverage and thickness. Follow these steps:
- Dampen the prepared substrate with clean water without leaving puddles or standing water.
- Apply the first membrane coat using a brush or roller, working product into all surface pores.
- Allow the first coat to cure according to manufacturer specifications, typically 4 to 6 hours.
- Apply the second coat perpendicular to the first, ensuring total coverage of 4 kg/m² across both coats.
- Embed saturated ecofelt membranes at all corners, control joints, and crack locations before second coat application.
Never apply membrane to completely dry surfaces, as this prevents proper bonding. Conversely, standing water dilutes the membrane and compromises thickness. The substrate should appear damp but not wet when you begin application.
Pro Tip: Mark your coverage rate on the container before starting. Weigh or measure to ensure you achieve the full 4 kg/m² specification. Thin applications fail quickly under hydrostatic pressure.
Understanding the complete waterproofing application process helps you avoid shortcuts that compromise system integrity. Always verify waterproofing membrane compatibility with your chosen tile adhesive before purchasing materials.
Handling Corners, Joints, and Interfaces
Water finds the path of least resistance, which explains why most leaks originate at corners, joints, and wall to floor interfaces. These vulnerable zones require reinforced detailing beyond standard membrane application.
Use saturated ecofelt membranes as reinforcement strips, overlapping at least 100 mm in all directions at corners and control joints. Press the fabric firmly into the first membrane coat, eliminating air bubbles and wrinkles that create weak spots. Apply the second membrane coat over the fabric to fully encapsulate the reinforcement.
- Treat cracks wider than 1 mm with specialized crack bridging membranes or sealants before standard membrane application.
- Ensure continuous membrane coverage from wall onto floor without gaps or thin spots.
- Incorporate expansion joints in the tile layout to accommodate building movement without stressing the waterproofing layer.
- Check that membranes wrap up walls at least 150 mm above the finished tile level in wet areas.
- Inspect all interfaces carefully for complete coverage before declaring the job ready for tiling.
Careful detailing at wall to floor junctions prevents the notorious leaks that damage ceilings below bathrooms and balconies. The membrane must form an unbroken envelope around the entire wet area. Explore proven essential waterproofing methods to understand how professionals handle complex detailing.
Expected Timelines and Curing Periods
Rushing membrane curing ranks among the most common and costly mistakes in tile waterproofing. Wet membranes lack the tensile strength and water resistance needed to perform under tile installations. According to TAL’s technical guidance, waterproofing membrane systems require a minimum of 3 days drying time before tiling can be started to ensure full curing and adhesion.
Curing time varies with weather conditions, humidity levels, and membrane type. Hot, dry conditions accelerate curing while cool, humid weather extends drying periods. Always allow at least 3 days in normal conditions, adding extra time during winter or high humidity.
“Never compromise on curing time, even when project deadlines press. A membrane that cures for 2 days instead of 3 may appear dry but lacks full chemical cure, leading to bonding failures when tile adhesive is applied.”
Protect newly applied membranes from rain, sprinklers, and foot traffic during curing. Water exposure during cure dilutes the membrane, washes away uncured material, and creates thin spots that leak later. Check weather forecasts before scheduling waterproofing work, avoiding application when rain threatens within 3 days.
Use quick setting tile adhesives specifically formulated to work with waterproof membranes. Standard adhesives may not bond properly to cured membrane surfaces. Following proper curing protocols as detailed in this waterproofing installation guide prevents adhesive failure and protects your investment. Always verify recommended curing periods for your specific membrane product before proceeding to tiling.
Common Mistakes and Failure Points
Waterproofing failures typically stem from predictable mistakes during installation and post application phases. Understanding these pitfalls helps you avoid expensive repairs and tile replacements. Research on common waterproofing mistakes shows that punctured membranes and poor surface prep cause failures and expensive repairs.
Never puncture cured membranes with nails, screws, or drill bits when installing fixtures or accessories. Each hole creates a direct water pathway through your waterproof barrier. If you must penetrate the membrane, seal penetrations immediately with compatible sealants and membrane patches.
- Skipping surface cleaning leaves dust and contaminants that prevent membrane adhesion.
- Using incompatible products creates delamination between membrane and tile adhesive layers.
- Failing to seal joints and seams properly leaves gaps where water penetrates.
- Applying membranes too thin reduces water resistance and flexibility.
- Ignoring manufacturer mixing ratios compromises membrane chemistry and performance.
| Common Mistake | Consequence | Corrective Action |
|---|---|---|
| Insufficient surface prep | Poor adhesion and early failure | Clean thoroughly and repair all defects before membrane application |
| Incompatible products | Delamination and bonding failure | Verify compatibility of all system components before purchase |
| Rushed curing | Weak membrane and tile bond | Allow full 3+ day cure regardless of project pressure |
| Missing corner reinforcement | Leaks at vulnerable joints | Apply ecofelt strips with 100 mm overlaps at all corners |
| Thin application | Inadequate water barrier | Measure coverage to ensure full 4 kg/m² specification |
Understanding realistic waterproofing costs helps you budget properly and avoid cheap shortcuts that guarantee future failures.
Alternative Waterproofing Systems and Tradeoffs
Different waterproofing systems offer varying benefits depending on your specific application, budget, and environmental conditions. Liquid applied flexible membranes like TAL SUPERFLEX cure relatively fast and conform easily to complex shapes, but require completely dry weather during application and curing.
Cold applied sheet membranes such as Armtec provide excellent durability and UV resistance, making them ideal for exposed balconies and terraces in harsh South African sun. Sheet systems install faster than liquid membranes but demand expert handling to prevent air pockets and ensure proper overlaps at seams.
| System Type | Advantages | Disadvantages | Best Use |
|---|---|---|---|
| Liquid flexible slurry | Easy application, excellent adhesion | Weather dependent, requires skill | Bathrooms, internal wet areas |
| Cold applied sheet | Fast installation, UV resistant | Needs expertise, risk of air pockets | Balconies, external terraces |
| Cementitious coating | Good with cement adhesives | Less flexible, slower cure | Stable substrates, low movement areas |
| Polyurethane liquid | Highly flexible, fast cure | Higher cost, strong odor | High movement zones, complex details |
Key tradeoffs to consider when selecting systems:
- Installation speed versus application complexity and skill requirements
- Weather sensitivity during application and curing phases
- Long term durability under UV exposure and temperature cycling
- Material and labor costs ranging from R150 to R350 per square meter
- Compatibility with your chosen tile adhesive and substrate type
Costs vary significantly based on system selection, site accessibility, and regional labor rates. Gauteng installations typically cost R180 to R300 per sqm while Western Cape ranges from R200 to R350 per sqm. Consult this detailed waterproofing materials guide to understand product options available in South Africa.
Cost Considerations and Expected Outcomes
Investing in proper waterproofing under tiles costs significantly less than repairing water damage and replacing failed installations. Typical waterproofing expenses range between R150 and R350 per square meter, including quality materials and professional labor. This investment protects structural integrity and prevents the devastating costs of water infiltration.
Properly executed waterproofing delivers substantial long term benefits:
- Prevents water damage to substrates, structural elements, and interior finishes below tiled areas
- Extends tile installation lifespan by eliminating moisture related debonding and cracking
- Protects building structural integrity from water induced concrete degradation and steel corrosion
- Eliminates mold growth and associated health risks in wet areas
- Maintains property value by preventing visible water damage and deterioration
Waterproofing failures trigger cascading expenses far exceeding initial installation costs. Failed systems require complete tile removal, substrate repair, new waterproofing application, and tile replacement. Total remedial costs often reach R800 to R1,500 per square meter, three to five times the original waterproofing investment.
Cost drivers affecting your project budget include:
- Membrane system selection and material specifications
- Surface condition and extent of preparation required
- Project complexity including corners, penetrations, and difficult details
- Site accessibility and working conditions
- Regional labor rates and contractor experience levels
Quality waterproofing represents preventive maintenance that saves substantially over your property’s lifespan. Understanding the importance of maintaining waterproofing helps you appreciate long term value beyond initial costs. Review comprehensive information about cost and benefits of waterproofing to make informed decisions about your investment.
Protect Your Property with Expert Waterproofing Solutions

Proper waterproofing under tiles demands technical knowledge, quality materials, and meticulous execution. Professional services designed for Gauteng and Western Cape climates ensure your investment delivers decades of protection. Expert application prevents water damage while extending your property’s lifespan and value.
Explore professional solutions through comprehensive guides on choosing waterproofing solutions suited to your specific needs. Discover how to upgrade your property with Pro Waterproofing expertise. Master technical details with this waterproofing application process guide before starting any project.
FAQ
How long should you wait before tiling after waterproofing?
Allow a minimum of 3 days curing time before tiling over waterproofing membranes. Extend this period during cool, humid weather or when using thicker membrane applications to ensure complete chemical cure and proper adhesion.
Can you waterproof over existing tiles?
Waterproofing over existing tiles rarely succeeds because membranes cannot bond effectively to glazed, non porous tile surfaces. Remove old tiles, prepare the substrate properly, then apply new waterproofing membranes before installing fresh tiles.
What signs indicate waterproofing failure under tiles?
Damp patches on walls or ceilings below tiled areas, efflorescence on tile surfaces, hollow sounds when tapping tiles, grout deterioration, and persistent musty odors signal waterproofing failure. Address these symptoms immediately to prevent structural damage.
Which waterproof membranes are best for outdoor balconies in South Africa?
Cold applied sheet membranes with UV resistance, such as Armtec systems, perform excellently on South African balconies exposed to intense sun. Alternatively, polyurethane liquid membranes offer superior flexibility and weather resistance for outdoor applications.
Is DIY waterproofing recommended for complex wet areas?
Complex wet areas with multiple corners, penetrations, and critical details require professional expertise to ensure proper execution. DIY application suits simple, small projects, but bathrooms, balconies, and structural wet areas benefit from experienced contractor knowledge and warranty protection.
Recommended
- DIY Waterproofing Process: Achieve Leak-Free Results Easily
- Top Three Basement Waterproofing Tips for Homeowners
- How to Prepare for Waterproofing: Complete Step-by-Step Guide
- Roof Waterproofing Process: Secure Your Property Today – Pro Waterproofing
- Moisture Detection and Assessment for Flooring Issues in Tampa, FL: What Plumbing Services Can Help? Home Therapist Cooling, Heating, and Plumbing