A leaking roof in South Africa is not a minor inconvenience. Between summer downpours, intense UV radiation, and the freeze-thaw cycles in higher-altitude regions, your roof faces relentless stress year-round. Left unaddressed, even a small leak can cause structural timber rot, mould growth, and damage that costs tens of thousands of rands to fix. SANS 10400-Part L requires roofs to remain watertight for at least five years with proper installation, which means shortcuts simply do not hold up. This guide walks you through every stage, from spotting the first warning signs to verifying a lasting repair.
Table of Contents
- Common causes and early signs of roof leaks in South Africa
- Essential tools and materials for effective roof leak repairs
- Step-by-step process for repairing roof leaks
- How to verify your repair and maintain a leak-free roof
- Why most DIY roof repairs in South Africa fail and what you should do instead
- Get lasting peace of mind with professional roof leak repairs
- Frequently asked questions
Key Takeaways
| Point | Details |
|---|---|
| Timely action matters | Rapid repairs prevent costly damage and structural problems. |
| Proper preparation is critical | A clean, sound surface ensures lasting results that meet local regulations. |
| UV protection extends lifespan | Use UV-resistant coatings to combat harsh South African sun. |
| Routine checks prevent leaks | Bi-annual inspections and gutter maintenance help you catch small issues early. |
| Professional help ensures compliance | Qualified experts adhere to SANS standards for safe, durable repairs. |
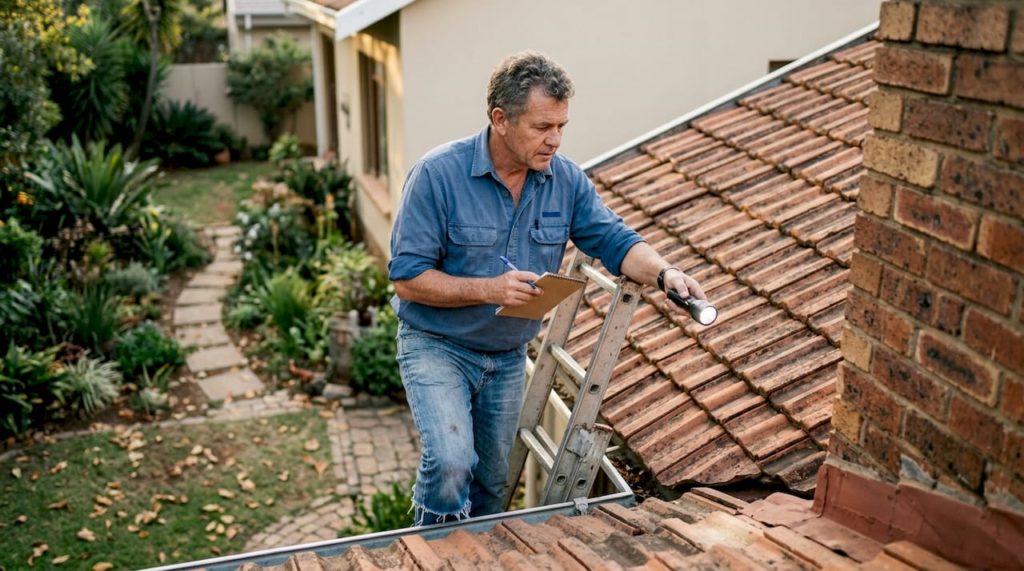
Common causes and early signs of roof leaks in South Africa
Now that you understand why timely leak detection matters, let’s explore how issues commonly start. South African roofs face a unique combination of threats, and knowing what triggers a leak puts you ahead of the problem before it escalates.
Blocked gutters are a leading cause of roof leaks in South Africa, forcing water to back up under tiles or into fascia boards. Other frequent culprits include cracked or slipped tiles, deteriorating flashings around chimneys and skylights, and UV-damaged waterproofing membranes that become brittle over time. The South African sun is particularly harsh on roofing materials, accelerating wear far faster than in cooler climates.
Early signs are often subtle. Learning to identify roof leaks early can save you a significant repair bill. Watch out for:
- Damp or discoloured patches on ceilings or walls
- Peeling paint or bubbling plaster near the roofline
- Mould growth or persistent musty smells in upper rooms
- Visible rust stains or water trails on interior surfaces
- Sagging sections of ceiling board
Seasonality plays a big role. Summer thunderstorms in Gauteng and the Cape’s winter rainfall season both put roofs under intense pressure. Thermal expansion during hot days followed by rapid cooling at night also stresses joints and sealants over time. Good property maintenance essentials always include a roofing check before each wet season.

Pro Tip: Book a professional inspection in late summer or early autumn, before the main rainy season hits. Catching small cracks or blocked gutters at this stage costs a fraction of what emergency repairs demand.
Essential tools and materials for effective roof leak repairs
With the causes clear, you’ll need the right kit for a long-lasting fix. Arriving on a roof without the correct materials is one of the most common reasons DIY repairs fail within months.
Preparation is critical; repairs must begin on a clean, sound surface. Loose debris, moss, or old flaking sealant left in place will prevent new products from bonding properly. Before you buy anything, assess the best waterproofing types for your specific roof, as the right product varies between flat, tiled, and metal surfaces.
| Tool or material | Purpose | Priority |
|---|---|---|
| Acrylic or bitumen sealant | Sealing joints, cracks, and flashings | Must-have |
| Waterproofing membrane | Covering flat or low-pitch roof areas | Must-have |
| Stiff-bristle brush or broom | Surface cleaning and preparation | Must-have |
| Extension ladder with stabiliser | Safe roof access | Must-have |
| Nitrile gloves and safety goggles | Personal protection | Must-have |
| Primer | Improving adhesion on porous surfaces | Recommended |
| Roof paint with UV inhibitor | Long-term UV protection | Recommended |
| Trowel or applicator roller | Even product application | Recommended |
| Knee pads | Comfort during extended work | Optional |
Must-have items are non-negotiable for a safe, effective repair. Recommended items significantly improve durability, especially given South Africa’s UV intensity. Optional items simply make the job more comfortable.
For South African conditions, always choose UV-resistant products. Standard sealants not rated for high UV exposure can degrade within a single summer. Review the surface preparation guide before applying any product to ensure the substrate is ready.
Pro Tip: Always read the manufacturer’s data sheet before mixing or applying any waterproofing product. Compatibility between primer, membrane, and topcoat matters enormously, and using mismatched products from different brands is a very common and costly mistake.
Step-by-step process for repairing roof leaks
With kit at the ready, let’s get to the core of the repair, one step at a time. Following a structured sequence prevents the most common errors and gives your repair the best chance of lasting.
- Locate the leak precisely. Water travels along rafters before dripping, so the visible stain indoors is rarely directly below the entry point. Inspect the roof surface in dry weather, looking for cracked tiles, lifted flashings, or membrane bubbles.
- Prepare the surface thoroughly. Remove all loose material, moss, and old sealant. Sweep clean, then wash with a diluted fungicidal solution if mould is present. Allow to dry completely before proceeding.
- Apply primer where required. On porous or previously painted surfaces, a bonding primer improves adhesion dramatically. Follow the application process guide for correct drying times.
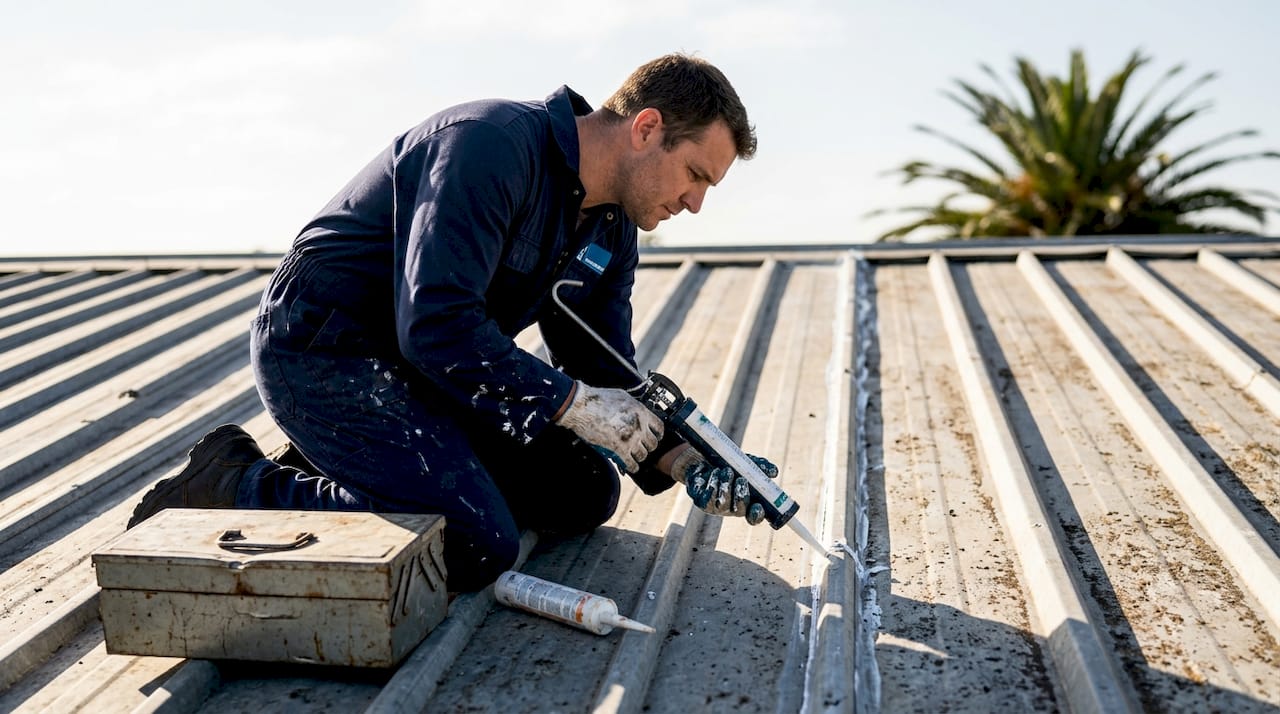
- Repair cracks and joints. Fill hairline cracks with flexible acrylic sealant. For larger gaps or flashing repairs, use a reinforced bitumen or polyurethane product rated for outdoor use.
- Apply the waterproofing membrane or coating. Work in thin, even coats. For flat roofs, embed a reinforcing fabric layer in the first coat for added tensile strength. Allow each coat to cure fully before adding the next.
- Seal all edges and penetrations. Pipes, vents, and roof edges are the most vulnerable points. Apply extra sealant around every penetration and press firmly to eliminate air pockets.
- Apply a UV-protective topcoat. This is especially important in South Africa. A reflective or UV-stabilised roof paint extends the life of the repair significantly.
| Roof type | Recommended repair method | Key consideration |
|---|---|---|
| Flat/low-pitch | Liquid membrane with fabric reinforcement | Ensure positive drainage |
| Tiled | Replace cracked tiles, re-bed and re-point | Check for underlying sarking damage |
| Metal sheeting | Lap sealant and self-drilling screws | Use compatible metal primer |
Important: Roofs must be made watertight by competent installers according to manufacturer instructions, with tensile strength above 1.5 MPa. Non-compliant repairs may void your property insurance and breach SANS 10400-Part L.
For a detailed walkthrough of each stage, the step-by-step roof waterproofing resource covers material-specific techniques in full.
How to verify your repair and maintain a leak-free roof
Repair done, but what now? Ensuring the problem stays solved is just as important as the repair itself. Many property owners skip this stage and only discover a failed repair during the next heavy downpour.
Use these steps to confirm your repair has held:
- Hose test: With a helper inside the roof space, run a garden hose over the repaired area for several minutes. Start low and work upward. Any remaining entry points will show up as drips or damp patches inside.
- Post-rain inspection: After the first significant rainfall, check the ceiling, roof space, and repaired area externally for any new staining or moisture.
- Visual check of sealant edges: Look for lifting, cracking, or bubbling in the applied product, which indicates poor adhesion or insufficient surface preparation.
Ongoing maintenance is what separates a roof that lasts from one that leaks every season. Use the roof waterproofing checklist to build a simple routine. Key tasks include:
- Clearing gutters and downpipes every three months
- Checking flashings and ridge capping after storms
- Inspecting membrane coatings annually for cracking or delamination
- Renewing UV-protective topcoats every two to three years
UV coatings extend the lifespan of waterproofed surfaces against the intense South African sun, making them one of the most cost-effective maintenance investments you can make. The roof waterproofing basics guide explains coating types in plain language.
Pro Tip: Schedule bi-annual roof inspections, once in autumn before the rains and once in spring after winter. Catching small issues at these points costs very little compared to emergency call-outs mid-season.
Know when to call in a professional. If you find widespread membrane failure, structural timber damage, or leaks that return despite repeated repairs, a qualified waterproofing contractor is the right call.
Why most DIY roof repairs in South Africa fail and what you should do instead
Even after following all the steps, one mistake derails most DIY repairs. And it is almost never the step people expect. The real culprit is almost always preparation or product selection, not the application itself.
Most guides focus on technique. What they underplay is that skipping surface preparation or ignoring product data sheets causes the vast majority of premature failures. A sealant applied over damp concrete, or a membrane used without the correct primer, will peel within months regardless of how neatly it was applied.
Preparation and following manufacturer instructions are essential for long-term results. This is not optional advice. It is the difference between a repair that lasts five years and one that fails before the next rainy season.
We have seen property owners spend more on repeated DIY attempts than a single professional job would have cost. The DIY waterproofing guide is a useful resource, but be honest with yourself about the scope of the problem. For large areas, ongoing leaks, or any situation involving structural damage, a qualified contractor is not a luxury. It is the only way to guarantee compliance with SANS 10400-Part L and protect your property insurance.
Get lasting peace of mind with professional roof leak repairs
If you want guaranteed, lasting protection, here is how the experts can help. Following this guide gives you the knowledge to handle minor repairs confidently, but some situations genuinely require professional expertise.

Professional waterproofing contractors ensure full compliance with SANS standards, use commercial-grade materials, and back their work with warranties that DIY repairs simply cannot offer. When the stakes are high, whether it is a commercial property, a large flat roof, or a leak that keeps returning, partnering with specialists removes the guesswork entirely. The Pro Waterproofing specialists team works across residential, commercial, and industrial properties throughout South Africa. Request a quote today and get a clear assessment of your roof’s condition from people who do this every day.
Frequently asked questions
How can I tell if my roof leak is serious?
Serious leaks often cause persistent damp, recurring stains, or visible structural damage. Chronic leaks escalate to major structural problems if not addressed, so persistent symptoms always warrant urgent professional assessment.
What is the best time to repair a leaking roof in South Africa?
Plan repairs during dry spells before the rainy season for the best results and durability. Proactive inspections ahead of rains, combined with UV coatings, significantly reduce the risk of in-season failures.
Can I fix a roof leak myself, or should I call a professional?
Minor leaks can be addressed DIY with the right materials and preparation, but for ongoing issues or large areas, a qualified professional is strongly recommended. Long-term watertightness and compliance require competent installers and adherence to SANS 10400-Part L.
What maintenance steps help prevent roof leaks?
Regular gutter cleaning, bi-annual inspections, and renewing UV-protective coatings are the three most effective prevention measures. Regular professional inspections and maintained gutters catch problems before they become costly repairs.