

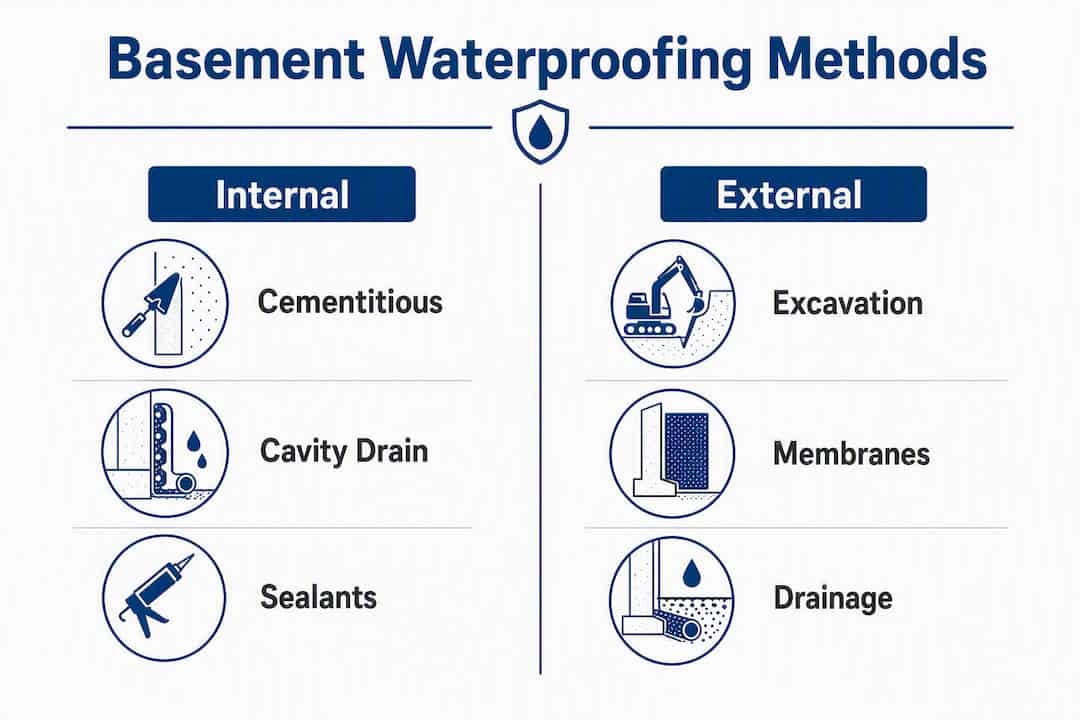
The right treatment depends entirely on what type of water you are dealing with. For surface dampness and minor moisture, a penetrating masonry sealer or cementitious coating is often enough. Small cracks and active seeping joints need injection resin. Non-pressurised leakage through the wall face calls for cementitious tanking applied to the internal surface. Where you have genuine hydrostatic pressure, an active leak, or a high water table, a cavity drain membrane (CDM) channelling water to a sump pump is the most reliable internal fix. If the site allows excavation, an external membrane on the positive face of the wall is the most permanent solution of all.
Here is a quick reference before the detail:
- Penetrating masonry sealer — surface dampness, hairline moisture, capillary absorption
- Cementitious tanking slurry — non-pressurised seepage, minor internal leakage
- Crystalline pore-blocking slurry — damp concrete walls, alkali-reactive pores
- Cavity drain membrane (CDM) with sump — active leaks, hydrostatic pressure, retrofit basements
- Injection resins (polyurethane or epoxy) — cracks, service-penetration leaks, active water paths
- External membrane and tanking — new builds, full retrofits with site access, severe hydrostatic pressure
- Bituminous masonry coating — below-ground damp-proofing on block or brick where pressure is low
Pro Tip: Before applying any coating or tanking system, fix drainage and seal every service penetration and construction joint. According to SANS 10021, these are the most frequent failure points — not the wall face itself.
Table of Contents
- Quick reference: what to put on basement walls to stop water
- How cementitious tanking works and when to use it on your walls
- How a cavity drain membrane system manages groundwater in your basement
- External waterproofing: why excavating and membraning the outside wall is the most permanent fix
- Crack repair and injection resins: fixing active leaks and structural cracks
- Surface sealants and masonry waterproofers: what they actually do
- Preparing your basement walls before applying any waterproofing treatment
- Can you DIY basement waterproofing? realistic scope, costs and timelines in South Africa
- South Africa–specific requirements, standards and site risks
- Maintenance routines and warning signs that waterproofing is failing
- Questions to ask and red flags to watch for when hiring a waterproofing contractor
- Key takeaways
- The part most homeowners get wrong
- Prowaterproofing: site surveys, CDM installation, and lasting warranties for South African basements
- Useful sources and further reading
Quick reference: what to put on basement walls to stop water
| System | Best for | Excavation needed? | Typical lifespan |
|---|---|---|---|
| Penetrating masonry sealer | Surface damp, capillary moisture | No | several years |
| Cementitious tanking | Non-pressurised seepage, minor leaks | No | 10 years |
| Crystalline slurry | Damp concrete, pore-blocking | No | Long-term (self-sealing) |
| Cavity drain membrane + sump | Active leaks, hydrostatic pressure | No | more than 10 years with maintenance |
| Polyurethane injection resin | Active crack leaks, service penetrations | No | 10–20 years |
| Epoxy injection resin | Structural crack reinstatement (dry) | No | Long-term structural fix |
| External membrane/tanking | New builds, severe pressure, full retrofit | Yes | 20–30+ years |
| Bituminous coating | Low-pressure damp-proofing, block/brick | No | 5 years |
Usage hints at a glance:
- Sealers and coatings are the fastest, cheapest option but will not hold against sustained water pressure.
- Cementitious tanking suits brick, block, and concrete but must be applied to a clean, sound surface with all cracks repaired first.
- CDM systems are the go-to for existing South African basements where digging out is impractical. They do not stop water entering; they manage it safely to a sump.
- Injection resins are a targeted fix, not a whole-wall solution.
- External membranes stop water at source but require significant groundwork.
How cementitious tanking works and when to use it on your walls
Cementitious tanking is a cement-based waterproof render applied directly to masonry or concrete walls. It bonds to the substrate and forms a rigid barrier that resists moisture migration. You can apply it to the internal (negative) face when external access is not possible, or to the external (positive) face during construction. Most systems come as a two-component powder-and-liquid mix or a single-component powder activated with water.
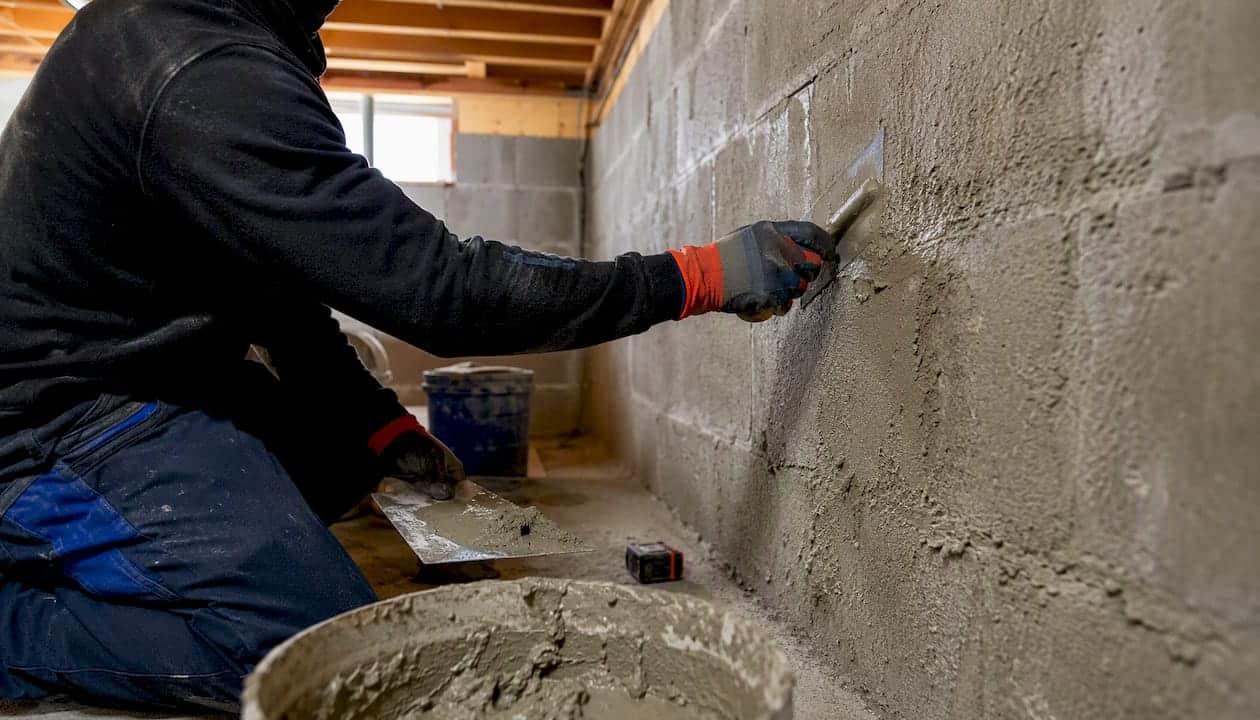
When it makes sense: non-pressurised seepage, hairline moisture through block or brick, and situations where you cannot excavate. It is not designed to hold back sustained hydrostatic pressure on its own.
Step-by-step preparation and application:
- Clear the basement and remove all furniture, stored items, and loose fixtures.
- Hack off any loose plaster, render, or paint back to the bare substrate.
- Wire-brush or mechanically grind the wall surface to remove efflorescence, laitance, and contamination.
- Treat salt deposits with a proprietary efflorescence remover; allow to dry fully.
- Open all cracks wider than 0.3 mm by chasing them out to a V or U profile; fill with a fast-setting hydraulic cement or crack filler and allow to cure.
- Seal all construction joints and service penetrations with a water-stop compound or compressible insert before tanking. SANS 10021 identifies these as the most common failure points.
- Pre-wet the wall surface so it is saturated surface-dry (SSD) — this prevents the substrate from drawing water out of the fresh slurry too quickly.
- Apply the first coat of tanking slurry by brush or trowel to the recommended thickness (typically 1–2 mm per coat; check the product data sheet).
- Allow the first coat to reach initial set, then apply the second coat in the opposite direction for even coverage.
- Cure the finished surface by keeping it damp for the period specified by the manufacturer, typically 24–72 hours. Avoid application below 5°C or in direct hot sun.
Performance limits: cementitious tanking will resist capillary moisture and low-level seepage reliably. Under sustained hydrostatic pressure — a high water table, a heavy Gauteng rainstorm saturating clay soil — it can debond or crack. In those conditions, pair it with a drainage strategy or move to a CDM system.
Pro Tip: Always apply a cove fillet at the wall-to-floor junction before tanking. A sharp internal angle is a stress concentration point where the membrane is most likely to crack under movement.
How a cavity drain membrane system manages groundwater in your basement
A cavity drain membrane (CDM) does not try to stop water coming through the wall. Instead, it accepts that water will enter and controls where it goes. The dimpled plastic sheet is fixed to the wall face, creating a drained air gap between the membrane and the wall. Water that passes through the wall runs down the back of the membrane, enters a perimeter channel at floor level, and drains to a sump pit where a pump ejects it away from the building.
The flow path: wall face → membrane cavity → perimeter drain channel → sump pit → pump discharge.
CDMs are the most reliable internal solution for retrofit basement waterproofing where external excavation is not practical. They handle active leaks and pressurised groundwater that would simply push a rigid coating off the wall. Once installed, the membrane face can be finished with plasterboard on a studwork frame, giving a habitable internal surface.
When to choose a CDM:
- Active leaks through the wall or floor
- High water table or hydrostatic pressure
- Retrofit where digging out is not feasible
- Repeated failure of previous coatings or tanking
Advantages: works with active water, handles pressure, allows full internal finishing, and has a long service life when maintained. Disadvantages: the sump pump is a mechanical component that requires maintenance and can fail during a power cut. A battery backup unit is not optional in South Africa’s load-shedding environment.
Installation considerations:
- Perimeter drain channel must be correctly graded to the sump pit.
- Sump pump should be sized for the expected inflow rate, with a battery backup.
- Inspection access panels must be built into any internal lining so the membrane and drain can be checked.
- Vapour control and insulation can be incorporated behind the plasterboard finish.
- Floor area is reduced slightly by the thickness of the membrane and studwork.
For Gauteng homes on clay-heavy soils, where waterproof basement flooring and wall drainage must work together, a CDM paired with a correctly sized sump is often the only system that performs reliably after heavy rain.
External waterproofing: why excavating and membraning the outside wall is the most permanent fix
External tanking stops water on the positive face of the wall, before it ever contacts the structure. For more regional technique details, see Sealtek Cape sitemap. That is why it remains the gold standard for basement waterproofing where excavation is practical. Internal systems manage water that has already entered; external systems prevent entry altogether.
Membrane options include:
- Bitumen felt (torch-on or cold-applied)
- Polyolefin sheet membranes
- Liquid-applied polyurethane or bituminous coatings
- Bentonite clay panels (self-sealing, suitable for new builds)
Steps and trades involved:
- Excavate to the base of the foundation wall; shore the excavation where required.
- Clean and prepare the wall face; repair cracks and honeycombing.
- Apply a primer coat compatible with the chosen membrane.
- Install the membrane system from footing to finished ground level, lapping joints and detailing corners.
- Fix a protection board over the membrane before backfilling to prevent damage.
- Install a French drain (perforated pipe in gravel) at footing level where groundwater is significant.
- Backfill with free-draining material and compact in layers.
Cost and disruption: external tanking is the most expensive and disruptive option. Local indicative figures from ServiceLink SA put external tanking costs in the mid-range per square metre during construction, with French drain installation costing more per linear metre. CDM retrofits cost somewhat more than external tanking per square metre, depending on site conditions. These are order-of-magnitude figures; actual quotes will vary by site conditions and access.
| System | Typical cost (ZAR) | Excavation | Durability | Wall materials | Time to complete |
|---|---|---|---|---|---|
| External tanking | R400–R800/m² | Yes | 20–30+ years | Concrete, brick, block | Days to weeks |
| Cavity drain membrane | R600–R1,200/m² | No | more than 10 years (maintained) | All types | 1–5 days |
| French drain | R1500–R3,000 per linear metre | Yes | 20+ years | N/A | Days |
| Cementitious tanking | Not publicly listed | No | 10 years | Concrete, brick, block | 1–3 days |
| Masonry sealer | Not publicly listed | No | 5–10 years | Brick, block, concrete | Hours to 1 day |
When external is the right call: new builds (always specify it at construction stage), structures where internal systems have failed repeatedly, and sites with severe hydrostatic pressure and adequate access for machinery.
Crack repair and injection resins: fixing active leaks and structural cracks
Injection resins are the targeted tool for cracks that are actively leaking or for service penetrations that have failed. Two resin types cover most situations, and choosing the wrong one is a common and expensive mistake.
Hydrophobic polyurethane resin expands on contact with water, filling the crack from the inside out and creating a flexible, watertight plug. Use it for active leaks where water is present at the time of injection. It does not bond structurally; it stops water.
Epoxy resin bonds to dry concrete and restores structural integrity across a crack. Use it when the crack is dry, stable, and the goal is reinstatement of load-bearing capacity. Epoxy will not expand to fill a wet crack and can be displaced by active water flow.
Practical injection steps:
- Chase out the crack surface to remove loose material and expose the full width.
- Clean with compressed air or a wire brush to remove dust and debris.
- Install injection ports at 150–300 mm centres along the crack length.
- Seal the crack face between ports with a fast-setting surface mortar, leaving the ports open.
- Inject resin from the lowest port upward, moving to the next port when resin appears at the adjacent one.
- Cap each port after injection and allow the specified cure time before testing.
- For active leaks, use a hydrophobic polyurethane and test by wetting the crack after cure.
Pro Tip: Resin injection solves the crack, not the cause. If hydrostatic pressure is driving water through multiple cracks, injection alone will not hold. Combine targeted injection with a CDM or drainage improvement for a lasting repair.
Surface sealants and masonry waterproofers: what they actually do
Surface sealants are the most accessible product category for homeowners, and also the most misunderstood. They work well within their limits; the problem is that those limits are narrow.
Penetrating silane/siloxane sealers soak into the pores of brick, block, or concrete and line them with a hydrophobic layer. They reduce capillary absorption and resist wind-driven rain. They do not form a film on the surface and will not resist hydrostatic pressure.
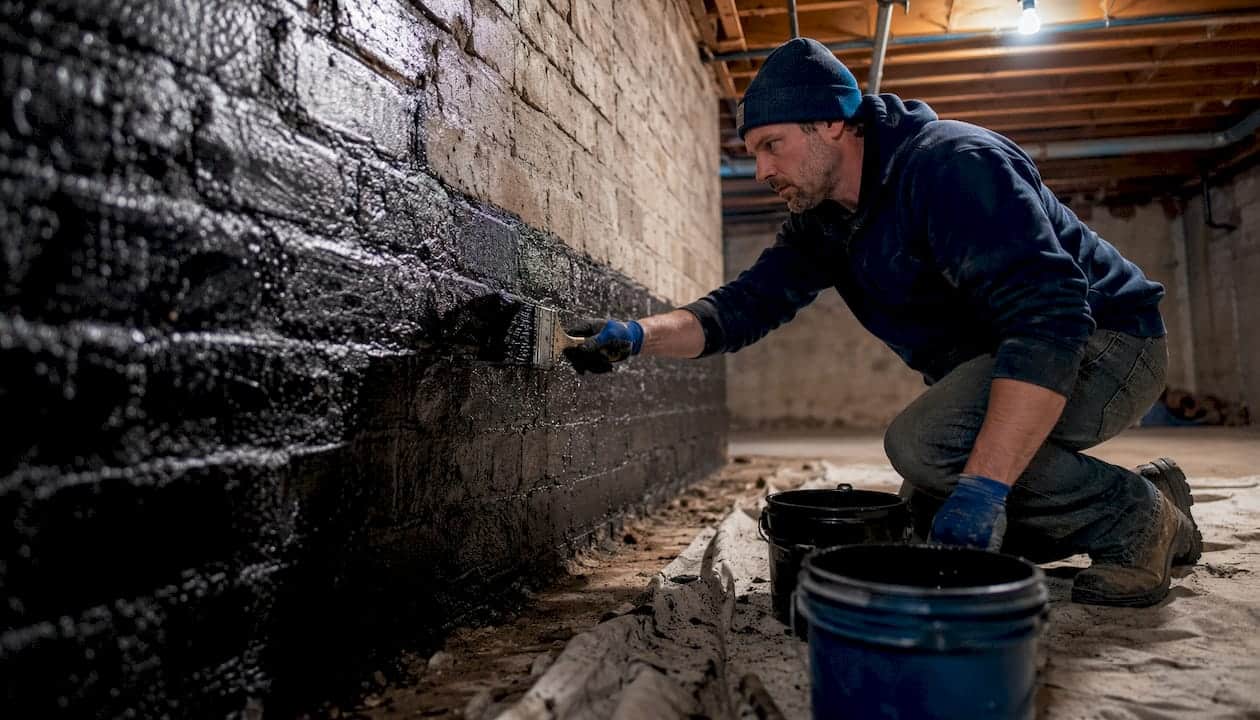
Bituminous masonry coatings are brush-applied, flexible, and relatively cheap. They are appropriate for below-ground damp-proofing on block or brick where water pressure is low. SANS 10021 does not accept ordinary damp-proofing paint as adequate for resisting active water ingress in basements.
Crystalline pore-blocking systems (such as cementitious crystalline slurries) work differently: the active chemicals react with water and cement to grow crystals inside the concrete pores, progressively blocking moisture paths. They are most effective on dense concrete and offer a degree of self-sealing if minor cracks develop later.
When a sealer is a reasonable choice:
- Reducing capillary moisture through a sound, uncracked wall
- Protecting a decorative finish from surface moisture
- Complementing a drainage strategy as a secondary measure
- Preventing minor moisture ingress in a dry-storage basement
Choosing by wall material:
- Concrete: crystalline slurry or silane/siloxane penetrating sealer
- Brick: siloxane sealer or bituminous coating for low-pressure situations
- Block: cementitious tanking or bituminous coating; test porosity first with a water drop — if it absorbs in under 30 seconds, the surface is ready for penetrating treatment
A masonry sealer should never be the sole defence against pressurised water. As a US consumer guide from The Home Depot notes, waterproof paint and sealers are the least expensive option but are limited in scope. For South African basements with any active ingress, they are a complement, not a solution.
Preparing your basement walls before applying any waterproofing treatment
No waterproofing system performs better than the surface it is bonded to. Skipping preparation is the single most common reason treatments fail within a year.
- Clear the space. Remove all furniture, stored items, and floor coverings. Disconnect and cap any services that run across the walls.
- Remove loose material. Hack off any failing plaster, render, or paint. Tap the wall with a hammer; hollow-sounding areas must come off.
- Mechanical preparation. Wire-brush or angle-grind concrete surfaces to remove laitance. For brick or block, a stiff wire brush removes loose mortar and surface contamination.
- Treat efflorescence. Brush off salt deposits dry first, then apply a proprietary efflorescence remover. Do not apply waterproofing over active salt bloom — it will lift the coating.
- Repair cracks and penetrations. Chase out cracks, fill with hydraulic cement or the system’s own repair mortar, and seal all service penetrations and construction joints with a water-stop compound. SANS 10021 and Board of Agrément guidance both flag these as the primary failure points.
- Prime the surface. Apply the primer specified by the waterproofing product manufacturer. Using the wrong primer — or skipping it — breaks the bond.
Environmental conditions: most cementitious and coating products require a substrate temperature above 5°C and below 35°C, and a relative humidity below 85%. In South Africa’s summer rainfall regions, avoid application during or immediately after heavy rain. Allow the wall to dry for at least 48 hours after visible wetting before applying coatings.
Safety: basements are enclosed spaces. Solvent-borne bituminous coatings and two-component epoxy resins produce fumes that accumulate quickly. Use a half-face respirator with organic vapour cartridges, nitrile gloves, and eye protection. Run a mechanical ventilation fan throughout application and for at least two hours afterwards. Never work alone in a confined basement with solvent products.
Can you DIY basement waterproofing? realistic scope, costs and timelines in South Africa
Some tasks are genuinely within reach of a competent homeowner. Others are not, and attempting them without the right equipment or experience usually results in a failed system and a second bill to fix it.
DIY-friendly tasks:
- Surface cleaning, efflorescence removal, and minor crack filling with hydraulic cement
- Applying a penetrating masonry sealer to a sound, dry wall
- Applying a single-component cementitious tanking slurry to a small, prepared area
- Installing a basic sump pit liner (the pump installation itself should be checked by a plumber)
Leave these to a qualified contractor:
- External excavation and membrane installation
- Full CDM installation with perimeter drain and sump
- Structural crack injection under load
- Any work requiring compliance documentation for SANS or Board of Agrément certification
Typical tool and materials list for DIY tasks:
- Angle grinder with wire cup brush or diamond grinding disc
- Stiff wire brush and cold chisel
- Hydraulic cement (fast-setting)
- Masonry primer and cementitious tanking slurry
- Roller, brush, and mixing paddle
- Basic PPE: dust mask (P2), safety glasses, nitrile gloves, knee pads
Cost and timeline guidance: a DIY masonry sealer application on a small basement wall (under 20 m²) can be completed in a weekend using materials costing a few hundred rand. A professional CDM installation for a typical South African basement runs R600–R1,200 per m² based on local market data, with most projects taking one to five days. External tanking during construction costs R400–R800 per m².
South Africa–specific requirements, standards and site risks
Waterproofing in South Africa is not just a practical matter. It is a compliance matter, and the standards are specific.
SANS 10021 governs the waterproofing of buildings and sets out performance criteria that ordinary damp-proofing paint does not meet for basements with active water ingress. The standard requires specified waterproof membranes and drainage for below-ground spaces subject to water pressure. It also specifies a 20-hour unpressurised test for certain wall assemblies as an acceptance criterion. SANS 10400 Part K adds requirements for vapour barriers and continuous damp-proof membranes, including the treatment of cavities and wall-to-floor junctions.
The Board of Agrément South Africa performance criteria state clearly that no dampness should be visible on the internal face of external walls in habitable buildings under normal weather conditions. Continuous damp-proof membranes under slabs are required, and construction joints must be detailed with water stops.
Local soil and water-table risks:
- Gauteng’s clay-heavy soils expand when wet and hold water against foundation walls, raising hydrostatic pressure significantly after summer storms.
- Coastal areas face different challenges: high humidity, salt-laden groundwater, and aggressive carbonation of concrete.
- Sites with a shallow water table or poor surface drainage need geotechnical input before specifying a waterproofing system.
Compliance signals to look for when hiring:
- Products or systems carrying SANS or Board of Agrément certification
- A written site survey report identifying the water source and drainage conditions
- A method statement that addresses service penetrations, movement joints, and drainage
- A written workmanship warranty
Illustrative scenario: a homeowner in Midrand with a clay-soil site experiences seepage through the basement wall every summer, despite two previous applications of cementitious coating. The clay soil holds water against the wall for days after rain, building hydrostatic pressure that pushes the coating off the substrate. The correct solution here is a CDM with a perimeter drain and sump, or external tanking if the site allows excavation. A coating alone will never hold under those conditions, regardless of brand or application quality. Without adequate drainage, internal-only waterproofing measures will fail in exactly this scenario.
Maintenance routines and warning signs that waterproofing is failing
A waterproofing system is not a fit-and-forget installation. CDM systems have mechanical components; coatings degrade; drainage channels block.
Routine maintenance checklist:
- Test the sump pump monthly by pouring water into the pit and confirming the pump activates and discharges correctly.
- Inspect the discharge pipe and check valve every six months for blockages or backflow.
- Clear perimeter drains and external gullies before the summer rainfall season.
- Inspect CDM membrane fixings and access panels annually; look for signs of membrane lifting or perimeter channel blockage.
- Re-apply penetrating sealers at the interval specified on the product data sheet, typically every five to ten years.
- Check wall-to-floor cove fillets and construction joint seals for cracking or separation.
Warning signs that need immediate attention:
- New damp patches appearing on previously dry walls
- Rising efflorescence (white salt deposits) on the wall face
- Musty odour in the basement, particularly after rain
- Peeling paint, bubbling plaster, or finishes lifting from the wall
- Persistent water behind CDM membrane or at skirting level
Warning: battery backup for your sump pump is critical. During a South African summer storm, mains power and peak groundwater inflow often coincide. A pump that stops during load-shedding at the height of a storm can allow significant flooding within hours.
Questions to ask and red flags to watch for when hiring a waterproofing contractor
The waterproofing industry in South Africa has no shortage of contractors willing to offer a “permanent solution” for a low price. The questions below separate the credible ones from the rest.
Must-ask questions:
- Will you provide a written site survey report identifying the water source, drainage conditions, and proposed scope?
- Which SANS-compliant or Board of Agrément–certified products and systems will you use?
- Can you provide a written method statement covering service penetrations, movement joints, and drainage?
- What is the warranty period, and does it cover both materials and workmanship?
- Can you provide references and photographs of completed local work of a similar type?
- Are your installers trained and approved by the product manufacturer?
Red flags:
- No written scope of work or method statement before you sign anything
- Claims of a “permanent solution” with no mention of drainage or service penetrations
- Refusal to address construction joints, expansion joints, or pipe penetrations
- Pressure to pay in cash with no written invoice or VAT receipt
- No mention of SANS compliance or product certification
- A quote significantly lower than all others, with no explanation of what has been excluded
When comparing quotes, focus on scope and warranty rather than price alone. A contractor who addresses drainage, penetrations, and movement joints in writing, and backs the work with a workmanship guarantee, is worth more than the cheapest price on the page. For a detailed checklist on selecting a waterproofing contractor in South Africa, Prowaterproofing’s guides walk through the evaluation process step by step.
Key takeaways
The most reliable approach to waterproofing basement walls is to match the system to the water pressure: sealers for surface damp, cementitious tanking for non-pressurised seepage, and a cavity drain membrane with sump for active or hydrostatic leaks.
| Point | Details |
|---|---|
| Match system to water pressure | Sealers suit surface damp; cementitious tanking suits minor seepage; CDM with sump handles active leaks and hydrostatic pressure. |
| Seal joints and penetrations first | SANS 10021 identifies construction joints and service penetrations as the most frequent failure points before any coating is applied. |
| External tanking is most permanent | Where excavation is possible, external membranes at R400–R800/m² stop water at source; CDM retrofits run R600–R1,200/m²; French drain installations cost R1,500–R3,000 per linear metre. |
| SANS compliance matters | SANS 10021 and Board of Agrément criteria require specified membranes and drainage for basements with active water pressure, not paint. |
| Prowaterproofing for South African sites | Prowaterproofing offers site surveys, CDM installation, external tanking, injection repairs, and sump pump services with workmanship warranties. |
The part most homeowners get wrong
Most basement waterproofing failures I see in South African homes come down to one thing: the homeowner, or a contractor, treated the wall face as the problem. They painted it, tanked it, or sealed it, and the water came back within a season.
The wall face is not the problem. The water pressure behind it is the problem, and the joints and penetrations are where it finds its way in. SANS 10021 has been saying this for years. Gauteng’s clay soils make it worse: after a summer downpour, that clay holds water against your foundation wall for days, building pressure that no coating product is rated to resist indefinitely.
The practical priority order is: stop the water source where you can (surface drainage, gutters, grading), seal every joint and penetration with a proper water stop, then choose the wall system that matches the pressure you are dealing with. If there is any doubt about hydrostatic pressure, plan for drainage first and treat the wall second. A CDM with a battery-backed sump is not the glamorous answer, but it is the one that keeps working after the next storm.
One more thing: get the warranty in writing, and confirm it covers workmanship, not just materials. A product warranty without a workmanship guarantee is worth very little when the system fails at a joint the installer did not detail properly.
Prowaterproofing: site surveys, CDM installation, and lasting warranties for South African basements
Choosing the right system is straightforward once you know what type of water pressure you are dealing with. Getting that diagnosis right is where most homeowners need help, and it is exactly what a Prowaterproofing site survey delivers.

Prowaterproofing offers a full range of basement waterproofing services across South Africa: site surveys with written diagnosis and scope recommendations, cavity drain membrane installation, external tanking, injection crack repairs, and sump pump installation and maintenance. Every survey includes an assessment of the leak route, drainage conditions, and service penetrations, with a written scope and ballpark costing so you know what you are committing to before any work begins. All installations are backed by workmanship warranties, and systems are specified to meet SANS and Board of Agrément requirements.
Contact Prowaterproofing to book a site survey and get a written diagnosis for your basement.
Useful sources and further reading
- SANS 10021: The waterproofing of buildings — the primary South African standard governing basement waterproofing performance criteria, membrane requirements, and drainage.
- SANS 10400 Part K: Walls — guidance on vapour barriers, damp-proof courses, and wall construction requirements.
- Board of Agrément South Africa: Water penetration and damp proofing — performance criteria for habitable buildings and requirements for continuous membranes and construction joint detailing.
- AfriSam: Waterproofing and rising damp — practical guidance on DPC installation, rising damp treatment, and chemical injection for South African masonry.
- Prowaterproofing: interior basement wall sealer guide — product selection and SANS considerations for internal sealers in South African homes.
- Prowaterproofing: wet basement solutions guide — practical troubleshooting and staged remedies, including CDM and sump pump recommendations.
- TT Waterproofing — South African waterproofing contractor with case studies and regional technique references.
- Sealtek Cape — regional waterproofing and sealing specialist with technical references for Cape-based projects.