
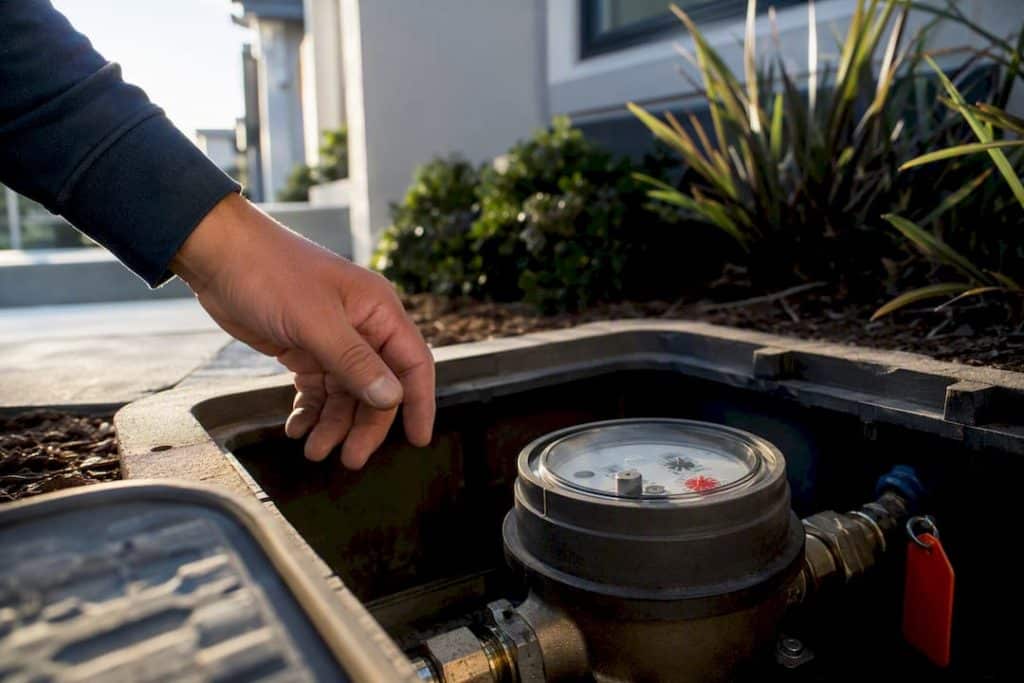
Run the water meter test first: stop every tap, appliance and outdoor hose, note the reading, wait fifteen minutes, then check again. If the number has moved, water is escaping somewhere inside the property. From there, check toilets, taps and the geyser in that order, and if the leak still will not show itself, bring in a professional leak detector rather than start pulling up floors and tiles.
TL;DR:
- Conduct the water meter test with all water fixtures off, watching for slow or rapid movement to identify internal or external leaks.
- Use the food colouring test, float adjustments, and appliance inspections to locate toilet, tap, or geyser leaks efficiently.
- Check outdoor and underground areas for soggy patches, sinking paving, or lush grass that could indicate supply line leaks.
- Call a professional leak detector if the meter moves after isolating fixtures, or if leak signs point to underground or slab leaks.
- Prioritize free and easy diagnostics first, then escalate to equipment-based detection or waterproofing assessments if damp persists or reappears.
Table of Contents
- Common signs that suggest a leak in your home
- How to run a water-meter leak test at home
- Checking toilets, taps and the geyser
- Outside and underground leak signs
- When to call a professional leak detector
- Quick DIY stopgaps while you wait for repairs
- When a leak points to a waterproofing problem, not just a pipe
- Inspecting underground irrigation and sprinkler systems
- Checking washing machines, dishwashers and other water-using appliances
- Editorial take: the smartest leak checklist skips straight to what’s cheap and fast
- Get a waterproofing assessment from Prowaterproofing
- Sources
- FAQ
Common signs that suggest a leak in your home
A leak rarely announces itself with a flood. It usually shows up as a pattern of smaller clues that, taken together, point somewhere specific.
- Damp patches on walls or ceilings that return after painting over them
- Peeling paint or bubbling plaster, especially near bathrooms or kitchens
- Mould in corners or behind furniture that was not there last season
- A patch of unusually green or soggy lawn, even during dry weeks
- Sinkholes, soft ground, or cracked paving near buried pipework
- The sound of running water when every tap in the house is off
- Hissing inside walls or a noticeable drop in water pressure
Damp patches on walls, peeling paint, mould and oddly green lawn sections often show up well before a leak ever reaches your water bill. One sign on its own might mean nothing. Two or three together, particularly a damp wall paired with reduced pressure, are usually enough reason to run the meter test that same day.
How to run a water-meter leak test at home
This is the test municipal guidance leans on because it works without any special equipment, and it settles the argument in under an hour.
- Stop all water use. Turn off every tap, don’t run the dishwasher or washing machine, and switch off outdoor irrigation. If you can isolate the geyser at its valve, do that too.
- Find your meter and read the display exactly as it stands. Photograph it if the digits are hard to read outdoors.
- Watch the low-flow indicator. Most meters have a small triangle, star, or spinning dial that moves with even a trickle of water passing through.
- Wait 15 to 60 minutes without using any water. Longer waits (or an overnight test) catches slower leaks that a quick check might miss.
- Recheck the reading. If the number has changed, or that low-flow indicator has moved at all, water is leaving the property somewhere it should not be.
The City of Cape Town’s guidance on finding and fixing water leaks treats this exact sequence as the standard first step, and for good reason: it needs no tools beyond your eyes and a stopwatch.
Pro Tip: Watch the low-flow indicator rather than only comparing two readings. A spinning dial or moving triangle confirms a small leak in seconds, so you don’t have to stand around for the full wait.
If the meter does not move at all, you can rule out an internal leak with real confidence. If it moves slowly, suspect a toilet or a small drip somewhere. If it moves fast, stop and call a plumber. That is not a job for a wait-and-see approach.
Checking toilets, taps and the geyser
Toilets cause more positive meter tests than anything else in the house, which makes them the obvious next stop.
- Food-colour test: add a few drops of food colouring to the cistern, wait ten minutes without flushing, and check the bowl. Colour appearing in the bowl means the flush valve is letting water through when it shouldn’t.
- Float and overflow check: look inside the cistern for a float sitting too high, or water trickling into the overflow pipe. Either points to a worn valve or an incorrectly set float.
- Taps: check every tap for a slow drip, even ones you rarely use. A loose fitting or worn washer is usually a five-minute fix, not a call-out.
- Geyser: check the pressure-relief or overflow pipe for constant dripping, inspect the isolation valve, and look at every visible connection for dampness or corrosion.
Pro Tip: If the pressure-relief valve on the geyser drips constantly rather than occasionally, it is often the valve itself failing, not necessarily a sign of a bigger plumbing problem. It is a relatively inexpensive part, but leaving it too long may cause continuous water loss.
Toilets are a low-cost first fix precisely because the food-colour test is free and takes minutes. Fixing a flush valve rarely needs a specialist.
Outside and underground leak signs
If the inside checks come up clean but the meter test still shows movement, the problem is probably outside the walls of the house.
Look for a patch of grass greener than the rest of the lawn, ground that feels unusually soft or squelchy underfoot, paving that has started cracking or sinking, or damp creeping up an external wall near ground level. These usually point to a supply line between the meter and the house, or between the street connection and the meter.
- Shut the internal stopcock and repeat the meter test to confirm whether the leak sits before or after that valve
- If the meter still moves with the stopcock closed, the fault likely sits on the supply side, closer to municipal responsibility
- If it stops moving, the leak is somewhere within your own internal plumbing
Underground leaks of this kind usually need specialist, non-destructive detection rather than digging on a guess. Trenching the wrong section of garden is expensive and, more often than homeowners expect, still misses the actual source.
When to call a professional leak detector
Some situations genuinely call for equipment you don’t own, and there is no shame in reaching that point quickly rather than after a weekend of frustration.
Call a professional if the meter keeps moving after you have isolated every fixture, if the reading changes fast rather than slowly, or if you suspect the leak sits under a concrete slab or underground. These are not scenarios where trial and error pays off.
- Acoustic detection listens for the sound water makes moving through a pressurised pipe, useful for supply lines and buried sections.
- Pressure testing isolates sections of pipe and checks whether pressure holds, narrowing down which run has the fault.
- Tracer gas pushes a harmless gas through the pipe and detects where it escapes, effective under floors and behind walls.
- Thermal imaging picks up temperature differences caused by escaping water, particularly useful for hot-water lines.
Professional detection using these methods is designed specifically to avoid unnecessary demolition. Before you book anyone, write down your meter readings, the time you tested, and exactly which fixtures you isolated. A clear list of what you have already tested genuinely shortens the visit and keeps the bill down, since the technician isn’t repeating steps you have already done.
Quick DIY stopgaps while you wait for repairs
A few safe, low-cost steps can limit damage or even solve the problem outright while you sort out the bigger fix.
- Shut off the mains at the internal stopcock if you suspect a serious leak, then only turn individual fixtures back on one at a time to isolate the source.
- Replace a worn toilet flapper or flush valve once the food-colour test confirms the fault, usually a cheap part available from any hardware shop.
- Swap a tap washer if a tap drips constantly, tightening the fitting gently rather than forcing it.
- Use a pipe clamp as a temporary seal on an exposed, accessible pipe with a visible split, never on anything buried or hidden in a wall.
Pro Tip: A pipe clamp is a stopgap, not a repair. It buys you a few days, not a few months.
Do not attempt to dig up buried pipework or open a wall to chase a leak yourself. That kind of work risks turning a contained plumbing issue into a structural one, and the SmartPlumbing guidance on hidden leak detection is clear that guesswork here tends to cost more than it saves.
When a leak points to a waterproofing problem, not just a pipe
A single damp patch that clears up after a repair is a plumbing issue. Damp that keeps returning in the same spot, or spreads along a wall base over several seasons, usually points to a waterproofing failure working alongside (or instead of) a pipe fault.
Prowaterproofing offers assessments that look at both possibilities together, rather than treating them as separate jobs handled by separate trades. Before booking one, gather your meter-test results and note exactly where the damp keeps reappearing. That evidence lets an assessment start from a diagnosis, not a guess. Visit Prowaterproofing for more detail on what an assessment covers.
Inspecting underground irrigation and sprinkler systems
An irrigation system running on a timer is one of the easiest leaks to miss, because it only runs at set times, often before dawn, when nobody is watching.
Start by checking your meter test results for movement that seems to happen only at certain times of day rather than continuously. An overnight or extended meter test, left running for several hours rather than the usual 15 minutes, is far better suited to catching this pattern than a quick daytime check, since timed irrigation cycles and pool fills can slip past a short test entirely.
Walk the irrigation line itself looking for the same signs as any underground leak: soggy patches that appear along the pipe route rather than at the sprinkler heads, unusually lush grass in a straight line across the garden, or water pooling around a valve box after the system has finished its cycle. Sprinkler heads themselves are worth checking individually, since a cracked or misaligned head can waste a surprising amount of water without ever looking dramatic.
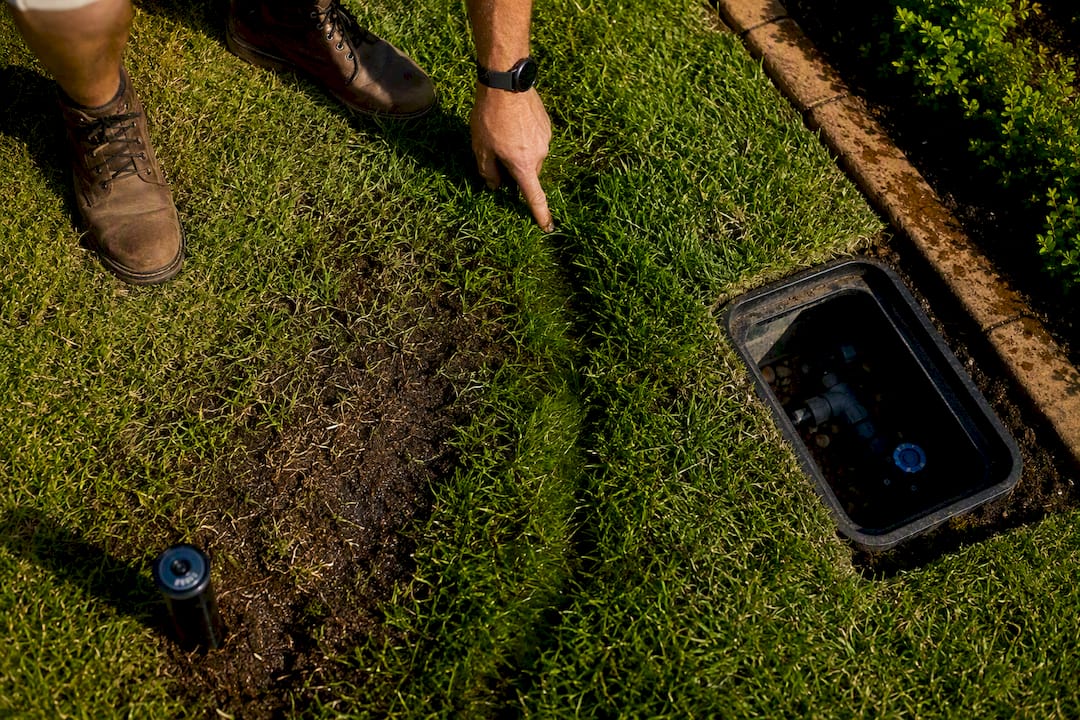
If you have a manual shut-off valve for the irrigation system specifically, close it and run the water-meter test again. If the meter stops moving with the irrigation isolated but the rest of the house running normally, you have found your leak without touching a single length of buried pipe. If it keeps moving, the fault sits elsewhere and the irrigation system is not to blame.
Checking washing machines, dishwashers and other water-using appliances
Appliances are a common source of leaks that homeowners overlook simply because the water disappears down a drain rather than pooling visibly on the floor.
Pull the washing machine and dishwasher away from the wall, if you can do so safely, and check the hoses at both ends for dampness, corrosion around the fittings, or a hose that has gone hard and cracked with age. Rubber supply hoses degrade over years even without obvious damage, and a slow seep at a connection point can run for months before anyone notices a damp patch on the floor behind the appliance.
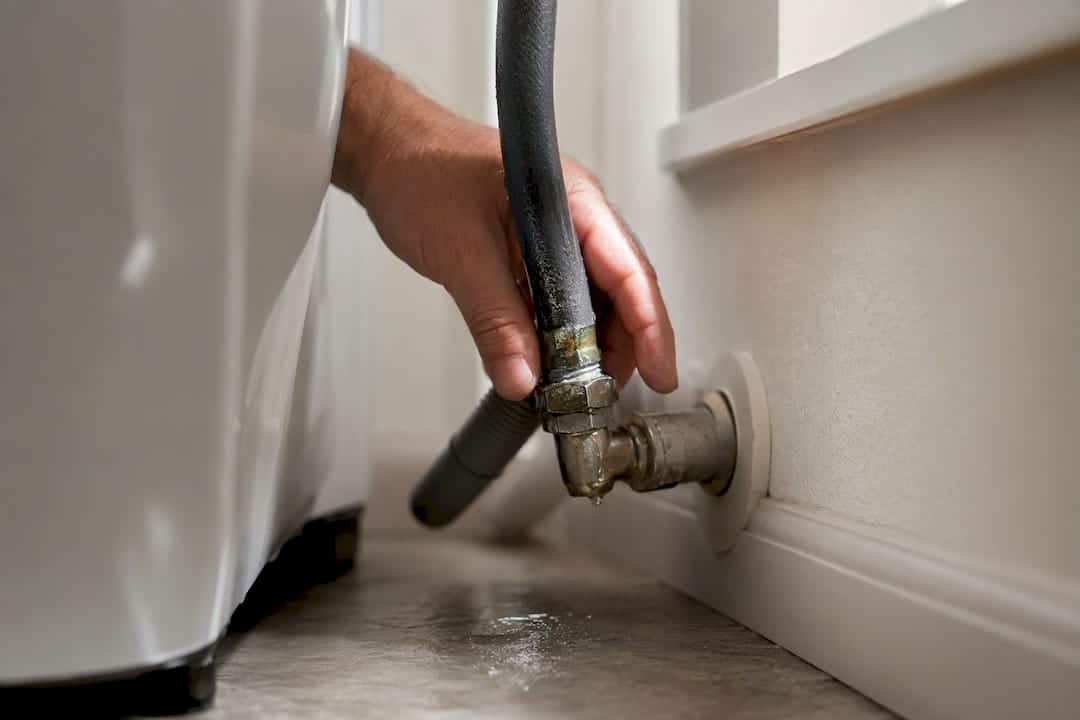
Run each appliance through a short cycle and watch the connections while it fills and drains, rather than only checking afterwards. A leak that only shows during the fill stage, when pressure in the hose is highest, is easy to miss if you only inspect a cold, empty machine.
Check the drain hose too, not just the supply side. A poorly seated drain hose can leak steadily during the drain cycle and mimic the signs of a slab leak, sending water into a nearby wall cavity or under flooring. If your meter test shows movement only while an appliance is mid-cycle, that is a strong clue the appliance itself, not the house plumbing, is the source.
Editorial take: the smartest leak checklist skips straight to what’s cheap and fast
Most advice on leaks buries the useful bit under paragraphs of caution about calling a plumber immediately. That is backwards for most homeowners. The meter test costs nothing and takes fifteen minutes, and the toilet food-colour test costs less than a coffee. Run those two before anyone touches a wall or a floorboard, because the two most common causes of a positive meter reading, a worn flush valve and a dripping geyser overflow, are both cheap, obvious fixes once you know where to look.
Where conventional advice falls short is in treating every unexplained damp patch as either “call a plumber” or “ignore it.” Neither is right when damp keeps returning in the same spot season after season. That pattern deserves a proper assessment, because a failing waterproofing membrane produces symptoms that look exactly like a slow pipe leak, and treating one as the other wastes money on the wrong repair.
Prioritise the free tests first, escalate to acoustic or thermal detection only once you have ruled out the obvious, and treat repeat damp as a signal to look at waterproofing, not just pipework.
— Eben
Get a waterproofing assessment from Prowaterproofing
Some services provide a single point of contact for both diagnosis and repair, instead of juggling a plumber for the leak and a separate contractor for the damp it left behind. That coordination matters most when damp keeps returning in the same spot, because treating the symptom without checking the membrane underneath usually means paying for the same repair twice.

Before you book an assessment, run the meter test and the toilet food-colour test yourself, and jot down what you find. Having those results ready means the visit starts with actual evidence rather than a fresh guess, which saves time on-site. From there, Prowaterproofing can look at whether the issue is plumbing, waterproofing, or both, and set out what needs doing next. Head to the site to request an assessment or a quote and get a straight answer on what’s causing the damp.
Sources
- How to check for a hidden water leak using your water meter — SmartPlumbing
- Water leak detection: how to find a hidden water leak — K‑Plumbing
- How to check for a leak — Severn Trent / My Supply
FAQ
How can you tell where a water leak is coming from?
Start with the meter test to confirm water is escaping at all, then isolate fixtures one at a time, toilets first, then taps, then the geyser, repeating the test after each. Whichever fixture stops the meter moving once isolated is the source; if none of them do, the leak likely sits underground or under a slab and needs specialist detection.
How do I test if my water is leaking at home?
Stop all water use, note your meter reading, wait 15 to 60 minutes without using any water, then check again. If the reading has changed or the low-flow indicator has moved, water is escaping somewhere inside the property.
Is there a device that can detect water leaks?
Yes. Professionals use acoustic listening devices, pressure testing equipment, tracer gas and thermal imaging cameras to find leaks without digging or opening walls unnecessarily. These tools are typically brought in once a meter test confirms a leak but the source cannot be found by simpler checks.
How much does it cost to trace a water leak?
Costs vary by method and how hidden the leak is, and current pricing is best obtained directly from a local plumber or detection specialist rather than quoted generically. Giving the technician your meter-test results and a list of fixtures you have already isolated tends to shorten the visit and reduce the overall cost.
When does a leak mean I need waterproofing, not just a plumber?
If damp keeps returning in the same spot after a plumbing repair, or spreads along a wall base over more than one season, the cause is often a waterproofing failure rather than an active pipe leak. Some companies offer assessments to examine both possibilities together once you have your meter-test results and photos of the affected area ready.