
Waterproofing from the inside works well for floor-wall joint seepage, hairline wall cracks, and general dampness coming through porous block. It does not work as a standalone fix for mid-wall streaming, structural cracks, or a high water table pushing hard against your foundation without any exterior drainage in place.
If you’re staring at a damp patch right now, here’s what to do next:
- Damp patch at the floor-wall joint: interior perimeter drain and sump, or a cementitious slurry, will likely solve it.
- Water running mid-wall or through a visible crack: patch and monitor, but plan for a proper diagnostic before committing to a finish.
- Constant seepage regardless of weather, or bowing walls: stop here and book an exterior survey before spending on interior products.
Run a simple water test on a dry day. Hose the exterior grade near the affected wall for twenty minutes and watch where the water shows up inside. That single check tells you more than any product brochure.
Key Takeaways
Interior waterproofing solves cove joint seepage and minor wall dampness reliably, but it cannot relieve hydrostatic pressure or replace exterior repair for structural leaks.
| Point | Details |
|---|---|
| Match method to leak type | Perimeter drains suit cove joint seepage; mid-wall leaks need exterior diagnosis first. |
| Positive vs negative side matters | Negative-side coatings fight adhesion loss under pressure that exterior work avoids entirely. |
| Hybrid approach saves cost | Targeted exterior repair on one failing wall plus interior drainage elsewhere often costs less than full exterior work. |
| Maintenance is not optional | Sump pumps need monthly checks and battery backup testing to keep working. |
| Get a proper diagnosis | Prowaterproofing surveys the cause before recommending interior drainage, tanking, or hybrid repairs, with a written scope and warranty. |
Table of Contents
- How does waterproofing from the inside actually work?
- What causes basement water, and how do you read the signs?
- Which interior methods and materials actually work?
- What can’t interior waterproofing fix?
- How do you waterproof a basement from the inside yourself?
- When should you call a professional instead?
- What do experienced waterproofers do differently?
- How Prowaterproofing helps you fix this properly
- Sources
How does waterproofing from the inside actually work?
Interior methods do one of two jobs: they manage water after it has already got through the wall or slab, or they try to block it at the inner face before it ever reaches the room. The first is drainage. The second is coatings or tanking. They are not interchangeable, and confusing them is where most DIY attempts go wrong.
Groundwater pushes against your foundation through hydrostatic pressure, and it finds the weakest path: the cove joint where floor meets wall, mortar joints between blocks, or straight through the porous core of a hollow block. Interior waterproofing typically manages that water after it enters, usually by routing it into a perimeter drain that feeds a sump pump. Exterior waterproofing, by contrast, stops water reaching the wall at all.
This is the positive side versus negative side distinction that matters more than most homeowners realise:
- Positive-side waterproofing sits on the wet side of the wall (outside), blocking water before it arrives.
- Negative-side waterproofing sits on the dry side (inside), fighting water that’s already pushing through.
Negative-side coatings have to fight adhesion loss and can’t bridge a moving crack the way exterior membranes can. Picture a cross-section: soil pressing against the outer wall, the wall itself, the floor slab, then an interior drain running along the base of the wall into a sump pit. Everything on the room side of that wall is defence, not prevention.
What causes basement water, and how do you read the signs?
Most basement leaks trace back to a short list of culprits: poor exterior grading that slopes toward the house, blocked gutters and downpipes dumping water at the foundation, a naturally high water table, hydrostatic pressure after heavy rain, ageing plumbing, porous block walls, or a cracked slab.
Where and when the water shows up tells you which one you’re dealing with.
- Damp at the floor-wall joint only, after rain: classic cove joint seepage, often grading or gutter related.
- Streaming mid-wall, any weather: hydrostatic pressure or a structural crack.
- White chalky residue (efflorescence) with no active water: past moisture migration through block, not necessarily an active leak.
- Condensation on cold pipes rather than wall seepage: a humidity problem, not a waterproofing one.
Pro Tip: Mark every damp spot with chalk before you do anything else, then run the garden hose test. Contractors do this because it reproduces the leak on demand rather than guessing from a dried stain.
Which interior methods and materials actually work?
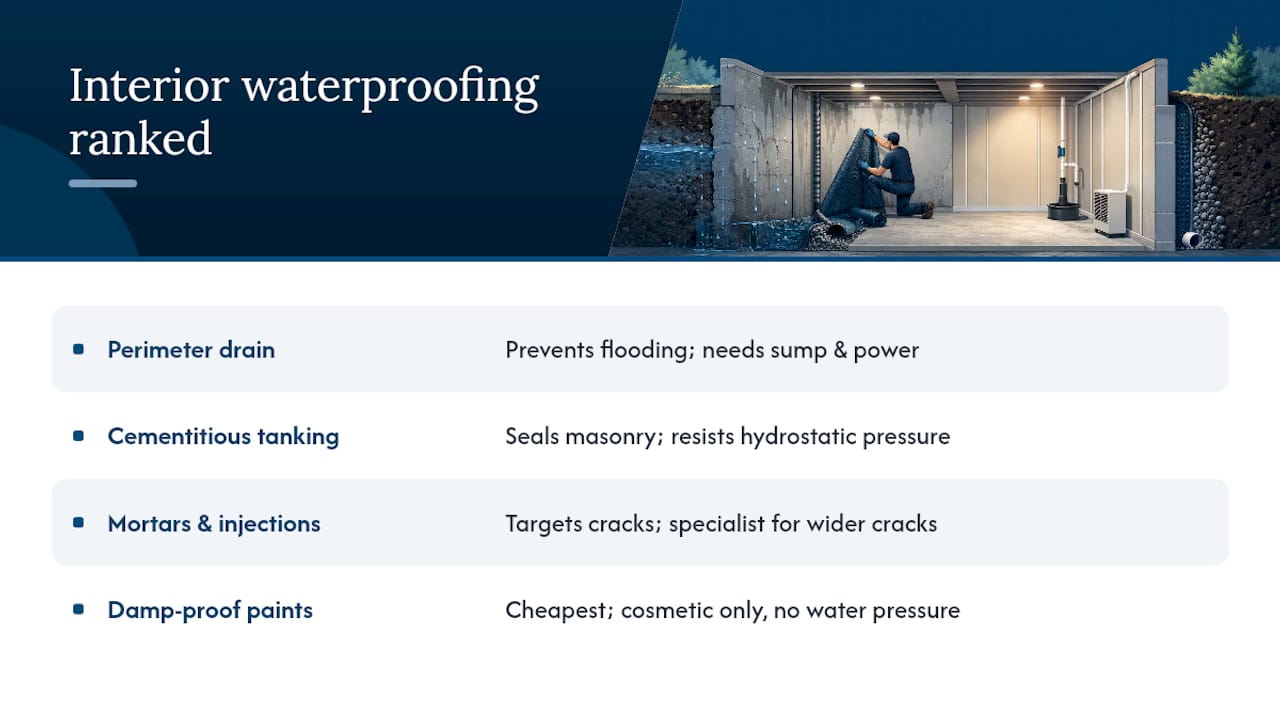
For most finished or soon-to-be-finished basements, the order of preference runs: interior perimeter drainage with a sump first, cementitious tanking or slurry second, flexible mortars and crack injections third, and damp-proof paints or membranes last, reserved for minor cosmetic dampness only.
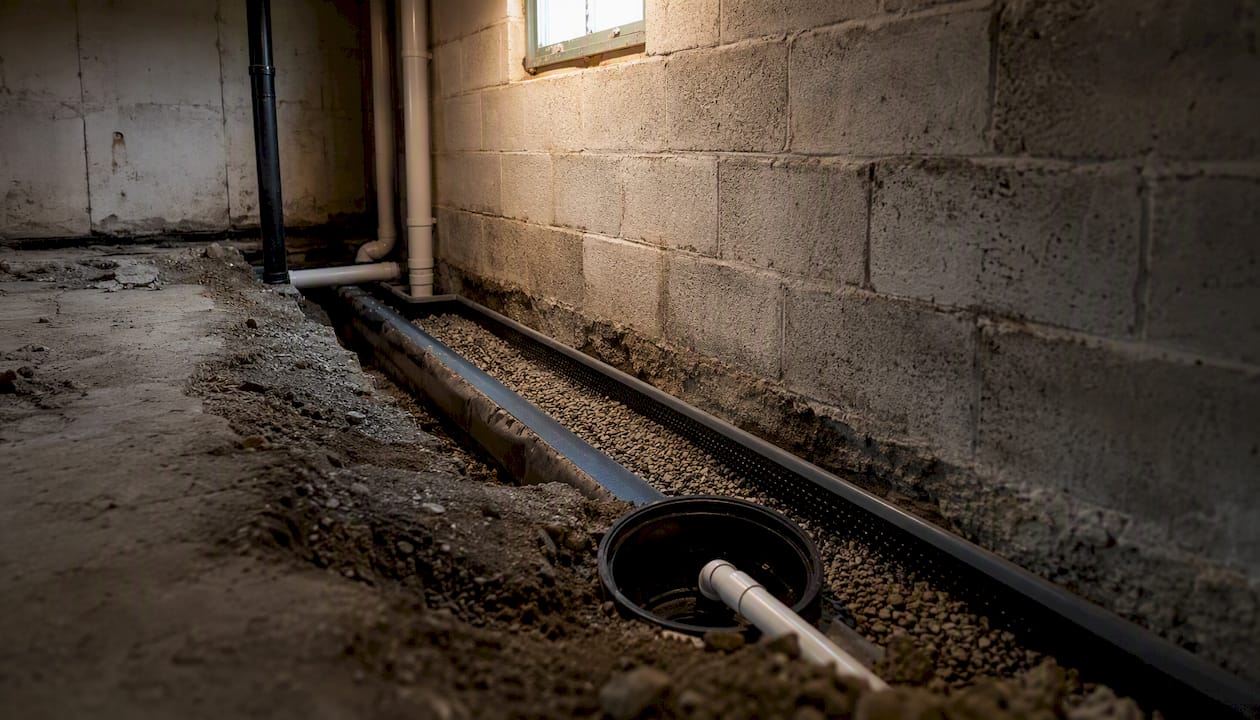
Interior perimeter drains and sump pumps cut a channel along the base of the interior wall, capture incoming water, and pump it out before it reaches the floor. This approach is effective at preventing flooding but it’s entirely reactive: it depends on electricity, a working pump, and regular maintenance. No pump, no protection. Best for ongoing cove joint seepage. Installation typically takes one to three days for an average basement and involves genuine floor disruption, so it’s a job for concrete-cutting equipment, not a weekend project for most owners.
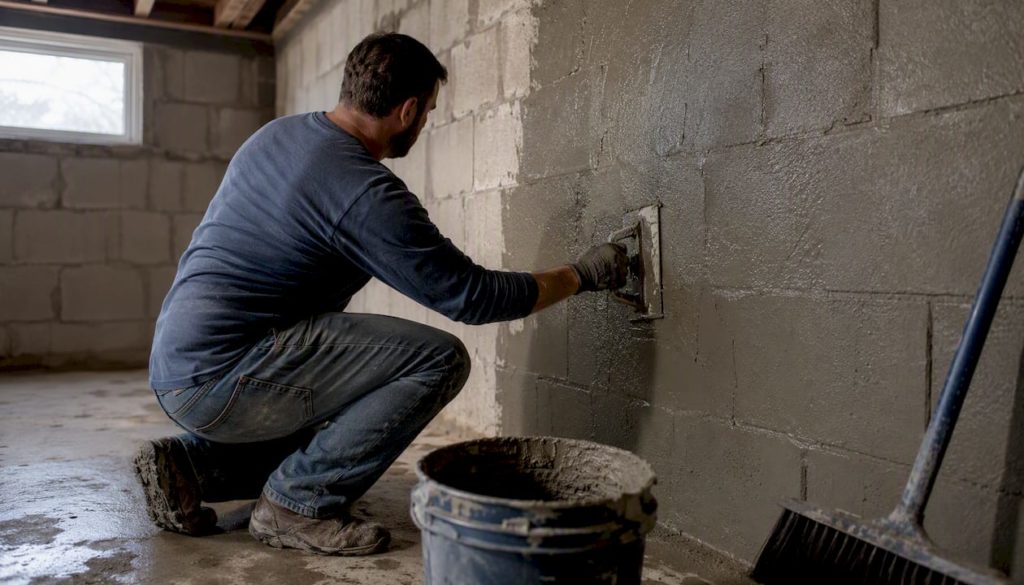
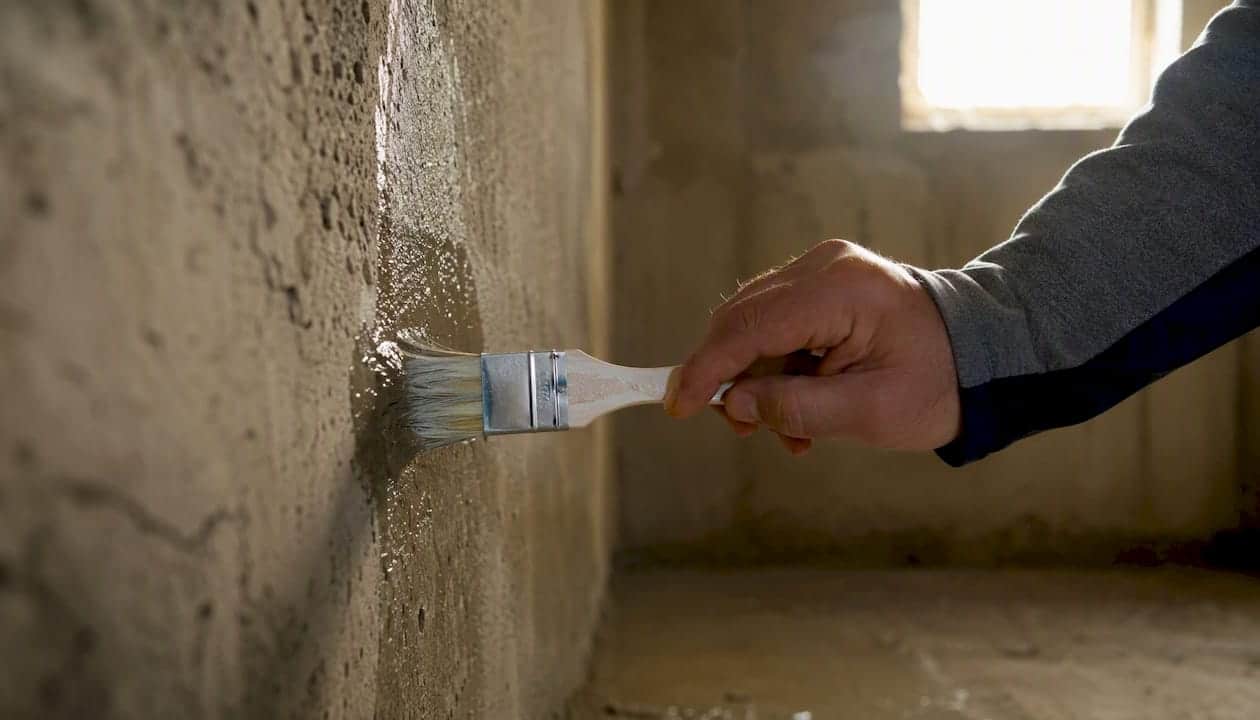
Cementitious tanking and slurry coatings are cement-based, polymer-modified mixes trowelled or brushed onto masonry to seal it. Polymer-modified two-part cementitious coatings offer strong adhesion and can resist both positive and negative hydrostatic pressures when the substrate is properly prepared and cured. They work best on porous block or brick with light, consistent seepage rather than an active running leak. DIY-capable for a confident homeowner, though getting the surface prep right (removing laitance, wetting the substrate correctly) is where most amateur jobs fail.
Crystalline treatments penetrate the concrete itself and grow a crystalline structure inside the pore network. Crystalline products can seal hairline cracks and resist hydrostatic pressure from either side, which makes them useful where you can’t guarantee which face the pressure is coming from. Longevity here tends to beat surface coatings because the treatment isn’t just sitting on the wall, it’s part of it.
Flexible mortars and epoxy or urethane injections target individual cracks rather than whole walls. Injection is genuinely a specialist’s job for anything wider than a hairline, since getting the resin to fill the full depth of a crack without pressure control is difficult to do reliably by hand.
Damp-proof paints and membranes are the cheapest and least durable option, suited only to minor cosmetic dampness with no active water pressure behind it.
Pro Tip: A hybrid approach often beats an all-or-nothing choice: dig and waterproof the exterior only on the one wall that’s actively failing, then run interior drainage everywhere else. This targeted strategy can cost significantly less than a full exterior perimeter dig while still fixing the wall that’s actually causing the problem.
What can’t interior waterproofing fix?
Interior work manages symptoms. It cannot relieve the hydrostatic pressure building against the outside of your wall, it has a limited ability to bridge a crack that keeps moving with seasonal ground shift, and negative-side coatings lose adhesion faster under sustained pressure than anything applied on the wet side. Porous block cores can keep transmitting moisture even after you’ve coated the visible face, and any drainage-based system is only as reliable as the pump running it.
A membrane that fails quietly behind a finished stud wall doesn’t announce itself. It just traps moisture against timber and drywall until mould is already established by the time anyone notices the smell.
Watch for these signs that interior measures alone won’t hold: water streaming from the middle of a wall rather than the base, cracks wider than a few millimetres, visible bowing or leaning in a wall, or leaks that keep returning despite a working perimeter drain. Any of those point toward exterior repair work rather than another coat of sealant.
How do you waterproof a basement from the inside yourself?
Confirm the leak type first. Run the hose test, mark the entry points, and only proceed with DIY if you’re dealing with cove joint seepage or minor wall dampness rather than anything on the warning list above.
- Prep the site. Disconnect nearby electrics, clear the area, and ventilate the space, cementitious dust and solvent-based coatings both need airflow.
- Prepare the surface. Clean thoroughly, chase out any loose or crumbling mortar, and let the substrate reach the moisture level the product data sheet specifies before you start.
- Deal with cracks first. Rout out and fill or inject cracks before applying any broader coating, coating over an unfilled crack just delays the leak.
- Apply the cementitious slurry or tanking coat, working it into the surface rather than just laying it on top.
- Cure fully before insulating, foam board and a separated stud wall go up only after the coating has cured per the manufacturer’s timeline, usually several days.
- Install perimeter drainage and a sump if that’s part of the plan, this means trenching the floor slab edge, which is genuinely a two-person, multi-day job.
Wear a respirator when mixing cementitious powders, and never wire a sump pump into a circuit without proper earthing. Once installed, check the sump pump monthly, test the battery backup twice a year, inspect coated surfaces annually, and reapply per the product’s stated lifespan. For a fuller walkthrough of the sequencing, this step-by-step guide covers the same process in more depth.
When should you call a professional instead?
Bring in a contractor once you see structural cracks or bowing, mid-wall leaks, damp spreading across a wide section of wall, an external drainage situation you can’t diagnose yourself, a high water table, or any plan to convert the basement into finished living space where a failure later means real cost.
Before hiring anyone, ask:
- What diagnostics will you run (drainage test, core samples) before proposing a fix?
- Why this method over the alternatives, and what happens if it doesn’t fully resolve the leak?
- What does the warranty actually cover, and for how long?
- Can I see references or examples of similar jobs?
- Do you carry the right insurance and licensing for this work?
- What’s the realistic timeline and how much disruption should I expect?
Get at least two or three quotes, and ask each contractor for a simple sketch of the proposed system, not just a price. A written scope of work protects you if the job goes sideways.
What do experienced waterproofers do differently?
Fix the exterior grading and clear the gutters before you touch anything inside. It sounds basic, and that’s exactly why it gets skipped, but plenty of “waterproofing failures” are just water still being dumped at the foundation from a blocked downpipe. Test any coating on a small panel first; cure behaviour varies more between batches than people expect. And in any flood-prone property, spend the extra on a sump pump with a genuine battery backup rather than the cheapest unit on the shelf.
- Grading and drainage first, coatings second.
- Small test patch before full application.
- Battery backup on the sump pump, always.
A practical view on priorities
Moisture control beats cosmetics every time. I’ve seen too many jobs where someone paints over a damp wall and calls it done, only to find rot behind the plasterboard two years later. The properties that hold up long-term are the ones where the owner treated exterior grading and interior drainage as one system, not a choice between them.
How Prowaterproofing helps you fix this properly
Getting a leak diagnosed correctly the first time saves you from paying twice, once for the wrong fix and once for the right one. Prowaterproofing runs proper diagnostic surveys before recommending anything, whether that ends up being interior drainage and a sump system, cementitious tanking, or a hybrid job that pairs targeted exterior work with interior backup.

Every job comes with a written scope and a clear warranty before work starts, so you know exactly what’s covered and for how long. If you’re seeing damp at the floor-wall joint, a recurring leak your last fix didn’t solve, or you’re just not sure which category your problem falls into, get in touch with Prowaterproofing for a site visit and a straight answer on what your basement actually needs.
Sources
- Interior vs Exterior Basement Waterproofing: Expert Guide
- Are Interior Drainage Systems Enough for Basement Waterproofing?
- Permastop – A crystalline waterproofing treatment – Cemcrete
- SealPro DampEnd Cementitious Waterproof Coating | Expert Coatings