
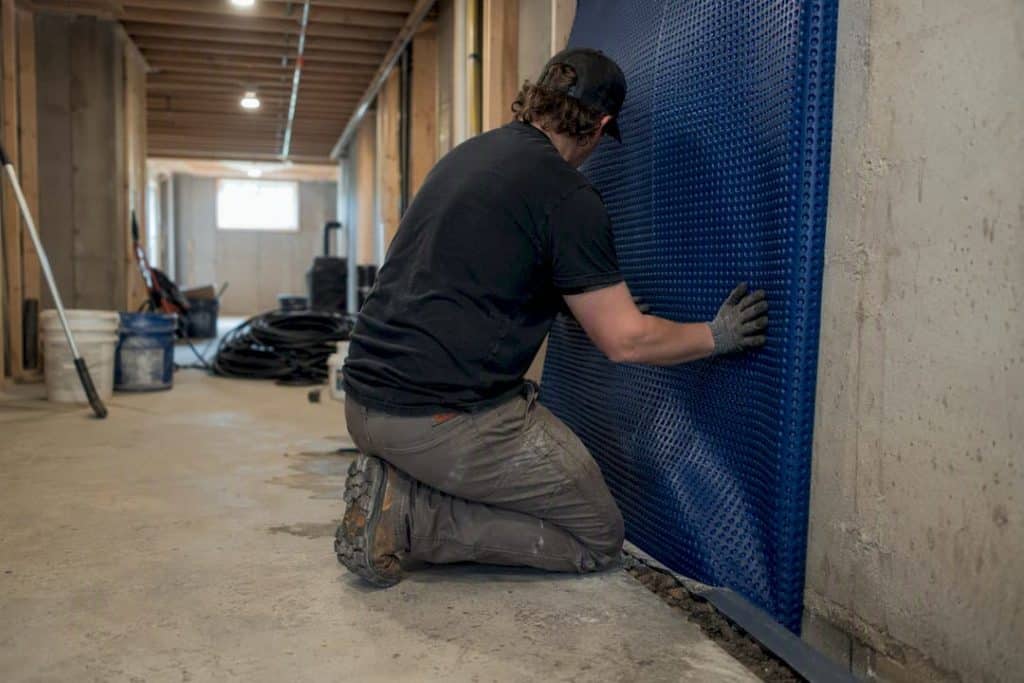
The only reliable hydrostatic pressure basement fix is one that manages groundwater first and waterproofs second: a drainage system with a pumped discharge, paired with the right membrane or coating for the site. Waterproofing alone, without somewhere for the water to go, tends to fail within a few seasons. Clear your gutters, extend downpipes away from the foundation, and get a sump pump running as immediate steps. If you see active flooding, new structural cracks, or bowing walls, stop the DIY approach and call a structural engineer or waterproofing contractor straight away.
TL;DR:
- External drainage systems like French drains are the most effective way to relieve hydrostatic pressure before applying waterproof membranes, but access for excavation may be limited.
- Installing a cavity drain membrane with a sump pump and backup is a reliable retrofit solution when external excavation isn’t feasible, but regular maintenance is essential.
- Proper diagnosis involves observing water behavior over time, inspecting cracks and wall conditions, and monitoring groundwater levels to identify pressure-driven water intrusion.
- Long-term waterproofing success depends on continuous maintenance of drainage systems and gutters, with ongoing checks for blockages and seepage events.
- Addressing hydrostatic pressure reduces mould growth and mold-related health issues caused by persistent basement dampness and poor air circulation.
Table of Contents
- Quick checklist: practical fixes and what each one achieves
- How do you diagnose hydrostatic pressure in a basement?
- What are the actual methods for fixing hydrostatic pressure?
- How much does fixing hydrostatic pressure cost, and how long does it take?
- What should you ask a waterproofing contractor before hiring them?
- How do you accurately test for hydrostatic pressure levels?
- Keeping a fixed basement dry for the long term
- Can hydrostatic pressure affect basement air quality?
- Why drainage always comes before waterproofing
- Get a site survey from Pro Waterproofing
- Sources
Quick checklist: practical fixes and what each one achieves
Not every basement needs excavation and a five-figure invoice. Start cheap and work up, based on how bad the ingress actually is.
- Fix grading and gutters first. Ground should slope away from the foundation at a gentle incline over the first few metres, with downpipes discharging well clear of the wall. This alone resolves a surprising number of “mystery” leaks.
- Add an exterior French drain and external tanking where you can excavate. This stops water reaching the wall at all, which is the most effective way to relieve hydrostatic pressure at source.
- Install a cavity drain membrane with an internal perimeter drain and sump pump when digging up the garden isn’t practical. This is the standard retrofit approach for finished basements.
- Fit a sump pump with battery backup and an alarm, never a single pump with no failsafe.
- Use temporary pumping or sandbags only as a stop-gap while you arrange a permanent fix, not as a long-term plan.
Pro Tip: Before spending on any waterproofing product, spend an afternoon watching what your gutters and downpipes actually do during a heavy rain shower. Half of all “hydrostatic” leaks start with water that never should have reached the foundation wall.
How do you diagnose hydrostatic pressure in a basement?
Hydrostatic pressure has a distinct signature, and it rarely looks like a simple damp patch. Groundwater pushes laterally against below-grade walls and upward against slabs whenever the water table rises above the footing level, and the resulting damage pattern is fairly consistent from house to house.
- Check crack shape and location. Horizontal cracks or stair-step cracks in block or brick walls, especially mid-height, point to lateral pressure rather than settlement.
- Look for bowing or inward lean in basement walls, sometimes visible as a slight bulge when you sight along the wall with a torch.
- Time the seepage. Water that appears within a day or two of heavy rain and tracks along the wall/floor joint is pressure-driven, not condensation.
- Rule out rising damp and condensation by checking whether the moisture is localised near grade level or general and worse in humid weather; those point to different problems entirely.
- Inspect outside grading and downpipe discharge points while it’s raining, if you can, to see exactly where water pools.
- Watch for efflorescence (white mineral deposits) as a sign water has been moving through masonry for some time.
- Treat floor heave, repeated flooding, or fresh large cracks as red flags that need a structural or geotechnical assessment before you touch anything else, particularly given that poor sub-soil drainage is a documented cause of retaining wall and basement failure after sustained rain.
If cracks are widening, a professional consult on what’s actually driving wall cracks is worth the callout fee before you patch anything cosmetically.
What are the actual methods for fixing hydrostatic pressure?
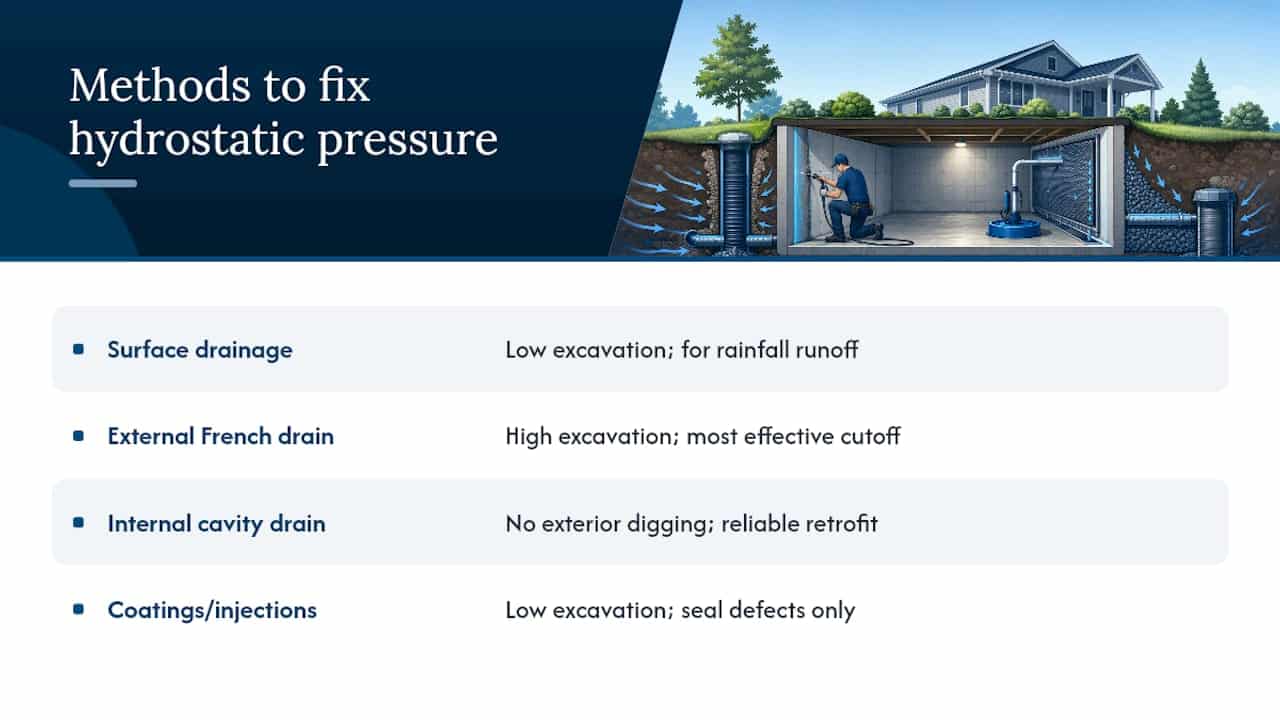
Every method below solves a slightly different version of the same problem, and the trade-off is almost always excavation cost versus long-term reliability.
Surface drainage and grading is the cheapest intervention and, for mild seepage, sometimes the only one you need. Regrading soil, extending downpipes, and adding a shallow swale to redirect surface water costs relatively little and works when the source is rainfall runoff rather than a genuinely high water table.
External French drains paired with positive-side waterproofing (tanking) attack the problem at the wall itself. A trench is dug around the foundation perimeter, a perforated pipe is bedded in gravel below floor level, and a waterproof membrane is applied directly to the exterior wall face before backfilling. This is widely regarded as the most effective way to stop hydrostatic pressure before it reaches the structure, and SANS guidance specifically recommends a cut-off trench and land drain ahead of backfilling for basements exposed to hydrostatic conditions. The catch is obvious: you need access to dig, which isn’t always possible with an attached garage, a paved driveway, or a neighbour’s boundary wall in the way.
Internal cavity drain membranes with a perimeter drain and sump pump are the retrofit gold standard when external excavation isn’t realistic. The membrane doesn’t stop water entering the wall; it manages it, channelling seepage down to a drain that feeds the sump pump, while plasterboard or flooring finishes can go straight over the cavity system. Industry guidance treats this as the most reliable retrofit option where digging up the perimeter isn’t on the table.
Sump pumps need real thought given, not an afterthought purchase. Capacity should match your worst realistic inflow, float switches need to be tested, and guidance is consistent that battery backup and an alarm are non-negotiable for reliability, since storms and power cuts have an irritating habit of arriving together.
Crack injection, crystalline waterproofing systems, and cementitious coatings each have a place, but only as one part of a plan, not the whole plan. They seal a specific defect or add resistance to a wall face; they do nothing about the water pressure building up behind that wall. Under genuine hydrostatic load, a coating with no drainage behind it is buying time, not solving the problem.
Where groundwater chemistry is aggressive, elevated chloride or sulphate levels and a shallow water table raise the stakes considerably, and structural engineering input becomes necessary to specify dewatering measures and corrosion-resistant reinforcement. Wall anchors, underpinning, and full structural remediation belong in the hands of a geotechnical engineer, never a general contractor working from a product brochure.
How much does fixing hydrostatic pressure cost, and how long does it take?
Costs vary a great deal by scope, soil conditions, and access, but the pattern is fairly predictable.
- Surface grading and downpipe fixes: the lowest cost tier, often completed in a day or two.
- Internal cavity drain and sump pump systems: mid-range, typically installed within a week for an average basement footprint.
- External excavation, tanking, and French drains: the highest cost tier, running from one to several weeks depending on perimeter length, access, and whether hardscaping needs removing and replacing.
- Comprehensive structural repairs (underpinning, wall anchors): the longest timelines, often weeks to months once engineering design and approvals are factored in.
Ongoing costs matter too. Sump pumps need periodic testing and occasional replacement of the float switch or battery, and reputable contractors back drainage and membrane work with a written warranty. Cheap single-coat surface sealants recur as a recommendation for a reason: they solve the symptom for one season, then the same seepage reappears once hydrostatic pressure rebuilds behind the wall.
What should you ask a waterproofing contractor before hiring them?
A rushed hire is the single biggest reason homeowners end up paying for the same fix twice. Ask to see photos and references from jobs with similar groundwater conditions to yours, not just a generic portfolio.
Confirm the specifics of the method being proposed, the warranty length, and whether the contractor carries insurance. Reputable operators should be comfortable discussing compliance with relevant SANS waterproofing standards rather than waving the question away. Insist on a quote with separate line items for drainage, waterproofing membrane, and any structural work, so you can see exactly what you’re paying for and compare quotes properly.
- Ask for at least two references from jobs involving basement or below-grade water, not general roofing or exterior painting.
- Confirm in writing what the warranty covers and for how long.
- Check the quote separates drainage, membrane, and structural line items.
- Walk away from pushy sales tactics, no written warranty, or a plan that has no answer for pump backup or long-term drainage maintenance.
Pro Tip: If a contractor’s entire fix is a bucket of sealant and a promise, ask them directly where the water is supposed to go once it hits that wall. A vague answer is your cue to get a second quote.
How do you accurately test for hydrostatic pressure levels?
You don’t need laboratory equipment to get a reasonable read on hydrostatic pressure, but you do need to be methodical about it. Start by tracking groundwater behaviour over at least one full rain event rather than a single glance after a downpour: note how quickly water appears indoors, how long it persists, and whether it recedes as the ground dries.
A simple observation well, a length of perforated pipe sunk into a small bore hole near the foundation, lets you see roughly where the water table sits relative to your basement floor. If the water level in that pipe rises close to or above floor level after rain, you’re dealing with genuine hydrostatic load rather than surface infiltration.
Pressure testing on walls themselves is usually the domain of a contractor or engineer, using moisture meters to map damp patterns across the wall face and comparing readings at different heights. A reading that increases toward the base of the wall, rather than staying constant, points to pressure-driven moisture migration rather than a leak from a single defect like a cracked pipe or a poorly sealed window well.
For anything beyond a straightforward retrofit, particularly where groundwater carries elevated chloride or sulphate content, geotechnical input matters. Soil borings and water table monitoring over several weeks give a far more reliable basis for engineering decisions than a single site visit ever can, especially where dewatering or specialised reinforcement might be needed.
Keeping a fixed basement dry for the long term
A drainage-first fix is not a “install and forget” job. Sump pumps in particular need a maintenance rhythm: test the float switch every few months, listen for the backup alarm during a storm, and replace the battery on schedule rather than waiting for it to fail during the one flood that actually matters.
Perimeter drains and French drains can silt up over years, particularly in sandy or clay-heavy soils, so an annual check of discharge points confirms water is still flowing freely away from the foundation rather than backing up somewhere unseen. Gutters and downpipes deserve the same seasonal attention. A single blocked gutter can undo an otherwise well-designed drainage system by dumping water exactly where you spent money keeping it away.
Keep a simple log of any seepage events, including rainfall intensity and how the system responded. That record becomes genuinely useful evidence if you ever need to make a warranty claim, and it also flags a developing problem before it becomes a structural one. If you notice the interval between pump cycles shortening over successive storms of similar size, that’s usually a sign groundwater levels are rising or a drain has partially blocked, not something to ignore until the next big rain event. For homeowners who want a broader primer on how these systems interact underground, the mechanics of subsurface drainage are worth understanding even after the fix is in place.
Can hydrostatic pressure affect basement air quality?
Persistent moisture from hydrostatic pressure does more than damage walls and flooring; it creates the exact conditions mould needs to establish itself. Mould spores are present in virtually every environment, but they need sustained damp surfaces to actually colonise, and a basement wall wicking groundwater continuously provides precisely that.
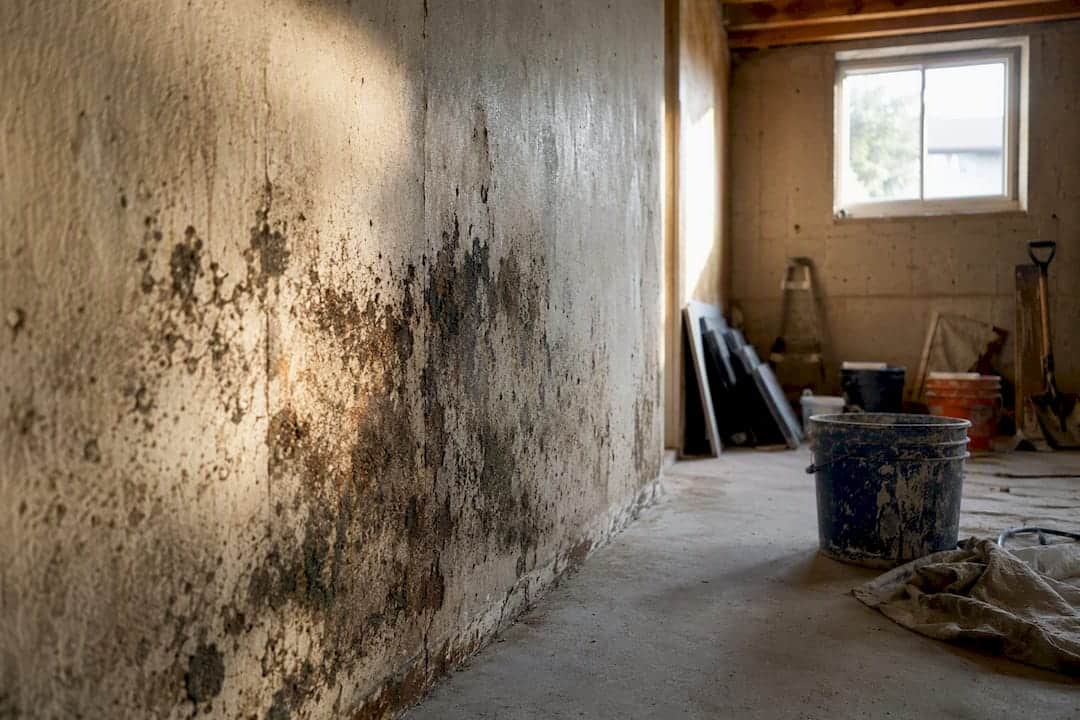
The problem compounds because basements typically have poorer air circulation than living spaces above grade, so moisture and any resulting mould growth tend to concentrate rather than disperse. Musty odours are often the first sign, appearing well before visible mould growth, and they indicate elevated humidity that a dehumidifier alone won’t fix if the underlying water source remains active.
Health effects from basement mould range from mild irritation, coughing, throat irritation, to more significant respiratory symptoms for people with asthma or allergies, and prolonged exposure is not something to shrug off in a space where children or elderly relatives spend time. Addressing the moisture source through drainage and pumped discharge resolves the air quality issue at its root, whereas painting over mould or running an air purifier without fixing the water ingress simply delays the problem’s return. Once a drainage-first fix is in place and humidity drops to normal indoor levels, most surface mould can be cleaned and the recurrence risk drops sharply, provided the underlying water management keeps working as designed.
Why drainage always comes before waterproofing
We’ve seen the same pattern repeat across enough basements to trust it: coatings applied without any drainage plan almost always come back as a callout within a year or two, sometimes sooner after a wet winter. The wall hasn’t failed as such; the water simply had nowhere else to go and found the next weak point.
The jobs that stay dry are the ones where drainage gets designed first and the membrane or cavity system gets treated as the second layer, not the whole solution. That’s not a sales pitch, it’s just what holds up under repeated rain events over years rather than months.
If you’re weighing up a quote right now, ask what happens to the water once it’s diverted. If nobody can answer that clearly, get a proper site survey before you commit to anything.
— Eben
Get a site survey from Pro Waterproofing
Prowaterproofing exists for exactly the scenario this article covers: a basement where surface fixes haven’t worked and you need someone who treats drainage as step one, not an upsell. Prowaterproofing’s teams handle site diagnosis, external tanking, cavity drain systems, and sump pump installation with battery backup, all under one written quote rather than a patchwork of separate contractors guessing at each other’s work.

A proper survey should tell you exactly what’s happening on your site: where the water table sits, whether external excavation is realistic given your access, and what combination of drainage and waterproofing actually fits your budget and timeline. Every quote from Prowaterproofing sets out scope, timescale, and warranty terms in writing before any work begins, so you know precisely what you’re paying for and what’s guaranteed afterwards.
If your basement has shown any of the signs covered above, seepage after rain, cracking, or a musty smell that won’t shift, request a site visit through Prowaterproofing and get a proper diagnosis before the next heavy rainfall finds the same weak point again.
Sources
- SANS 10400-G: Part G: Excavations (extract)
- The Ultimate Guide to Basement Waterproofing: Costs, Systems & Solutions for SA Homes | ServiceLink SA
- Structural engineering designs for soil and water challenges | ConstroFacilitator
- How poor sub-soil drainage can lead to structural damage | Mail & Guardian