
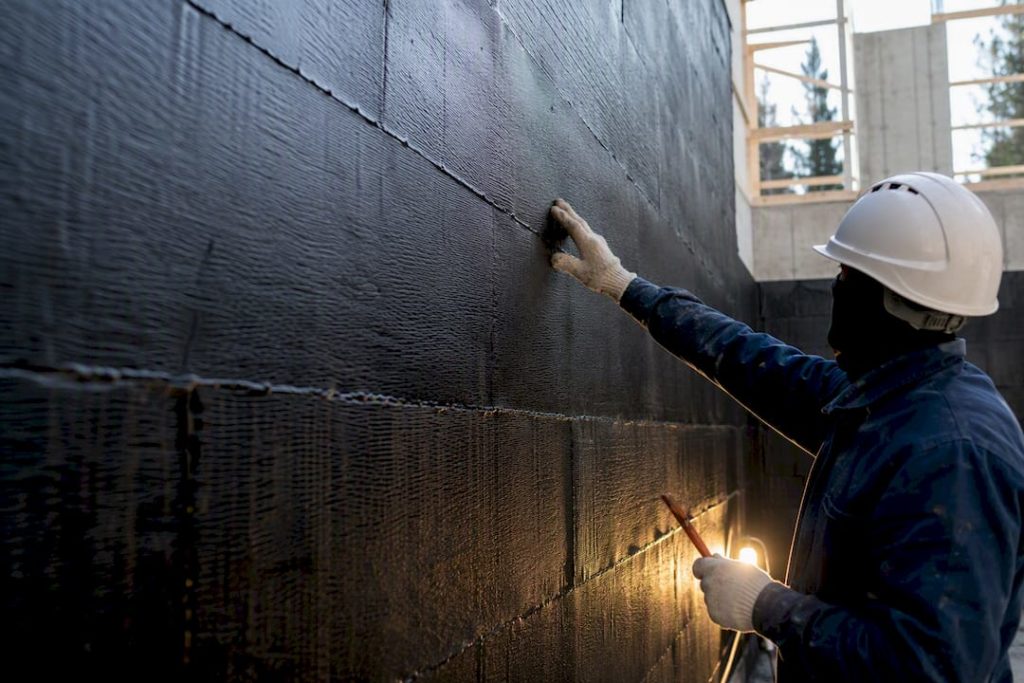
A bituminous membrane waterproofing method uses distilled bitumen modified with polymers and reinforced with polyester or glass-fibre carriers, laid in torched, self-adhesive, cold-bonded, or hot-melt sheets to create a continuous watertight barrier. It suits flat roofs, basements, decks, and any surface facing hydrostatic pressure. The result only holds up when installers follow manufacturer datasheets and SANS clauses, and when accredited applicators do the work.
TL;DR:
- Ensuring proper adhesion and layer count is crucial, especially for basements under hydrostatic pressure, which require at least two staggered layers and specific overlap dimensions.
- Substrate preparation must be thorough, including cleaning, drying, repairing defects, and applying primer correctly, to prevent early membrane failure.
- Torch-on methods demand careful technique, such as proper heating, staggering joints, and immediate rolling, to achieve a fully bonded, water-tight surface.
- Site inspection protocols should include visual seam checks, adhesion testing, and confirmation of correct falls and ponding, with manufacturer documentation for warranty validity.
- Choice of membrane type and application method must match exposure conditions, with UV-stable membranes for exposed roofs and reinforcement tailored to structural movements.
Table of Contents
- Types of bituminous membranes and material characteristics
- Standards and specification minima you should insist on
- Getting the substrate ready before the membrane goes down
- Application methods: torch-on, self-adhesive, cold-adhesive and hot-melt compared
- Laps, flashings and the detail work that decides whether it actually holds water
- Inspection, testing and what to demand at handover
- Diagnosing failure and repairing bituminous membranes that have started to fail
- Eben’s contractor checklist and what actually goes wrong on site
- Membrane, liquid coating, or prefabricated system: which one actually fits?
- How Prowaterproofing handles bituminous membrane installations
- Sources
Types of bituminous membranes and material characteristics
The polymer modifier decides how a membrane behaves under stress long before installation even starts. Bitumen on its own is brittle in the cold and soft in the heat, so manufacturers blend it with either elastomers (styrene butadiene styrene, or SBS) or plastomers (atactic polypropylene, or APP) to fix that weakness in opposite ways.
SBS membranes stay flexible at low temperatures and stretch to accommodate structural movement, which makes them the standard choice for roofs in variable climates, expansion joints, and any detail where the substrate flexes seasonally. APP membranes trade some of that flexibility for higher softening points and better resistance to UV exposure and ponding heat, so they tend to perform well on exposed, sun-baked flat roofs where movement is minimal but thermal load is constant.
Reinforcement matters just as much as the bitumen chemistry. A bituminous waterproofing membrane is a blend of distilled bitumen and polymers, typically reinforced with polyester or glass-fibre carriers to deliver tear resistance and dimensional stability. Polyester carriers stretch and recover, which suits roofs with thermal cycling. Glass-fibre carriers are stiffer and more dimensionally stable, better suited to substrates that stay put.
When you’re checking a datasheet, four figures tell you almost everything you need to know:
- Softening point: the temperature at which the bitumen starts to flow; higher is better for exposed, sun-facing applications.
- Low-temperature flexibility: the point at which the sheet cracks when bent; lower is better for cold climates or shaded, unheated areas.
- Reinforcement weight and type: heavier polyester generally means better puncture resistance under foot traffic or ballast.
- Total membrane thickness: thicker sheets resist mechanical damage but cost more and are harder to detail around tight penetrations.
Matching the product to the exposure is where most specification mistakes happen. An exposed roof with no ballast or topcoat needs UV-stable APP or a granule-surfaced SBS. A covered roof under paving or gravel can use a cheaper, unprotected membrane because sunlight never reaches it. Buried applications, such as basement tanking, need a product rated for constant ground moisture and root resistance rather than UV performance. Basements under genuine hydrostatic pressure, where groundwater pushes against the wall rather than merely sitting against it, need multi-layer SBS systems with mechanically reinforced laps, not a single sheet rated for roof use.
Standards and specification minima you should insist on
Specification is where waterproofing jobs are won or lost, usually before a single roll of membrane reaches site. SANS guidance sets minimum layer counts for hydrostatic situations and prescribes specific overlap dimensions, and it favours hot jointing compounds over cold ones wherever hydrostatic pressure could develop. That last point catches a surprising number of contractors out: cold adhesives are convenient and low-risk from a fire-safety standpoint, but they are not always the compliant choice once water is actively pushing against a structure rather than draining off it.
The practical minima worth memorising, or at least writing into your tender documents, are these:
- Single-layer torch-on systems are acceptable for exposed roofs with adequate falls and no sustained water pressure.
- Basements and any surface under hydrostatic load need a minimum of two bonded layers, staggered so the joints of the second sheet never sit above the joints of the first.
- Overlap dimensions are specified by the manufacturer and the standard together, not by site habit, and typically fall in a defined range depending on the product and application method.
- Hot bitumen jointing compound is the preferred method wherever groundwater pressure is a factor; cold adhesive is generally reserved for lower-risk, well-drained applications.
Statistic to know: SANS 10021 clauses on bituminous felt specifically call out minimum layer counts for hydrostatic conditions and set out preferred jointing compound types for those scenarios, rather than leaving the choice to site discretion.
Why does this matter beyond ticking a compliance box? A single-layer membrane on a basement wall can look perfectly installed on the day of handover and still fail within a year, because hydrostatic pressure finds the one weak seam a single layer can’t back up. Two staggered layers give you redundancy: if water finds a pinhole in the outer sheet, it still has to cross an unbroken inner sheet before it reaches the structure.
When you’re reviewing bids, ask contractors to quote the specific SANS clause they’re pricing against, not just “SANS compliant” as a blanket phrase. Ask for the manufacturer’s datasheet for the exact product they intend to use, and check that its stated overlap and jointing requirements match what’s written into the method statement. If a quote doesn’t mention layer counts for a basement or retaining wall, that’s a red flag worth raising before signing anything.
Getting the substrate ready before the membrane goes down
No membrane, however good, bonds properly to a substrate that’s wet, dirty, or full of voids. Substrate preparation is unglamorous, and it’s also the single most common source of early failure on sites where the membrane itself was specified correctly.
Here’s the sequence worth following on any job:
- Clean the surface completely. Remove dust, loose aggregate, oil, and any residue from previous coatings. A pressure wash followed by a full dry-out period is standard on concrete decks.
- Confirm the surface is dry. Bitumen bonding is compromised by residual moisture, and torch-on applications in particular can trap steam under the sheet if the substrate hasn’t dried out fully.
- Repair blowholes and voids. Small surface defects in concrete need filling with a compatible repair mortar before priming; leaving them open creates weak points where the membrane can’t bond flush.
- Check falls to outlets. A flat roof needs a minimum fall, generally around 1:80 as a widely used guide figure, to avoid standing water; if the existing deck doesn’t achieve this, a screed layer needs specifying before membrane work starts to ensure proper drainage.
- Prime the surface. Primer choice depends on the substrate: bituminous emulsion primers suit concrete and screed, while solvent-based primers are often specified for steel decking. Let the primer flash off (dry to a tack-free state) before laying membrane; laying too early traps solvent and weakens the bond.
Storage and handling deserve equal attention, and they’re where a lot of otherwise good installations go wrong before the torch is even lit. Rolls should be stored vertically, and handling below 5°C risks stiffening the membrane enough to cause cracking when it’s unrolled. Work generally needs to stop below minus 2°C, since the membrane becomes too brittle to lay safely at that point regardless of how careful the crew is.
Pro Tip: Keep a handful of spare rolls in a heated site store overnight before a cold-morning start. A membrane that’s been sitting in an unheated container at 2°C will crack when unrolled, no matter how skilled the applicator is with the torch.
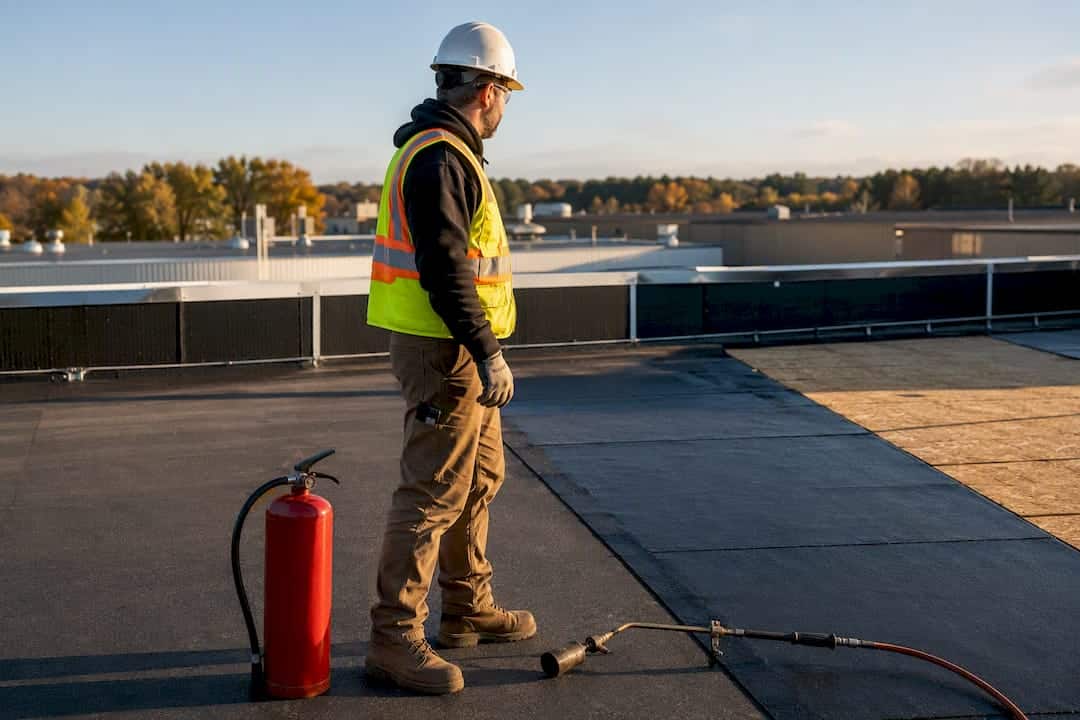
Fire safety controls for torch-on application aren’t optional extras. Every torch-on site needs a fire extinguisher within reach, a designated fire watch during and for at least 30 to 60 minutes after torching finishes, and a clear protocol for working near timber decking, insulation boards, or any combustible substrate. Insurers increasingly ask for evidence of these controls before covering commercial roofing work, and for good reason: torch-on fires are one of the more common causes of roofing-related site incidents.
Application methods: torch-on, self-adhesive, cold-adhesive and hot-melt compared
Each application method solves the same problem, bonding bitumen sheet to substrate, but the technique, tools, and failure points differ enough that mixing up the steps between them is a common cause of callbacks.
Torch-on membrane
Torch-on remains the most widely specified method for exposed roofs because it produces a fully bonded, monolithic surface with no gaps for water to travel under.
- Prime the substrate and allow it to flash off fully.
- Unroll the membrane dry first to check alignment and cutting, then re-roll it from both ends toward the middle.
- Light the torch and begin heating the underside of the membrane and the substrate simultaneously, moving at a steady pace as you unroll.
- Watch for a visible molten bitumen bead forming ahead of the roller. That bead is the single clearest sign of a proper bond; if you’re not seeing it, you’re moving too fast or the flame is too weak.
- Roll the sheet down immediately behind the torch to expel trapped air and press it into full contact.
- Stagger each subsequent sheet so its joints never align with the layer beneath, and heat-fuse overlaps until the same molten bead appears along the seam.
Sika’s application guidance for torch-on membrane confirms this exact sequence: prime, align, stagger, and heat-fuse overlaps until you see that molten bead, then allow the surface to cool before doing anything else to it.
Common torching mistakes worth flagging on any site visit:
- Torching too fast, leaving a cold, unbonded strip beneath the sheet that looks fine on the surface but peels under load.
- Overheating one spot, which scorches and thins the bitumen and creates a weak point rather than a strong bond.
- Skipping the stagger and running joints in a straight line up the roof, concentrating stress along a single failure path.
- Failing to roll immediately, which traps air bubbles that show up as blisters months later.
Self-adhesive membrane
Self-adhesive sheets suit sites where an open flame is a genuine hazard, such as near existing insulation, timber structures, or occupied buildings where torch fumes and fire risk aren’t acceptable.
- Peel back a section of the release liner and align the exposed edge to your starting line.
- Press the exposed adhesive down firmly, then peel the remaining liner away gradually as you roll the sheet forward.
- Use a hand roller or weighted roller immediately behind the peel point to remove trapped air and bed the adhesive fully.
- Seal all laps by pressing firmly along the full width of the overlap; some products need a hand-held heat gun on the lap edge only, not the full sheet, to improve adhesion in cold weather.
Self-adhesive is faster and safer to install than torch-on, but it’s more sensitive to substrate cleanliness. Dust or moisture under a self-adhesive lap won’t burn off the way it might under torch heat, so it just stays there as a weak point.
Cold-adhesive bonding
Cold-adhesive systems apply liquid bitumen adhesive with a trowel, roller, or notched squeegee, then lay the sheet into the wet adhesive before it skins over.
- Select an adhesive compatible with the specific membrane brand; not all cold adhesives are interchangeable across manufacturers.
- Apply at the spread rate stated on the datasheet. Under-application starves the bond; over-application wastes material and can bleed through laps.
- Lay the sheet into the adhesive while it’s still wet, generally within the open time stated on the tin, which can be as short as a few minutes in warm weather.
- Roll firmly and immediately to bed the sheet and push out trapped air before the adhesive starts to skin.
Timing is the entire game with cold-adhesive work. Miss the open-time window and you get a mechanically weak, poorly bonded joint that looks fine until the first heavy rain finds the gap.
Hot-melt bitumen method
Hot-melt systems, sometimes specified where a fully bonded, seamless membrane is required across large basement or podium areas, use a kettle to melt bitumen to a pourable state before laying sheet or pouring a monolithic coating.
- Bring the kettle to the manufacturer’s stated application temperature, generally checked with a thermometer rather than judged by eye.
- Apply the molten bitumen in a controlled, even pour or spread immediately ahead of the roller.
- Lay the membrane sheet into the hot bitumen without delay; hesitation lets the bitumen cool and skin before the sheet beds properly.
- Roll firmly straight away to bond fully and expel air, checking for bubbling or an uneven surface as you go.
Kettle temperature control is the make-or-break variable here. Bitumen that’s too cool won’t flow or bond properly; bitumen that’s overheated degrades and loses adhesive strength, and it becomes a serious burn hazard for the crew handling it.
Sequencing and vertical work
Multi-layer builds, standard on basement tanking, need each layer to cure or bond fully before the next goes on, and the second layer’s joints must sit clear of the first layer’s joints. Contractors commonly use a staggered-lay method, straddling the previous layer’s overlaps rather than repeating the same joint pattern, specifically to avoid creating a continuous weak line through the whole build.
Vertical applications, tanking a basement wall for instance, need mechanical fixings at the top of each sheet run in addition to the adhesive or torch bond, since gravity works against the bond over time on a vertical face in a way it never does on a flat roof.
Laps, flashings and the detail work that decides whether it actually holds water
Flat runs of membrane rarely fail. Laps, corners, and penetrations do, and they’re responsible for the overwhelming majority of leaks traced back to a bituminous system.
Lateral and end overlaps need to be sized to the product and method, generally in a defined range set by the manufacturer, and every end-to-end joint in one sheet run should be staggered against the joints in the adjacent run rather than lining up. A straight run of aligned joints gives water a direct path to travel along if any single seam weakens.
Detail work that separates a competent installation from a mediocre one:
- Forming internal fillets at wall-to-floor junctions rather than a sharp right angle, since bitumen sheet can’t bend around a hard corner without stressing the reinforcement.
- Counterflashing at parapets, dressing the membrane up and over the parapet and securing it under a metal flashing to stop water tracking behind the upstand.
- Securing vertical upstands with mechanical fixings as well as adhesion, particularly on taller parapets where the membrane’s own weight works against the bond over time.
- Bedding pipe collars and scuppers in a dedicated sequence, membrane first, collar dressed and sealed over it, then a secondary seal, rather than trying to seal around a fixed pipe in a single pass.
Detail work around drains and penetrations needs particular care because these are fixed points that can’t move with the membrane, so the seal has to accommodate that mismatch through generous overlap and mechanical clamping rather than adhesion alone.
Pro Tip: Photograph every penetration detail and lap before you cover it with ballast, screed, or backfill. It costs nothing on site and saves weeks of argument if a leak turns up eighteen months later and nobody can agree on how the original detail was actually built.
Temporary protection matters more than most schedules allow for. Freshly laid membrane exposed to foot traffic, plant movement, or scaffold work before it’s protected picks up punctures that won’t show until the first heavy rain. Protective boards or a temporary ply walkway over active membrane areas is cheap insurance against a very expensive repair.
Inspection, testing and what to demand at handover
Quality assurance on a bituminous membrane job comes down to a handful of checks, done consistently, rather than one dramatic final test.
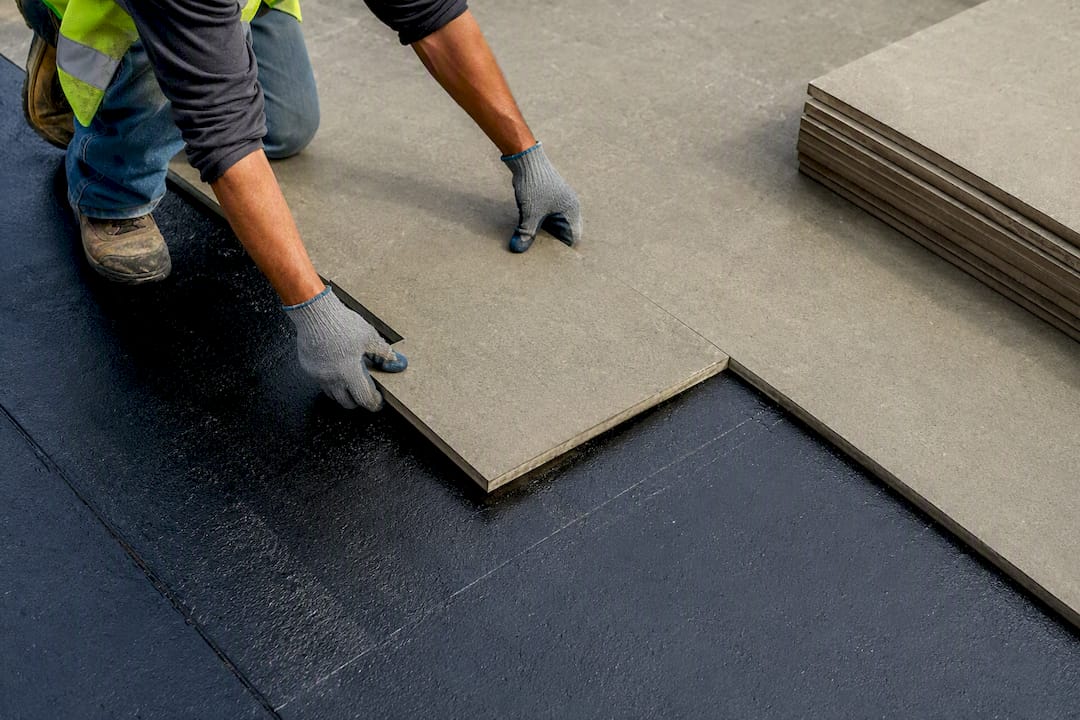
- Walk every lap and seam visually, checking for a continuous, even weld line with no cold spots, scorching, or visible gaps.
- Check adhesion at random points by lifting a small section of lap edge with a putty knife; it should resist and show torn bitumen, not lift cleanly.
- Confirm falls and ponding after the first rain event, or by flooding the roof briefly if the schedule allows, to check water actually reaches the outlets.
- Request a manufacturer witness test on larger commercial jobs, where a technical representative attends site to confirm the installation matches the specified method statement.
- Collect documentation at handover: the product datasheet used, the applicator’s accreditation certificate, the signed method statement, and the written warranty terms.
Worth noting: manufacturer guidance on dual-reinforced membrane products recommends annual inspections, with more thorough maintenance attention roughly every four to five years to catch UV degradation and seam movement before they become leaks.
If a warranty document doesn’t name the applicator by accreditation number, or the method statement doesn’t reference the specific product datasheet used on site, push back before signing off. Those two documents are what you’ll need if something goes wrong three years into a ten-year warranty period. When inspection turns up something outside normal wear, such as unexplained blistering across a wide area, that’s the point to escalate directly to the manufacturer’s technical support line rather than letting the applicator guess at a fix.
Diagnosing failure and repairing bituminous membranes that have started to fail
Ponding water, UV-bleached patches, blisters, and lifted seams are the four signs worth watching for on any membrane past its first few years of service. Ponding shows up as a permanently damp patch that never dries between rain events, usually pointing to inadequate falls rather than a material fault. UV degradation looks like a chalky, faded surface, common on membranes that never got their protective topcoat. Blisters are trapped air or moisture pockets that expand and contract with temperature, eventually cracking the surface. Lifted seams are the most urgent: they mean water has a direct route into the substrate.
The repair route depends on how far the damage has spread. A practical approach to remediating old or damaged membranes starts with cleaning the surface fully, then judging whether a full overlay is viable or whether isolated defects can be patched with solvent-free sealant or a liquid-applied reinforcement layer. Full replacement only becomes necessary when the substrate underneath has been compromised, not just the surface membrane.
- Small punctures and isolated blisters: cut out, clean, and patch with a matching membrane offcut, torched or adhered over the defect with generous overlap.
- Widespread seam failure across a roof: consider a full liquid-applied overlay rather than chasing dozens of individual patches.
- UV degradation with no puncture damage: a protective topcoat may be enough, provided the membrane underneath is still structurally sound.
- Substrate-level water ingress with membrane intact: the problem is likely a detail failure at a penetration or lap, not the membrane sheet itself.
On the topcoat timing question specifically: manufacturer guidance recommends waiting six to eight weeks after torching before applying a UV protective topcoat, giving residual solvents and heat time to fully settle. Coating too early risks poor adhesion and premature peeling of the very layer meant to protect the membrane long-term.
Eben’s contractor checklist and what actually goes wrong on site
Choosing a contractor for bituminous membrane work comes down to five checks, in this order: accreditation with the membrane manufacturer, a portfolio of comparable jobs (roof versus basement versus deck work genuinely differ), a written method statement referencing the exact product and SANS clauses, a warranty that names both the material and the workmanship separately, and a stated maintenance offering rather than a one-off installation with no aftercare plan.
The recurring errors worth watching for on site, gathered from years of reviewing installations that came back with problems:
- Under-torching at laps. Crews under time pressure often skip the visible bead check and move on, leaving a weld that looks sealed but isn’t.
- Missing the stagger. Running joints in a straight line up a roof is faster to lay but concentrates every bit of stress on one line.
- Ignoring minimum falls. A roof laid dead flat, with no fall to outlets, guarantees ponding no matter how good the membrane is.
- Skipping the flash-off period on primer. Laying membrane onto tacky, still-wet primer looks fine on day one and fails within a season.
- No mechanical fixing on vertical runs. Adhesive alone on a tall upstand tends to creep downward over years under its own weight.
Local climate shapes both material choice and maintenance frequency more than most specifications acknowledge. Coastal sites with high UV exposure and salt-laden air need UV-stable products and more frequent inspection than inland, shaded installations. Areas with sharp seasonal temperature swings favour SBS membranes over APP for the flexibility alone. Further guidance on flat-roof specific detailing and drainage sits in Pro Waterproofing’s flat roof waterproofing resource, which covers the drainage side of this in more depth. Accredited applicators and manufacturer-backed warranties materially improve long-term outcomes, and that’s worth insisting on at procurement stage rather than treating it as a nice-to-have.
Membrane, liquid coating, or prefabricated system: which one actually fits?
Bituminous membranes earn their place wherever movement accommodation or hydrostatic resistance genuinely matters: basements under groundwater pressure, exposed roofs needing a UV-stable topcoat system, and decks with real structural flex. Liquid-applied membranes suit complex, penetration-heavy roofs where sheet detailing becomes impractical, or smaller remedial jobs where a full re-membrane isn’t justified. Prefabricated single-ply systems can suit large, simple roof geometries where speed matters more than the redundancy a multi-layer bituminous build gives you.
None of that replaces a proper site assessment. Match the spec to the exposure and structure first, then compare accredited applicators’ proposals against it rather than picking a system name off a brochure.
— Eben
How Prowaterproofing handles bituminous membrane installations
This service connects residential, commercial, and industrial clients with waterproofing professionals who specify and install bituminous membrane systems correctly the first time, from basement tanking to flat roof and deck work.

A quote request typically gets you a defined scope of work, a method statement naming the product and application technique, a realistic timescale, and sample warranty wording covering both material and workmanship separately. That paperwork is exactly what this guide has been pointing you towards checking for, and it’s the difference between a membrane job that lasts fifteen years and one that needs revisiting in three. For further reading on how membrane selection affects long-term roof performance, the flat roof waterproofing guide covers the drainage and fall considerations in more detail, and this roof longevity advice adds useful maintenance context for anything already installed.
If you’re weighing up a repair against a full re-membrane, or you simply want a second opinion on a method statement a contractor has handed you, request a site inspection through Prowaterproofing and get a scoped answer before committing to either route.
Sources
- NRC publications: bituminous membranes overview
- Sika: How to apply torch-on membrane
- Derbigum SP technical datasheet