TL;DR:
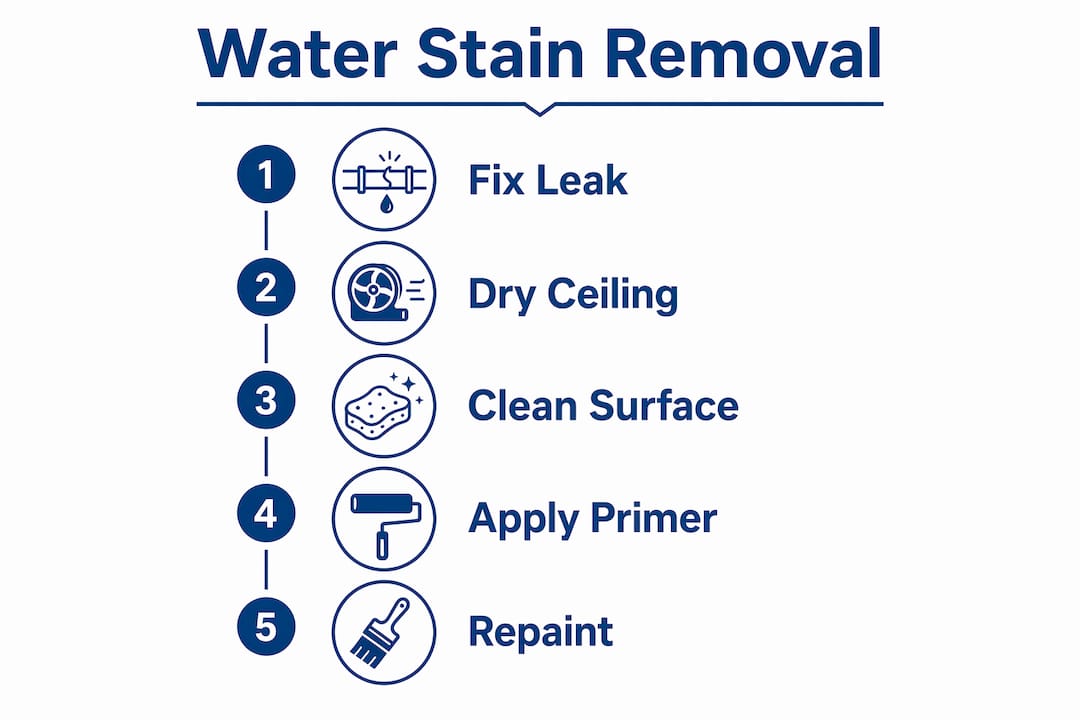
- Water stains on ceilings result from water-soluble tannins and salts that regular paint cannot hide. Effective removal requires fixing the leak, drying the surface thoroughly, and applying a stain-blocking primer to prevent reappearance. Properly addressing these steps ensures a permanent fix rather than temporary coverage.
Water stains on ceilings are caused by water-soluble tannins and mineral salts that standard paint cannot cover. Knowing how to get water stains out of the ceiling requires more than a fresh coat of emulsion. You need to fix the source, dry the surface properly, and apply a stain-blocking primer before any topcoat. Skip any of those steps and the brown ring reappears within days. This guide walks you through every stage, from tracking down the leak to achieving a finish that holds.
How to get water stains out of the ceiling: find the source first
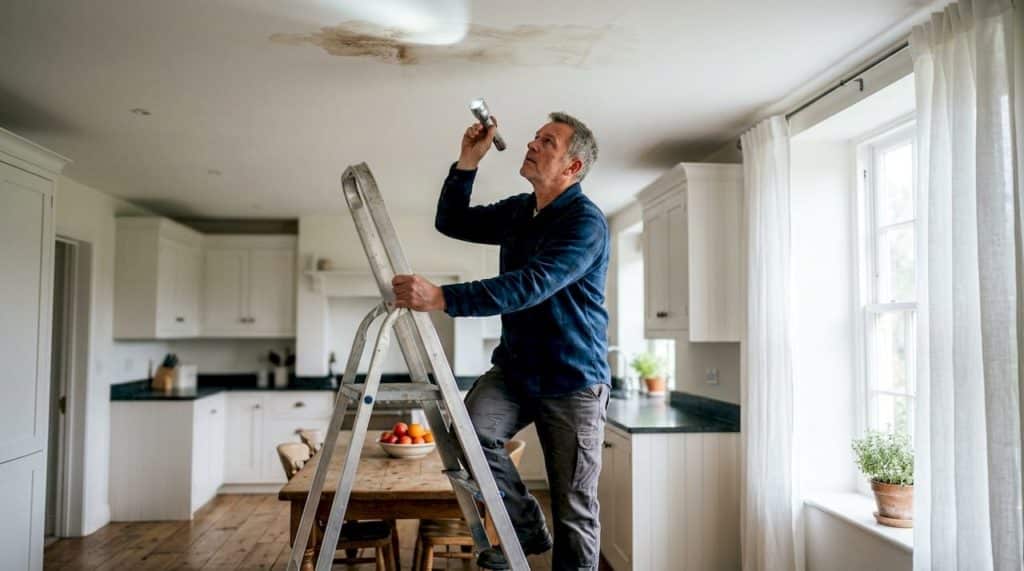
The most common mistake homeowners make is painting over a stain before fixing the leak. A ceiling stain is a moisture warning, not just a cosmetic problem. Treat it as a sign and you solve it permanently. Treat it as decoration and you repaint the same patch every few months.
Water stains spread sideways beneath the ceiling surface, which means the leak is rarely directly above the visible mark. A stain in the centre of a bedroom ceiling could originate from a plumbing joint near the wall, a cracked roof tile above the eaves, or a faulty seal around a bathroom fixture one room over.
Where to look for the leak
- Roof space or loft: Use a torch to check for damp insulation, wet timber, or daylight showing through tiles.
- Plumbing joints: Inspect waste pipes, supply lines, and compression fittings above the stained area.
- Bathrooms above: Check grout lines, bath sealant, and the base of the shower tray for cracks.
- Gutters and flashings: Blocked gutters overflow and force water under fascia boards. Damaged flashings around chimneys or skylights are a frequent culprit.
- HVAC condensate lines: A blocked condensate drain on an air-conditioning unit drips steadily and leaves a clean, round stain.
Pro Tip: Use a pinless moisture meter to scan the ceiling around the stain. It detects moisture below the surface that your hand cannot feel, helping you map how far the water has travelled.
Do not begin any cosmetic treatment until the leak is fully repaired. If you are unsure of the source, a professional roof leak inspection will locate the problem before it causes structural damage.
Why drying time matters more than most homeowners realise
Painting over a damp ceiling is the single most common reason ceiling stains reappear. Drywall requires 7–14 days to dry fully after water damage. Plaster ceilings can take up to three weeks under good ventilation. Those are minimum figures under ideal conditions. A poorly ventilated room in winter takes considerably longer.
Rushing this stage traps moisture beneath the primer. That moisture then pushes the stain back through the paint, and you are left with the same brown ring plus a layer of wasted effort.
Steps to dry the ceiling correctly
- Fix the leak first. No drying method works while water is still entering.
- Open windows and doors to create cross-ventilation through the affected room.
- Run a dehumidifier in the room for at least 48 hours after the leak is repaired.
- Position a fan to blow air directly across the ceiling surface, not just around the room.
- Test with a moisture meter. Professionals confirm dryness by checking that the ceiling reads below 1% moisture content before priming. Touch alone is unreliable because the surface can feel dry while the core remains wet.
Pro Tip: Hire or borrow a pinless moisture meter rather than guessing. A reading above 1% means the ceiling needs more time, regardless of how dry it looks or feels.
Cleaning and preparing the stained area
Once the ceiling is dry, clean the stained area before applying any primer. Surface grime, mildew residue, and dust all reduce how well primer bonds to the ceiling. A clean surface gives the primer a firm grip and produces a more even finish.
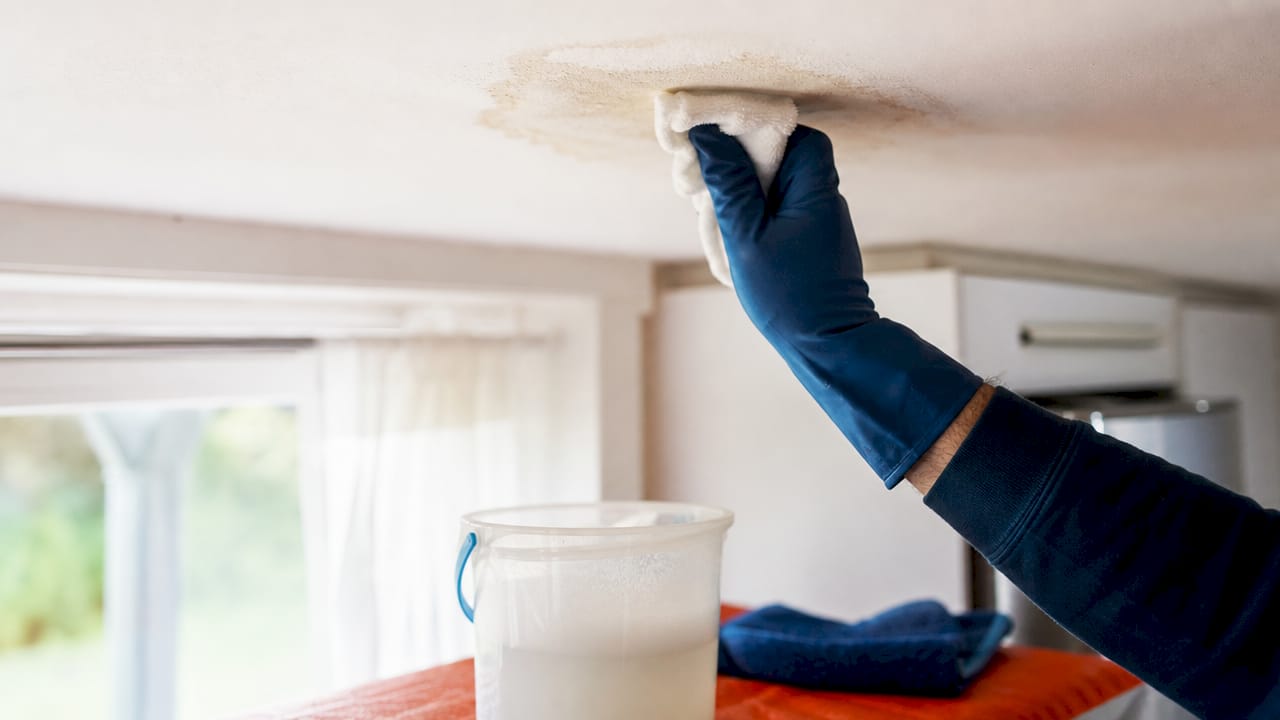
A mild detergent or vinegar-water solution removes surface dirt and light mildew effectively. Mix one part white vinegar with three parts warm water, apply with a damp cloth, and wipe gently. Do not scrub hard or saturate the area. Oversaturation re-wets the ceiling and adds drying time you have already worked to eliminate.
Key cleaning steps
- Wear eye protection and gloves when working overhead with any cleaning solution.
- Use a damp cloth, not a wet sponge. Excess liquid soaks into drywall and delays drying.
- Wipe in one direction rather than circular motions to avoid spreading mildew spores.
- Allow the cleaned area to dry completely before moving to primer. Give it at least two hours in a well-ventilated room.
Cleaning removes surface grime, but it does not remove the tannin ring itself. That brown stain is locked into the ceiling material and only a stain-blocking primer will stop it bleeding through paint. Think of the clean as preparation, not the cure.
For guidance on preventing moisture from returning after repairs, the waterproofed areas maintenance guide from Prowaterproofing covers long-term protection strategies.
Choosing and applying the right stain-blocking primer
This is the step that separates a permanent fix from a temporary cover-up. Standard latex or acrylic ceiling paints fail to block brown water stains because the tannins and mineral salts are water-soluble. A water-based paint reactivates them and they bleed straight through. You need a primer that creates a physical barrier the stain cannot penetrate.
Primer types compared
| Primer type | Stain-blocking ability | Drying time | Cleanup solvent |
|---|---|---|---|
| Water-based latex | Poor | 1–2 hours | Water |
| Oil-based alkyd | Good | 2–4 hours | White spirit |
| Shellac-based (e.g. Zinsser BIN) | Excellent | 45 minutes | Denatured alcohol |
Shellac-based primers are the professional standard for tough water stains. Zinsser BIN dries to recoat in 45 minutes, blocks the most stubborn tannin rings, and seals odours as well. The trade-off is that brushes must be cleaned with denatured alcohol or ammonia, not water. Oil-based alkyd primers are a solid second choice and are easier to clean up, but they take longer to dry and are less effective on very dark stains.
How to apply stain-blocking primer
- Stir the primer thoroughly before use. Shellac primers settle quickly.
- Apply to the stained area only. Priming the entire ceiling creates a visible sheen difference and flash-through where the primer was applied.
- Feather the edges 5–8 cm past the visible stain. Feathering the primer 2–3 inches beyond the stain edge reduces the visible repair halo after painting.
- Apply one coat. A single coat of shellac primer is sufficient for most water stains.
- Allow full drying time before topcoating. With shellac, that is 45 minutes. With oil-based primer, allow at least two hours.
Pro Tip: Decant shellac primer into a small container rather than working from the tin. It thickens quickly when exposed to air, and a smaller working volume stays usable for longer.
Repainting the ceiling after priming
Once the primer is fully dry, the ceiling is ready for its topcoat. Use a quality ceiling latex or acrylic paint in a flat or matt finish. Flat paint hides surface imperfections better than silk or satin, which is exactly what you need over a repaired area.
Apply the topcoat only to the primed area and feather it into the surrounding ceiling. Two thin coats produce a better result than one thick coat. Allow the first coat to dry fully before applying the second. Rushing between coats causes the paint to drag and leaves brush marks.
Common mistakes to avoid
- Painting over a damp primer. If the primer feels tacky, it is not ready. Wait the full drying time.
- Using the wrong sheen level. Silk or satin paint over a flat ceiling creates a visible patch even when the colour matches perfectly.
- Skipping the second coat. One coat of topcoat over primer often looks slightly different in raking light. Two coats produce a consistent finish.
- Matching old paint by eye. Ceiling white yellows over time. Buy a fresh tin and repaint a slightly larger area to blend the repair into the surrounding surface.
If the stain keeps returning after correct priming and painting, the leak has not been fully resolved. A persistent stain is a sign of ongoing water ingress, not a painting problem. Prowaterproofing’s ceiling stain repair guide covers the full process for homeowners dealing with repeat staining.
Key takeaways
Fixing ceiling water stains permanently requires leak repair, full drying, surface cleaning, shellac-based primer, and a quality topcoat applied in the correct order.
| Point | Details |
|---|---|
| Fix the leak first | Cosmetic treatment without leak repair causes the stain to return within days. |
| Allow full drying time | Drywall needs 7–14 days; plaster needs up to three weeks before priming. |
| Use a moisture meter | A pinless meter confirms the ceiling is below 1% moisture before you prime. |
| Choose shellac primer | Shellac-based primers block water-soluble tannins that latex paint cannot stop. |
| Feather primer edges | Extending primer 5–8 cm past the stain prevents visible repair halos after painting. |
What I have learned from years of watching ceiling stains come back
Eben here. The single most expensive mistake I see homeowners make is skipping straight to the paint tin. A ceiling stain is not a painting problem. It is a water problem that happens to show up as a painting problem. Every time someone calls me about a stain that keeps coming back, the story is the same: they painted over it, it looked fine for a week, then the brown ring reappeared.
The moisture meter advice is not optional. I have seen ceilings that felt bone dry to the touch but read 4% on a meter. Priming at that moisture level is pointless. The stain bleeds through and you have also created the perfect conditions for mould to grow behind the paint.
Shellac primer is worth every rand. It costs more than a water-based option, and the cleanup is messier. But one coat of Zinsser BIN over a properly dried surface stops the stain permanently. I have never had to go back to a job where shellac was used correctly. I have gone back to plenty of jobs where someone used a cheap water-based primer and hoped for the best.
The other thing I would tell you: if you cannot find the leak source yourself, do not guess. Treating the wrong area wastes time and money. A proper leak detection inspection costs far less than repairing the structural damage that builds up when a slow leak goes undetected for months.
— Eben
When a ceiling stain points to a bigger waterproofing problem
Some ceiling stains are straightforward: a loose roof tile, a cracked pipe, a failed bath sealant. Others signal deeper waterproofing failures that a coat of primer will not resolve.

Prowaterproofing provides professional leak detection, waterproofing repairs, and sealant application for residential and commercial properties across South Africa. If you have repaired the visible leak and the stain keeps returning, the problem likely lies in a failed waterproofing membrane, a compromised roof system, or rising damp working its way up through the structure. Prowaterproofing’s team uses specialist equipment to locate the true source and apply a lasting fix. Visit Prowaterproofing to request a quote and get a professional assessment before the damage spreads further.
FAQ
Why does paint keep bleeding through my ceiling stain?
Standard latex paint reactivates water-soluble tannins, causing the stain to bleed back through within hours or days. Only a shellac or oil-based stain-blocking primer creates a barrier that stops this.
How long should I wait before painting a water-damaged ceiling?
Drywall needs 7–14 days and plaster up to three weeks to dry fully. Use a pinless moisture meter to confirm the ceiling reads below 1% moisture before priming.
Can vinegar remove a ceiling water stain completely?
A vinegar-water solution cleans surface grime and light mildew but cannot remove deep tannin rings. Surface cleaning prepares the area for primer; it does not eliminate the stain itself.
What is the best primer for removing watermarks from a ceiling?
Shellac-based primers such as Zinsser BIN are the most effective option. They block tough stains, dry to recoat in 45 minutes, and outperform water-based primers on water-soluble tannin stains.
What if the ceiling stain keeps coming back after I repaint?
A recurring stain means the leak has not been fully resolved. Repaint after confirming the source is fixed, the ceiling is dry, and a stain-blocking primer has been applied. If the stain persists, seek a professional waterproofing inspection.