
Call a professional waterproofing contractor if a room in your building shows persistent damp. A site survey and moisture test will tell you whether you’re dealing with rising damp, penetrating damp, or a leak, and each of those needs a different permanent fix, such as damp-proof course (DPC) work, membrane systems, tanking, or plumbing repairs. Skip the DIY condensation tricks. Book a proper diagnosis first.
TL;DR:
- External inspections of roof, guttering, and ground levels are essential, as water ingress at these points can mimic internal damp and require different fixes.
- Proper diagnosis relies on combining moisture meter readings with contextual checks like tide marks and the location of stains, as rising damp usually doesn’t exceed one meter height.
- Fixes for damp need to match the cause, such as chemical or physical DPC reinforcements for rising damp or external membrane systems for penetrating damp, each with specific product details.
- Quotes should specify site visit confirmation, full material specifications, scope, staged payments, and warranties; vague or incomplete quotes are warning signs of potential failure.
- Ongoing maintenance practices like gutter clearing, ground regrading, and proper roof and planter upkeep are critical to prevent damp recurrence after repair.
Table of Contents
- What a professional checks: surveys, moisture testing and diagnosis
- Permanent contractor methods matched to the cause of damp
- How to read quotes and choose a contractor who will fix the problem permanently
- What to expect commercially: cost, timelines and warranty practice
- Vapour barriers and vapour diffusion control
- Indoor humidity control methods
- Impact of heating and airflow on damp reduction
- Effects of houseplants and furnishings on room dampness
- Maintenance practices to prevent recurrence of damp
- Health risks associated with indoor damp and mould growth
- DIY techniques and quick fixes to temporarily reduce room dampness
- Eben’s perspective: why correct specification and testing prevent future failures
- How Pro Waterproofing helps you get from diagnosis to a signed-off repair
- Sources
What a professional checks: surveys, moisture testing and diagnosis
A competent contractor doesn’t guess. They arrive with instruments and a method, because guessing at the cause is how homeowners end up paying twice for the same wall.
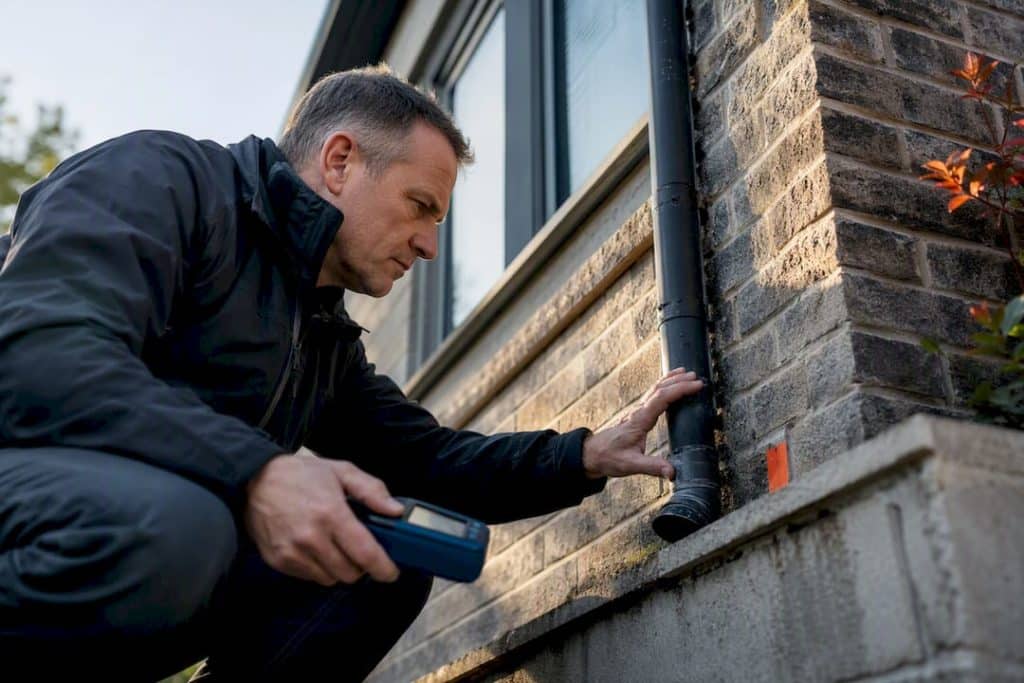
The starting point is almost always a moisture meter. Pin-type meters measure electrical resistance between two probes pushed into the surface, while non-pin (capacitance) meters scan without puncturing plaster, useful for a first pass across a large wall. Neither tool works in isolation. A skilled surveyor cross-references readings against the pattern of the damp, because a reading alone rarely tells the whole story.
Beyond the meter, expect a combination of the following:
- Infrared thermal imaging to spot cold, wet patches behind plaster that aren’t yet visible as staining.
- Salt staining assessment, since rising damp typically carries ground salts (nitrates and chlorides) that crystallise on the surface as the wall dries.
- Destructive inspection in stubborn cases, meaning a small section of plaster is broken back to inspect the masonry directly.
- Contextual checks: tide marks and their height, the wind-facing orientation of the wall, and whether staining sits near a roof valley, gutter, or pipe run.
That last point matters more than most homeowners realise. Rising damp rarely climbs higher than about a metre above floor level; a stain at shoulder height is almost never rising damp; it’s penetrating damp or a leak that just happens to be running down the same wall.
A proper survey also looks outside the room. Inspectors typically check the roof, guttering, and ground levels before settling on a diagnosis, because water entering at roof level can travel a surprising distance before it shows up on an internal wall. Moisture in a wall can also trace back to something as simple as a planter box built against the external face or ground that’s been built up above the original DPC line. A contractor who skips the outside inspection and jumps straight to a treatment quote is skipping the part of the job that actually matters.
Permanent contractor methods matched to the cause of damp
The remedy has to match the mechanism, not just the symptom. A wall that’s damp for three different reasons needs three different fixes, sometimes on the same job.
Rising damp is capillary action drawing groundwater up through masonry where the DPC has failed or was never installed. Contractors generally choose between injecting a chemical damp-proof course (a silicone or siloxane cream forced into drilled holes) and physically reinstating a DPC by cutting into the mortar course. Chemical injection is faster and less disruptive; physical DPC work tends to last longer in solid, older walls where the mortar has degraded. Either way, plaster affected by rising damp needs to be stripped and replaced to roughly the treated height, plus a margin, because salt-contaminated plaster won’t stop drawing moisture even once the source is cut off.
Penetrating damp usually comes from driving rain forcing its way through porous or cracked masonry, or from a bridged DPC where soil, paving, or render has been allowed to sit above the damp-proof line. External repairs (repointing, rendering with a breathable system) plus regrading the ground away from the wall often solve it without any interior work at all. Where the wall is genuinely exposed, an external membrane or cavity drainage detail may be needed. Sealing any DPC bridge is non-negotiable. Fix everything else and leave the bridge in place, and the damp returns within a season.
Roof and plumbing leaks need the correct membrane for the application: torch-on bituminous felt, polyolefin sheeting, or liquid-applied systems, each with its own detailing requirements around flashings, upstands, and laps. A national standard sets out lap widths, jointing methods, and reinforcement at corners because a membrane is only as good as its weakest joint. Plumbing leaks should be repaired immediately; delaying “until the waterproofing is done” almost always means redoing the waterproofing too.
Basements and hydrostatic pressure call for a different order of solution entirely: external tanking, internal cavity drain membranes paired with a sump and pump system, and water stops built into construction joints. Standards generally treat two layers of bituminous felt or a compliant polyolefin sheet as minimum specification for pressure-resisting membranes, because a single layer with no redundancy fails the moment one pinhole appears. This is a good moment to read up on stopping hydrostatic pressure without excavation if the room in question sits below ground.
Pro Tip: Ask for the membrane’s product datasheet, not just its trade name. “Torch-on membrane” tells you almost nothing; a proper spec names the brand, the thickness in millimetres, and the reinforcement type.
How to read quotes and choose a contractor who will fix the problem permanently
A quote is where good intentions either survive contact with paperwork or fall apart. Here’s what has to be in it before you sign anything:
- Confirmation of an actual site visit, not a price generated from a phone description of “damp patch on the wall.”
- Full material specification: brand, product name, thickness, and number of coats or layers, not a generic system name.
- A defined scope of works with exclusions, so you know exactly what isn’t included, such as replastering or gutter repairs.
- A staged payment schedule tied to progress, plus stated curing and drying times before redecoration begins.
- Written warranty terms, covering both workmanship and the material manufacturer separately.
On trust checks: look for manufacturer approvals, compliance references to the relevant national waterproofing standard, proof of insurance, and contactable references from similar jobs. For wet areas especially, insist on flood testing or a follow-up moisture recheck once the work is done, rather than taking the contractor’s word that it’s dry.
One figure worth knowing: quotes that list only a system type with no brand, thickness, or reinforcement detail are considered insufficient by industry checklists, and that vagueness is one of the most common precursors to a failed job. If a quote reads like a single sentence, ask for the datasheet before you ask for the discount.
Red flags worth walking away from: no site visit, a deposit north of half the contract value, vague phrases like “waterproof coating” with nothing else specified, and any reluctance to put warranty terms in writing. At the survey stage, ask directly what caused the damp, what evidence supports that diagnosis, and what happens if the problem recurs within the warranty period.
What to expect commercially: cost, timelines and warranty practice
Cost swings on a handful of factors: how complex the diagnosis turned out to be, how accessible the affected area is (a basement wall costs more to reach than an internal partition), the material chosen, and the total treated area. The cheapest quote on the table is usually the one that’s cut a corner somewhere, whether that’s material thickness, surface preparation, or the number of coats specified.
Timelines vary by cause. A chemical DPC injection with replastering might run a few days to a week; basement tanking with a sump and pump installed can take considerably longer once excavation and curing are factored in. Drying time before redecoration is not optional; painting over a wall that’s still releasing moisture just traps it behind fresh paint and starts the cycle again.
Warranty practice generally splits into two documents:
- Workmanship warranties, typically running 5 to 10 years, covering the installation itself.
- Manufacturer material warranties, often longer, sometimes 10 to 20 years, covering the product independently of who installed it.
Get both in writing, along with the exact process for making a claim if something fails.
Vapour barriers and vapour diffusion control
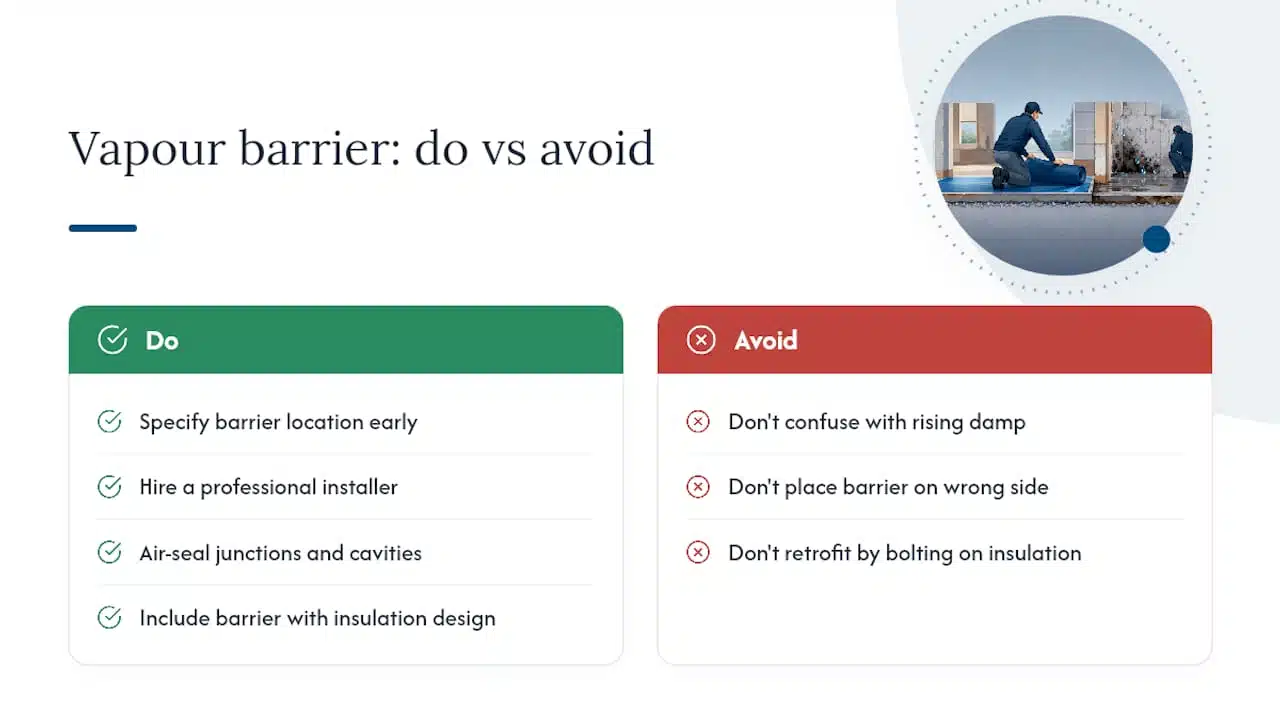
A vapour barrier stops moisture-laden air from migrating through a wall or ceiling assembly and condensing where it hits a cold surface, inside a cavity, for instance. This is a different mechanism from rising or penetrating damp, and it’s often confused with both.
Vapour diffusion happens because warm, humid air holds more moisture than cold air. When that air moves through a wall build-up and reaches a colder layer, it can condense as liquid water, quietly, inside the structure, long before anyone notices a stain. National standards specify where in a wall or roof assembly a vapour barrier belongs relative to the insulation, because placing it on the wrong side can trap moisture rather than exclude it. This is a genuinely easy detail to get wrong, and it’s one reason a professional installer, rather than a general contractor bolting on insulation as an afterthought, matters here.
Interstitial condensation, moisture forming inside a wall cavity rather than on a visible surface, connects directly to how well a building’s envelope is sealed and insulated through proper air sealing for HVAC efficiency. Poor sealing around junctions, where air leakage undermines both energy efficiency and moisture control, lets warm, wet air find its way into cold cavities it should never reach. Fixing a vapour barrier problem after the fact usually means opening up the wall, which is exactly why it needs to be specified correctly the first time a room is built or renovated.
Indoor humidity control methods
Once the structural fault is fixed, indoor humidity still needs managing, particularly while a treated wall is drying out. A dehumidifier pulls moisture from the air and is genuinely useful in the weeks after remedial work, when a wall that’s just been injected or tanked is still releasing residual water vapour into the room.
Ventilation does similar work by different means: it exchanges damp indoor air for drier outdoor air, rather than extracting moisture directly. Extractor fans in bathrooms and kitchens, trickle vents in window frames, and simply opening windows for short periods after cooking or showering all reduce the ambient moisture load a room has to cope with.
Neither of these measures fixes a structural problem. A dehumidifier running permanently in a room with rising damp is treating a symptom while the cause keeps pumping moisture into the wall. Where a contractor has confirmed the structural fault is resolved, humidity control becomes a maintenance tool rather than a workaround, useful for keeping a freshly treated room comfortable while plaster and paint fully cure.
Impact of heating and airflow on damp reduction
Warm air holds more moisture without condensing, which is why a consistently heated room tends to show less visible damp than a cold one, even with identical humidity levels. Cold spots, an external corner, a wall behind a wardrobe, a north-facing bedroom, are where warm humid air hits a cold surface and drops its moisture as condensation.
Airflow matters just as much as heat. A room with no air movement lets moisture settle in still pockets: behind furniture pushed hard against an external wall, in unused cupboards, in corners with no direct airflow from a window or door. Gentle, consistent air movement across a surface helps keep it slightly warmer and drier than a completely still pocket of air would.
None of this substitutes for fixing a structural cause. Heating and airflow adjustments genuinely help manage humidity in a room where the building envelope is sound, but they can’t stop groundwater rising through a wall with a failed DPC, or rain forcing its way through a cracked render. Where a room has been professionally treated for rising or penetrating damp, keeping it modestly heated and reasonably ventilated afterwards does help the treated area dry evenly and stay dry, which is a sensible habit rather than a remedy in its own right.
Effects of houseplants and furnishings on room dampness
Houseplants release moisture through transpiration, and a room packed with them adds a small but real humidity load to the air, particularly in a poorly ventilated space. It’s rarely significant enough to cause damp on its own, but in a room already struggling with excess moisture, a dense collection of plants isn’t helping.
Furnishings matter more than most people expect. Wardrobes, bookcases, and sofas pushed flush against an external wall block airflow and trap a pocket of still, cool air between the furniture and the wall, exactly the conditions condensation prefers. Leaving even a small gap, a few centimetres, between furniture and an external wall lets air circulate and stops that pocket forming.
Soft furnishings and carpets also absorb and hold moisture, which is one reason a room with a genuine damp problem often smells musty even when the wall itself looks dry to the eye. Curtains hung against a damp or condensation-prone window can trap moist air behind the fabric, and thick carpet laid directly onto a floor with rising damp beneath it will hold that dampness far longer than a bare, sealed floor would. None of this causes structural damp, but it can mask early signs of it and make a genuine problem harder to spot until it’s advanced.
Maintenance practices to prevent recurrence of damp
Most damp that returns after a professional repair returns because ongoing maintenance was neglected, not because the original work was faulty. Guttering is the biggest offender: a blocked or overflowing gutter dumps water straight down an external wall exactly where it can find its way into masonry, undoing a perfectly good repointing job within a year or two.
A short seasonal checklist keeps most of this at bay:
- Clear gutters and downpipes at least twice a year, more often near overhanging trees.
- Check that ground levels and paving still slope away from the building; ground rises over time as garden beds are topped up and paving is relaid, quietly bridging a DPC that was fine when the house was built.
- Inspect roof flashings and pointing annually, particularly after a harsh winter.
- Keep planters and dense shrubs a reasonable distance from external walls; a planter built directly against a wall is a recurring cause of penetrating damp.
A physical damp-proof course reinstatement or membrane installation is a permanent fix for the mechanism it addresses, but it doesn’t make a building maintenance-free. Treat the repair as the reset point, then keep the basics up so the same fault doesn’t quietly rebuild itself over the following decade.
Health risks associated with indoor damp and mould growth
Persistent damp creates the exact conditions mould needs: moisture, organic material to feed on (plaster, wallpaper paste, wood), and still air. Once mould establishes on a damp wall, it releases spores into the room air continuously, and those spores are the primary health concern, not the visible staining itself.
Respiratory irritation is the most common complaint: coughing, wheezing, and aggravated asthma symptoms in people who already have a sensitivity. Prolonged exposure in a poorly ventilated, consistently damp room can worsen allergic reactions and, in people with compromised respiratory conditions, contribute to more serious breathing difficulties. Children and older residents tend to feel the effects first and most severely.
There’s also a structural health angle that gets less attention: damp timber, in floor joists, skirting boards, or roof structures, is vulnerable to wood-rotting fungi and, in the right conditions, wood-boring insects. That’s a building problem as much as a health one, but it starts with the same unresolved moisture source. Painting over a mould patch without addressing the damp behind it doesn’t remove the spore source; it just hides it until the paint fails again, usually within a season.
DIY techniques and quick fixes to temporarily reduce room dampness
While waiting for a contractor’s site visit, or in the weeks after remedial work while a wall dries, a few temporary measures genuinely help without masking the underlying problem.
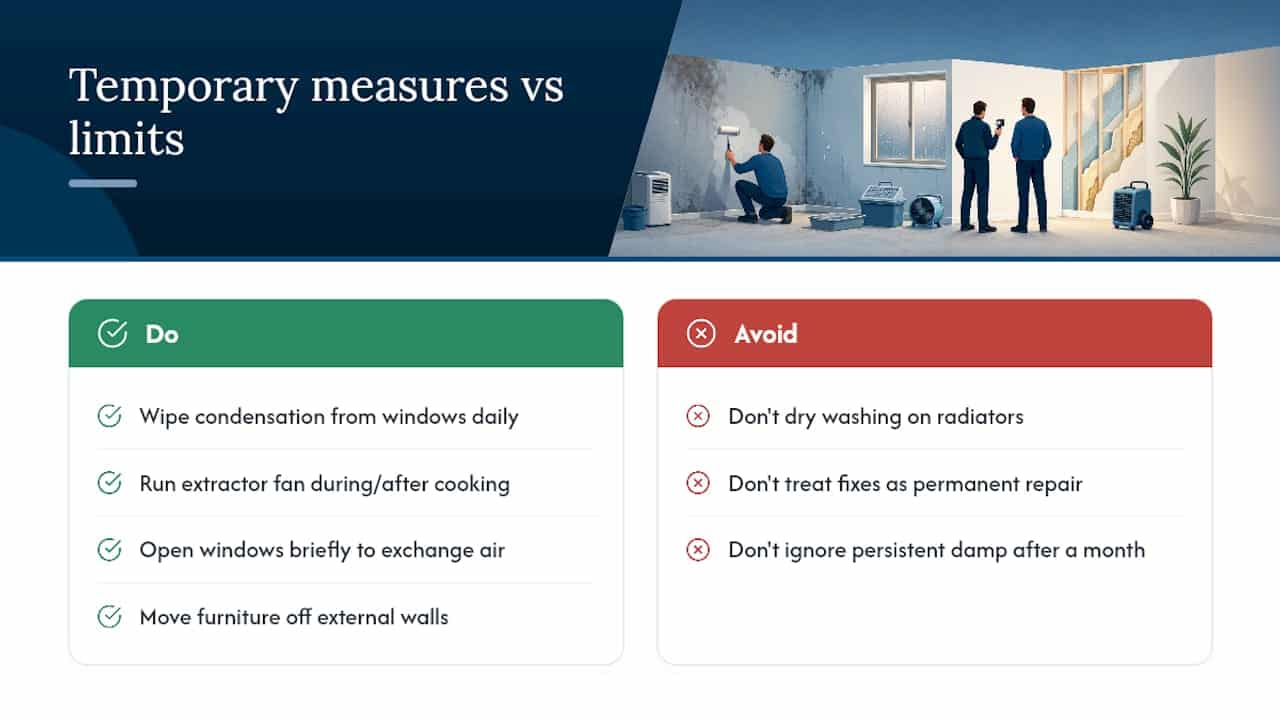
Wiping down condensation from windows and cold surfaces each morning stops that moisture soaking into surrounding plaster or timber frames. Running an extractor fan during and after cooking or showering removes moisture at the source before it spreads through the room. Opening windows briefly, even in cold weather, exchanges saturated indoor air for drier outdoor air far more effectively than leaving them shut all day.
Moving furniture a few centimetres away from external walls restores airflow to a cold spot that’s otherwise trapping moisture unseen. Avoiding drying wet washing on radiators or airers inside a room with existing damp keeps you from adding more moisture to air that’s already struggling to lose what it has.
None of these fixes address a failed DPC, a bridged damp course, or a slow roof leak. They buy time and comfort, and they’re genuinely worth doing, but they’re a holding pattern, not a repair. If the same wall is still damp a month after you’ve been doing all of the above consistently, that’s the signal the cause is structural, and it’s time for a proper diagnostic survey rather than another tube of anti-condensation paint.
Eben’s perspective: why correct specification and testing prevent future failures
Most damp “repairs” that fail within two years weren’t badly executed, they were badly specified. Someone painted over a symptom instead of treating the mechanism, and the wall did exactly what it was always going to do.
My advice is blunt: insist on photographs of the work at each stage, the actual material datasheets rather than a system name on an invoice, a signed completion certificate, and a moisture recheck weeks after the work, not just on the day the crew packs up. A contractor confident in their work has no reason to refuse any of that.
— Eben
How Pro Waterproofing helps you get from diagnosis to a signed-off repair
There are services that cover the full sequence, site survey, material specification, installation, and post-work testing, so you’re not stitching together separate contractors for diagnosis and repair. Quotes can include full material and warranty details on request, so you know precisely what’s being installed and for how long it’s covered.

Here’s what the process looks like in practice:
| Stage | What happens |
|---|---|
| Survey | Site visit, moisture testing, cause identified |
| Quote | Full material spec, scope, staged payments |
| Works | Remedial treatment installed to spec |
| Testing | Moisture recheck or flood test where relevant |
| Sign-off | Written warranty terms and completion documentation |
If a room in your property has been damp for longer than a season, get in touch with Pro Waterproofing and arrange a site survey. It’s the single step that turns guesswork into a permanent fix.
Sources
- South African national standard: The waterproofing of buildings (including damp‑proofing and vapour barrier installation)
- Don’t Hire a Waterproofing Contractor Without Reading This: The Ultimate Checklist | ServiceLink SA
- Roof inspections: What should the home inspector check? | HouseCheck