
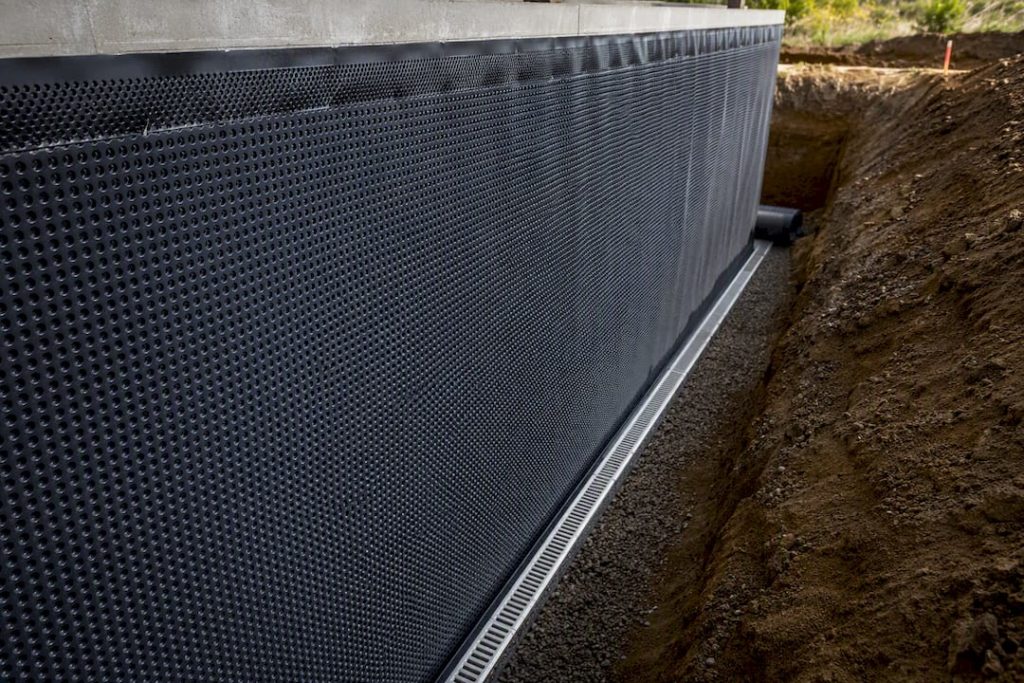
A drainage board is a prefabricated dimpled panel, usually HDPE or polypropylene, fixed over a waterproofing membrane to channel groundwater or roof water away from a structure. Its job is to relieve hydrostatic pressure before it ever reaches the membrane. It is a support layer within a waterproofing system, never a replacement for the membrane itself.
TL;DR:
- Proper orientation of the drainage board is crucial; reversing the dimpled side can trap moisture and cause failure.
- Heavy-duty commercial boards must have verified high compressive strength ratings to withstand backfilling loads and prevent damage.
- Integration of geotextile filters is essential to prevent soil fines from clogging the channels and compromising long-term performance.
- Lifespan largely depends on correct installation, with properly protected HDPE boards potentially lasting the life of the structure.
- A site appraisal before selection and installation helps avoid costly mistakes and ensures the system is tailored to actual conditions.
Table of Contents
- Where drainage boards get used: foundations, basements, roofs and podiums
- How a drainage board actually moves water away from a wall
- HDPE, recycled polypropylene and the retention boards built for green roofs
- Getting installation right: a short checklist and the mistakes that ruin it
- What a properly installed board actually achieves
- How long a drainage board lasts and what failure looks like
- Specifying drainage boards on real projects: Prowaterproofing’s view
- Get a proper site appraisal before you buy a single board
- Where to check the technical detail yourself
- Sources
Where drainage boards get used: foundations, basements, roofs and podiums
Below-grade foundation walls and retaining walls are the classic application. Water builds up against a basement wall after rain, and without somewhere to go, it pushes straight against the waterproofing membrane. A dimpled board fixed over that membrane gives the water a channel down to a footing drain instead of a wall to press against.
Roof applications work differently but solve a related problem. Inverted roof assemblies, green roofs and podium decks all sit water on top of a membrane rather than against it, so the board needs to manage standing water and, in planted systems, hold some of it back for root uptake. That’s why green roof boards and foundation boards, though they look similar, are specified against different criteria.
Specification also shifts with project scale:
- Domestic basement jobs typically use lighter-duty dimple sheet with a bonded filter fleece.
- Light commercial foundations call for boards with higher compressive ratings to survive backfilling equipment.
- Heavy commercial and podium work needs products tested under load with documented storage and compressive figures, not just a manufacturer’s marketing claim.
How a drainage board actually moves water away from a wall
The dimples are the whole mechanism. Pressed into the panel in a grid, they hold the flat back face away from the wall or membrane, creating a continuous air gap and channel network across the entire surface. Water hitting the board runs down through that gap under gravity rather than sitting against the structure, which is precisely what cuts hydrostatic pressure at the wall face.
Foundation boards and green roof boards use the dimples for different purposes: foundation boards are built purely to drain, while green roof cups are shaped to retain a limited volume of water for the plants above, which is why the two product families differ in profile design even though both look like dimpled sheet from a distance.
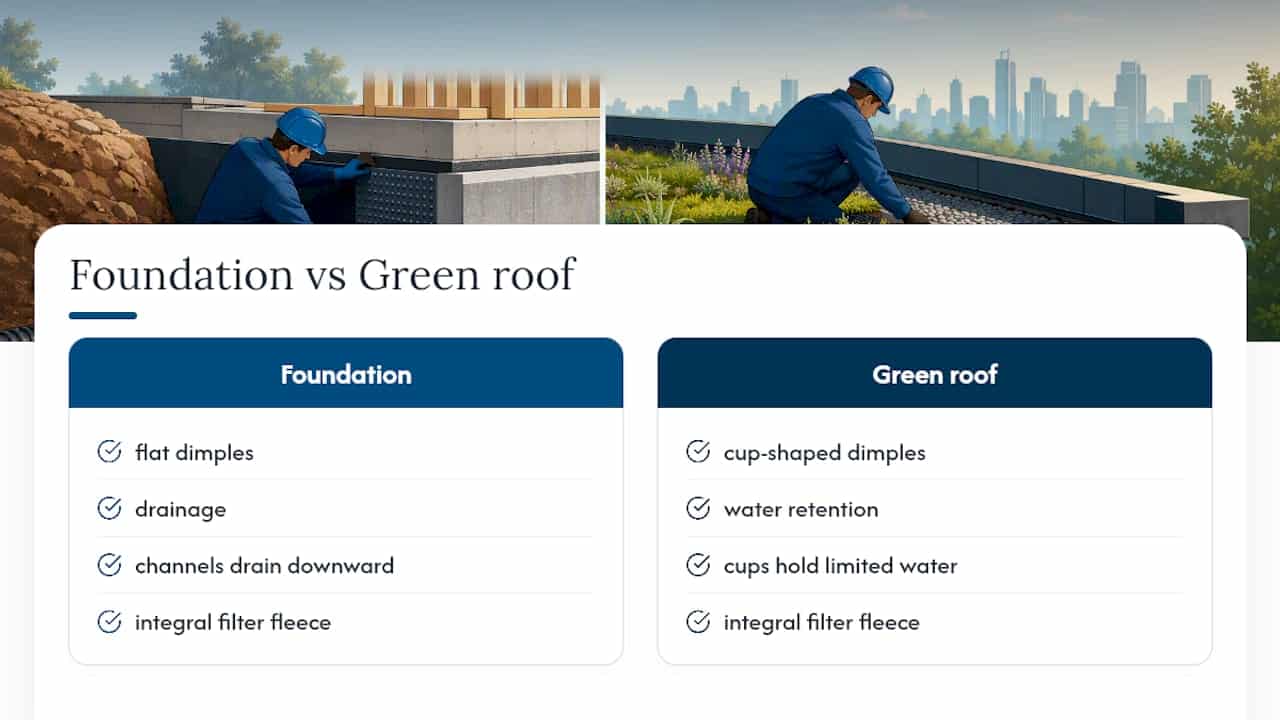
Most boards ship with an integral or bonded geotextile filter fleece on the soil-facing side. That fleece stops fine soil particles migrating into the dimple channels and silting them up over time, which is the single biggest threat to a board’s long-term performance. The channelled water eventually needs somewhere real to go: a perimeter footing drain, a sump pump, or a storm discharge point. A drainage board without a functioning outlet just moves the water problem a few centimetres, rather than solving it.
HDPE, recycled polypropylene and the retention boards built for green roofs
Most structural drainage boards are moulded from HDPE or recycled polypropylene, chosen because both resist the moisture and soil chemistry they’ll sit in for decades. Compressive strength is the number worth checking before anything else. Heavy-duty commercial boards can report high compressive strength values, while lighter domestic products sit well below that, which matters when a board will carry compacted backfill or vehicle loading above it.
Beyond the standard dimpled sheet, three variants come up repeatedly on real projects:
- Perforated retention boards for green roofs, which store water for planting while still draining excess; one roof drainage layer reports storage capacity around 8.7 litres per square metre with high compressive resistance once filled.
- Insulation-integrated boards with an EPS core, which combine drainage with thermal protection for the damp proofing beneath, useful where insulated foundation systems are already specified.
- Protection and drainage combination boards, built with channel systems for inverted roof and non-pitch applications where the board does double duty as both drainage and membrane guard.
Getting installation right: a short checklist and the mistakes that ruin it
Orientation decides whether a board works at all. On foundation walls, the dimpled face generally goes towards the structure or backfill side depending on the system, and getting this reversed is one of the most common causes of drainage board failure, trapping moisture instead of channelling it away. In ICF or foam block foundation work, installers often lay the flat side against the insulation with the fabric facing outward towards backfill, which prevents the board cutting into the foam.
A practical sequence for getting it right:
- Confirm the manufacturer’s stated orientation for the specific product and application before fixing anything.
- Fix boards at the recommended interval, using mechanical fasteners suited to the substrate. A waterproof fixing designed for membrane and board attachment avoids the pull-through failures that plain nails cause.
- Overlap adjoining sheets according to the datasheet, typically with the fleece lapping over the joint to keep soil fines out.
- Protect the board face during backfilling, since sharp aggregate can puncture both the board and the membrane beneath it.
The two mistakes that come up again and again on site: treating the drainage board as if it were the waterproofing membrane itself, and backfilling carelessly enough that the fleece clogs with fines before the building is even finished settling.
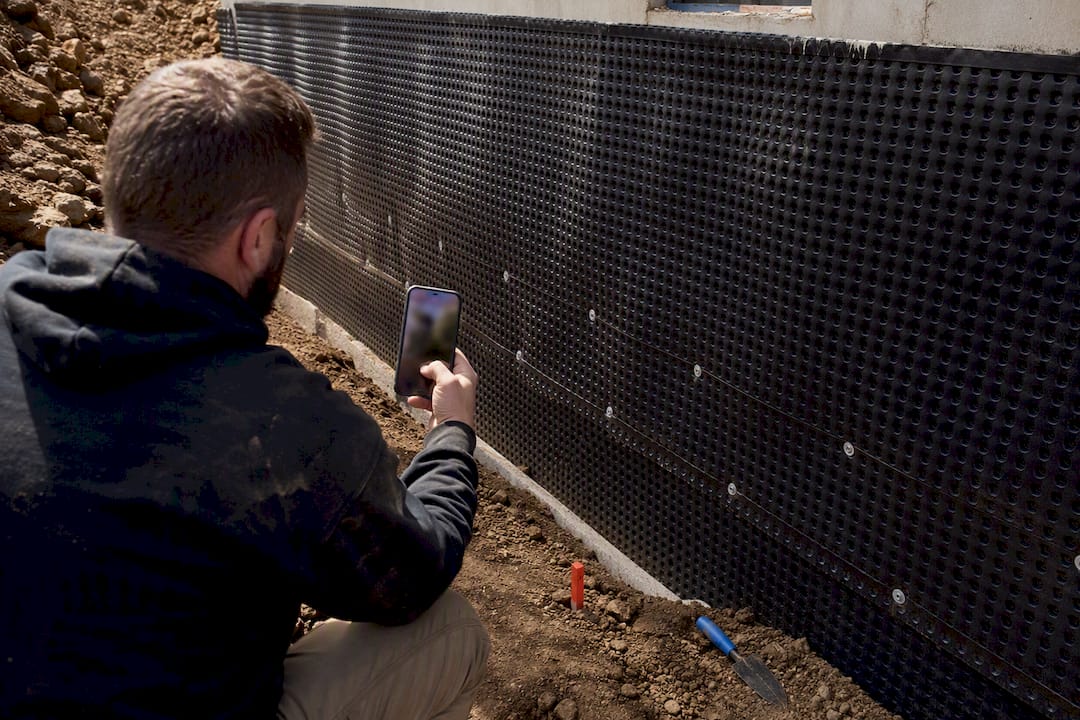
Pro Tip: Photograph every board run before backfilling starts. If a leak shows up two years later, that record is the fastest way to work out whether the fault sits in the membrane, the board, or the backfill practice.
What a properly installed board actually achieves
The core benefit is straightforward: less water sitting against the wall means less hydrostatic pressure pushing into the membrane and, eventually, into the building. That alone is why drainage boards appear on nearly every below-grade waterproofing specification.
The numbers back this up on paper. Retention-style roof boards can report storage capacity near 8.7 litres per square metre alongside compressive resistance exceeding 280 kN/m² once filled, figures worth checking against the actual loading a podium or trafficked roof will see. Boards also earn their place mechanically during construction: acting as a sacrificial layer that takes the impact of falling stone and debris during backfilling, sparing the membrane underneath.
How long a drainage board lasts and what failure looks like
Lifespan depends on material, chemical exposure in the surrounding soil, loading, and how carefully the board went in. HDPE boards installed correctly and protected during backfill can last the life of the structure; boards installed with reversed orientation or crushed by careless compaction can fail within a few years.
Watch for three signs during any inspection: fleece that’s visibly clogged or torn, persistent damp or efflorescence on the interior wall face suggesting the board isn’t channelling water at all, and physical crushing where loading exceeded the board’s compressive rating. Record the date, location and photo evidence of each finding. A maintenance log built this way turns a vague “damp problem” into a specific fault you can actually trace and fix.
Specifying drainage boards on real projects: Prowaterproofing’s view
A drainage board is not specified by default. Site conditions decide it: groundwater level, soil type, whether the structure will see future excavation access, and how the board interfaces with the footing drain already on the drawings. A board bolted onto a system that has no functioning outlet is wasted material.
That system-first thinking runs through Prowaterproofing’s approach to hydrostatic pressure control in basements and the broader question of how drainage protects a property long-term, where the board is one component among several, not the entire answer.
— Eben
Get a proper site appraisal before you buy a single board
Choosing the wrong drainage board, or installing the right one with the wrong orientation, is a far more expensive mistake than paying for a proper appraisal upfront. A site inspection to assess actual conditions, groundwater behaviour and existing drainage is recommended before system recommendation, rather than guessing from a floor plan.

If you’re preparing for a quote, have a few things ready: photos of the affected wall or roof area, any existing drawings showing footing drains or outlets, and notes on when dampness or standing water tends to appear. That’s enough for a proper specification conversation rather than a rough guess over the phone. Get in touch through Prowaterproofing to arrange a site appraisal and a written quote before your next basement, roof or podium waterproofing project moves forward.
Where to check the technical detail yourself
For compressive strength and storage capacity figures, go to the manufacturer’s own datasheet rather than a summary. Installation guidance on filter fabric and correct orientation is covered in the footing drain reference above, and Prowaterproofing’s basement drainage system guide covers how boards connect to sump and discharge arrangements.
Sources
- What Is a Drainage Board and How Does a Drainage Board System Work in Construction Projects?
- SikaRoof® Drainage Layer 40 UK technical data
- Drainage boards and footing drains | WATERPROOF! Magazine