
TL;DR:
- Proper waterproofing is essential to stop basement wall leaks caused by hydrostatic pressure from groundwater pushing against the foundation. Damp proofing resists vapor but fails under water pressure, leading to repeated leaks, so experts recommend membrane-based solutions like tanking slurry, external membranes, or interior drainage systems. Diagnosing water sources and external drainage issues before treatment ensures long-lasting repair, as incorrect fixes or reliance on waterproof paint often result in failure.
Proper waterproofing is the only reliable method to stop basement walls from leaking when liquid water is pushing through under pressure. Damp proofing, the treatment most homeowners reach for first, resists moisture vapour but cannot hold back water driven by hydrostatic pressure. Hydrostatic pressure builds when saturated soil presses groundwater against your basement walls with considerable force. Understanding this distinction is the foundation of every effective basement water leak repair, and getting it wrong means the problem returns within months.
How to stop basement walls from leaking: causes and why damp proofing fails
Hydrostatic pressure is the primary cause of basement wall leaks. When rain saturates the soil around your foundation, water accumulates and pushes outward against the wall surface. Concrete and masonry are porous materials. They absorb that pressurised water and eventually allow it through as active seepage or full leaks.
Damp proofing includes bitumen coatings and plastic sheeting applied above ground level to resist vapour. These products are not designed to withstand liquid water under pressure. Applying them to a leaking basement wall is like using a raincoat to stop a burst pipe.
“Waterproofing experts highlight the critical error of treating basement leaks with damp proofing alone, stressing the necessity of waterproofing membranes capable of handling positive and negative water pressure sides.”
Two distinct problems often get confused here. Rising damp travels upward through capillary action in masonry and responds to a chemical damp proof course injection. Basement wall leaks caused by hydrostatic pressure require a fundamentally different treatment. Confusing the two leads to repeated failures and wasted money.
Key signs that hydrostatic pressure is your problem:
- Active water trickling or pooling at the base of the wall or at the cove joint (where wall meets floor)
- White chalky deposits (efflorescence) on the wall surface caused by mineral salts carried by water
- Bowing or cracking in the wall structure under soil pressure
- Damp patches that worsen after heavy rainfall or seasonal groundwater rises
What waterproofing methods actually work for basement walls?
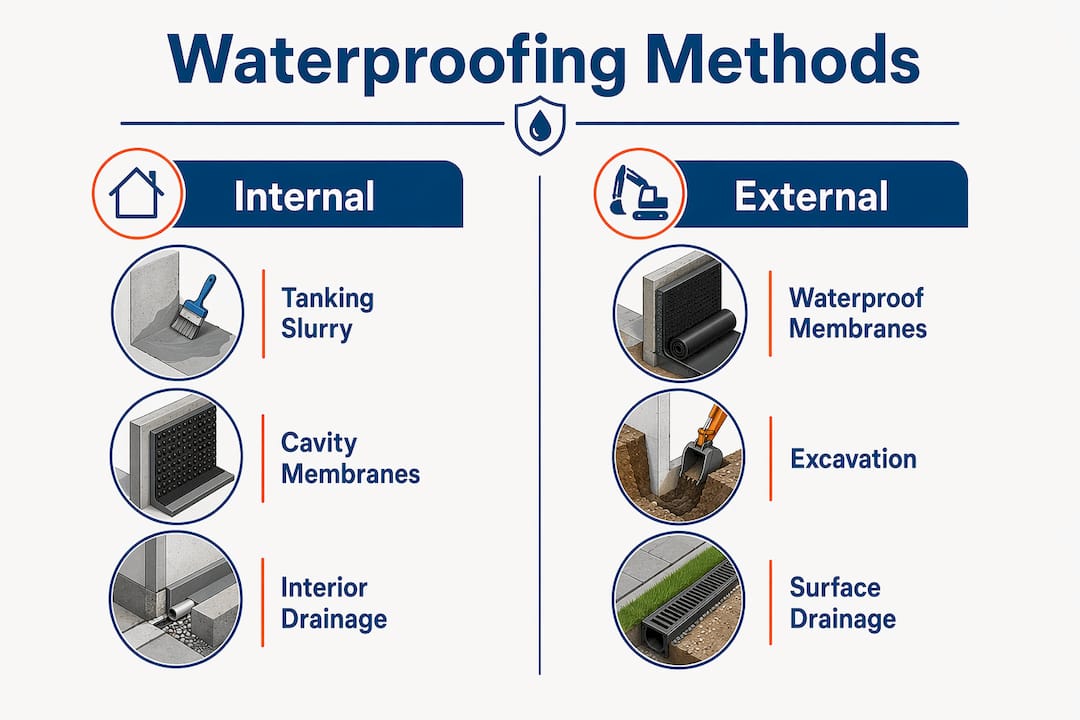
Basements with active water leaks require an integrated approach, not a single product. The right method depends on whether you treat the wall from the outside, the inside, or both.
Tanking slurry
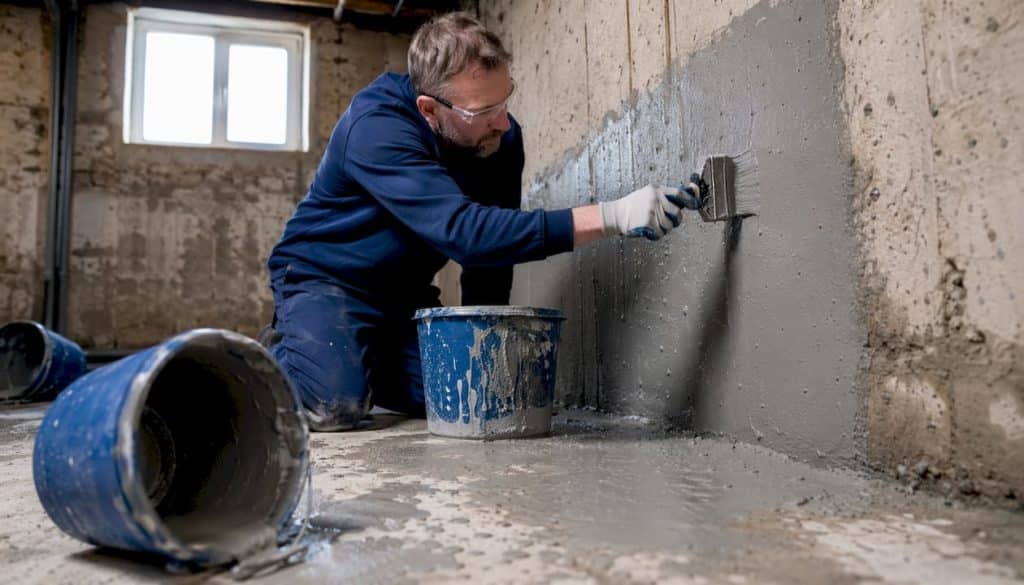
Tanking slurry is a cementitious waterproofing coating brushed or sprayed directly onto masonry. It bonds to the substrate and resists moderate hydrostatic pressure from either side. Tanking slurry suits low to moderate groundwater conditions and works on both internal and external wall faces. It is one of the most widely used methods in South African residential basements.
Cavity drain membranes
A cavity drain membrane is a studded plastic sheet fixed to the internal wall face. It does not block water. Instead, it channels water that penetrates the wall down into a perimeter drain and then to a sump pump. This system manages hydrostatic pressure rather than resisting it outright. It is particularly effective where excavating the external wall is impractical.
External waterproofing membranes
External membranes stop water at the source before it contacts the wall. External basement waterproofing is the most thorough solution where hydrostatic pressure is significant. It requires excavating around the foundation, applying a membrane or crystalline system to the outer wall face, and installing drainage board to direct water away. The cost and disruption are higher, but the protection is superior.
Interior drainage systems
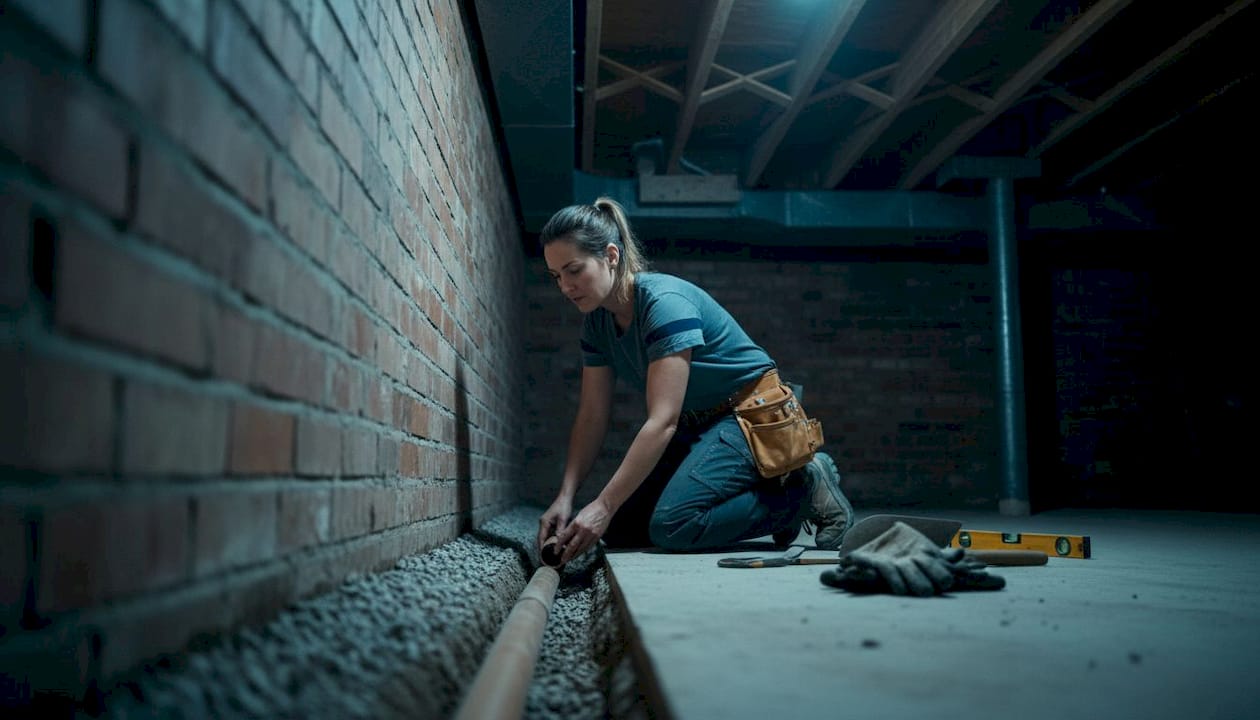
Interior drainage systems such as a French drain combined with a sump pump are necessary when surface treatments cannot resist continuous groundwater pressure. The French drain collects water at the base of the wall and channels it to the sump, which pumps it away from the property. This is the standard professional solution for severe or persistent basement leaks. You can read more about choosing between these options in this basement drainage comparison.
| Method | Application | Best suited for |
|---|---|---|
| Tanking slurry | Internal or external wall face | Low to moderate hydrostatic pressure |
| Cavity drain membrane | Internal wall face | Where excavation is not possible |
| External membrane | Outside of foundation wall | High hydrostatic pressure, new builds or major renovations |
| Interior French drain + sump | Below floor perimeter | Severe or persistent active leaks |
| Waterproof paint | Surface only | Vapour resistance only, not active leaks |
Pro Tip: Waterproof paint cannot resist hydrostatic pressure. Never rely on masonry paint as your primary waterproofing layer in a basement with active seepage.
Step-by-step process for waterproofing basement walls
A correct application process is as important as the right product. Skipping preparation steps is the single most common reason waterproofing fails within the first year.
-
Diagnose the moisture source. Tape a piece of plastic sheeting to the damp wall and seal all edges. Leave it for 24 hours. If moisture collects on the wall side of the plastic, water is penetrating from outside. If moisture collects on the room side, you have a condensation problem, not a structural leak.
-
Fix external drainage issues first. Check that gutters and downpipes discharge water well away from the foundation. Confirm that the ground slopes away from the building. Redirecting surface water reduces the hydrostatic load on your walls before any treatment begins.
-
Test for hygroscopic salts. Salt contamination is a hidden cause of ongoing damp even after treatment. Use a moisture meter and a salt test kit. If salts are present, remove all contaminated plaster before applying any waterproofing system.
-
Prepare the wall surface. Hack off loose render and plaster. Clean the wall with a wire brush to remove efflorescence. Fill cracks and honeycombed concrete with a hydraulic repair mortar. The surface must be structurally sound before any membrane or coating goes on.
-
Apply the chosen waterproofing system. Follow the manufacturer’s specification exactly, including primer coats, application thickness, and curing times. For tanking slurry, apply a minimum of two coats in opposing directions. For cavity drain membranes, fix the studded sheet securely and connect it to a perimeter channel.
-
Install or upgrade drainage. Connect perimeter channels to a correctly sized sump pump. Test the pump under load before closing up the floor. A pump that fails during a storm undoes every other step.
-
Re-plaster with salt-resistant render. After waterproofing, use a sand and cement render mixed with a waterproofing additive. Standard plaster will absorb residual salts and show damp patches again within months.
Pro Tip: Always read the basement waterproofing methods guide for South African conditions before specifying a system. Local soil types and seasonal rainfall patterns affect which method performs best.
Common mistakes that cause waterproofing to fail
Most basement waterproofing failures trace back to a short list of avoidable errors. Recognising them before you start saves significant time and money.
- Treating a hydrostatic leak with damp proofing products. Damp proofing resists vapour but cannot stop liquid water under pressure. This is the most expensive mistake homeowners make.
- Skipping the salt test. Hygroscopic salts left in old plaster attract moisture from the air. Your new waterproofing system will appear to fail even when it is working correctly.
- Ignoring external water management. A blocked gutter or poorly graded garden bed can direct thousands of litres of water against your foundation every year. No internal system compensates for that volume indefinitely.
- Applying waterproofing to a wet or contaminated surface. Coatings and membranes need a clean, dry, and sound substrate to bond correctly. Rushing this step causes delamination within months.
- Relying on waterproof paint as a standalone fix. Paint provides surface protection only. It peels under hydrostatic pressure and gives a false sense of security.
When troubleshooting a recurring leak, check these warning signals first: new cracks appearing near previous repairs, efflorescence returning after replastering, and water appearing at the cove joint after rainfall. Any of these signals indicate that the underlying pressure has not been managed. At that point, professional assessment is the correct next step. Prowaterproofing recommends a full moisture survey before specifying any remedial system. You can also find practical guidance on stopping water seepage through basement walls in this dedicated article.
Key takeaways
Stopping basement wall leaks requires waterproofing systems designed to resist hydrostatic pressure, not damp proofing products intended for above-ground vapour control.
| Point | Details |
|---|---|
| Damp proofing is not waterproofing | Damp proofing resists vapour only; it cannot stop liquid water under hydrostatic pressure. |
| Diagnose before treating | Test for moisture source, salt contamination, and external drainage issues before applying any system. |
| Match the method to the pressure | Tanking slurry suits moderate pressure; cavity drains and sump systems suit severe or persistent leaks. |
| Salt removal is non-negotiable | Replace contaminated plaster with salt-resistant render after waterproofing to prevent recurring damp. |
| Integrated solutions last longest | Combining drainage improvement, waterproof coating, and membrane systems provides the most durable protection. |
Why I always say: diagnose first, treat second
After years of working with property owners across South Africa, the pattern I see most often is this: someone spends money on a product, applies it themselves, and the leak returns within one wet season. The product is rarely the problem. The diagnosis is.
Homeowners understandably reach for the quickest fix. Waterproof paint is cheap and available at every hardware store. But paint cannot resist hydrostatic pressure, and applying it to a wall that is actively leaking is money spent on false confidence.
What I have found actually works is treating the diagnosis as the most important step. Is the water coming through the wall under pressure, or is it rising from below, or is it condensation? Each answer leads to a completely different solution. Getting that wrong means every subsequent step is also wrong.
South African conditions add a layer of complexity. Clay-heavy soils in many parts of Gauteng and the Western Cape expand significantly when wet, increasing lateral pressure on basement walls beyond what standard damp proofing was ever designed to handle. Seasonal rainfall patterns mean walls that appear dry in summer can be under serious pressure by july. A professional moisture survey accounts for all of this. A tin of waterproof paint does not.
My honest recommendation: before spending anything on materials, get a proper assessment from a qualified waterproofing specialist. The cost of diagnosis is a fraction of the cost of a second failed repair.
— Eben
Professional basement waterproofing in South Africa
Basement leaks do not resolve themselves, and the longer water penetrates your walls, the more structural damage accumulates.
Prowaterproofing provides professional basement waterproofing services for residential, commercial, and industrial properties across South Africa. The team assesses hydrostatic pressure conditions, specifies the correct waterproofing system for your soil type and groundwater level, and installs it to a standard that carries a warranty. Whether your basement needs tanking slurry, a cavity drain membrane, or a full sump and drainage installation, Prowaterproofing has the experience to get it right the first time. Contact the team for a site assessment and quote tailored to your property.
FAQ
What is the difference between damp proofing and waterproofing a basement?
Damp proofing resists moisture vapour and minor surface dampness but cannot stop liquid water under hydrostatic pressure. Waterproofing uses membranes and drainage systems designed to handle pressurised groundwater, which is what basement walls require.
Can I stop basement leaks with waterproof paint?
Waterproof paint provides surface protection only and cannot resist hydrostatic pressure. It is not a reliable primary treatment for an actively leaking basement wall.
How do I know if my basement leak is caused by hydrostatic pressure?
Active water at the cove joint, leaks that worsen after heavy rainfall, and efflorescence on the wall surface all indicate hydrostatic pressure. A plastic sheet taped to the wall for 24 hours confirms whether water is penetrating from outside.
Do I need to excavate outside to fix a leaking basement wall?
Not always. Internal systems such as cavity drain membranes and sump pumps manage water effectively without excavation. External waterproofing is the most thorough solution but is typically reserved for severe pressure conditions or major renovations.
When should I call a professional for basement water seepage repair?
Call a professional when leaks recur after DIY treatment, when cracks appear in the wall structure, or when water enters at the cove joint. These signs indicate hydrostatic pressure that requires an integrated waterproofing system rather than surface repairs.