

TL;DR:
- Waterproofing for semi-detached Cape homes involves applying barriers and drainage systems to prevent water ingress and damage. Proper diagnosis, surface preparation, and material selection are essential for effective moisture control in the high-rainfall, coastal environment. Regular maintenance helps extend the lifespan of waterproofing systems and protects the property’s structural integrity.
Waterproofing for semi-detached Cape homes is defined as the application of protective barriers, coatings, and drainage systems to building surfaces to prevent water ingress and preserve structural integrity. The Western Cape’s high annual rainfall, coastal salt air, and shared party walls make semi-detached properties particularly vulnerable to moisture damage. The three primary moisture categories affecting these homes are rising damp, penetrating damp, and condensation. Each requires a different treatment, which is why waterproofing differs fundamentally from damp proofing: waterproofing stops liquid water penetration, while damp proofing controls moisture vapour movement. Many Cape homes require both.
What are the common waterproofing techniques for semi-detached Cape homes?
Semi-detached Cape homes face a specific structural challenge: one or two shared walls that cannot be treated from both sides. This limits access and concentrates moisture risk at party wall junctions, parapets, and shared roof sections.
The most widely used techniques include:
- External membrane application. Bituminous and liquid rubber membranes are applied to external walls and foundations to form a continuous barrier. These work best on exposed gable ends and below-ground sections where soil moisture is persistent.
- Roof waterproofing. Roof membranes, such as bitumen or acrylic coatings, protect both pitched and flat roofs by forming unbroken barriers against rain and pooling water. Flashing details at parapets and abutments are critical junctions that fail most often.
- Elastomeric and breathable wall coatings. These seal hairline cracks while allowing vapour to escape, which prevents internal dampness from building up behind the coating. In high-rainfall Western Cape environments, elastomeric coatings provide 7–10 years of protection.
- Sealants and joint fillers. Polyurethane and silicone sealants are applied at window frames, door reveals, and parapet copings. These junctions are the most common entry points for penetrating damp in Cape homes.
- Drainage improvements. Gutters, downpipes, and French drains redirect water away from foundations, greatly reducing penetration risk. Combining drainage with membrane systems produces the most durable result.
Pro Tip: On a semi-detached property, always inspect the shared parapet wall first. Water pooling at the junction between your roof and your neighbour’s is the single most common source of penetrating damp in Cape terraces.

How do you identify waterproofing failures and moisture sources?
Early detection prevents minor defects from becoming structural problems. Common visible symptoms include peeling paint, damp patches on internal walls, mould growth, efflorescence (white salt deposits on masonry), and hairline cracks that appear or worsen after heavy rain. These failures typically start at flat roofs, parapets, and window seals.
Knowing the symptom is not enough. You must identify the moisture source accurately before any treatment begins.
- Rising damp travels upward through masonry from ground-level moisture. It typically appears as a tide mark on lower walls and carries salt deposits.
- Penetrating damp enters horizontally through cracks, failed seals, or porous masonry. It appears as wet patches that correspond directly with rain events.
- Condensation forms on cold surfaces when warm, humid air meets them. It is most common in bathrooms, kitchens, and poorly ventilated rooms.
Professional diagnostic tools make the difference between an accurate diagnosis and an expensive guess. Electronic moisture meters measure moisture content in walls at different depths. Thermal imaging cameras reveal hidden cold bridges and moisture pathways invisible to the naked eye. Hygrometers measure ambient humidity to distinguish condensation from structural dampness.
Misidentifying the moisture source often leads to remediation costs four times higher than correctly targeted waterproofing projects. Professional diagnostic moisture mapping is not an optional extra. It is the foundation of every effective treatment.
Pro Tip: If you see a damp patch that disappears in dry weather and returns after rain, you are dealing with penetrating damp, not rising damp. The two treatments are completely different, and confusing them wastes money.
What waterproofing materials are best suited for semi-detached Cape homes?
Material selection depends on the surface type, moisture category, and the Cape’s specific climate conditions. The table below compares the three main membrane categories used in residential Cape waterproofing.
| Material type | Best application | Lifespan | Coastal suitability |
|---|---|---|---|
| Bituminous membrane | Flat roofs, foundations | 10–15 years | Good with UV-stable cap sheet |
| Liquid rubber membrane | Roofs, walls, complex shapes | 10–20 years | Excellent |
| Cementitious coating | Wet rooms, retaining walls | 5–10 years | Moderate |
| Elastomeric acrylic paint | External walls, parapets | 7–10 years | Excellent |
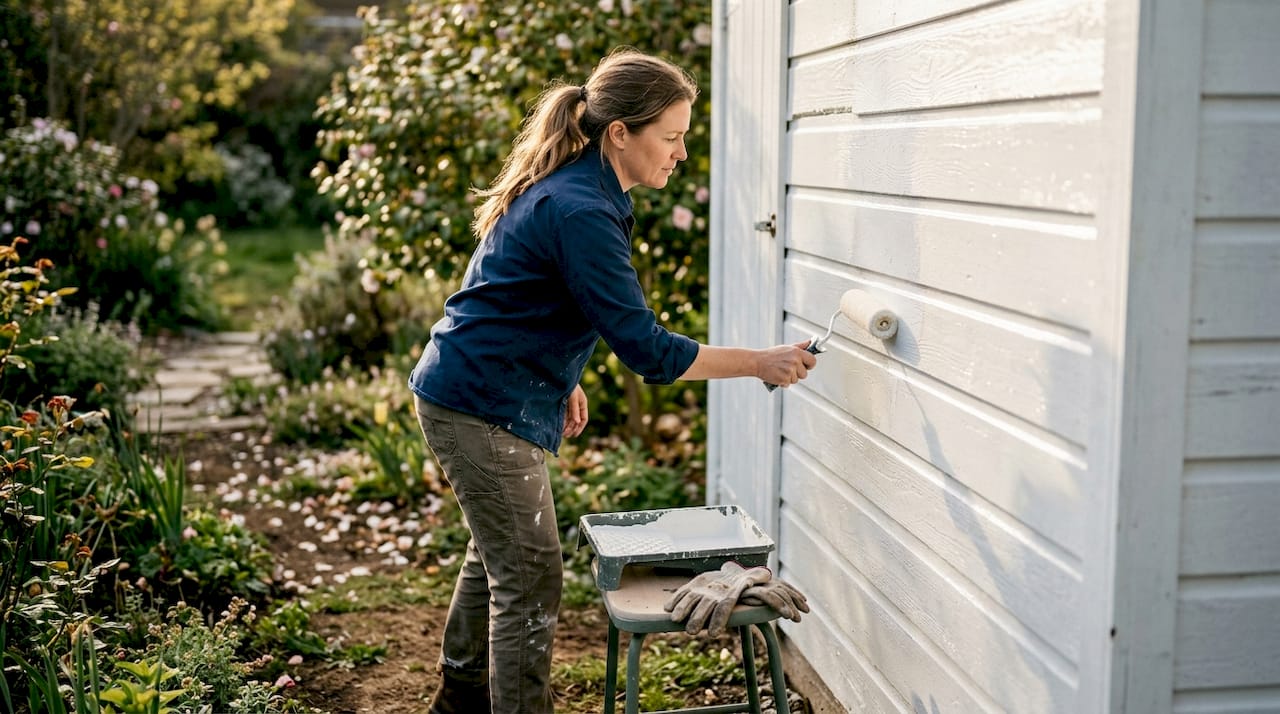
Elastomeric and acrylic coatings deserve particular attention for Cape homes. They flex with the building as it expands and contracts through seasonal temperature changes. This flexibility prevents the micro-cracking that rigid coatings develop over time. They also allow vapour permeability, meaning trapped moisture can still escape rather than building pressure behind the coating.
Waterproofing and damp proofing materials serve different purposes and should not be substituted for each other. A damp proof course (DPC) inserted into a wall controls rising moisture vapour but cannot stop liquid water penetrating through a cracked parapet. Many semi-detached Cape homes need both systems working together.
Coastal environments add an extra demand: salt-laden air degrades standard membranes faster than inland conditions. Specialist primers formulated for saline environments extend membrane adhesion and prevent delamination. High-quality membranes and specialist primers extend waterproofing lifespan and prevent failures in coastal settings.
Pro Tip: Always ask your contractor for a product data sheet before application. Confirm the membrane is rated for coastal exposure and carries a manufacturer’s guarantee of at least 10 years.
How to prepare your semi-detached Cape home for waterproofing
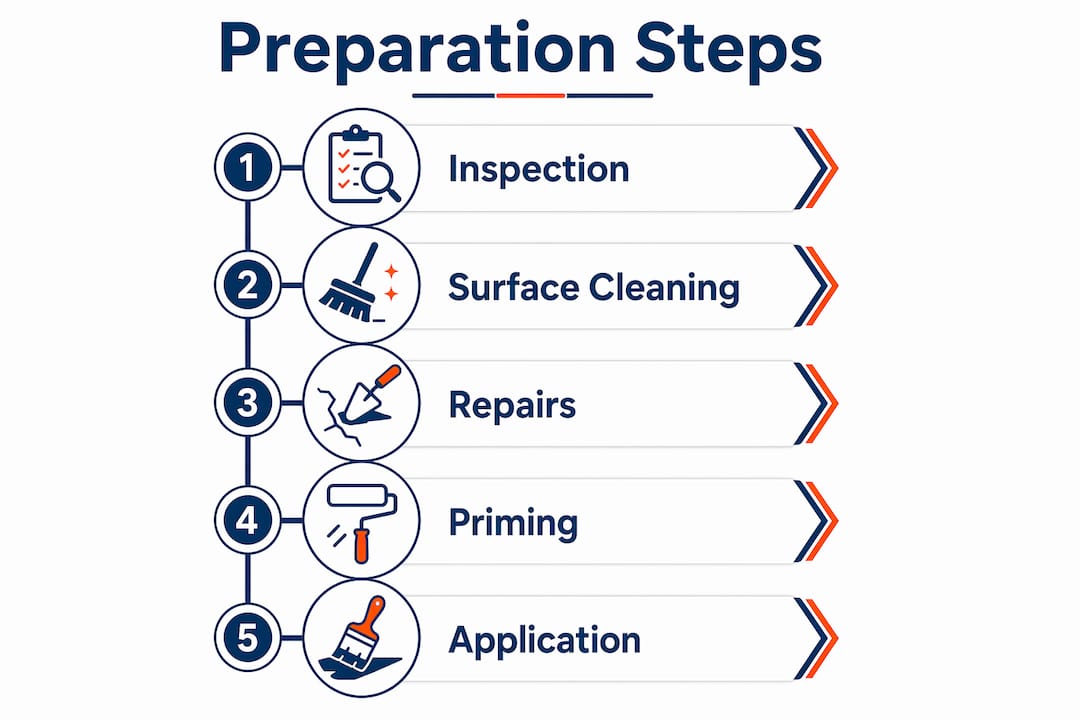
Preparation determines whether a waterproofing system lasts a decade or fails within two years. Skipping preparation steps results in poor adhesion and early failure. Follow this sequence before any coating or membrane is applied.
- Clean all surfaces thoroughly. Remove dirt, algae, loose paint, and efflorescence using a pressure washer or wire brush. Algae and salt deposits prevent membrane adhesion.
- Allow surfaces to dry completely. Applying waterproof coatings over active dampness traps moisture and accelerates internal structural damage. Drying time varies by season and substrate thickness.
- Repair all cracks and damaged plaster. Fill hairline cracks with a flexible filler and re-render any areas where plaster has blown or delaminated. Membranes bridge small cracks but cannot compensate for structural voids.
- Replace failed flashings. Metal or fibreglass flashings at roof abutments and parapets must be sound before any membrane is applied over them. A new membrane over a failed flashing will fail at the same point.
- Address drainage before waterproofing. Clear blocked gutters and downpipes. Regrade soil away from the foundation if it slopes toward the building. Active water flow must be redirected before any barrier is installed.
- Halt active leaks first. Use a hydraulic cement or crystalline product to stop any active water ingress before applying the primary waterproofing system.
For a detailed walkthrough of each step, Prowaterproofing’s guide on preparing for a waterproofing project covers substrate standards specific to South African conditions.
What maintenance keeps waterproofing effective in Cape homes?
Waterproofing is not a permanent fix applied once and forgotten. The Western Cape’s seasonal storms, UV exposure, and salt air degrade even the best membranes over time. Proactive maintenance extends service life and prevents the kind of water damage that requires full structural remediation.
- Inspect every 2–3 years. Regular inspection every 2–3 years helps detect damage early and avoids costly repairs. Seasonal visual checks after major storms are also recommended for Cape homeowners.
- Check roofs and parapets after winter storms. Look for lifted membrane edges, cracked flashing, and blocked outlets. These are the first points to fail after high winds and heavy rain.
- Re-coat on schedule. Elastomeric wall coatings typically require a maintenance coat every 7–10 years. Do not wait for visible failure before re-coating.
- Clear gutters and downpipes twice a year. Blocked drainage forces water back against walls and into roof junctions. This is the most preventable cause of penetrating damp in Cape homes.
- Manage vegetation near foundations. Tree roots and dense shrubs trap moisture against walls and can physically displace waterproof membranes at ground level.
- Repair cracks promptly. A hairline crack left untreated through one wet season can become a structural crack by the next. Flexible sealant applied early costs a fraction of full re-rendering.
Pro Tip: Set a calendar reminder for april and october each year. April catches any winter storm damage before the wet season peaks. October checks the system after summer UV exposure, when coatings are most likely to have dried and cracked.
Key takeaways
Effective waterproofing for semi-detached Cape homes requires accurate moisture diagnosis, correct material selection, thorough surface preparation, and a consistent maintenance schedule to protect structural integrity and property value.
| Point | Details |
|---|---|
| Diagnose before treating | Misidentifying moisture type leads to remediation costs four times higher than targeted treatment. |
| Match materials to climate | Elastomeric and liquid rubber membranes outperform rigid coatings in the coastal Western Cape environment. |
| Prepare surfaces fully | Surfaces must be clean, dry, and crack-free before any membrane or coating is applied. |
| Inspect every 2–3 years | Regular checks after storms catch failures early and prevent costly structural repairs. |
| Combine systems | Most Cape homes need both waterproofing and damp proofing working together for complete moisture control. |
What I have learned from waterproofing Cape homes
After years of working with semi-detached Cape properties, the pattern I see most often is this: a homeowner notices a damp patch, buys a tin of waterproof paint, and applies it directly over the problem. Six months later, the paint is bubbling and the damp patch is larger. The coating did not fail because it was a bad product. It failed because the moisture source was never addressed.
The most expensive mistake in Cape home waterproofing is not choosing the wrong membrane. It is skipping the diagnostic step entirely. Thermal imaging and moisture mapping feel like an unnecessary cost until you realise they prevent you from spending money on the wrong treatment. I have seen homeowners spend more on three failed DIY attempts than a single professional assessment and targeted repair would have cost.
The other thing I would push back on is the idea of a single-product fix. Semi-detached Cape homes are complex structures with shared walls, multiple roof levels, and varying exposure to wind-driven rain. An integrated system, combining drainage, breathable wall coatings, roof membranes, and sealed junctions, consistently outperforms any single product applied in isolation. You can read more about residential waterproofing approaches that take this whole-building view.
The good news is that proactive maintenance genuinely works. Homeowners who inspect annually and re-coat on schedule rarely face the kind of structural water damage that requires full remediation. The cost difference between maintenance and remediation is significant. Treat waterproofing as a routine part of property upkeep, not a crisis response.
— Eben
Prowaterproofing: specialist waterproofing for Cape homes
Semi-detached Cape homes need a waterproofing approach that accounts for shared walls, coastal exposure, and the Western Cape’s wet winters. Prowaterproofing provides professional assessments, material selection guidance, and guaranteed application for residential properties across the Cape.
Whether you are dealing with a persistent damp patch, planning a full exterior treatment, or simply want a professional inspection before the winter rains arrive, Prowaterproofing’s team brings local knowledge and proven systems to every project. Get a waterproofing quote tailored to your property, or visit Prowaterproofing to request a consultation and find out exactly what your home needs.
FAQ
What is the difference between waterproofing and damp proofing?
Waterproofing stops liquid water from penetrating building surfaces, while damp proofing controls moisture vapour movement through walls. Many semi-detached Cape homes require both systems to manage all moisture types effectively.
How often should I inspect waterproofing on my Cape home?
Inspect every 2–3 years as a minimum, with additional visual checks after major winter storms. Early detection of cracked flashings or lifted membranes prevents minor defects from becoming structural problems.
Can I apply waterproof paint myself?
Surface preparation is the critical factor. Applying waterproof paint over damp or poorly prepared surfaces traps moisture and causes bubbling and peeling. Professional preparation and application consistently produce longer-lasting results.
What causes efflorescence on Cape home walls?
Efflorescence is white salt deposits left on masonry surfaces when water moves through the wall and evaporates. It signals active moisture movement and should be investigated with a moisture meter before any coating is applied.
How much does waterproofing a semi-detached Cape home cost?
Cost varies depending on the surface area, moisture type, material specification, and extent of preparation required. A professional assessment from a specialist such as Prowaterproofing provides an accurate quote based on your specific property conditions.