TL;DR:
- Roof waterproofing relies on multiple layered materials for lasting protection.
- Proper application and regular inspections are essential to prevent costly water damage.
- Ongoing maintenance is crucial since waterproofing layers degrade over time.
Water damage is one of the most expensive maintenance issues facing South African properties, yet most homeowners only discover the problem once the ceiling is already stained or the walls smell of damp. The uncomfortable truth is that a single poorly constructed waterproofing layer is often the main culprit. Many people assume any coat of sealant will do the job, but roof waterproofing is a layered system, not a one-time paint job. Understanding how these layers work, what materials suit your roof, and when to act can save you thousands of rands in avoidable repairs.
Table of Contents
- What are roof waterproofing layers?
- Main types of waterproofing materials used in South Africa
- How waterproofing layers are applied: step-by-step process
- Signs of failure and when to reapply waterproofing layers
- Our perspective: what most people get wrong about roof waterproofing layers
- Protect your roof with trusted experts
- Frequently asked questions
Key Takeaways
| Point | Details |
|---|---|
| Layered protection is key | Multiple waterproofing layers create a more effective barrier than a single coating. |
| Material matters | Choosing the right waterproofing material for your roof type and climate is crucial. |
| Watch for warning signs | Spotting early failures in your waterproofing layers can prevent expensive repairs. |
| Professional help pays off | Expert installation and regular maintenance lengthen the life of your waterproofed roof. |
What are roof waterproofing layers?
Roof waterproofing layers are a series of materials applied in sequence to form a continuous, impermeable barrier over your roof surface. Think of it like the sole of a good boot: one thin layer of rubber would wear through quickly, but several bonded layers create something far more durable and resistant. Each layer in a waterproofing system has a specific job, whether that is priming the surface, providing flexibility, or offering UV resistance against the harsh South African sun.
Waterproofing layers form a barrier between your property and rain, preventing leaks and interior damage. A single coating, by contrast, can crack, peel, or develop pinholes over time, leaving your roof vulnerable. Layering materials compensates for the weaknesses of any individual product and extends the overall lifespan of the system significantly.
Missing or damaged layers cause a predictable chain of problems:
- Persistent leaks that appear even during light rain
- Damp patches on interior ceilings and upper walls
- Mould growth in roof spaces and rooms below
- Structural timber decay when moisture reaches roof beams
- Bubbling or flaking interior paint caused by trapped moisture
It is also worth distinguishing waterproofing layers from simple moisture barriers like vapour membranes used inside walls. Roof waterproofing is an external, load-bearing system designed to withstand rain, wind, foot traffic during maintenance, and temperature extremes. A vapour barrier merely slows moisture migration through a wall cavity. These are very different products with very different purposes, and confusing them is a costly mistake. Exploring the roof waterproofing essentials gives you a clearer picture of how the full system is constructed and why each component matters.
Main types of waterproofing materials used in South Africa
Not all waterproofing materials perform equally, and different materials are selected for roofs depending on weather resistance and cost. South Africa’s climate varies enormously from the wet Western Cape winters to the summer thunderstorms of Gauteng and KwaZulu-Natal, so material choice is not a one-size-fits-all decision.
Here is a comparison of the most widely used systems:
| Material | Best for | Lifespan | Key advantage |
|---|---|---|---|
| Bitumen (torch-on) | Flat and low-slope roofs | 10-15 years | Excellent waterproofing integrity |
| Acrylic coating | Tiled and metal roofs | 5-8 years | Easy application, UV resistant |
| Polyurethane membrane | Flat roofs, balconies | 10-12 years | Flexible, handles movement well |
| Liquid waterproofing | Complex shapes, gutters | 5-10 years | Seamless, no joins to fail |
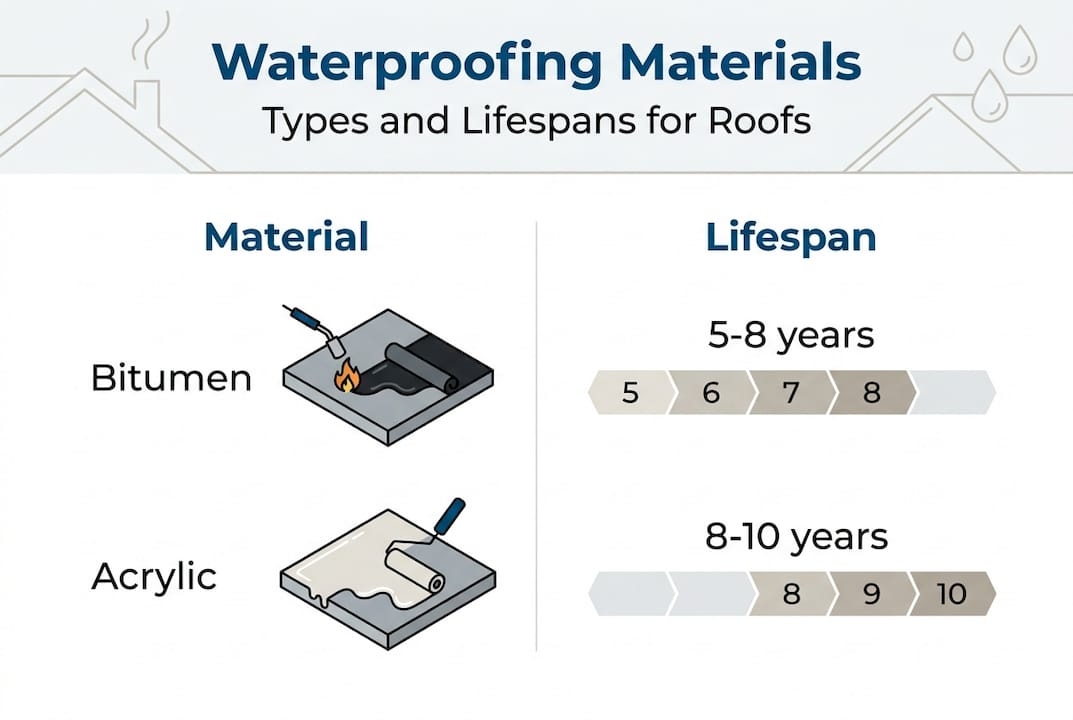
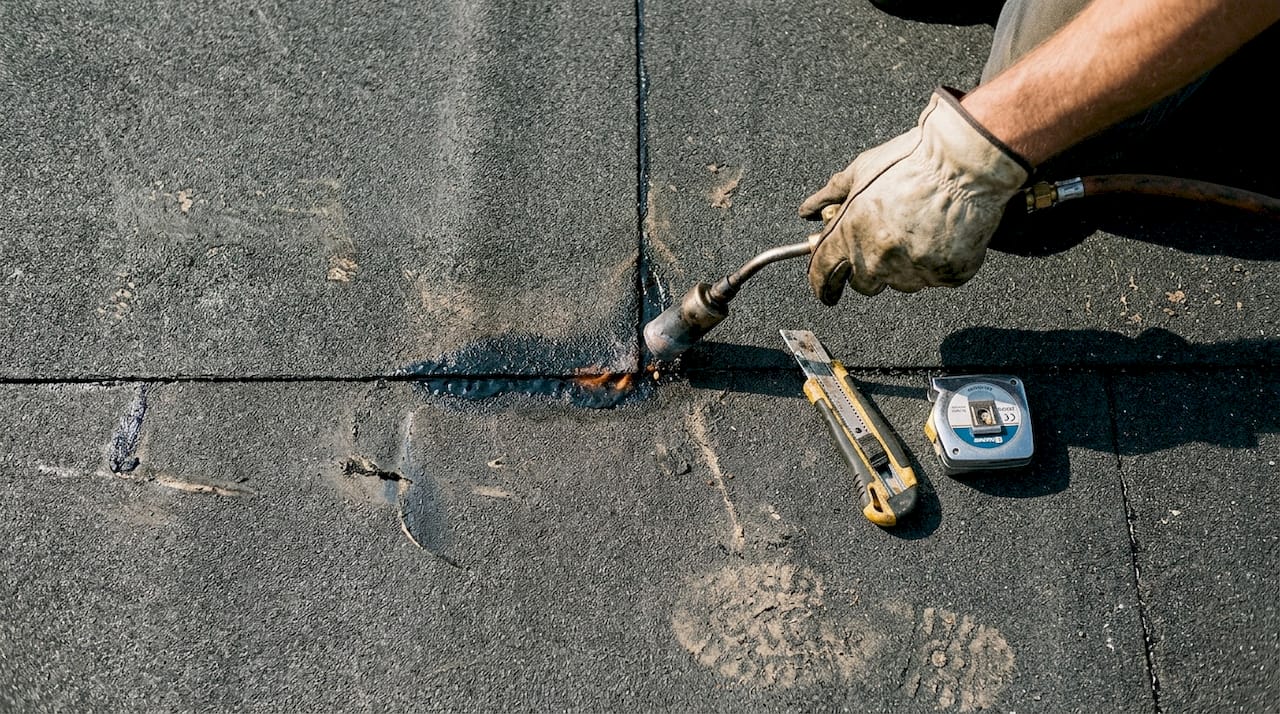
Bitumen systems, often called torch-on because they are heat-bonded to the surface, are among the most robust options for flat roofs. They create a thick, self-adhesive membrane that resists standing water effectively. Acrylic coatings are popular for tiled roofs because they are water-based, breathable, and reflect UV radiation, which helps keep interior temperatures lower during summer.
Polyurethane membranes are worth considering for roofs that experience structural movement, such as older buildings or those with lightweight steel frames. Their flexibility means they stretch rather than crack when the building shifts slightly. Liquid waterproofing systems are particularly useful for awkward roof shapes, around pipes, and in gutters where sheet membranes cannot conform to every curve.
For South African conditions, a few additional factors matter:
- UV stability is critical given the intensity of the local sun
- Thermal expansion is significant on metal roofs during summer
- Wind uplift resistance is important in coastal and highveld areas prone to storms
Pro Tip: Always ask your contractor whether the product they are using is rated for your specific roof type. A liquid acrylic designed for tiles will not perform the same way on a flat concrete surface. You can explore waterproofing types in South Africa and membrane roof solutions to understand which systems are appropriate before you commit.
How waterproofing layers are applied: step-by-step process
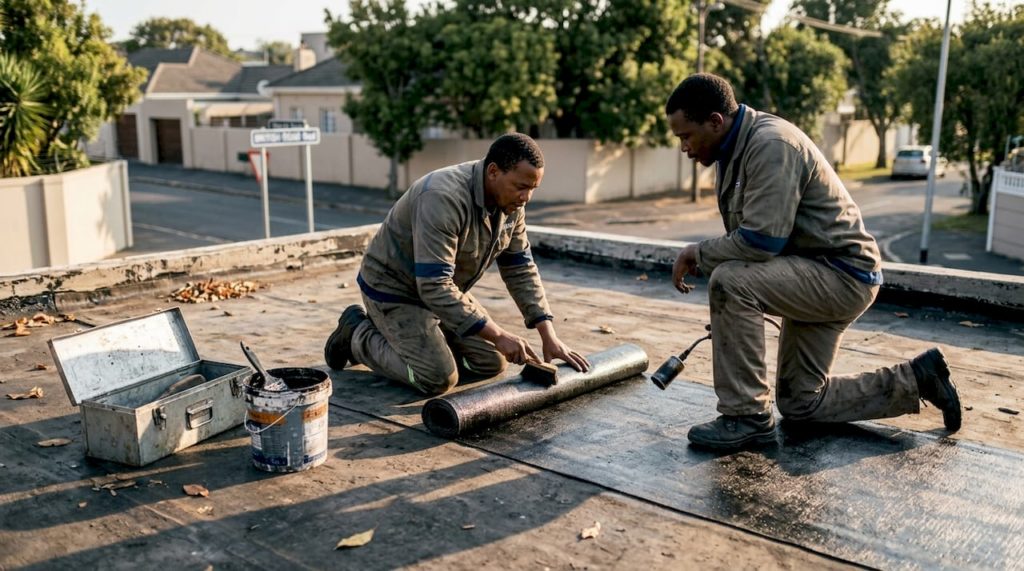
Once you have selected your material, here is how professionals make sure each layer is correctly applied and will last. Correct preparation and sequential application are crucial to successful waterproofing. Skipping a step or rushing the process is the single biggest reason why waterproofing systems fail prematurely.
- Surface preparation. The roof is thoroughly cleaned to remove dirt, algae, loose material, and old failing coatings. Any cracks, spalling concrete, or damaged tiles are repaired before any waterproofing product is applied. A contaminated or unstable surface will prevent proper adhesion.
- Primer application. A primer is applied to seal the surface and improve bonding between the substrate and the waterproofing layers above. This step is frequently skipped by inexperienced contractors, which leads to delamination within a few years.
- Base coat or membrane positioning. The primary waterproofing layer is applied, whether that is a torch-on membrane being heat-bonded, a liquid coating being rolled on, or a sheet membrane being mechanically fixed. Overlaps between sections must meet the manufacturer’s minimum specifications.
- Sealing joints and edges. All joints, perimeters, and penetrations such as pipes and drains receive additional reinforcement. These are the highest-risk areas for water ingress and require extra attention.
- Final inspection. The completed system is checked for pinholes, thin spots, and areas where coverage is uneven. A professional will use a visual inspection and sometimes a flood test on flat roofs to confirm integrity.
A roof that looks waterproofed is not necessarily watertight. The quality of the process matters far more than the brand of the product.
Pro Tip: Always request a written inspection report after installation. It gives you a baseline record for future maintenance and is useful if warranty claims arise later. Understanding the full roof waterproofing process and the effective waterproofing workflow will help you ask the right questions when hiring a contractor. You can also review steps for lasting protection to benchmark what a quality job should include.
Signs of failure and when to reapply waterproofing layers
With the application steps in mind, it is equally important to know when your waterproofing layers might be failing, so you can act quickly. Visible leaks, damp patches, and deteriorating finishes are the first signs of failed waterproofing layers, but by the time these appear, damage is already under way.
Watch for these early warning signs:
- Bubbling or blistering on the roof surface, indicating trapped moisture beneath the membrane
- Musty odours inside rooms directly below the roof
- Efflorescence (white salt deposits) on exterior walls near the roofline
- Peeling interior paint on ceilings or upper walls
- Visible cracks or splits in the waterproofing membrane itself
- Water stains appearing after rain, even if no active drip is visible
Here is a general guide to typical lifespans and recommended inspection intervals:
| System type | Expected lifespan | Inspection frequency |
|---|---|---|
| Acrylic coating | 5-8 years | Every 12 months |
| Liquid polyurethane | 10-12 years | Every 12-18 months |
| Torch-on bitumen | 10-15 years | Every 18-24 months |
Delaying action is expensive. A small crack in a membrane that costs a few hundred rands to repair can allow water to penetrate roof timbers, insulation, and ceiling boards. Replacing those elements costs far more than fixing the waterproofing layer that failed in the first place. Reviewing the warning signs for waterproofing and familiarising yourself with best waterproofing practices will help you stay ahead of problems.
Pro Tip: Schedule your annual inspection before the rainy season begins, not during or after it. Catching vulnerabilities in dry conditions means repairs can be completed properly rather than rushed in wet weather.
Our perspective: what most people get wrong about roof waterproofing layers
After working with countless homeowners and property managers across South Africa, we have noticed a consistent pattern. Most people treat waterproofing as a once-off task. They invest in a quality installation, feel reassured, and then forget about the roof entirely until a leak forces their hand. By that point, the damage is always worse and more expensive than it needed to be.
The real mistake is treating waterproofing as a product rather than a system that requires ongoing attention. Even the best materials degrade under UV exposure, thermal cycling, and the physical stress of rain and wind. A roof that was perfectly waterproofed eight years ago is not necessarily still performing well today.
We also see many property owners assume that a newer roof does not need professional assessment. In reality, installation errors are most likely to reveal themselves in the first two to three years, and catching them early is far cheaper than waiting. Exploring natural roof waterproofing options can also complement your existing system for added resilience. Proactive, scheduled maintenance is not an extra expense. It is the strategy that keeps unexpected costs off your plate.
Protect your roof with trusted experts
Understanding how waterproofing layers work gives you the knowledge to make better decisions, but knowing what to look for is only part of the solution. Proper installation and inspection require the right materials, tools, and experience to ensure every layer performs as it should.

At Pro Waterproofing, we work with homeowners and property managers across South Africa to assess, install, and maintain roof waterproofing systems that genuinely last. Whether you need a full installation, a routine inspection, or advice on which materials suit your specific roof, our team is ready to help. Reach out through professional waterproofing support to request a quote or get expert guidance tailored to your property. Protecting your investment starts with one conversation.
Frequently asked questions
How often should roof waterproofing layers be checked in South Africa?
Experts recommend inspecting waterproofing layers at least once a year, ideally before the rainy season, to catch problems early before they become costly repairs.
Can I apply waterproofing layers myself, or should I hire a professional?
Small surface repairs are manageable as a DIY task, but proper application technique for a full system is critical and best handled by a professional to ensure lasting protection.
What is the average lifespan of roof waterproofing layers?
Quality waterproofing layers typically last between 5 and 10 years, though material selection and local climate exposure will significantly influence how long your specific system performs.
Recommended
- Roof Waterproofing Steps for Lasting Protection
- Effective Roof Waterproofing Workflow for Lasting Protection
- Roof Waterproofing Process: Secure Your Property Today – Pro Waterproofing
- Master Roof Waterproofing in 2025: Step-by-Step for SA Owners
- Dakinspectie bij bouwkundige keuring uitgelegd – Schippers Bouwconsult