TL;DR:
- Proper workflow in waterproofing ensures long-term protection and prevents costly failures.
- Surface preparation, priming, reinforcement, and inspection are crucial steps often overlooked.
- Choosing a contractor who understands and explains their process is vital for successful waterproofing.
Most property owners assume waterproofing is straightforward: slap on a product, leave it to dry, and you’re done. That assumption costs South African homeowners and building managers thousands of rands every year in avoidable repairs. Water ingress is one of the leading causes of structural deterioration in local properties, and the culprit is rarely the product itself. It’s almost always the process. A poorly executed workflow, whether rushed, incomplete, or simply uninformed, undermines even the most expensive waterproofing systems. This article walks you through the professional approach to waterproofing application, from surface preparation to post-application inspection, so you know exactly what good work looks like.
Table of Contents
- Why the right workflow matters for waterproofing success
- Step-by-step breakdown of the professional waterproofing application workflow
- Comparing common waterproofing methods in the workflow
- Ensuring quality: Inspection, maintenance, and long-term performance
- What most property owners miss about waterproofing workflows
- Partner with experts for your waterproofing needs
- Frequently asked questions
Key Takeaways
| Point | Details |
|---|---|
| Structured workflow is vital | A clear step-by-step waterproofing process is key to long-lasting protection and property value. |
| Choose method wisely | Not all waterproofing systems suit every situation; picking the right one improves results and saves money. |
| Inspection prevents problems | Regular follow-ups ensure waterproofing lasts and catches early signs of failure before they escalate. |
| Professional help matters | Qualified specialists use proven workflows and reduce the risks of DIY mistakes or shortcuts. |
Why the right workflow matters for waterproofing success
Waterproofing is one of those investments that’s invisible when it works and catastrophic when it doesn’t. Many property owners discover this the hard way, after mould appears on interior walls, ceilings begin to sag, or structural concrete starts to crack. The frustrating part is that most of these failures are entirely preventable.
South Africa’s climate adds another layer of complexity. Coastal regions face salt-laden moisture and humidity. Inland areas deal with intense summer storms followed by dry spells that cause materials to expand and contract. These fluctuating conditions put enormous stress on waterproofing systems, and any weakness in the application workflow gets exploited quickly.
The stakes are high. Improper waterproofing causes up to 80% of building water ingress failures. That statistic should make any property owner pause before accepting a rushed quote or a contractor who skips surface preparation.
A structured waterproofing application process protects your investment in several measurable ways:
- It ensures the substrate is properly prepared, so products bond correctly
- It reduces the risk of premature delamination or cracking
- It allows for the correct curing time between layers
- It creates a documented record for warranty claims and future maintenance
- It identifies problem areas before they become expensive failures
“A waterproofing system is only as strong as the process behind it. The best membrane in the world will fail if the surface beneath it hasn’t been properly prepared and primed.”
Skipping steps to save time or money is a false economy. Repair work after a failed waterproofing job typically costs two to three times more than doing it correctly the first time. The workflow isn’t bureaucracy. It’s the foundation of every successful application.
Step-by-step breakdown of the professional waterproofing application workflow
Professionals don’t improvise. Every reliable waterproofing job follows a logical sequence, and understanding that sequence helps you evaluate whether a contractor is doing the job properly.
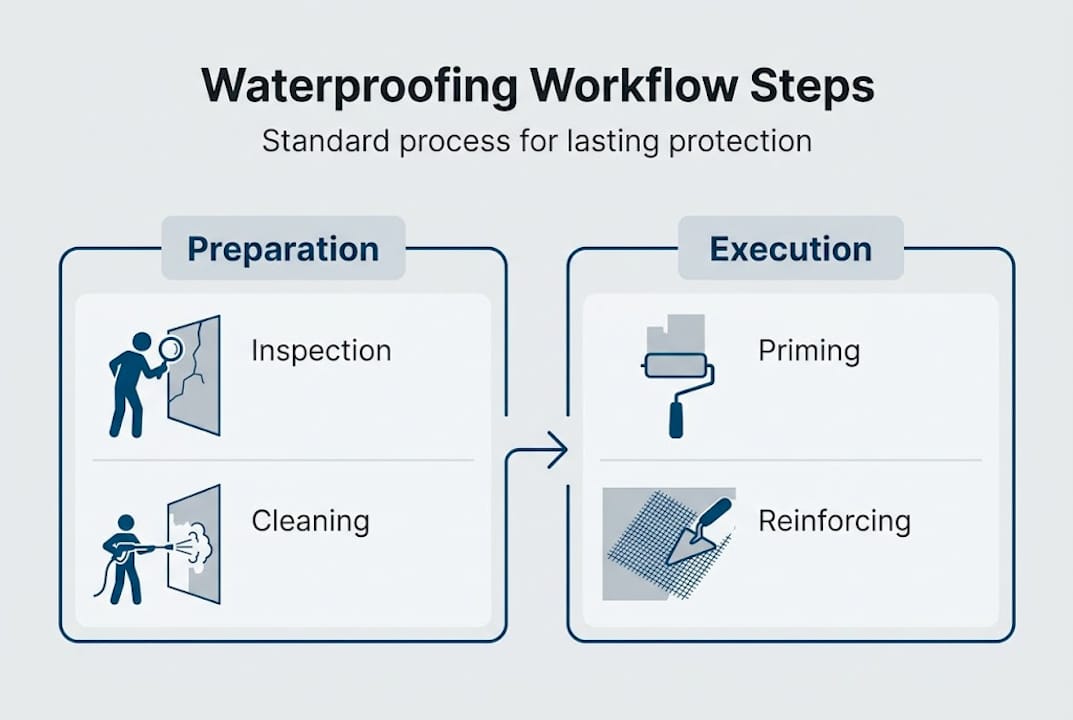
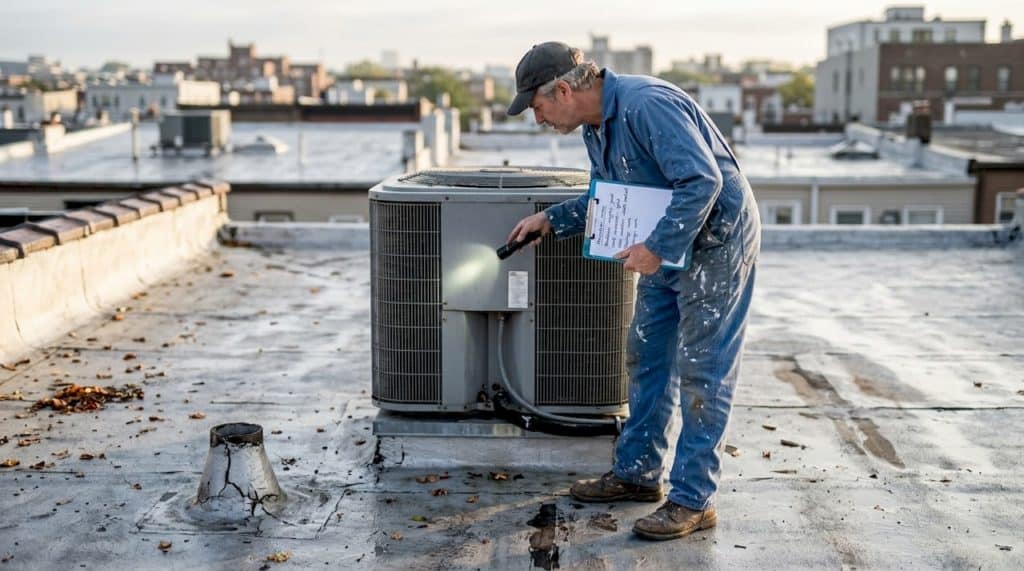
1. Site inspection and assessment
Before any product is opened, a thorough inspection identifies the source of moisture, the condition of the substrate, and any existing damage. This step determines which system is appropriate and what preparatory work is needed.
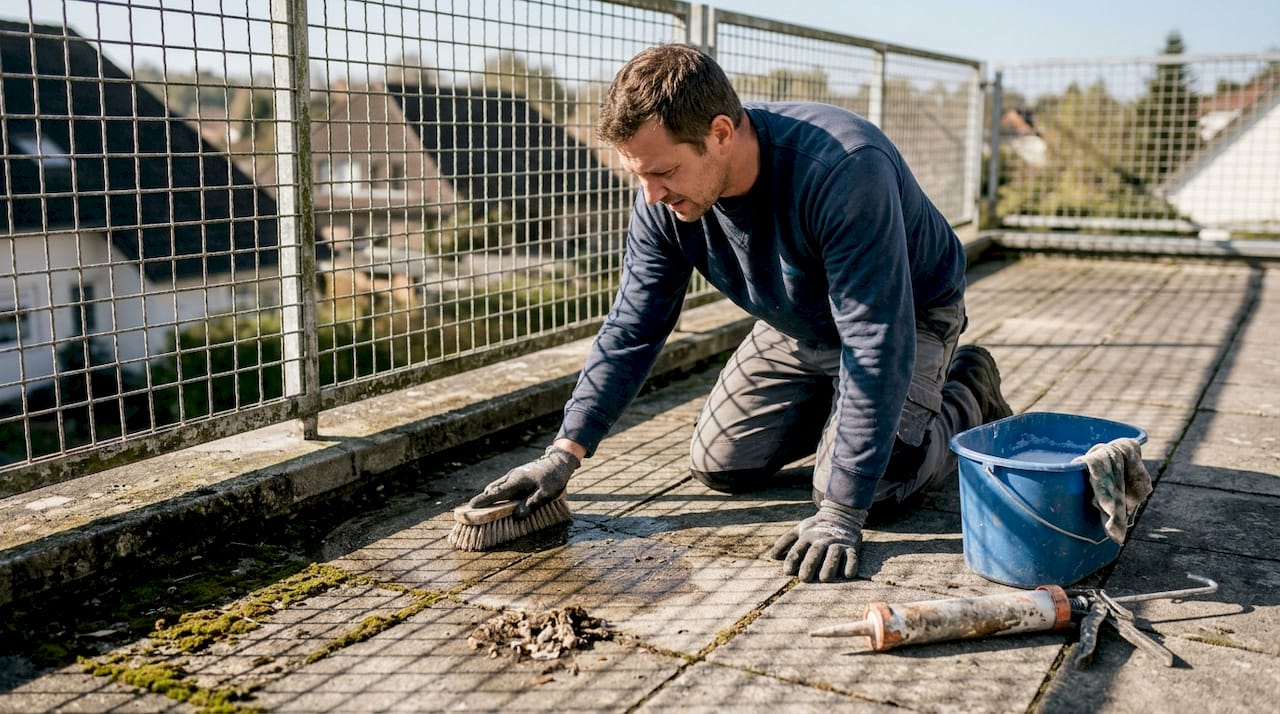
2. Surface preparation
This is the most critical and most frequently skipped step. Surfaces must be clean, dry, and structurally sound. Loose material, oil, dust, and previous coatings are removed. Cracks are filled with appropriate repair mortars. Waterproofing preparation steps are non-negotiable because no membrane adheres reliably to a compromised surface.
3. Priming
A primer seals the surface and improves adhesion for the waterproofing layer. Different substrates require different primers. Skipping this step is one of the most common causes of membrane failure.
4. Reinforcement at stress points
Corners, joints, pipe penetrations, and expansion joints are reinforced with fabric or mesh before the main waterproofing layer is applied. These are the areas most vulnerable to movement and cracking.
5. Waterproofing layer application
The chosen system is applied in the specified number of coats, at the correct thickness, and within the recommended temperature and humidity range. For concrete waterproofing processes, this often involves multiple passes to achieve full coverage.
6. Curing and drying
Professional waterproofers follow a strict application sequence, including mandatory curing periods between coats. Rushing this stage compromises the entire system.
7. Top coat or protection layer
In exposed areas, a UV-resistant top coat or screed protects the waterproofing membrane from physical damage and sunlight degradation.
8. Final inspection and testing
Water testing, flood testing, or electronic leak detection confirms the system is intact before the job is signed off.
Pro Tip: Always ask your contractor for a written application sequence before work begins. If they can’t provide one, that’s a warning sign worth taking seriously.
Comparing common waterproofing methods in the workflow
Not every waterproofing system suits every situation. The method you choose affects how the workflow unfolds, how long the job takes, and how well the result performs over time. Different waterproofing systems fit different scenarios and budgets, and understanding the trade-offs helps you make an informed decision.
| Method | Best suited for | Workflow complexity | Typical lifespan |
|---|---|---|---|
| Liquid-applied membrane | Roofs, balconies, complex shapes | Moderate | 10 to 15 years |
| Torch-on bitumen | Flat roofs, large commercial areas | High | 15 to 20 years |
| Cementitious coating | Basements, water tanks, wet rooms | Low to moderate | 5 to 10 years |
| Sheet membrane | Below-slab, retaining walls | High | 20 years or more |
Liquid-applied membranes are the most versatile option for residential properties. They conform to irregular surfaces and are applied by brush, roller, or spray. The workflow is manageable, and repairs are straightforward.
Torch-on bitumen is a robust solution for large flat roofs. It requires specialised equipment and trained applicators. The workflow is more complex, involving heat application and careful seam overlapping.
Cementitious coatings are rigid systems suited to below-grade structures and water-retaining elements. They’re easier to apply but offer less flexibility, which makes them unsuitable for surfaces subject to movement.
Sheet membranes provide excellent protection for below-slab applications. They’re installed before concrete is poured, making them part of the construction workflow rather than a retrofit solution.
Key considerations when choosing your method:
- The degree of surface movement expected
- Exposure to UV light and foot traffic
- Whether the application is internal or external
- Budget and required lifespan
For exterior waterproofing best practices, liquid-applied systems and torch-on options dominate because of their durability and seamless coverage.
Ensuring quality: Inspection, maintenance, and long-term performance
A successful application is not the end of the story. What happens in the months and years after installation determines whether your waterproofing investment delivers its full value. Scheduled maintenance and periodic inspection prolong waterproofing performance significantly.
Post-application inspection checklist:
- Confirm full coverage with no pinholes or thin spots
- Check all seams, joints, and penetrations for proper sealing
- Verify that drainage outlets are clear and functioning
- Conduct a water test or flood test where applicable
- Document the completed work with photographs and written records
Pro Tip: Keep a maintenance file for your property that includes the application date, product used, contractor details, and warranty information. This is invaluable when you need to make a claim or plan future maintenance.
Maintenance frequency guidelines:
| Property type | Inspection frequency | Maintenance action |
|---|---|---|
| Residential home | Annually | Visual check, clear drainage |
| Commercial building | Every 6 months | Full inspection, minor repairs |
| Industrial facility | Quarterly | Detailed inspection, load testing |
Early warning signs to watch for include blistering or bubbling in the membrane, water stains on interior ceilings or walls, efflorescence (white salt deposits) on masonry, and musty odours in enclosed spaces. Catching these early means a small repair rather than a full system replacement.
For commercial waterproofing best practices, documentation is particularly important. Building managers who maintain detailed inspection records are better positioned to manage warranty claims and plan capital expenditure accurately.
What most property owners miss about waterproofing workflows
After years in this industry, one pattern stands out clearly: property owners focus on products and prices, but rarely on process. They compare membrane brands and request multiple quotes, which is sensible. But they seldom ask contractors to walk them through the application sequence step by step.
We’ve seen situations where premium membranes failed within two years, not because the product was defective, but because the surface beneath was damp when application began. The contractor skipped the drying period to meet a deadline, and the entire system delaminated. The warranty was void because the application conditions weren’t met.
DIY attempts and underqualified contractors share the same blind spot: they treat waterproofing as a coating exercise rather than a system installation. The product is just one component. The substrate condition, the primer, the reinforcement, the curing time, and the final inspection are equally important.
Choosing the right contractor means asking about their workflow, not just their price. A contractor who can explain every step with confidence and provide references is worth more than the cheapest quote on the table. Prioritise process over price, and your waterproofing will perform exactly as it should.
Partner with experts for your waterproofing needs
If this article has shown you anything, it’s that professional waterproofing is a disciplined, sequential process that requires skill, experience, and the right materials applied in the right order.

The Pro Waterproofing experts bring that discipline to every project, whether it’s a residential roof, a commercial basement, or an industrial facility. Our team conducts thorough site assessments, follows proven application workflows, and provides documented post-application inspections. You get lasting protection and complete peace of mind. Reach out to us today for a personalised site assessment and let us show you what a properly executed waterproofing workflow looks like in practice.
Frequently asked questions
What is the most effective waterproofing application method?
Liquid-applied systems suit complex surfaces and offer seamless protection, making them one of the most versatile choices for both residential and commercial properties.
How long does a professional waterproofing application usually last?
Proper maintenance extends waterproofing lifespan to 10 to 15 years or beyond, provided inspections are conducted regularly and minor repairs are addressed promptly.
Can I do waterproofing myself, or should I hire a professional?
Expert application prevents common failures from poor preparation, and while DIY kits exist, professional work is strongly recommended for any area subject to significant water exposure or structural risk.
How do I know if my building needs waterproofing?
Visible water damage and odour are warning signs, and if you’re noticing damp walls, efflorescence, or musty smells, a professional assessment is the right next step.