

TL;DR:
- A waterproofing mock-up test verifies material performance and application quality before full-scale installation. It reduces costly failures by identifying issues with material compatibility, adhesion, and watertightness through physical testing on site. Following industry standards and documenting results are essential to ensure waterproofing effectiveness and project compliance.
A waterproofing mock-up test is a full-scale physical trial conducted on site to verify that a waterproofing system performs correctly before it is applied across an entire building. The test confirms material compatibility, application quality, and watertight integrity before finishing trades such as tiling or cladding begin. Construction professionals and property managers who skip this step risk costly remedial work, warranty disputes, and structural water damage. Standards such as ASTM D903 and South Africa’s SATAS certification framework set the baseline for how these trials must be conducted. Prowaterproofing integrates mock-up testing into every project to catch failures before they become permanent.
What does a waterproofing mock-up test involve?
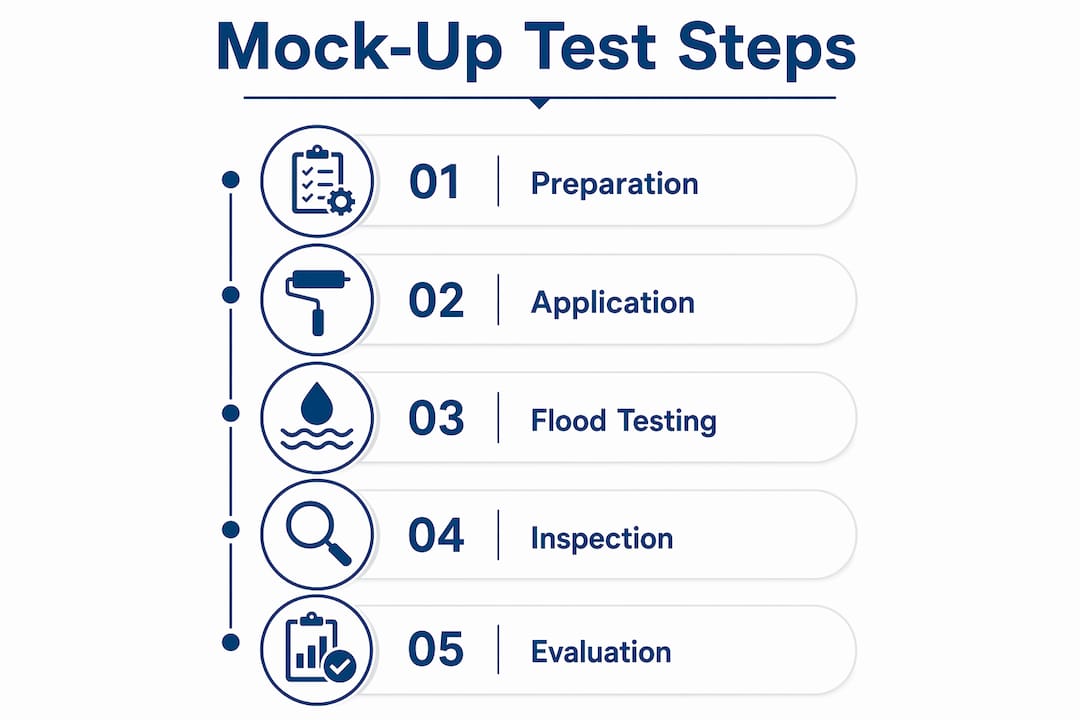
A waterproofing mock-up test follows a defined sequence of preparation, application, and verification steps. Each stage must be completed correctly before the next begins.

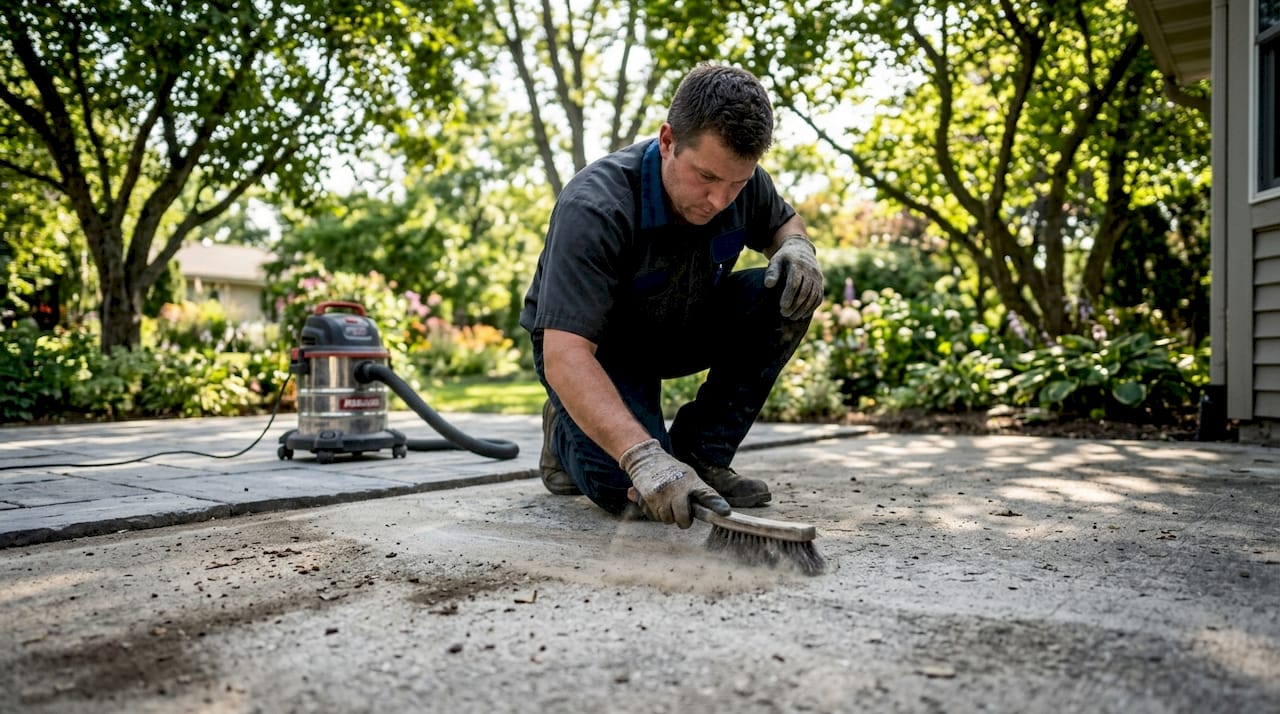
Substrate preparation
The substrate must be clean, sound, and free of dust, oil, and loose material before any waterproofing product is applied. Cracks and voids are repaired with a compatible filler, and the surface is primed according to the manufacturer’s specification. Skipping primer is one of the most common causes of adhesion failure identified during testing.
Application of waterproofing layers
A properly executed mock-up incorporates multiple waterproof layers, reinforcement fabric at critical junctions such as corners and pipe penetrations, and a final flood test before any finish is applied. Each coat must reach the specified wet film thickness, measured with a gauge on site. Reinforcement fabric is embedded into the first coat while it is still wet, then overcoated once cured.
Flood testing
Flood testing flat areas requires damming all outlets and ponding water to at least 50mm depth for a minimum of 48 hours before finishes are applied. That duration is not arbitrary. It gives water sufficient time to find any pinhole, thin spot, or unbonded area that a visual inspection would miss entirely.
Pro Tip: Photograph the water level at the start and end of the flood test. A drop in level without visible evaporation is a reliable early indicator of a leak.
Pull tests and visual inspection
Pull tests measure adhesion strength by attaching a dolly to the cured membrane and applying a measured tensile load. Visual inspection checks for blistering, delamination, and uneven coverage. Both methods together give a complete picture of membrane performance that no single test can provide alone.
What industry standards guide waterproofing mock-up testing?
Industry standards define the minimum acceptable conditions for mock-up tests. Knowing which standards apply to your project prevents disputes and protects you legally.
- SATAS certification: SATAS tests and certifies waterproofing membrane systems in South Africa. The NHBRC and government bodies require SATAS-approved products, with product approval numbers referenced in tender documentation. This means unapproved products cannot legally be specified on many public-sector projects.
- ASTM D903: This international standard covers peel and stripping strength of adhesive bonds, directly relevant to pull test procedures used in mock-up verification.
- Method statements: A written method statement must accompany every mock-up test. It records the products used, application rates, layer sequence, curing times, and test conditions.
- Quality control plans (QCPs): A QCP documents hold points and witness points at which an independent inspector must sign off before work continues. Mock-up completion is always a hold point on well-managed projects.
- Test conditions: Standards specify water temperature, ambient temperature range, and minimum curing time before flooding. Testing in extreme heat or cold without noting conditions invalidates results.
South Africa’s waterproofing standards for 2026 align closely with international practice while reflecting local climate conditions, particularly the thermal cycling and UV exposure common in coastal and highveld environments.
| Standard or body | Requirement | Practical implication |
|---|---|---|
| SATAS | Product certification | Only approved membranes on NHBRC projects |
| ASTM D903 | Adhesion peel strength | Pull test benchmark for bonded membranes |
| NHBRC | Approved waterproofing systems | Tender documentation must reference approval |
| QCP / ITP | Hold and witness points | Inspector sign-off before flood test begins |
| Method statement | Documented application procedure | Legal record of test conditions and materials |
Why is material compatibility the most critical factor in mock-up testing?
Material compatibility is the single most common source of waterproofing failure, and it is the factor most reliably exposed by a mock-up test. Waterproofing failure is often caused by poor adhesion, material incompatibility, or inadequate curing. These are problems that a mock-up reveals before large-scale application commits the project to a failing system.
Waterproofing material combinations should never be treated as commodities. Full-scale mock-up testing is the only reliable way to prevent failures caused by incompatible admixtures or application errors. Technical data sheets describe ideal conditions. A mock-up tests real ones.
Skipping field mock-up tests on new waterproofing material formulations can lead to rapid slump loss, weak bonding layers, and leaks that only appear weeks after application. That timeline makes remediation expensive and disruptive. The mock-up compresses that timeline to 48 hours on a small panel, before any tiles or cladding are fixed.
Experienced practitioners use mock-ups to gain tactile and visual understanding of material reactions during hydration, such as the heat generated by curing or the effect of defoamer dosage on surface permeability. No technical data sheet captures that knowledge. It exists only in the hands and eyes of someone who has mixed, applied, and observed the product under real site conditions.
Pro Tip: When testing a cementitious coating for the first time, apply it to a vertical surface as well as a horizontal one. Slump behaviour on a vertical substrate often reveals workability problems that a flat panel test conceals.
Reviewing the full range of waterproofing materials for South African properties before specifying a system helps narrow the field to products with a proven compatibility track record.
How to interpret waterproofing mock-up test results
Test results are only useful if you know what to look for and what each finding means for the broader project. A passed mock-up gives you a documented baseline. A failed one gives you specific information about what to fix.
Signs of a successful mock-up:
- No visible water ingress or damp patches after the 48-hour flood test
- Pull test values meet or exceed the manufacturer’s minimum adhesion specification
- No blistering, cracking, or delamination visible on the membrane surface
- Layer thickness measurements fall within the specified range at all test points
- Reinforcement fabric is fully embedded with no dry edges or bridging at corners
Common failure indicators and what they mean:
- Water seeping through the slab soffit during flooding indicates a pinhole or unbonded area in the membrane
- Blistering points to trapped moisture or solvent in the substrate at the time of application
- Low pull test values indicate either inadequate priming or a substrate that was too smooth or contaminated
- Mock-ups facilitate quality control by providing physical verification of application methods, layer thickness, and reinforcement positioning before main construction proceeds
When a mock-up fails, the correct response is to identify the root cause, adjust the system or procedure, and repeat the test on a fresh panel. Do not proceed to the main works until a clean pass is documented. All results, including failures and the corrective actions taken, must be recorded in the project quality file and shared with the principal agent and client.
Witness testing by an independent inspector adds a layer of accountability that protects all parties. Many contracts now require a named inspector to sign the flood test record before the waterproofing is accepted.
What are the best practices for running a mock-up test on site?
Practical planning separates a mock-up that produces useful data from one that simply ticks a box. These guidelines apply to projects of any scale.
- Match the mock-up to the project scope. A large commercial roof requires a mock-up panel of at least 9m² to capture realistic application conditions. A domestic bathroom can be verified on a smaller area, but the panel must include at least one internal corner and one pipe penetration.
- Time the mock-up correctly. Schedule the test early enough that results can influence procurement decisions. Running a mock-up after materials are delivered in bulk removes the option to change products without cost.
- Document everything photographically. Photograph the substrate before priming, each coat as applied, the flood test setup with a ruler showing water depth, and the surface after draining. Photographs are the only evidence that survives a dispute.
- Use qualified applicators for the mock-up. The same crew who will apply the main works should apply the mock-up. A specialist brought in only for the trial produces results that do not reflect site capability.
- Repeat tests for unproven systems. When specifying a new or unfamiliar waterproofing system, run at least two mock-up panels under different ambient conditions. One result is a data point. Two results begin to show a pattern.
Pro Tip: Ask the waterproofing manufacturer’s technical representative to attend the mock-up. Their presence creates accountability and gives you direct access to expert interpretation of any anomalies.
Reviewing waterproofing best practices for South African properties alongside your mock-up plan helps align site procedures with current industry expectations.
Key takeaways
A waterproofing mock-up test is the most reliable method for confirming that a waterproofing system will perform as specified before it is applied at scale on a building project.
| Point | Details |
|---|---|
| Flood test standard | Pond water to at least 50mm depth for 48 hours before applying any finish. |
| Material compatibility | Test every new product combination on site; data sheets do not replace physical trials. |
| Standards compliance | SATAS certification and QCP hold points are mandatory on NHBRC and public-sector projects. |
| Failure documentation | Record all failures and corrective actions in the project quality file before proceeding. |
| Qualified personnel | Use the same crew for the mock-up as for the main works to produce representative results. |
Why I think skipping the mock-up is the most expensive decision on any waterproofing project
I have seen the consequences of omitting mock-up tests more times than I care to count. The pattern is always the same. A contractor is confident in a product they have used before, the programme is tight, and the mock-up feels like a delay. Six months later, water is tracking through a tiled floor, the tiles are up, and the argument about who pays has begun.
What surprises most property managers is how little a mock-up actually costs relative to remediation. Stripping tiles, re-waterproofing, and reinstating finishes on a failed bathroom or roof deck routinely costs ten to twenty times the price of the original waterproofing. The mock-up is not an overhead. It is the cheapest insurance available on a construction project.
The other thing I have observed is that mock-ups reveal applicator skill gaps that no CV or reference list will show. A crew that struggles to achieve consistent film thickness on a 2m² panel will not suddenly improve on a 200m² roof. The mock-up is as much a test of the team as it is of the product.
Waterproofing technology is advancing quickly, with new hybrid membranes and modified cementitious systems entering the market regularly. That makes mock-up testing more important, not less. The more novel the system, the less historical data exists to predict its behaviour under your specific site conditions. Physical testing fills that gap. No amount of manufacturer confidence replaces it.
— Eben
Prowaterproofing’s approach to verified waterproofing quality
Prowaterproofing delivers waterproofing solutions for residential, commercial, and industrial properties across South Africa, with mock-up testing built into the standard project workflow. Every system is verified on site before large-scale application begins, giving clients documented proof of performance rather than a verbal assurance. Whether you are managing a new build or addressing an existing leak, Prowaterproofing’s team applies current industry standards and quality control protocols to protect your investment. Visit Prowaterproofing to request a quote or speak with a specialist about your project’s waterproofing requirements.
FAQ
What is a waterproofing mock-up test?
A waterproofing mock-up test is a full-scale trial of a waterproofing system conducted on site before the main application begins. It verifies material performance, application quality, and watertight integrity under real site conditions.
How deep must the water be in a flood test?
Standard flood tests require water ponded to at least 50mm depth for 24–48 hours. All outlets must be dammed before flooding begins.
Which standards apply to waterproofing mock-up testing in South Africa?
SATAS certification is required for membrane systems on NHBRC and government projects. Quality control plans must include hold points at which an independent inspector signs off the mock-up result before work continues.
What happens if a mock-up test fails?
The root cause must be identified, the application method or material adjusted, and a fresh mock-up panel tested again. No main works should proceed until a clean pass is documented and signed off.
Why can’t a technical data sheet replace a mock-up test?
Technical data sheets describe performance under ideal laboratory conditions. A mock-up captures real site behaviour including heat of hydration, ambient humidity effects, and applicator technique, none of which a data sheet can predict.