
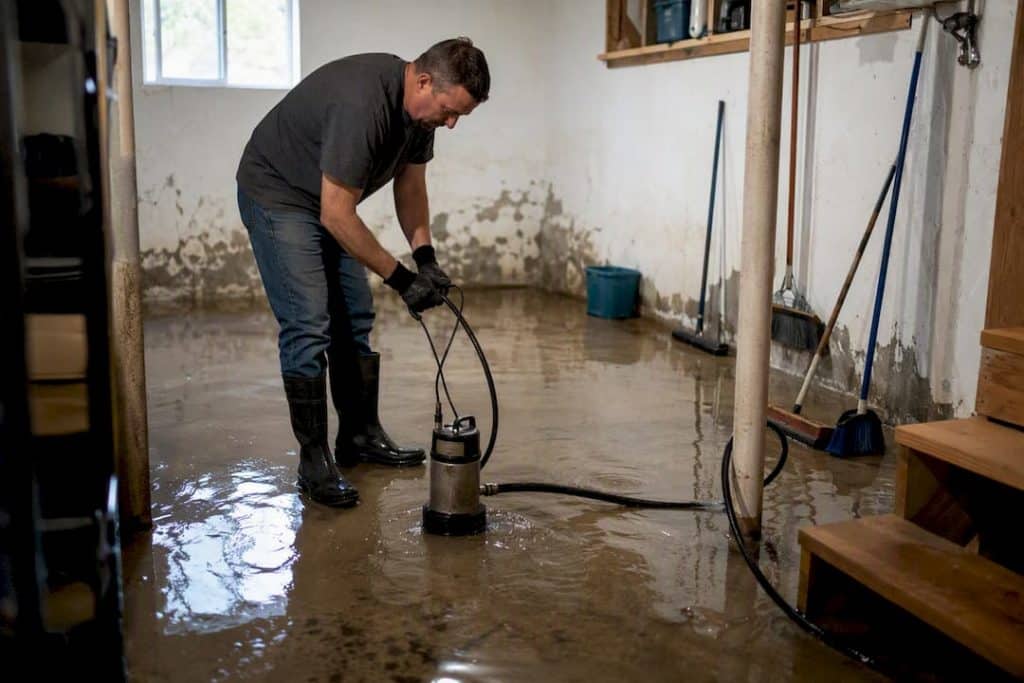
Stop the water, remove valuables from the floor, and switch off electricity to the affected area before you touch anything. Once the space is safe, remove standing water, get air moving, and run a dehumidifier while you work out where the water actually came from. The permanent fix depends entirely on that source: a burst or leaking pipe needs a plumber, groundwater pushing against your walls (hydrostatic pressure) usually needs drainage and a sump system or external waterproofing. A persistent damp smell with no obvious leak often points to condensation that insulation and ventilation can solve.
Do this now:
- Cut power to any sockets or fittings in standing water, but only at the mains if it’s safe to reach.
- Move furniture, boxes, and electronics off the floor immediately.
- Pump or wet-vac out standing water rather than waiting for it to evaporate.
- Open windows or run fans and a dehumidifier to start drying the space.
- Call a plumber if you suspect a burst pipe or failed fixture.
- Photograph everything before you clean up, for your contractor and your insurer.
Key Takeaways
Fixing water in a basement permanently requires correctly diagnosing the source first, then matching the repair (drainage, crack injection, or external tanking) to that specific cause.
| Point | Details |
|---|---|
| Act fast on safety | Cut power near standing water and remove valuables before starting any cleanup. |
| Diagnose before repairing | Match the fix to the cause: plumbing leak, hydrostatic pressure, poor drainage, or condensation. |
| Drainage beats sealant alone | Membranes and coatings usually fail against sustained groundwater without drainage support. |
| Know your DIY limits | Leave excavation, structural cracks, and slab drainage work to qualified contractors. |
| Prowaterproofing offers diagnosis-led repairs | An on-site assessment gives you a written quote and workmanship warranty matched to your actual water source. |
Table of Contents
- How to fix water in a basement: your first-hour checklist
- What is causing the water in your basement?
- Which permanent repair actually stops the leak?
- Should you DIY the fix or call a waterproofing contractor?
- What does fixing a basement leak typically cost?
- Get a proper diagnosis instead of guessing at the fix
- Frequently asked questions
- Sources
How to fix water in a basement: your first-hour checklist
Basement flooding is one of those problems where the first 60 minutes decide how bad the next six months look. Water sitting on a concrete floor for a day is an inconvenience. Water sitting there for a week is a mould colony.
Safety comes first, always. If water has reached electrical outlets, switch boxes, or any wiring, do not walk into it. Standing water and live electricity is a genuinely dangerous combination, and this is one of the few moments in a basement emergency where you should wait for a qualified electrician rather than improvise. If the water is still rising and near a gas appliance, get out and call for help before doing anything else.
Once the space is safe to enter, work through this sequence:
- Move anything of value, papers, or fabric off the floor first. Water wicks upward fast through cardboard and untreated wood.
- Remove standing water with a wet vac, a submersible pump, or buckets if the volume is small. Speed matters more than method here.
- Soak up residual moisture with old towels, then run box fans across the floor and walls.
- Set up a dehumidifier and keep it running for several days, even after the floor looks dry. Concrete holds moisture far longer than it appears to.
- If a storm is still active outside, sandbag low entry points and check that external drains near the foundation aren’t blocked.
- Once the immediate water is gone, inspect for a lingering damp smell, discoloured patches, or a white chalky residue on the walls, known as efflorescence.
Drying the space out properly, before you patch or paint anything, is the step most homeowners rush past. Sealing a wall over trapped moisture just moves the mould problem behind the wallpaper instead of solving it.
Damp basements are a recognised breeding ground for mould within 24 to 48 hours of water exposure, so treat the drying phase as non-negotiable rather than optional cleanup. If the water came from a sewer backup or has an odd smell, wear gloves and a mask, and consider calling a remediation specialist rather than handling it yourself. Stepwise drying and ventilation are the two moves that do the most to limit long-term mould risk after a leak.
Pro Tip: Before you move or clean anything, take wide photos of the flooded area, close-ups of any cracks or damp patches, and a note of the date and weather conditions. Contractors diagnose faster with this evidence, and insurers ask for it.
What is causing the water in your basement?
You cannot fix what you haven’t correctly identified, and this is where most DIY basement repairs go wrong. Sealing a crack that’s actually a symptom of groundwater pressure buys you a few dry months, then the same crack reopens somewhere else.
Work through these questions before deciding on a repair:
- Does it only happen after rain? That points to surface drainage, gutters, or grading rather than a plumbing fault.
- Is the water on the floor or coming through the walls? Wall seepage, especially near the base, often signals hydrostatic pressure from saturated soil outside.
- Is there a musty smell with no visible water? That’s usually condensation, common in summer when warm, humid air meets a cool concrete surface.
- Do you see white, powdery deposits on the walls? That’s efflorescence, mineral salts left behind as water evaporates through concrete, and it’s a reliable sign water has been moving through the wall for a while.
- Is the water localised near one wall or a window well? Check that well’s drainage and cover before assuming a structural issue.
Physically inspect your gutters, downpipes, and the grading around your foundation. Ground should slope away from the house, not toward it. Check plumbing fixtures and your water heater for slow leaks, and run a garden hose against a section of exterior wall for ten minutes while someone watches inside for seepage, an easy way to isolate a wall problem from a floor one.
Pro Tip: If water appears within hours of heavy rain and rises through the floor-wall joint rather than a visible crack, you’re very likely dealing with hydrostatic pressure. That calls for drainage and a sump system, not a tube of sealant.
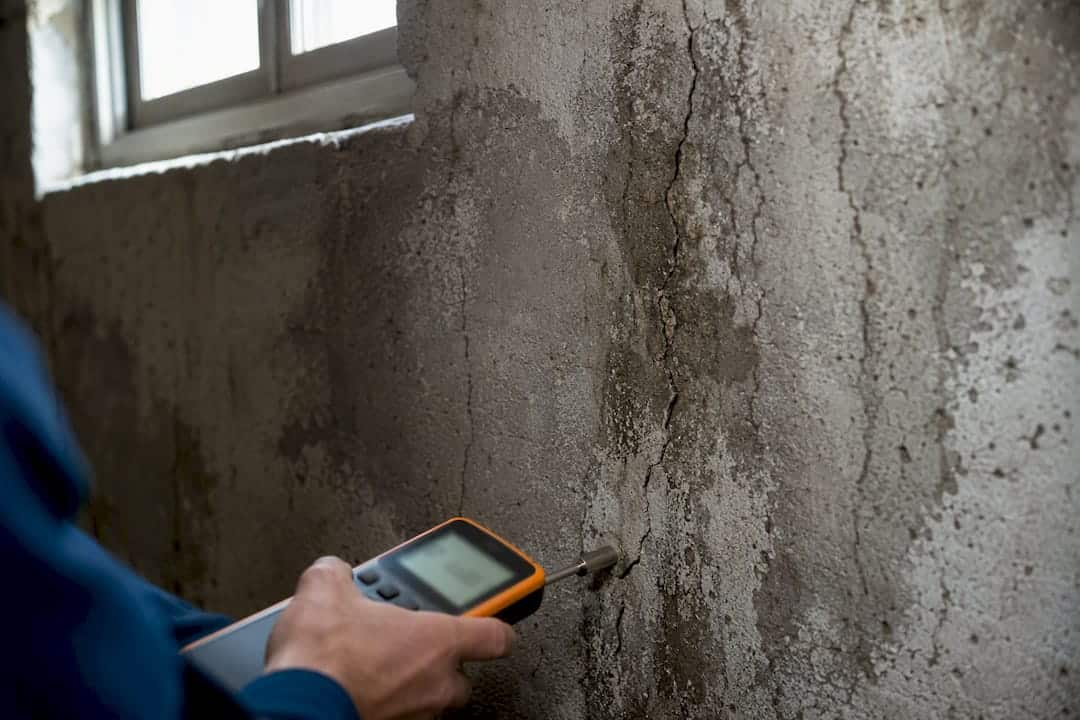
Persistent standing water without a clear plumbing cause is one of the strongest indicators of subsurface water pushing against your foundation, and it rarely resolves with surface patching alone.
Which permanent repair actually stops the leak?
Once you know the source, the repair options narrow considerably. Here’s how the standard approaches compare.
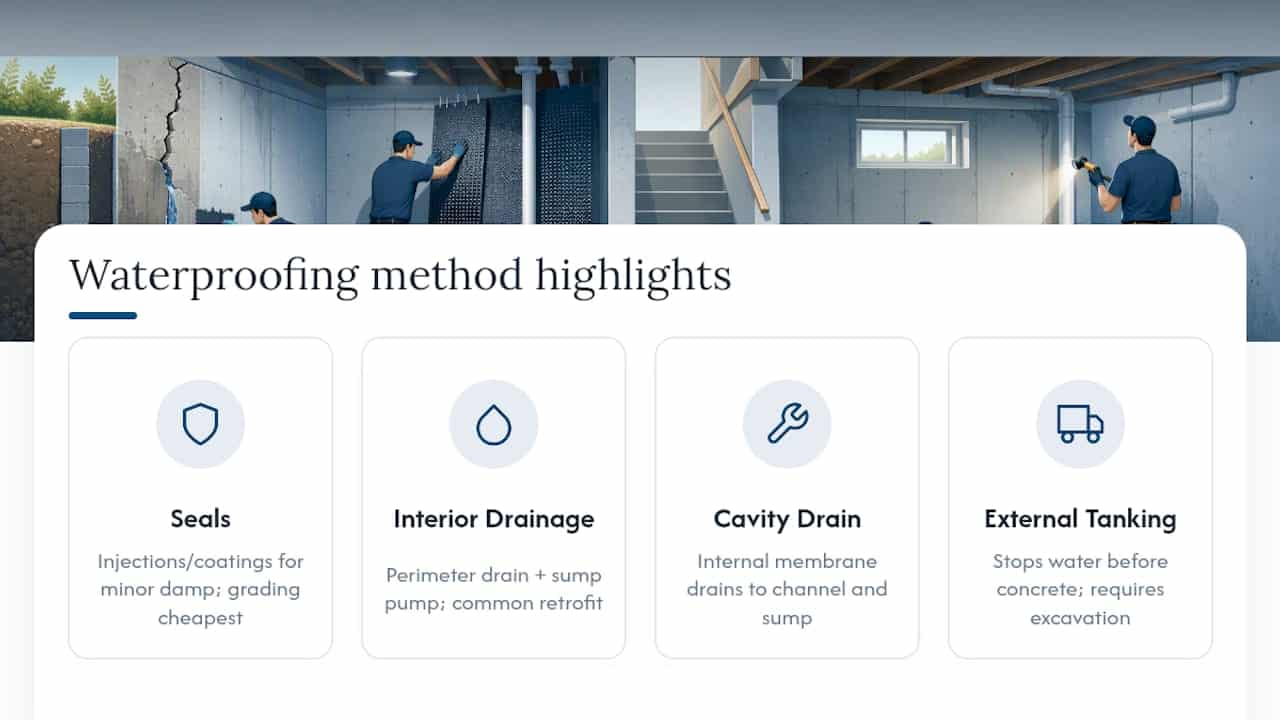
Crack injection uses epoxy or polyurethane resin injected directly into a foundation crack. It’s fast, relatively inexpensive, and effective for isolated, non-structural cracks, but it does nothing for a wall under constant hydrostatic pressure across its whole surface.
Interior perimeter drainage with a sump pump channels incoming water along a drain at the base of the wall to a sump pit, where a pump ejects it away from the house. This is the most common retrofit for finished basements because it doesn’t require digging up the garden, and it manages water rather than trying to block it outright at the source.
External tanking or membrane waterproofing applies a waterproof barrier to the outside of the foundation wall before backfilling. It’s widely regarded as the gold standard because it stops water before it ever reaches the concrete, but it means excavating around the house, which is disruptive and only realistic during new construction or a major renovation.
Cavity drain membranes are fitted internally against the wall, creating a gap that lets water drain down to a perimeter channel and sump rather than trying to hold it back. Many retrofit specialists favour this system for active leaks because it manages incoming groundwater rather than fighting it directly.
Cementitious or crystalline coatings work reasonably well against minor dampness but tend to fail against sustained water pressure unless paired with drainage behind them.
Improving surface grading and gutters costs the least and should happen regardless of which internal repair you choose. Drainage almost always needs addressing alongside any membrane or coating, since a membrane fighting standing groundwater on its own eventually loses.
South African National Standard SANS 10021 treats correct material selection and construction quality, particularly joint detailing, as the deciding factor in whether any of these methods actually holds up over time. A poorly installed premium membrane will fail faster than a well-installed basic one. You can read more on how to stop water from seeping through basement walls for wall-specific detail, or compare external and internal waterproofing methods in more depth.
Should you DIY the fix or call a waterproofing contractor?
Sealing a hairline crack, clearing gutters, fitting a window well cover, or running a portable dehumidifier are all reasonable weekend jobs. Excavation, structural crack repair, or any drainage system that ties into your building’s plumbing is a different category of risk entirely, and that’s where a qualified contractor earns their fee.
| Factor | DIY approach | Professional approach |
|---|---|---|
| Risk if wrong | Low, easily redone | High, can affect structural integrity |
| Typical cost | Lower upfront | Higher upfront, backed by warranty |
| Longevity | Short to medium term | Long term when done to standard |
| Disruption | Minimal | Can involve excavation or slab work |
Before hiring anyone, ask for proof of experience with basements specifically, a written workmanship warranty, and confirmation that drainage work follows SANS 10252 guidance on water supply and drainage installations where the sump discharge ties into existing plumbing.
What does fixing a basement leak typically cost?
Costs swing widely depending on the repair type, how deep excavation needs to go, your soil conditions, and the local water table. A single crack injection sits at the low end of the price scale and can often be completed in a day. Interior perimeter drainage with a sump system takes longer, usually a few days, and costs more because it involves cutting into the slab around the room’s perimeter. External tanking is the most expensive and time-consuming option, often a week or more once excavation, membrane application, and backfilling are all accounted for.
When comparing quotes, ask specifically about:
- Excavation depth and access requirements.
- Pump capacity and whether a battery backup is included.
- Membrane type and its expected lifespan.
- Written warranty terms and what voids them.
- Local labour rates and any applicable taxes on the quote.
Government drainage guidance is clear that pumping stormwater should be avoided where possible and that any sump specified for the job needs to be properly sized for the volume it will handle, not fitted as an afterthought. Check with your home insurer early too. Sudden pipe failures are sometimes covered, while gradual seepage or poor drainage generally isn’t, so documenting the damage as it happens matters for any claim.
Professional notes on standards and safe storage
SANS 10021 is blunt about one thing: the materials matter less than the workmanship. A correctly specified membrane installed with poor joint detailing will leak regardless of the product’s rating, which is why the installer’s track record matters as much as the system they’re proposing.
Where flood risk is genuine, don’t store anything valuable directly on a basement floor. Raise shelving an appropriate distance off the ground and check roofing, guttering, and indoor pipework regularly rather than waiting for a visible leak to prompt action.
- Ask any contractor for documented workmanship warranties, not just a materials guarantee.
- Confirm drainage and membrane choices reference recognised standards rather than a generic sales pitch.
- Keep irreplaceable documents and electronics off the floor permanently, flood risk or not.
A diagnose-first approach works better than patching symptoms
Most of the failed basement repairs I’ve seen traced back to one mistake: sealing the visible symptom without ever finding the actual source. Our approach at Prowaterproofing is straightforward. Diagnose the water’s origin, relieve the pressure causing it, then waterproof properly, in that order, not the reverse.
Get a proper diagnosis instead of guessing at the fix
A lot of basement water problems get worse because someone patches the wrong thing, buys a season of dry weather, then faces a bigger repair bill when the real cause resurfaces. Prowaterproofing exists to skip that guesswork stage. Rather than selling you a generic sealant kit, we send someone to actually look at your walls, your grading, and your drainage before recommending anything.

Requesting an on-site assessment gets you a written diagnosis, a fixed quote, and a workmanship warranty behind whatever solution fits your specific source of water, whether that’s crack injection, a sump and drainage system, or external tanking. Prowaterproofing also handles contractor vetting on your behalf, so you’re not left checking credentials yourself. If you’re dealing with water in your basement right now, request a quote through Prowaterproofing and get a proper assessment booked before the next heavy rain arrives.
Frequently asked questions
How do you fix a leaky basement permanently?
Identify whether the water is from plumbing, groundwater, poor surface drainage, or condensation, then apply the matching fix, a pipe repair, an interior drain and sump system, external tanking, or improved ventilation and insulation. Sealants alone rarely hold against sustained groundwater.
How do I stop water from seeping into my basement during heavy rain?
Check that gutters and downpipes are clear and directing water well away from the foundation, confirm the ground slopes away from your walls, and consider an interior perimeter drain with a sump pump if seepage happens with every significant rainfall.
Can I fix basement water seepage myself?
Minor tasks like clearing gutters, sealing shallow surface cracks, and adding window well covers are reasonable DIY jobs. Anything involving excavation, structural cracks, or drainage tied into your plumbing needs a professional.
How long does it take to fix a wet basement?
Drying out water can take a few days with fans and a dehumidifier running continuously. Crack injection often finishes in a day, interior drainage with a sump typically takes several days, and external tanking can run a week or more.
Is basement water always a sign of a serious problem?
Not always. Condensation from humid air meeting cool concrete is common and manageable with ventilation and a dehumidifier. Recurring water tied to rainfall or rising through the floor-wall joint usually points to a more serious drainage or hydrostatic pressure issue that needs professional attention.
Sources
- Guide to Architects concerning Drainage Water Supply and Stormwater Drainage
- SANS 10252 — Water supply and drainage for buildings (Part 1: Water supply installations for buildings)
- How to fix a wet, damp, or downright leaky basement — Efficiency Vermont
For complex or repeat leaks, consult a qualified contractor rather than relying on standards alone.