
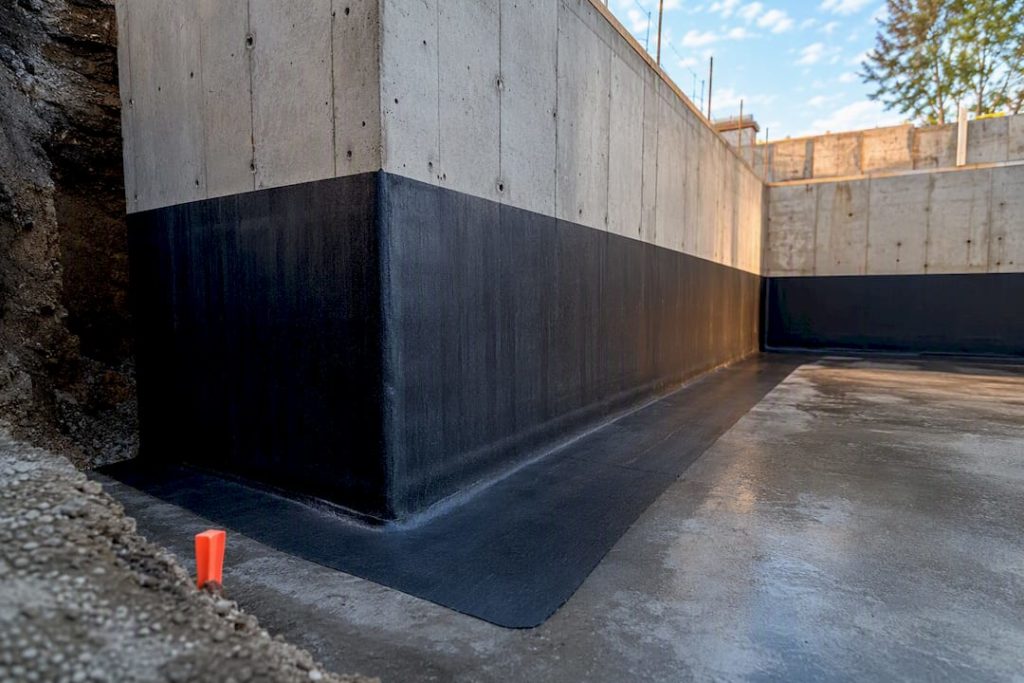
Box-type waterproofing (tanking) builds a continuous watertight envelope around a below-ground structure, sealing it against groundwater from every side. It is the right choice when hydrostatic pressure pushes against a basement, tank, or lift pit rather than water simply sitting on a surface. The rest of this guide walks through the variants, materials, and the step-by-step procedure you or your contractor should follow.
TL;DR:
- Box-type waterproofing is suitable primarily for structures exposed to hydrostatic pressure, such as basements in high water table areas and underground tanks.
- Traditional stone systems require significant excavation space, while modern membrane options are more adaptable for tight urban sites with limited clearance.
- Proper joint detailing, protection boards, and drainage tie-ins are crucial to prevent failures, which often stem from installation errors rather than material faults.
- A full, detailed specification including joint design and protection measures should be provided before work begins, along with a site assessment of water pressure and access constraints.
- Correct installation and site conditions can extend the lifespan of box-type systems to decades, but durability depends heavily on workmanship quality and careful planning.
Table of Contents
- What is box-type waterproofing and what are its main variants?
- Where is box-type waterproofing used and how do you decide if you need it?
- What materials and systems should you specify?
- How do you install box-type waterproofing step by step?
- What causes box-type waterproofing to fail?
- What does box-type waterproofing cost and how long does it last?
- What should you check before hiring a box-type waterproofing contractor?
- Why excavation clearance decides more than the spec sheet does
- Get a proper box-type waterproofing quote from Prowaterproofing
- Sources
What is box-type waterproofing and what are its main variants?
Box-type waterproofing, sometimes called tanking, wraps a structure in a continuous barrier rather than treating individual surfaces on their own. The idea is old: raft, walls and base are all protected as one sealed unit, so water cannot find a way round the system.
The traditional version uses Shahabad stone (a limestone slab) laid in staggered courses over rich cement mortar, with joints grouted to force water along a longer, harder path before it can reach the structure. It is still specified across parts of the world where the material and the labour are readily available.
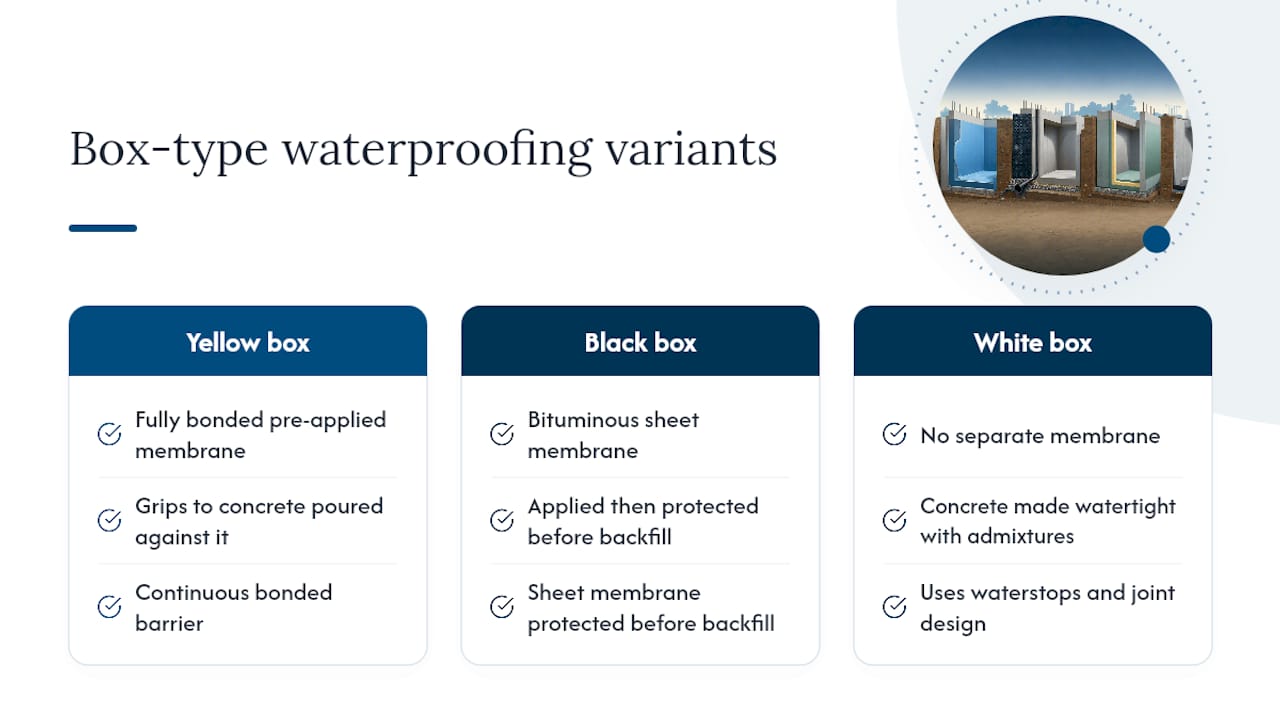
Modern practice has largely split into three concepts. Yellow box systems use fully bonded pre-applied membranes that grip directly to the concrete poured against them. Black box relies on bituminous sheet membranes, applied and then protected before backfill. White box dispenses with a separate membrane altogether, making the concrete itself watertight through admixtures, waterstops and careful joint design. Sika’s technical guidance sets out all three, plus hybrid combinations, and ties the choice to site exposure and how the structure will be built.
Where is box-type waterproofing used and how do you decide if you need it?
Box-type systems belong on projects where water pushes against the structure under pressure, not where it merely collects on a flat roof or balcony. That distinction decides everything that follows.
Typical applications include:
- Basements below the water table or in poorly drained ground
- Underground tanks and reservoirs
- Lift pits and other below-grade pits prone to standing water
- Podium slabs and below-grade car parks exposed to groundwater
Box-type systems sit among the heavier-duty solutions reserved for genuine hydrostatic pressure conditions, where lighter surface coatings simply won’t hold. Before committing to full tanking, check the soil report for water table depth, assess how aggressive the groundwater chemistry is, and confirm there’s enough excavation access to work safely around the perimeter. If pressure is mild and drainage can be improved instead, integral admixtures or internal tanking may be enough, and considerably cheaper.
What materials and systems should you specify?
Specification quality decides whether a box-type system lasts decades or fails within a few winters. The materials fall into four practical groups.
- Traditional stone and mortar: Shahabad tiles bedded in a rich cement mortar (commonly enriched with a waterproofing admixture), with every joint grouted and pointed to close the water path.
- Membrane systems: fully bonded FPO/hybrid sheets, APP or SBS bituminous membranes, and PVC or HDPE sheets, each suited to different construction sequences.
- White-box components: waterproofing concrete admixtures, PVC or hydrophilic waterstops at every joint, and properly detailed movement and construction joints.
- Complementary items: protection boards over exposed membranes, drainage pipework, geotextile filter fabric, and waterbars at penetrations.
Pro Tip: Never let a contractor substitute a cheaper waterstop or skip protection boards to save a day of labour — these are the components that fail first, long before the main membrane does.
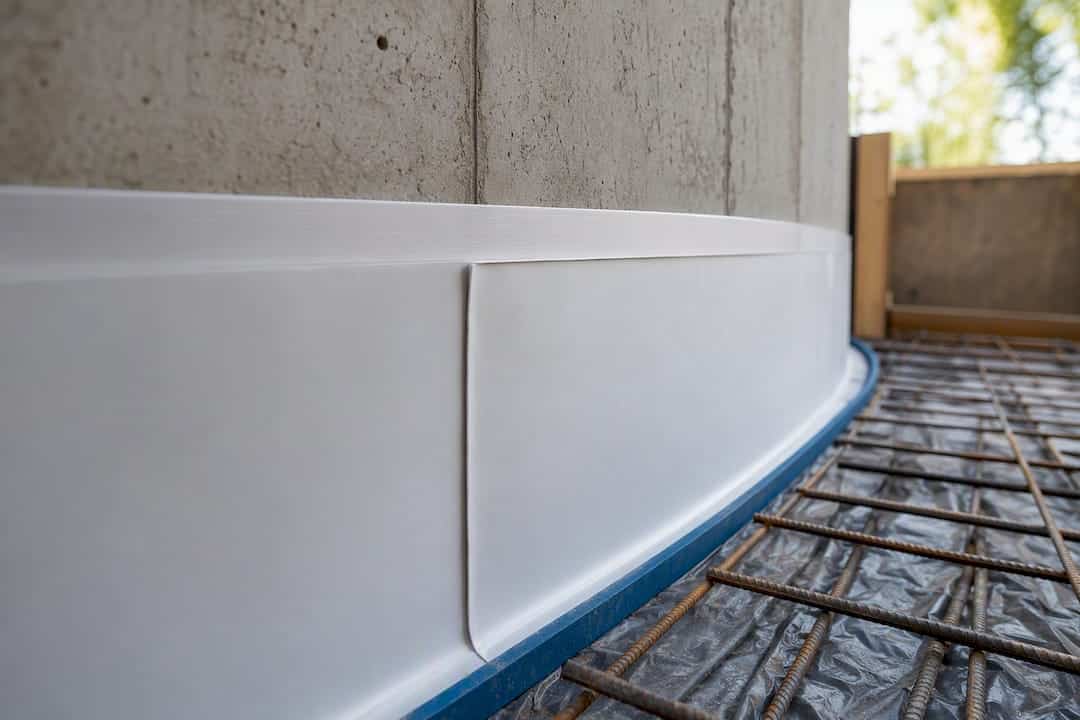
Fully bonded FPO sheet systems are worth flagging separately. Because they grip the concrete poured against them rather than sitting loose, they stop water tracking sideways between the membrane and the structure, which is one of the more common ways a “watertight” basement quietly fails. For protection boards and similar accessories, a material checklist for waterproofing details is a useful cross-check when comparing supplier quotes.
How do you install box-type waterproofing step by step?
Before any excavator moves, confirm three things on the drawings: the working clearance around the foundation, the drainage plan, and which box concept (Shahabad, membrane, or white box) the site actually allows. Traditional stone-box methods need real room to work, and tight urban plots often rule them out before a single stone is laid.
- Excavate and blind. Dig to the required depth and pour a blinding layer of concrete to give a clean, level working surface.
- Prepare the base. Bed Shahabad stone in mortar, or lay the pre-applied membrane directly onto the blinding, depending on the chosen system.
- Place stone or membrane up the walls. Continue the same system vertically, keeping joints staggered on stone work or laps consistent on membrane sheets.
- Grout and seal every joint. On stone systems, fill gaps with cementitious mortar and point them; on membranes, tape or weld laps according to the manufacturer’s detail.
- Cast the structural concrete. Pour the raft and walls against the prepared surface, incorporating waterstops at every construction and movement joint.
- Apply post-applied membranes or internal finishes where the system calls for a second layer of protection.
- Fit protection screed or boards over exposed membrane before backfill begins.
- Tie in drainage. Run drainage pipes at or below base-slab level so water pressure never builds against the finished system, then backfill in controlled layers.
Waterstops belong at every joint, penetration sleeves need their own detailing before the pour, and membranes must lap into the drainage layer rather than stopping short of it. On site, check surface cleanliness before application, test membrane continuity on self-adhesive sheets, record grouting and cure times on mortar work, and photograph everything before it disappears under backfill. Curing periods vary by mortar mix and weather, so follow the mix’s stated time rather than a fixed number of days. A step-by-step look at external basement waterproofing covers the QA sequence in more detail.
What causes box-type waterproofing to fail?
Most failures trace back to details, not the main material. Badly grouted joints in traditional stone work leave a direct path for water. Membranes get punctured or torn during careless backfilling. Drainage gets left out or under-specified, and penetrations for pipes and ducts are sealed as an afterthought rather than designed in from the start.
- Insist on protection screed or boards over every exposed membrane before backfill starts.
- Require joint detail drawings, not verbal assurances, at tender stage.
- Build in a sign-off point for a water test before the site is closed up.
- Treat any point where a pipe or cable passes through the box as a design detail, not a site improvisation.
Pro Tip: If a leak does appear years later, injection hoses and localised repairs are usually more practical than trying to expose a whole buried membrane. Full excavation should be the last resort, not the first response. Getting joint detailing right in the first place, covered in this guide to joint waterproofing, avoids that problem altogether.
What does box-type waterproofing cost and how long does it last?
Cost is driven mainly by excavated volume, the system chosen, and how much drainage and protection work the site demands. A white-box concrete approach can reduce membrane material costs but often raises the concrete specification and joint-detailing budget instead. Membrane systems trade lower concrete costs for more careful installation and protection work.
On lifespan, box-type systems can last for decades when correctly designed and installed, but that figure depends entirely on workmanship. Because membranes sit behind backfill, repair is harder once the site is closed up, which makes the installation stage the moment that determines most of the system’s working life. Periodic checks of visible joints, drainage outlets, and interior walls for damp patches catch problems while they’re still cheap to fix.
What should you check before hiring a box-type waterproofing contractor?
A proposal worth signing should name the exact product specification, show joint detail drawings including waterstop and injection-hose layout, describe the protection system for backfill, and confirm how drainage ties into the design. Ask to see this on paper before ground is broken, not promised verbally on site.
Red flags in a quote include vague material names, no mention of protection boards, and no water-testing or sign-off stage before backfill. A serious contractor will also explain why they’ve chosen a particular box concept for your site, referencing excavation access and groundwater conditions rather than defaulting to whatever they installed last time. Foundation and excavation constraints deserve their own scrutiny too, covered in this basement foundation construction guide.
A written warranty, a clear QA plan, and named products (not “equivalent approved”) are the baseline. Anything less leaves you carrying the risk once the site is backfilled.
Why excavation clearance decides more than the spec sheet does
Most guidance on box-type waterproofing spends its energy comparing materials: stone versus membrane, black box versus white box. That misses where projects actually go wrong. The material rarely fails on its own. The site constraints around it, especially how much room there is to excavate and work, decide which system is even possible before anyone opens a product catalogue.
A traditional Shahabad box needs generous working clearance around the foundation. On a tight urban plot hemmed in by neighbouring walls, that clearance simply doesn’t exist, and no amount of enthusiasm for the traditional method changes the geometry. This is where pre-applied membranes earn their reputation: they bond to formwork and need far less room to install, which is a practical answer to a site problem, not just a material upgrade.
The other overlooked point is that joint detailing, not the headline material, decides whether the box actually holds water out. A beautifully specified white-box concrete mix with a poorly detailed construction joint fails the same way a badly grouted stone box does. Get the design-phase site assessment and the joint drawings right first. Everything else is secondary.
— Eben
Get a proper box-type waterproofing quote from Prowaterproofing
Reading a procedure is one thing. Getting the joint details, drainage tie-in and protection system right on an actual site is another, and it’s where most box-type systems quietly go wrong. Our service connects property owners and managers with local waterproofing contractors across various projects involving basement, foundation, and below-ground waterproofing work.

Whether you’re weighing up a traditional stone box against a modern membrane system, or you simply want a written specification you can hold a contractor to, Prowaterproofing’s waterproofing services page is the place to start. Submit a quote request with your project details, and you’ll be connected with a contractor who can walk your specific site, check the excavation clearance, and recommend the box concept that actually fits your ground conditions rather than whatever happens to be on the truck that day.
Sources
For the technical background behind the systems discussed here, Sika’s basement waterproofing guidance sets out the yellow, hybrid, black and white box concepts in detail, and the Shahabad box-type presentation covers traditional stone-box specification. For related reading, see this guide on bituminous membranes and basement waterproofing methods.
- Waterproofing, Sika solutions for new concrete basements
- Types of Waterproofing — Membrane, Integral, Crystalline & More
- What Is Box-Type Waterproofing and Where Is It Used? – Waterproofrd