
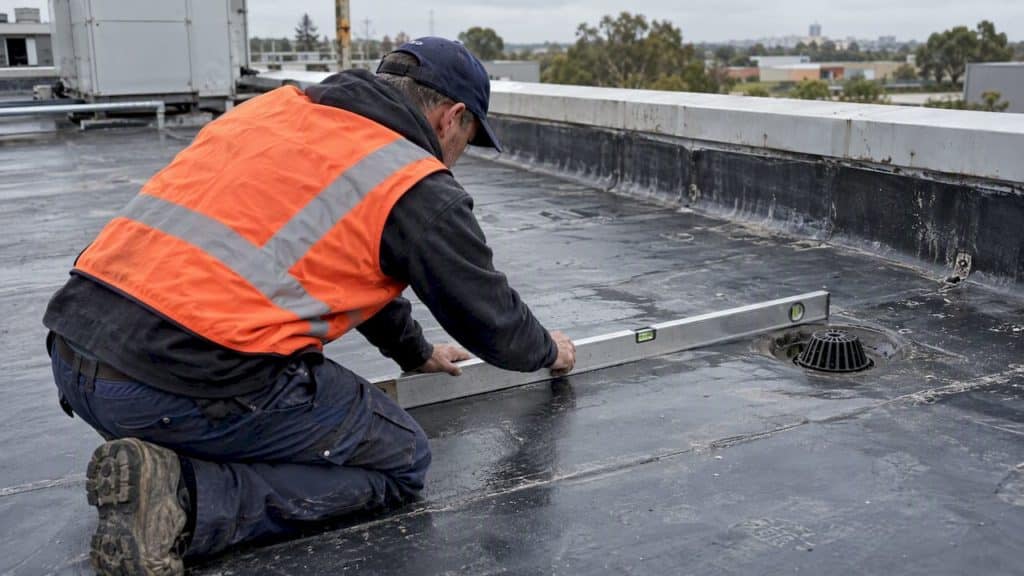
Good drainage keeps a flat roof dry and extends the life of both the waterproofing and the structure beneath it. Water that cannot leave the roof surface sits, ages the membrane and adds weight the deck was never designed to carry. Two habits make the biggest difference: checking outlets regularly and clearing debris before it blocks them. The sections below cover the checks, standards and fixes that keep a drainage system doing its job.
TL;DR:
- Proper drainage depends on regular inspection and cleaning of outlets, with ponding tests confirming effective water flow within 48 hours.
- The most common drainage systems—internal drains, scuppers, and gutters—each have weak points such as debris buildup, sealing issues, or sagging that require routine checks.
- The recommended minimum slope for finished falls is 1:80, with outlets placed at least 500 millimeters from walls and 1,000 millimeters from expansion joints.
- Address ponding problems by cleaning outlets, using temporary diversion methods, and considering re-screeding or adding outlets for persistent low spots.
- Regular inspections and logs before and after storms help detect issues early, preventing costly repairs and structural damage.
Table of Contents
- Why proper drainage matters for flat roofs
- Common flat roof drainage systems and how each work
- Design principles and standards to follow for falls and outlets
- Inspection and maintenance checklist for flat roof drainage
- How to fix ponding and common drainage problems
- How professional waterproofing and drainage integrate
- Maintenance first: a note from the author
- Pro Waterproofing: how we can help
- FAQ
- Sources
Why proper drainage matters for flat roofs
A flat roof is never perfectly flat. It relies on falls, outlets and gutters to move rainwater off before it causes damage, and when that system fails, the consequences stack up quickly. Standing water adds static load to a structure that may already be working near its design limit, and it accelerates the breakdown of bitumen and membrane surfaces faster than normal weathering would.
Ponded water also creates conditions for mould growth, timber rot in supporting structures and saturated insulation that loses its thermal value once wet. Where drainage backs up rather than draining away, water can push into parapets, overflow gutters and, in serious cases, find its way down into foundations.
- Ponding accelerates membrane ageing and adds unplanned load to the roof deck.
- Standing water encourages mould, timber decay and saturated insulation.
- Backed-up drainage can damage parapets, gutters and, eventually, foundations.
A 48-hour ponding test before waterproofing work is signed off remains one of the simplest ways to confirm a roof actually drains as designed rather than just looks like it should.
Common flat roof drainage systems and how each work
Most flat roofs rely on one of a handful of drainage approaches, often combined. Recognising which one covers a given roof helps when judging whether it is doing its job or needs attention.
- Internal drains: full-bore outlets set into the roof deck, usually fitted with catch baskets to trap leaves and grit before they reach the downpipe, and dependent on sound flashing where the outlet meets the membrane.
- Scuppers: openings through a parapet wall that let water exit at roof level, typically paired with overflow scuppers set slightly higher so a blocked primary outlet does not cause water to pool against the wall.
- Perimeter gutters and downpipes: effective on roofs with a clear edge fall, but limited on genuinely flat decks where water has nowhere obvious to run without a built-in slope.
- Tapered insulation or screed retrofits: added after construction to correct a roof that ponds, sometimes alongside new outlets positioned at the new low points.
Each system has a weak point worth checking: catch baskets fill with debris, scupper overflows get painted or sealed shut by accident, gutters sag under their own weight over time, and retrofitted falls can create new low spots if not tied into existing outlets correctly. Our waterproof membrane guide covers how membranes are detailed around each of these outlet types.
Design principles and standards to follow for falls and outlets
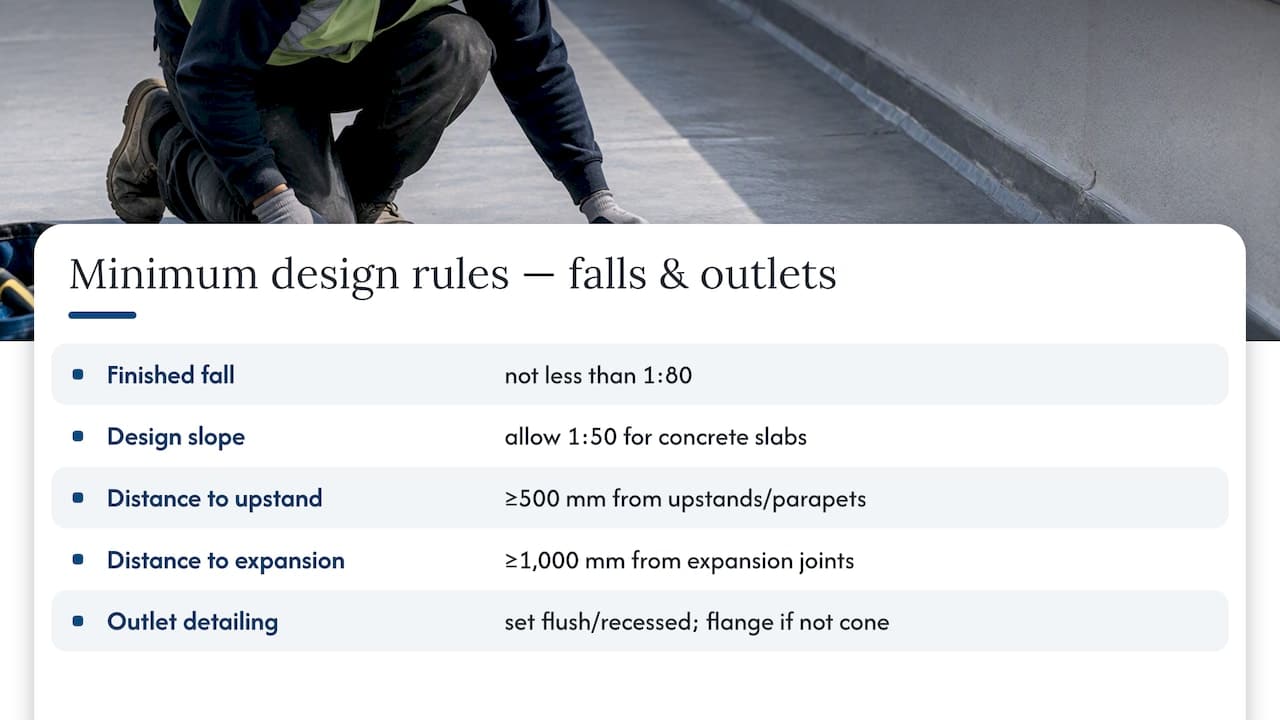
Drainage performance starts at the design stage, and a few numbers are worth knowing before accepting a contractor’s work as finished. SANS 10400 Part L recommends a finished fall of not less than 1:80, with a design slope allowance of 1:50 often used in concrete slabs to account for construction tolerances and deflection over time.
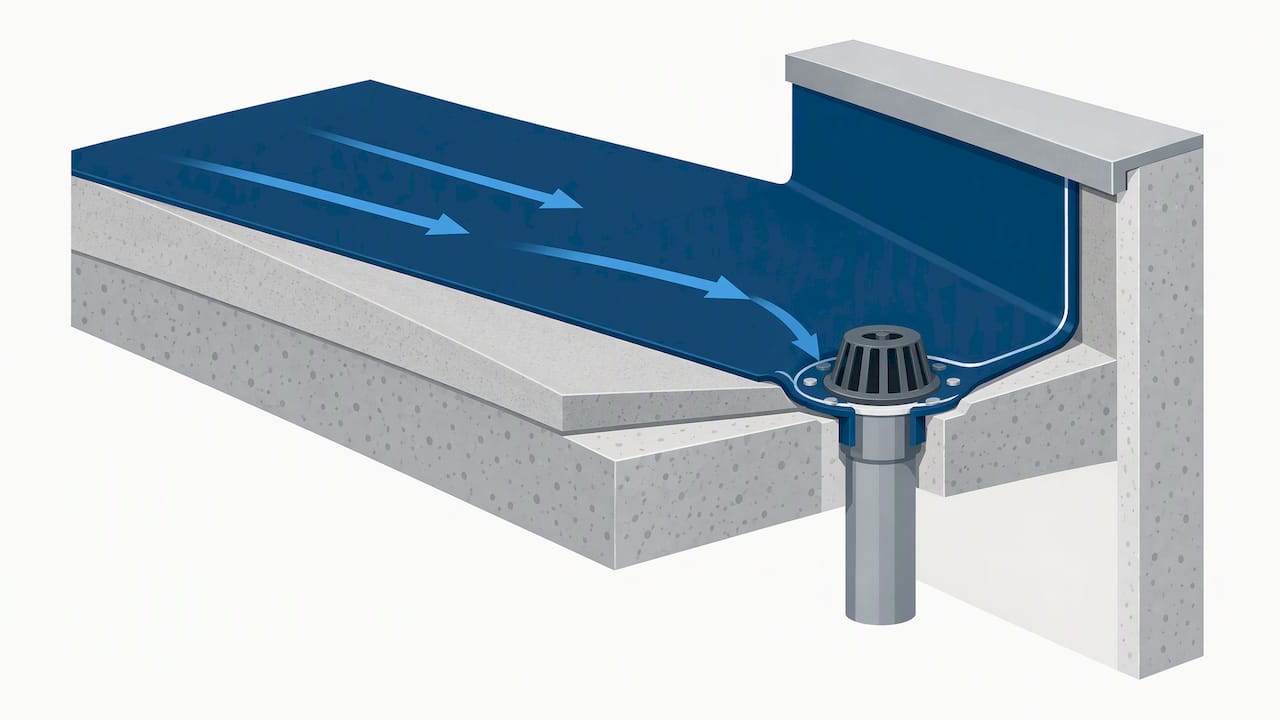
Outlet placement matters as much as the fall itself: outlets should sit at least 500 millimetres from upstands and parapet walls, and at least 1,000 millimetres from expansion joints, set flush or slightly recessed so water cannot pool around the rim. Where an outlet is not a full-bore coned type, it should be flanged so the membrane dresses onto a flat surface rather than into a round hole, which reduces the risk of tearing or delamination. Penetrations near low points should be kept to a minimum, and installation should follow the waterproofing manufacturer’s guidance under a competent installer.
Inspection and maintenance checklist for flat roof drainage
A drainage system only performs as well as its upkeep. A simple schedule, followed consistently, catches most problems before they become repairs.
- Monthly: clear leaves and debris from outlets and gratings, check scuppers are unobstructed, and look for any standing water that has not drained within 24 to 48 hours of rain.
- Six-monthly: rod and clear drains fully, inspect membrane seams near outlets, and confirm downpipes are discharging freely with supports still secure. Maintenance schedules used in public infrastructure projects list this six-monthly check cycle as standard practice for gratings and pipework.
- Annually: arrange a full inspection by a competent contractor, test the waterproofing where ponding has recurred, and replace worn or corroded gratings before they fail.
Pro Tip: Photograph any low spots or recurring ponding each time you inspect, and keep a simple maintenance log. It makes seasonal patterns and contractor conversations much easier before the rainy season arrives.
How to fix ponding and common drainage problems
Ponding is rarely one problem, it is usually a blocked outlet, a settled slab or a failed detail, and the fix depends on which. Start with triage, then decide whether a temporary or permanent solution is appropriate.
- Clear and inspect first: remove debris, lift and clean clogged gratings, and confirm the outlet itself is not cracked or displaced.
- Temporary measures: where ponding poses an immediate risk, a sump pump or temporary diversion channel can manage water while a permanent fix is arranged.
- Permanent remediation: re-screeding or adding tapered insulation corrects persistent low spots, while relocating or adding outlets addresses a drainage layout that was never adequate.
- Membrane repairs at outlets: flanged outlets that have pulled away should be re-dressed, mechanically clamped and counterflashed rather than simply resealed.
A roof with structural settlement, repeated ponding across multiple areas, or any sign of deck deflection needs an engineer or specialist waterproofing contractor rather than a routine repair. Property owners planning to add equipment such as solar panels should also have the roof’s structural load checked, since extra ponding risk compounds with added weight.
How professional waterproofing and drainage integrate
Outlet detailing is where waterproofing and drainage meet, and it is usually where failures start. A competent installer forms coves and turn-ups correctly, screeds to the specified fall, and dresses the membrane onto flanged outlets rather than leaving a gap for water to find.
When appointing a contractor for this kind of work, it is worth asking about their experience with outlet detailing specifically, confirming they carry appropriate licensing, checking whether they hold manufacturer approvals for the membrane system specified, and getting maintenance terms and warranty coverage in writing before work starts.
Maintenance first: a note from the author
Drainage checks are worth doing ahead of each season and immediately after any major storm, not just when a leak appears. Use the checklist above, photograph problem areas before requesting quotes, and keep records of every repair and warranty. Small habits here prevent most of the bigger repairs.
— Eben
Pro Waterproofing: how we can help
We offer flat roof waterproofing and drainage inspections, with drainage considered an integral part of the service. A site visit includes inspection of outlets, falls and membrane condition, photographing any problem areas, and providing a clear scope and quote before work begins.

If your roof has recurring ponding, a blocked outlet, or you simply want a second opinion before the next rainy season, get in touch through our waterproofing services page to request a quote.
FAQ
How does drainage work on a flat roof?
A flat roof is built with a slight fall, typically a minimum finished fall of 1:80 under SANS guidance, directing water towards outlets, scuppers or gutters rather than letting it pool. From there, internal drains, downpipes or scupper openings carry the water off the roof and away from the building.
What are three methods of draining flat roofs?
The three most common methods are internal drains with catch baskets, scuppers set through parapet walls with overflow protection, and perimeter gutters paired with downpipes. Tapered insulation or screed is often added as a fourth, corrective method where the original fall is inadequate.
What can I do if my flat roof doesn’t drain?
Start by clearing debris from outlets and gratings and confirming nothing is physically blocking the drain path. If ponding persists after clearing, the roof likely needs re-screeding, tapered insulation, an additional outlet, or a membrane repair at the outlet detail, which is work best assessed by a competent waterproofing contractor.
What is the purpose of a roof drain?
A roof drain removes rainwater from the roof surface before it can pond, add structural load or damage the waterproofing membrane. Properly sited and flanged outlets, as described in stormwater disposal guidance, also protect against water finding its way into parapets or the building structure itself.
Sources
- SANS 10400 Part L: Roofs (extract — drainage and waterproofing of flat roofs)
- Tender document — routine maintenance and servicing of rainwater disposal systems
- CSIR provisional bills of quantities — testing of flat roof waterproofing (ponding test)
- Guide to architects concerning drainage, water supply and stormwater drainage (government guidance)