

TL;DR:
- Water stains on ceilings indicate moisture problems that require fixing the leak first. Proper cleaning, priming with shellac or oil-based stain-blocking products, and thorough drying prevent stains from returning. Regular roof and plumbing inspections also help stop future ceiling stains.
A water stain on your ceiling is not just an eyesore. It is a warning sign that moisture has moved through your ceiling material, carrying dissolved tannins, rust, and debris that leave a yellow or brown ring behind. Knowing how to get water stain off ceiling surfaces properly means fixing the leak first, then treating the stain with the right products. Mould can begin growing on damp ceiling materials within 24–48 hours after moisture exposure. That urgency makes prompt, correct action the difference between a simple repair and a costly renovation.
How do water stains form and why do they come back after painting?
Water stains form when moisture moves through ceiling materials and evaporates, leaving behind dissolved minerals, tannins, and rust. The liquid dries, but the residue stays bonded to the surface in a distinct ring shape. That ring is not just discolouration. It is a physical deposit that ordinary paint cannot cover permanently.
Latex paint re-wets water-soluble tannins and minerals when applied over a stain. The stain bleeds straight through the fresh coat, often within days. This is why homeowners repaint a ceiling and find the brown ring reappears. The paint did not fail. The preparation failed.
Moisture also travels unpredictably inside walls and roof structures before appearing on your ceiling. Water often travels along structural parts before appearing, so the stain location may not sit directly below the leak point. Chasing the stain without tracing the actual water entry point leads to repeated failures.
Painting over an active leak or a still-damp ceiling causes bubbling, peeling, and mould growth behind the paint film. The moisture has nowhere to go and becomes trapped. Treating the symptom rather than the cause guarantees the problem returns.
Key reasons stains reappear:
- Water-based paints cannot seal water-soluble stain deposits
- The leak or moisture source was never fixed
- The ceiling was not fully dry before repainting
- Stain-blocking primer was skipped or applied too thinly
- The stain area was not cleaned before priming
Pro Tip: Before touching a paintbrush, press the back of your hand firmly against the stained area. If it feels cool or soft, the ceiling is still damp. Do not proceed until it feels completely dry and firm.
What tools and materials do you need for ceiling stain removal?
Gathering the right materials before you start saves time and prevents mid-job mistakes. Removing ceiling water stains requires both cleaning supplies and specialist painting products. Using the wrong primer is the single most common reason DIY ceiling stain removal fails.
| Item | Purpose |
|---|---|
| Moisture metre | Confirms the ceiling is fully dry before treatment |
| Safety goggles and gloves | Protects eyes and skin during cleaning and priming |
| Bleach and water solution (1:3 ratio) | Cleans surface mould and lightens staining before priming |
| White vinegar | Alternative cleaner for mild mould without bleach |
| Sandpaper (120 grit) | Smooths loose or flaking paint around the stain |
| Putty knife or scraper | Removes bubbled or peeling paint sections |
| Shellac or oil-based stain-blocking primer | Seals tannins and minerals to prevent bleed-through |
| Ceiling paint (water-based) | Final topcoat for a uniform finish |
Essential supplies checklist:
- Drop cloths and masking tape to protect walls and floors
- A sturdy stepladder rated for your weight
- A small roller and brush for primer application
- A second roller for the topcoat ceiling paint
- Disposable gloves for bleach handling
Bleach can lighten surface mould but does not seal water-soluble stains or prevent tannin bleed-through. Bleach is a cleaning agent, not a stain sealer. You still need a proper stain-blocking primer after cleaning. Skipping the primer and relying on bleach alone is one of the most common mistakes in water damage ceiling repair.
Pro Tip: A shellac-based primer such as Zinsser BIN dries in under an hour and provides the strongest stain seal available for ceiling repairs. Oil-based primers work well too, but take longer to dry.
Step-by-step process to remove water stains from ceilings
Removing ceiling water stains for lasting results follows a fixed sequence. Skipping any step, particularly the first two, causes the stain to return. Follow this process in order.
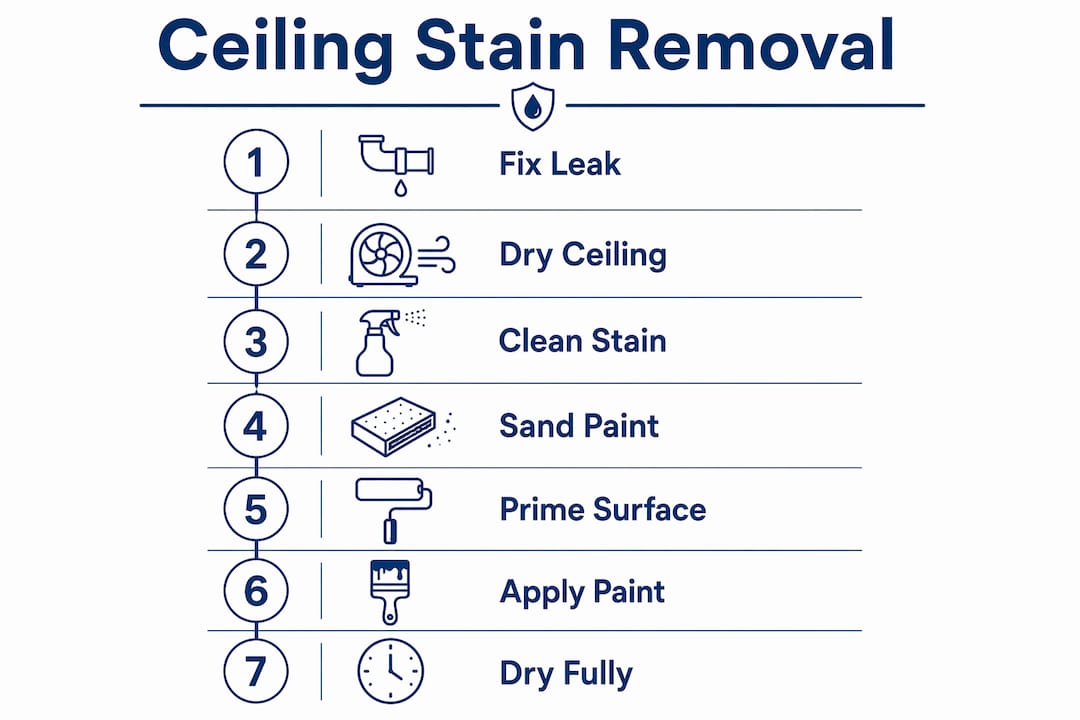
1. Identify and fix the leak
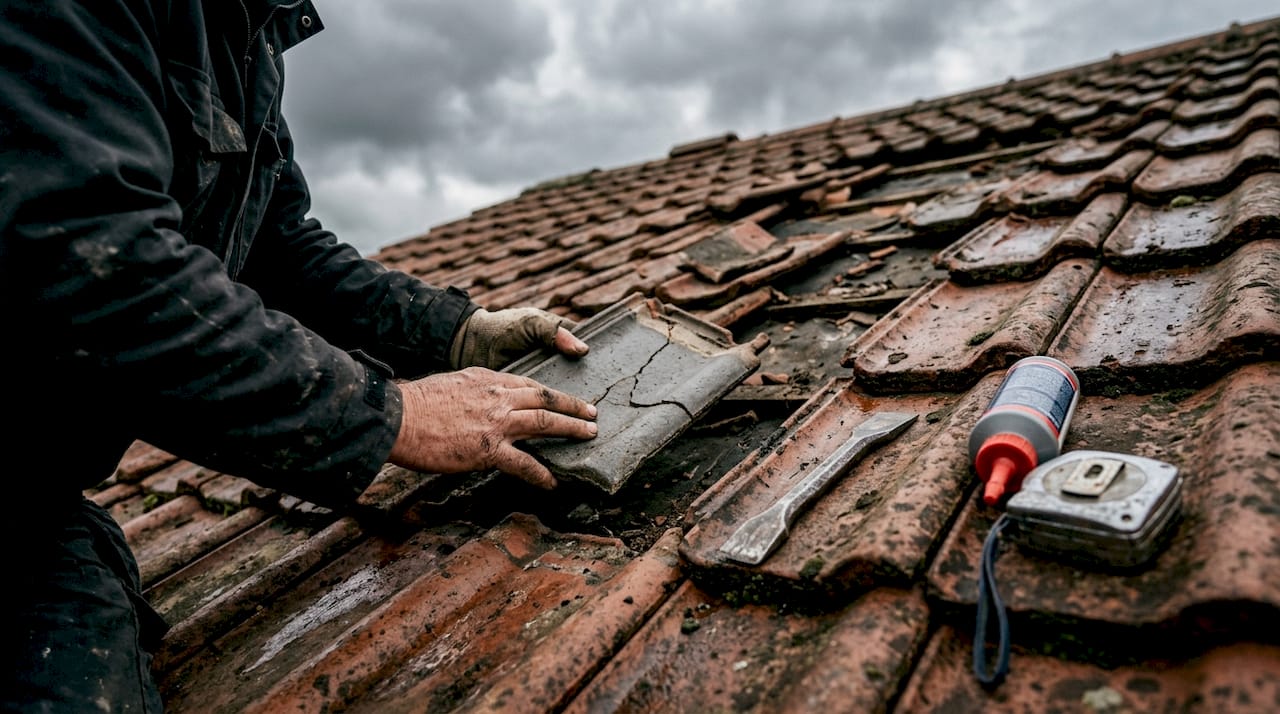
Trace the moisture source before touching the ceiling. Check the roof for cracked or slipped tiles, failed flashings, and blocked gutters. Check plumbing pipes and geyser overflow systems above the affected area. Fixing the roof or plumbing leak is the first step. Painting or patching alone will not stop water stains from returning. If you cannot locate the source yourself, a professional leak detection service can trace hidden leaks without invasive work.
2. Allow the ceiling to dry fully
Once the leak is fixed, the ceiling must dry completely. This can take several days to two weeks depending on how saturated the material is. Use a moisture metre to confirm dryness. The reading should reach the normal range for your ceiling material before you proceed.
3. Clean the stained area
Mix one part bleach with three parts water. Apply the solution to the stained area using a sponge or cloth. This removes surface mould and lightens the stain deposit. Allow the surface to dry completely after cleaning. For mild mould, white vinegar works as an alternative without the fumes.
4. Sand and remove damaged paint
Use 120-grit sandpaper to smooth any rough, flaking, or bubbled paint around the stain. A putty knife removes larger sections of loose paint. If the plaster or plasterboard is soft or crumbling, fill damaged areas with a suitable filler and allow it to cure fully before priming.
5. Apply stain-blocking primer
This step is the most critical in the entire process. A proper stain-blocking primer seals the stain permanently, preventing bleed-through and ensuring repainting lasts. Apply the primer generously, extending at least 5 centimetres beyond the visible stain edge. This prevents a ghost ring appearing at the primer boundary after painting.
“The stain-blocking primer is doing the real work here. The ceiling paint that follows is purely cosmetic. If you rush the primer stage or use the wrong product, the stain will bleed through regardless of how many topcoats you apply.”
6. Allow full drying time
Follow the primer manufacturer’s drying instructions precisely. Shellac-based primers typically dry within 45 minutes to one hour. Oil-based primers may need 4–8 hours. Do not apply ceiling paint before the primer is fully cured.
7. Apply two coats of ceiling paint
Apply the first coat of ceiling paint using a roller. Allow it to dry fully, then apply a second coat for a uniform finish. Two coats prevent patchiness and ensure the repaired area matches the surrounding ceiling. For a seamless result, consider rolling the entire ceiling rather than just the repaired section.
Pro Tip: Roll the ceiling paint in one consistent direction for both coats. Changing direction between coats creates visible lap marks once the paint dries.
How can you prevent water stains on ceilings from reappearing?
Prevention costs far less than repeated repairs. Most recurring ceiling stains trace back to neglected maintenance rather than sudden structural failure. A consistent inspection routine catches problems before they reach your ceiling.
Regular roof inspections every few years identify worn or damaged tiles, failed flashings, and blocked gutters before ceiling stains occur. After heavy rain or strong wind, a quick visual check of your roof from ground level takes minutes and can save thousands in repair costs. Pay particular attention to flashings around chimneys, skylights, and roof penetrations, as these are the most common entry points for water.
Indoor moisture problems including condensation and poor ventilation contribute to ceiling dampness and mould. Kitchens and bathrooms generate significant moisture daily. Extractor fans, open windows, and adequate airflow reduce condensation on cold ceiling surfaces. If your bathroom ceiling shows recurring staining without an obvious roof leak, poor ventilation is likely the cause.
Practical prevention steps:
- Inspect your roof after every major storm for displaced tiles or damaged flashings
- Clear gutters and downpipes at least twice a year to prevent overflow
- Check geyser pressure relief valves and overflow pipes annually
- Install extractor fans in bathrooms and kitchens if not already present
- Apply a waterproofing roof coating to flat or low-pitched roof sections every few years
- Monitor indoor humidity levels and use a dehumidifier in persistently damp rooms
Pro Tip: After fixing a ceiling stain, photograph the repaired area and note the date. If a new stain appears nearby within six months, the original leak source was not fully resolved and requires a deeper inspection.
In emergency situations where a ceiling bulges due to a pipe or geyser leak, shut off electricity and water supply immediately and drain the water safely to prevent collapse. A bulging ceiling holds significant water weight and can fail without warning.
Key takeaways
Removing ceiling water stains permanently requires fixing the moisture source first, then cleaning, priming with a shellac or oil-based stain-blocking primer, and repainting with two coats of ceiling paint.
| Point | Details |
|---|---|
| Fix the leak first | No cosmetic repair lasts if the moisture source remains active. |
| Dry fully before treating | Use a moisture metre to confirm dryness before cleaning or priming. |
| Use stain-blocking primer | Shellac or oil-based primer seals tannins and prevents bleed-through. |
| Extend primer beyond the stain | Apply primer at least 5 cm past the stain edge to prevent ghost rings. |
| Inspect regularly to prevent recurrence | Roof and plumbing checks every few years catch leaks before they stain. |
What I have learned from years of watching homeowners tackle ceiling stains
The most expensive mistake I see repeatedly is homeowners painting over a ceiling stain the same weekend they notice it. The ceiling looks dry to the eye, but the material inside is still saturated. Two weeks later, the stain is back and the paint is bubbling. Patience at the drying stage saves the entire job.
The second most common error is using bleach as the primary fix. Bleach lightens mould, which is useful, but it does nothing to seal the tannin deposits that cause the brown ring. Homeowners scrub the area, see it lighten, and assume the job is done. Then they paint directly over it with standard ceiling paint and wonder why the stain returns within a month.
Quality primer is not optional. A shellac-based stain-blocking primer is the product that actually solves the problem. It costs more than a tin of ceiling paint, but it is the only product that chemically seals the stain. Skipping it to save money guarantees a repeat repair.
My honest advice: if you cannot confidently locate the moisture source, call a professional before spending money on paint and primer. A roof waterproofing inspection or a plumbing leak trace costs far less than repairing a ceiling that has been painted over an active leak three times. Fix the cause, then fix the ceiling.
— Eben
When professional waterproofing makes sense for your ceiling
DIY ceiling stain removal works well when the leak source is obvious and the damage is contained. When stains keep returning despite correct treatment, or when multiple ceiling areas are affected, the underlying moisture ingress requires professional diagnosis.

Prowaterproofing provides expert leak detection, waterproofing membrane application, and tailored repair solutions for residential and commercial properties across South Africa. The team identifies moisture entry points that are not visible from inside the property and applies lasting waterproofing treatments that protect your ceiling from future staining. If your ceiling stains keep coming back, or if you want a professional assessment before starting repairs, contact Prowaterproofing for a quote and expert guidance.
FAQ
Why does my ceiling stain keep coming back after painting?
The stain returns because water-based paint re-wets water-soluble tannins, causing bleed-through. A shellac or oil-based stain-blocking primer applied before repainting permanently seals the stain.
Can I use bleach to remove a water stain from my ceiling?
Bleach lightens surface mould but does not seal the stain deposit. You still need a stain-blocking primer after cleaning to prevent the brown ring from bleeding through fresh paint.
How long should I wait before repainting a water-damaged ceiling?
The ceiling must be completely dry before you prime or paint. Depending on the extent of saturation, this can take several days to two weeks. A moisture metre confirms when the surface is ready.
How do I know if the leak is fixed before I repair the ceiling?
Monitor the stained area through at least one rain event or plumbing use cycle after the repair. If no new moisture appears and the ceiling feels dry and firm, the leak is resolved.
What is the best primer for ceiling water stains?
A shellac-based stain-blocking primer provides the strongest seal and dries within an hour. Oil-based stain-blocking primers are also effective and suit larger areas where shellac fumes are a concern.