
TL;DR:
- Proper diagnosis of basement leaks is essential before selecting sealing solutions or drainage systems to prevent repeated repairs.
- Sealing minor cracks with hydraulic cement or polyurethane caulk is effective, but active hydrostatic pressure requires drainage measures like French drains and sump pumps.
- Exterior waterproofing, combined with proper yard grading and gutter maintenance, offers the most durable long-term solution against water intrusion.
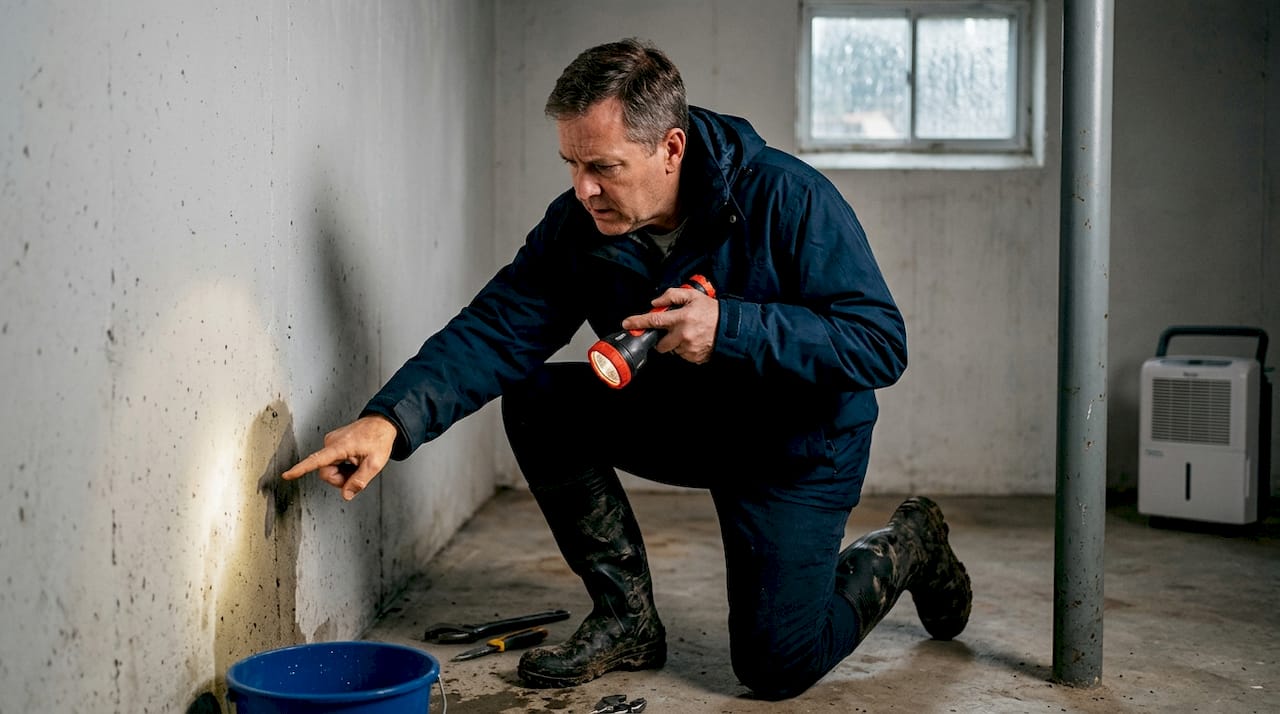
Sealing a leaky basement is the process of identifying and blocking water entry points in foundation walls and floors using targeted materials and drainage methods. The most common fixes range from hydraulic cement and polyurethane caulk for minor cracks to interior French drain systems and sump pumps for serious hydrostatic pressure. Knowing how to seal a leaky basement correctly starts with one non-negotiable step: diagnosing where the water actually comes from before you buy a single product. Get the diagnosis wrong and you will repeat the repair within months.
How to identify the source of basement leaks
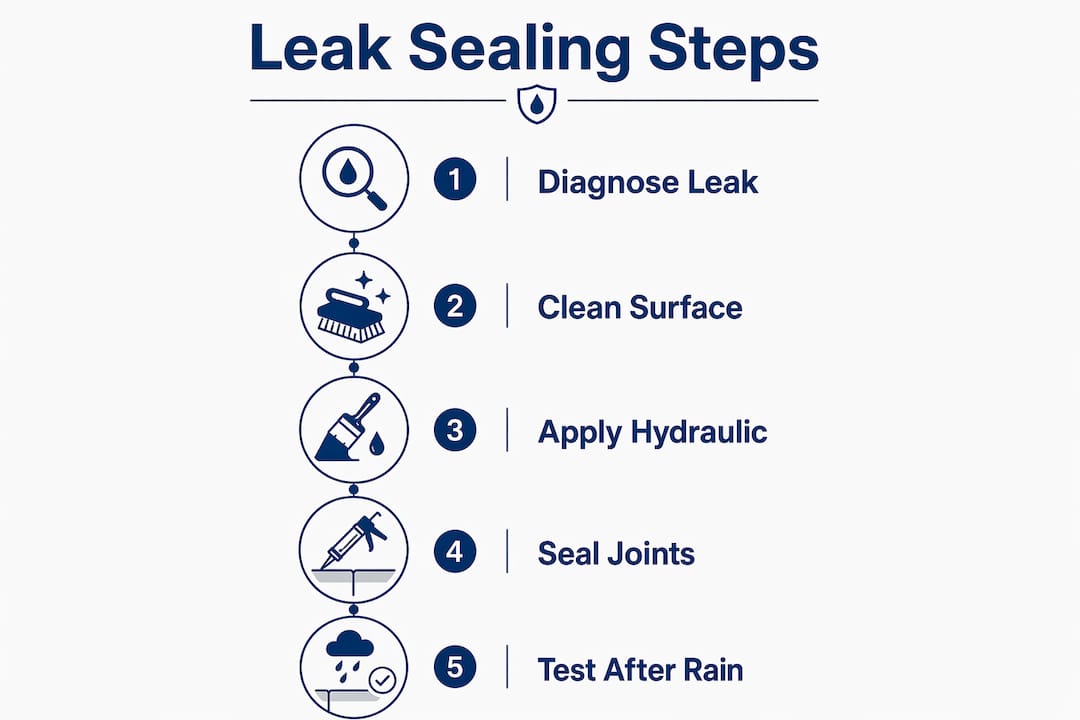
Applying the wrong fix is the leading cause of repair failure, which is why diagnosis comes before any sealing work. Basement water enters through three main pathways: cracks in the wall, the floor-wall joint, and porous masonry under pressure. Each pathway demands a different solution, so confusing them wastes both money and effort.
The simplest diagnostic tool is the aluminium foil test. Tape a 30 cm square of foil flat against a damp wall section, seal all four edges with duct tape, and leave it for 24 hours. If moisture collects on the room-facing side of the foil, you have condensation from interior humidity. If moisture collects on the wall-facing side, water is seeping through the masonry from outside. This single test separates a ventilation problem from a genuine waterproofing problem.
Beyond the foil test, look for these specific signs:
- White powdery deposits (efflorescence): Mineral salts left behind as water evaporates through concrete. Signals long-term seepage rather than a one-off event.
- Staining at the floor-wall joint: Water tracking along the base of the wall typically points to hydrostatic pressure or a failed footing drain.
- Horizontal cracks in block walls: These indicate lateral soil pressure and are structurally significant. Professional assessment is needed before sealing.
- Vertical or diagonal hairline cracks: Usually caused by concrete shrinkage or minor settlement. Often treatable with DIY methods.
- Active water flow during rain: Suggests a direct crack or gap rather than diffuse seepage through the wall face.
Pro Tip: Inspect your basement during or immediately after heavy rain. Active leaks are far easier to trace to their source when water is moving, and you will spot entry points that are invisible on dry days.
Hydrostatic pressure deserves special attention. When saturated soil surrounds a foundation, the weight of that water pushes inward with considerable force. Sealants applied to the interior wall face cannot resist sustained outward pressure from behind. Recognising this physics early prevents you from spending money on coatings that will blister and fail within a season.
What to use on basement walls for sealing minor cracks
For small, accessible cracks less than 1/8 inch wide, hydraulic cement is the go-to first-line material. Hydraulic cement expands as it sets, pushing deep into the crack to form a watertight plug. The critical limitation is time: mixed batches are workable for roughly three minutes, so you must prepare the crack and have your tools ready before mixing. Work in small batches and press the material firmly into the crack with a gloved hand or trowel, holding it in place until the initial set occurs.
Polyurethane caulk is the better choice for cracks at the floor-wall joint or anywhere slight movement is expected. Unlike rigid hydraulic cement, polyurethane remains flexible after curing, which means it accommodates minor seasonal movement without cracking again. Apply it with a standard caulk gun after cleaning the joint thoroughly with a wire brush and removing any loose debris.
For broader wall coverage, waterproof basement coatings such as Drylok or KILZ Basement and Masonry Waterproofer are widely used. A 5-gallon container covers approximately 500 square feet, and the product requires thick, even coats with full drying time between applications. These coatings work by penetrating the pores of bare concrete and blocking capillary moisture transfer. They are not a solution for active water pressure. Interior sealants fail when water pressure persists behind the wall, causing the coating to blister and peel.
Surface preparation is the step most DIY repairs get wrong. Follow this sequence before applying any coating:
- Remove all existing paint and coatings using a wire brush, angle grinder, or chemical stripper. Coatings bond to bare masonry, not to previous layers.
- Chip out efflorescence with a cold chisel and wire brush. These mineral deposits prevent adhesion.
- Clean the wall with a diluted muriatic acid wash (following manufacturer safety instructions) to open the pores of the concrete.
- Rinse thoroughly and allow the wall to dry completely. Most products specify a minimum drying period of 24 to 48 hours.
- Fill all visible cracks with hydraulic cement and allow it to cure fully before applying any coating over the top.
- Apply the first coat using a stiff masonry brush, working the product firmly into the surface. Follow with a second coat once the first is fully dry.
Pro Tip: Do not apply waterproof coatings in temperatures below 10°C or above 32°C. Extreme temperatures prevent proper curing and dramatically reduce the product’s rated effectiveness.
Hydraulic cement is best viewed as a temporary measure for small cracks rather than a permanent fix against heavy water pressure. For isolated wall cracks where injection is appropriate, epoxy or polyurethane crack injection costs between R9,000 and R36,000 per crack and offers a more durable structural repair, though DIY feasibility is low.
When drainage systems are the real answer
Sealing alone fails when hydrostatic pressure is the root cause. Interior perimeter drains combined with a sump pump are the recommended solution for active leaks at the floor-wall joint and for basements where water pressure builds up during wet seasons. These systems do not stop water from entering the wall. Instead, they intercept it before it spreads across the floor and channel it to a sump pit where a pump discharges it away from the foundation.
Installing an interior French drain involves cutting a channel around the perimeter of the basement floor, laying perforated pipe in a gravel bed, and covering it with a concrete cap. The work is disruptive and best handled by a specialist, but the result manages ongoing water intrusion far more reliably than any coating. Interior perimeter drains act as a secondary waterproofing method under engineering codes. They reduce hydrostatic pressure but do not replace exterior waterproofing where that is required.
The table below compares interior and exterior waterproofing approaches:
| Approach | Best for | Limitations |
|---|---|---|
| Interior coatings and sealants | Minor seepage, condensation control | Fails under active hydrostatic pressure |
| Interior French drain and sump pump | Active leaks, floor-wall joint seepage | Manages symptoms; does not address source |
| Exterior membrane and drainage board | Permanent fix for hydrostatic pressure | Requires excavation; higher cost |
| Crack injection (epoxy or polyurethane) | Isolated structural cracks | Low DIY feasibility; professional work needed |
Exterior waterproofing combined with drainage is the only permanent solution for hydrostatic pressure problems. It relieves pressure before it contacts the foundation wall, rather than managing the water after it has already entered. Excavating around the foundation to apply a waterproof membrane and install an exterior drainage board is expensive and disruptive, but for properties with persistently high water tables or severe pressure, it is the only fix that addresses the source rather than the symptom. You can read more about exterior waterproofing techniques to understand when this level of intervention is warranted.
Key maintenance points for drainage systems:
- Test your sump pump every six months by pouring water into the pit and confirming the float activates.
- Clear the perforated pipe inlet of sediment annually to prevent blockages.
- Install a battery backup for the sump pump so it operates during power outages, which often coincide with the heaviest rainfall.
Exterior measures that make sealing last longer
Interior repairs work best when exterior conditions are managed to reduce the volume of water reaching the foundation in the first place. Proper yard grading and gutter maintenance significantly reduce water pooling near foundations. The recommended standard is a slope of at least 150 mm over 3 metres away from the foundation, directing surface runoff away from the building rather than towards it.
Follow these exterior steps to support any interior sealing work:
- Check and correct yard grading. If soil has settled against the foundation over the years, add compacted fill to restore the outward slope. Avoid using loose topsoil, which erodes quickly.
- Clean gutters at least twice a year. Blocked gutters overflow directly against the foundation wall, saturating the soil and creating the exact conditions that drive hydrostatic pressure.
- Extend downspouts 1.2 to 1.8 metres from the foundation. Downspout extensions are inexpensive and prevent concentrated water discharge at the base of the wall.
- Inspect and seal window wells. Basement windows are a common and overlooked leak point. Fit window well covers to prevent rain accumulation, and seal the frame perimeter with polyurethane caulk.
- Manage plantings near the foundation. Large shrubs and trees draw moisture through their roots but also create channels for water to travel along roots directly to the foundation. Keep planting beds at least 600 mm from the wall.
Combination approaches using sealants with drainage and vapour barriers provide the best long-term moisture control. Exterior site management reduces the load on interior systems, extending the life of sealants and reducing how often sump pumps cycle. For properties in areas with high clay content soils, which retain water far longer than sandy soils, exterior grading corrections deliver a disproportionately large reduction in basement moisture. You can find further guidance on preventing basement water damage through a combination of these measures.
Key takeaways
Sealing a leaky basement requires accurate diagnosis first, followed by the right combination of sealants, drainage, and exterior water management to achieve lasting results.
| Point | Details |
|---|---|
| Diagnose before you repair | Use the aluminium foil test to confirm seepage versus condensation before buying any product. |
| Match the fix to the cause | Hydraulic cement and coatings work for minor seepage; hydrostatic pressure requires drainage systems. |
| Prepare surfaces properly | Remove all paint, efflorescence, and debris before applying any waterproof coating for rated adhesion. |
| Exterior controls extend sealant life | Correct grading and clean gutters reduce the water load that interior repairs must handle. |
| Drainage beats sealing under pressure | Interior French drains and sump pumps manage active leaks that coatings alone cannot stop. |
What I have learnt from watching homeowners repeat the same mistakes
The most expensive basement repair I have seen was not caused by a bad product. It was caused by a homeowner who applied two coats of Drylok over an unprepared wall with active hydrostatic pressure behind it. Within eight months, the coating had blistered off in sheets and the original crack had widened. The repair cost three times what a proper diagnosis and drainage installation would have cost at the start.
The pattern repeats constantly. Homeowners reach for a tin of waterproof paint because it is the most visible and accessible solution. But repeated repair failures almost always trace back to ignoring the physics of water pressure and trying to seal rather than relieve. Coatings are not wrong. They are simply the right tool for a narrow set of conditions: minor seepage through sound masonry with no active pressure behind it.
My honest recommendation is to spend the first hour on diagnosis, not on shopping. If you see staining at the floor-wall joint, horizontal cracks in block walls, or water that returns within weeks of sealing, get a professional assessment before spending more on materials. The distinction between dampproofing and true waterproofing matters enormously in high water table areas, and a qualified contractor will tell you which category your basement falls into. That conversation is worth more than any product on the shelf.
— Eben
Get professional help when DIY is not enough

Some basement leaks respond well to careful DIY work. Others need a professional assessment to identify the true source and install a system that lasts. Prowaterproofing offers expert basement waterproofing services across South Africa, from interior drain installation and crack injection to full exterior membrane application. If your basement keeps leaking despite repeated repairs, or if you are dealing with visible structural cracks or persistent floor-level seepage, the team at Prowaterproofing can assess the situation and recommend a solution matched to your specific conditions. Before committing to any major waterproofing project, it also pays to understand how to evaluate contractor bids so you get genuine value for your investment.
FAQ
What is the best material for sealing basement wall cracks?
Hydraulic cement is the most effective material for small cracks under 1/8 inch wide, as it expands on setting to form a watertight plug. For cracks at the floor-wall joint where movement is expected, flexible polyurethane caulk is the better choice.
Can waterproof paint stop basement leaks permanently?
Waterproof coatings such as Drylok work for minor seepage through sound masonry but are not reliable against hydrostatic pressure. If water pressure persists behind the wall, coatings will blister and fail regardless of how many coats are applied.
How do I waterproof a basement wall from the inside?
Clean the wall back to bare masonry, remove all efflorescence and loose material, fill cracks with hydraulic cement, and apply two thick coats of a masonry waterproof coating. For guidance on interior waterproofing methods, combining coatings with a drainage system gives the most reliable result.
When should I install a sump pump instead of sealing?
Install a sump pump when water enters at the floor-wall joint, when leaks return after sealing, or when the basement floods during heavy rain. These are signs of hydrostatic pressure that sealants alone cannot address.
How do I stop leaks in basement walls caused by outside water?
Correct yard grading to slope away from the foundation, extend downspouts at least 1.2 metres from the wall, and seal window well frames. For persistent pressure-driven leaks, exterior waterproofing with a drainage membrane is the only source-control solution.