TL;DR:
- Proper ventilation is essential to prevent moisture buildup that can undermine waterproofing systems. Without adequate airflow, trapped vapor causes premature membrane failure, mould growth, and structural damage. Tailored ventilation solutions, including wall plugs and roof vents, are vital for long-lasting waterproofing in South African climates, emphasizing the importance of integrating airflow management into project planning.
Thousands of South African homeowners invest in premium waterproofing membranes, coatings, and damp proofing systems, only to watch mould creep back across their ceilings or moisture pool beneath their floors within a season or two. The waterproofing product itself is rarely the culprit. What most owners and even some contractors miss is the role that ventilation plays in keeping those systems working. Without adequate airflow, moisture vapour builds up inside walls, roof cavities, and beneath membranes, quietly undermining even the most carefully applied waterproofing solution. This guide explains exactly how ventilation and waterproofing work together, and what you can do to protect your property properly.
Table of Contents
- Why ventilation matters for waterproofing
- Key ventilation solutions for South African properties
- Common mistakes: Balancing ventilation and waterproofing
- Tailoring ventilation and waterproofing to South African climates
- Our take: Why most waterproofing failures come down to missed ventilation details
- Next steps: Work with local waterproofing and ventilation experts
- Frequently asked questions
Key Takeaways
| Point | Details |
|---|---|
| Ventilation prevents hidden moisture | Allowing airflow is critical to stop damp and mould beneath waterproofing membranes. |
| Balanced solutions last longer | Pairing the right ventilation with waterproofing can extend system lifespan by decades. |
| Avoid common mistakes | Over-blocking airflow or using the wrong system undermines the best waterproofing products. |
| Climate matters | Adapt your ventilation and waterproofing approach to suit South African regional conditions and building types. |
Why ventilation matters for waterproofing
Think of your property as a sealed container. Every day, cooking, showering, breathing, and rainfall push moisture into the air and into building materials. Waterproofing membranes and coatings are designed to block liquid water from entering, but vapour is a different matter entirely. Without airflow, that vapour has nowhere to go.
Poor ventilation traps moisture under waterproof membranes, eventually causing them to blister, delaminate, and fail well before their expected lifespan. This is not a minor technical detail. It is one of the most common reasons that professionally installed waterproofing systems underperform in South African properties. When a membrane fails after two or three years in a climate where it should last ten or fifteen, trapped vapour is usually the explanation.
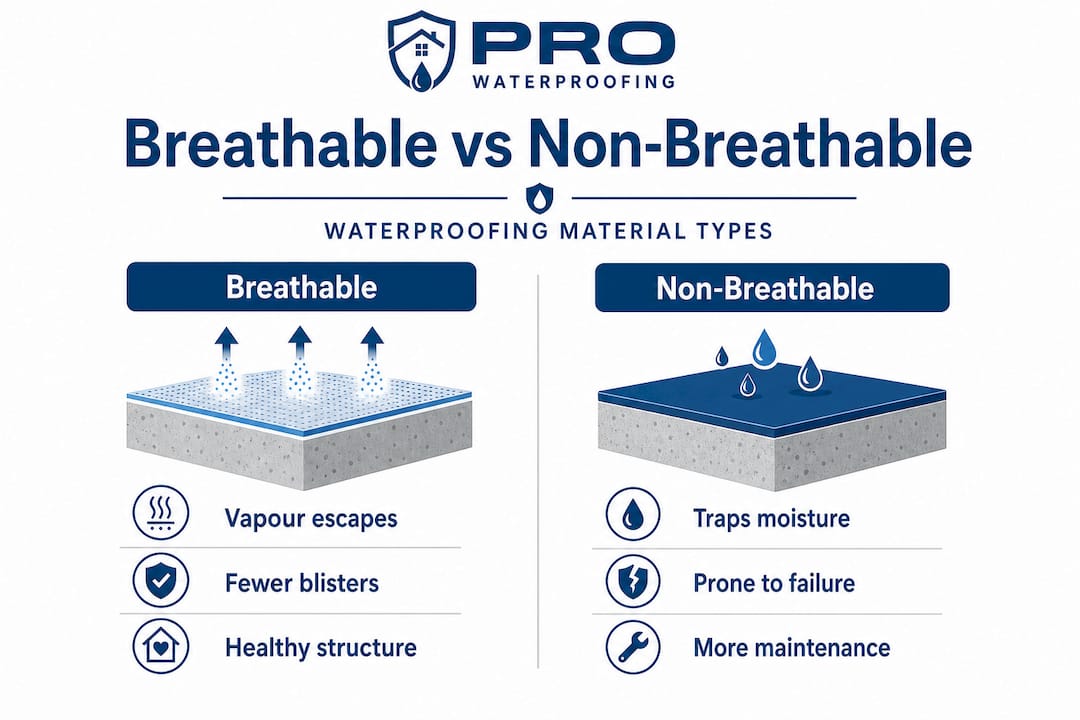
Understanding breathable waterproofing principles helps clarify this further. Some waterproofing materials allow vapour to pass through while still blocking liquid water. These breathable systems reduce the pressure of trapped moisture, but they still work best when paired with deliberate ventilation design. Relying on breathability alone, without managing airflow, is only half a solution.
Here is a straightforward overview of how ventilation affects different waterproofing approaches:
| Waterproofing method | Ventilation requirement | Consequence of poor ventilation |
|---|---|---|
| Bitumen membrane (flat roof) | High | Blistering and delamination |
| Acrylic coating (pitched roof) | Moderate | Peeling and cracking |
| Crystalline damp proofing (walls) | Moderate | Efflorescence and mould |
| Torch-on membrane (below slab) | Low | Reduced lifespan from sub-surface vapour |
| Cavity wall construction | High | Cavity moisture accumulation |
Following waterproofing best practices in South Africa means treating ventilation as part of the waterproofing specification, not as a separate afterthought. The current SA waterproofing standards increasingly reflect this joined-up approach.
Key reasons ventilation is essential alongside waterproofing:
- Trapped vapour raises internal pressure, forcing moisture through micro-cracks in membranes
- Warm, moist air condensing on cold surfaces causes interstitial condensation (moisture forming inside building materials) that no surface coating can address
- Stagnant air encourages mould and mildew growth, which physically degrades bonding agents in waterproofing products
- Without airflow, wet materials dry far more slowly after rainfall or plumbing leaks, extending the window for structural damage
Pro Tip: During any waterproofing project planning stage, ask your contractor to produce a ventilation assessment alongside their waterproofing specification. If they cannot do both, find someone who can.
Key ventilation solutions for South African properties
Once the need for ventilation is established, choosing the right method makes all the difference for both new builds and renovations. South African properties vary enormously, from double-storey coastal homes in Cape Town to single-storey brick houses in Gauteng and corrugated iron structures in rural KwaZulu-Natal. Each scenario calls for a different ventilation approach.
“Wall ventilation plugs like DampVent accelerate drying of trapped moisture post-damp proofing, preventing mould and further damage in South African walls.” This is particularly relevant in older properties where rising damp has saturated brick or plaster over many years.
Wall ventilation plugs are discreet plastic or ceramic inserts drilled into external walls at regular intervals. They allow air to circulate through the wall cavity or the body of a solid masonry wall, drawing out moisture without requiring any mechanical equipment. Proper spacing matters enormously. Plugs that are too far apart leave dead zones where moisture accumulates.
A standard spacing guide for wall ventilation plugs:
| Wall material | Recommended plug spacing | Optimal height above floor |
|---|---|---|
| Solid brick (230mm) | Every 900mm horizontally | 150 to 300mm above floor |
| Cavity brick wall | Every 1200mm horizontally | 75mm above damp proof course |
| Hollow concrete block | Every 750mm horizontally | 150mm above floor |
| Stone rubble wall | Every 600mm horizontally | 200 to 350mm above floor |
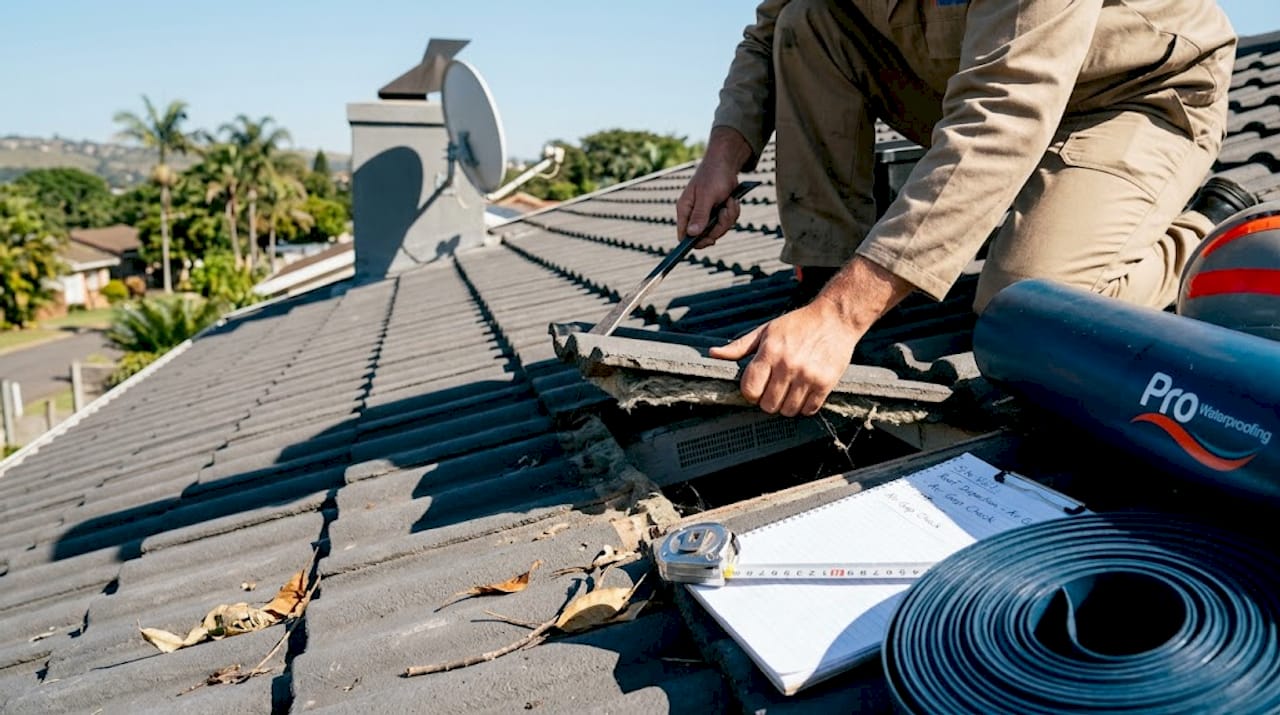
For roofs, the situation is equally important. Roof ventilation controls condensation by allowing moist air to escape the roof cavity, which directly protects timbers, insulation, and waterproofing membranes from degradation. A well-vented roof cavity dramatically extends the service life of the entire roof assembly.
How to add or inspect roof and wall vents on your property:
- Start with an inspection. Walk your roof space and walls after rainfall. Use a moisture meter if possible. Look for discolouration, efflorescence (white salt deposits on brickwork), or a musty smell.
- Map your existing ventilation. Note where current vents, soffit openings, or wall plugs are positioned. Identify gaps longer than 1.5 metres without any ventilation point.
- Calculate the required vent area. A general rule for pitched roof spaces is one square metre of free vent area for every 300 square metres of ceiling area, balanced between low eaves and high ridge positions.
- Choose the right vent type. Ridge vents suit pitched roofs; mushroom or dome vents suit flat and low-pitched roofs; wall plugs suit solid and cavity masonry.
- Install and seal correctly. Every vent penetration is a potential water entry point. Use waterproof collars and flashing around any roof vent, and ensure wall plugs are bedded in a water-resistant mortar.
- Re-inspect after installation. Check for any new damp patches within 30 to 60 days. Ventilation improvements often reveal existing moisture that then needs to dry out, which is expected and not a sign of failure.
These damp proofing tips can help you understand the full picture when addressing moisture in walls before or after adding ventilation.
Pro Tip: In South Africa’s humid coastal regions, use stainless steel or UV-stabilised plastic ventilation components. Standard galvanised steel corrodes quickly in salt air, negating the benefit of the vent entirely within a few years.
Common mistakes: Balancing ventilation and waterproofing
With the right solutions in mind, it is also vital to understand how to avoid pitfalls that could undermine your waterproofing efforts. Ventilation done incorrectly can be as damaging as no ventilation at all.
One of the most misunderstood areas involves flat roofs. In flat roofs, improper venting can worsen condensation by drawing moist indoor air into insulation layers. This is the opposite of what most people expect. The distinction between vented and unvented roof assemblies is critical, and getting it wrong is an expensive mistake.
Common misconceptions and corrections:
- Misconception: More vents always means better protection. Correction: Unbalanced venting creates negative pressure that pulls warm, humid indoor air into the roof cavity, causing more condensation, not less.
- Misconception: Waterproofing seals everything, so ventilation is unnecessary. Correction: No membrane is entirely vapour-proof. Vapour pressure builds up regardless and needs a managed escape route.
- Misconception: Wall plugs are only for old or poorly built properties. Correction: Even modern properties with cavity walls benefit from deliberate ventilation, particularly in high-humidity areas.
- Misconception: Roof vents are only needed in summer. Correction: Winter is often when condensation damage is worst, as warm interior air meets cold roof surfaces. Ventilation is a year-round requirement.
- Misconception: You can install vents anywhere for convenience. Correction: Vent placement must follow the direction of prevailing winds and the physics of warm air rising. Random placement reduces effectiveness dramatically.
Rear-ventilated roof assemblies, where a deliberate air gap sits between insulation and the roof covering, have been shown to last significantly longer than sealed assemblies in South African conditions. Properties using this approach correctly regularly achieve roofing lifespans of up to 25 years before major remediation is needed.
Understanding the difference between waterproofing vs damp proofing is important here, as each system interacts differently with ventilation. Using the waterproofing inspection checklist can help you spot ventilation-related failures before they escalate.
Pro Tip: When in doubt about vented versus unvented assemblies, always follow SANS 10400 (the South African National Standard for construction) requirements for your specific building type and climate zone. This protects both your property and your insurance position.
Tailoring ventilation and waterproofing to South African climates
With a clear sense of what to avoid, the next step is adapting solutions for your unique property and region. South Africa covers an enormous range of climatic conditions, from the wet winters of the Western Cape to the humid subtropical summers of KwaZulu-Natal and the dry, temperature-extreme Highveld of Gauteng.
“Vented roofs prevent interstitial condensation but require balanced intake and exhaust; unvented compact roofs rely on vapour control and insulation stacking instead.” Choosing incorrectly for your climate zone can invalidate both the ventilation and the waterproofing system.
How to assess and adapt ventilation for your property and region:
- Identify your climate zone. South Africa uses SANS 204 to classify climate zones from 1 (arid Highveld) to 6 (humid subtropical coast). Each zone has different moisture load expectations that affect how aggressive your ventilation strategy needs to be.
- Assess your building type. Flat-roofed commercial properties in Johannesburg face different condensation risks to pitched-roof homes in Durban. The roof assembly, wall construction, and occupancy pattern all influence what is needed.
- Evaluate your current insulation. Insulation without a vapour control layer (a thin membrane that limits vapour movement) can trap moisture inside the roof assembly. This is particularly problematic in humid coastal zones.
- For coastal properties, prioritise cross-ventilation in roof cavities with corrosion-resistant vent hardware. Salt-laden air accelerates material degradation, so both the ventilation components and the waterproofing membranes need to be rated for coastal exposure.
- For inland properties, focus on managing the large temperature swings between day and night. These swings create repeated condensation cycles. Continuous ridge venting combined with soffit intake vents manages this effectively.
- Consult current waterproofing regulations before starting any project. Local municipalities sometimes impose requirements beyond the national SANS standards, particularly in flood-prone or coastal protection zones.
Our take: Why most waterproofing failures come down to missed ventilation details
After working on properties across South Africa, from modest residential renovations to large commercial roof recoveries, a pattern becomes very clear. The waterproofing products used in failed systems are almost never inferior. The membranes, coatings, and sealants are usually exactly what the specification called for. What is missing, almost every time, is deliberate thought about site-specific ventilation.
Contractors focus heavily on product selection and application technique, which matters enormously. But they often apply solutions based on what worked on the last job, rather than what the current building’s orientation, occupancy, and climate zone actually demand. In South Africa’s varied conditions, that copy-paste approach is risky. A solution that performs perfectly in a dry Highveld warehouse fails in a humid Durban apartment block, even if the membrane is identical.
What separates long-lasting waterproofing jobs from the ones that get called back is always the planning phase. The best contractors we have encountered think about air movement before they think about product selection. They ask where moisture is coming from, where it needs to go, and how to create a pathway for it to leave the building assembly without ever touching the waterproofing membrane.
The industry standards for waterproofing in South Africa are evolving to recognise this. But standards catch up slowly. In the meantime, as a property owner, the most powerful thing you can do is demand a ventilation assessment as part of any waterproofing project proposal. If a contractor presents you with a membrane specification and a price without mentioning airflow, cavity conditions, or vapour management, that is a significant warning sign.
Do not accept waterproofing without ventilation planning. The two are inseparable if you want results that last.
Next steps: Work with local waterproofing and ventilation experts
Protecting your property from moisture damage is not simply a matter of buying a quality product and having it applied correctly. Every building has its own moisture pathways, ventilation gaps, and climate challenges. What works for your neighbour’s home may be entirely wrong for yours.

At Pro Waterproofing, we approach each project with an assessment that covers both the waterproofing specification and the ventilation requirements specific to your property and region. Whether you need an inspection of existing systems, a plan for a new build, or remediation of a failed membrane, our team brings local knowledge and current standards expertise to every consultation. Start by reviewing the step-by-step inspection checklist to understand what to look for on your own property, then speak to a waterproofing expert for a tailored assessment. The sooner you address ventilation alongside waterproofing, the longer your investment will last.
Frequently asked questions
Can I add ventilation to my property after waterproofing is installed?
Yes, various solutions such as wall ventilation plugs and roof vents can be retrofitted after waterproofing, and products like DampVent accelerate drying of trapped moisture quickly without disturbing existing membranes.
Does roof ventilation really extend the life of waterproofing membranes?
Roof ventilation prevents trapped condensation from building up beneath membranes, and moist air escaping the cavity means membranes avoid the repeated swelling and drying cycles that cause early failure.
What are signs my property needs better ventilation for waterproofing?
Persistent mould patches, a musty odour, peeling paint on internal ceilings, efflorescence on brick, and recurring damp patches after rain all suggest moisture is not escaping the building assembly efficiently, even where waterproofing is present.
Are there risks to over-ventilating or using the wrong system?
Yes, particularly with flat roofs, where improper venting worsens condensation by drawing warm indoor air into insulation layers, so choosing the correct assembly type and vent placement is essential rather than simply adding more vents.