TL;DR:
- A well-designed basement interior requires comprehensive moisture control through professional waterproofing and insulated foundation walls. Modern finishes like luxury vinyl plank flooring, layered lighting, and multi-zone layouts create a warm, functional living space that mimics upper floors. Prioritizing moisture mitigation ensures durability and long-term value, preventing costly issues like mould and buckling finishes.
A basement interior is a purposefully designed below-ground living space that combines moisture control, appropriate materials, layered lighting, and spatial organisation to function as a comfortable, practical extension of your home. The term “finished basement” is the recognised industry standard for this type of space, though “basement interior” captures the full scope of design decisions involved. In 2026, the benchmark has shifted considerably. Modern basement design now demands finishes and lighting that deliver a feeling indistinguishable from upper floors, rejecting old tolerances for dim, unfinished spaces. Materials like luxury vinyl plank flooring, moisture-resistant drywall, and LED lighting systems have made that standard genuinely achievable for most homeowners.
How to prepare your basement interior against moisture
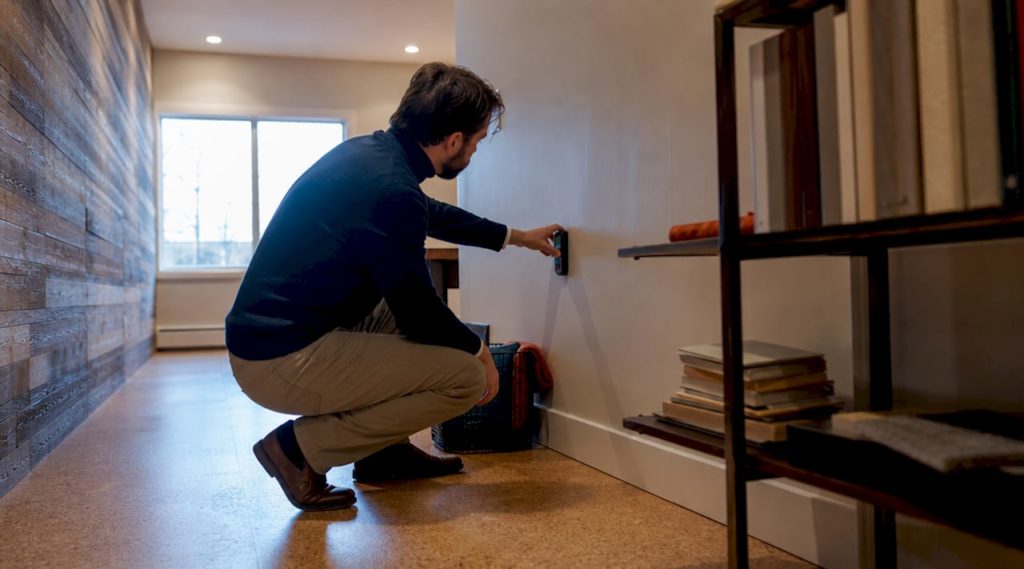
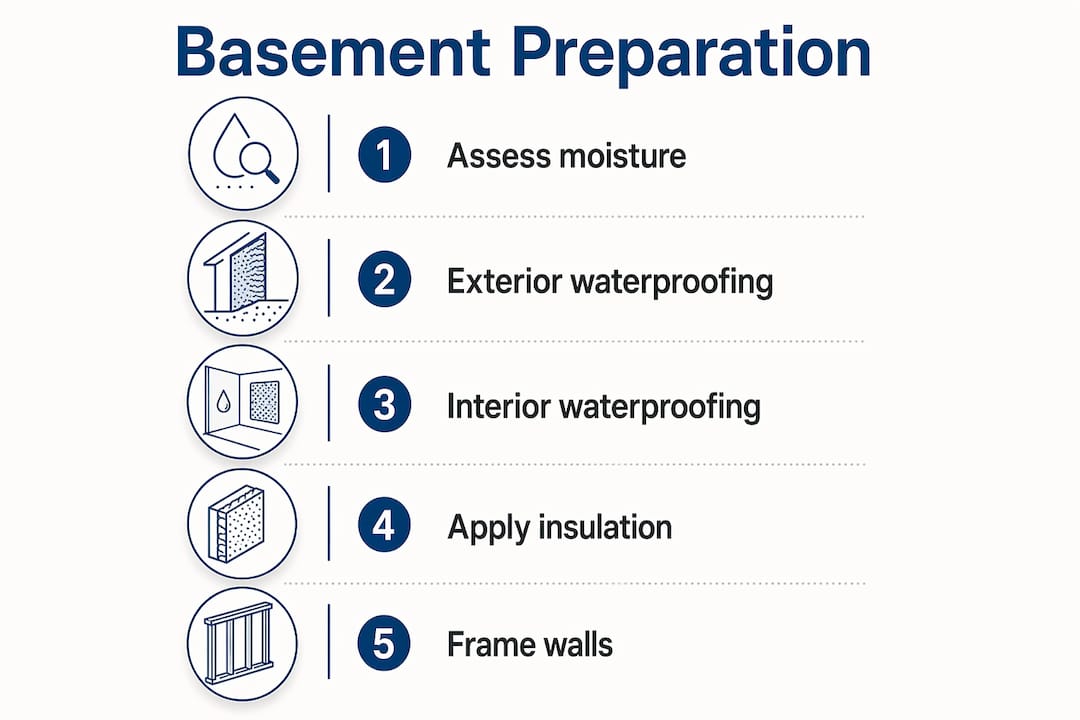
Moisture mitigation is the single most critical step before any design work begins. Untreated moisture leads to mould, warping, and peeling finishes within seasons, undoing every rand or dollar spent on flooring and décor. A professional moisture assessment identifies whether your foundation walls are dry, whether groundwater is a risk, and what waterproofing method suits your specific site conditions.
Interior and exterior waterproofing serve different purposes and carry different costs. Exterior waterproofing addresses the root cause by sealing foundation walls from the outside, while interior waterproofing methods manage water that has already entered the structure using drainage channels and sump pumps. For most residential renovations, a combination of both approaches delivers the most durable result. Prowaterproofing recommends a professional inspection before committing to either method, as the wrong choice can create a false sense of security.
Insulation is equally non-negotiable. Concrete foundation walls act as thermal bridges, drawing cold and moisture inward. Rigid foam board or closed-cell spray foam insulation applied directly against the foundation wall prevents humidity absorption and mould risk. Traditional fibreglass insulation is unsuitable for basements because it absorbs moisture and becomes a breeding ground for mould within months.
Key preparation steps before finishing your basement:
- Commission a professional moisture and waterproofing assessment
- Address any active water ingress using exterior wall waterproofing before framing
- Install rigid foam board or closed-cell spray foam against all foundation walls
- Fit a vapour barrier over insulation before framing interior walls
- Use moisture-resistant drywall such as greenboard, purple board, or DensArmor near wet areas
- Confirm compliance with local building codes before proceeding
Pro Tip: Never frame directly against a concrete wall without insulation. Even in dry climates, seasonal temperature changes cause condensation on bare concrete, and that moisture will migrate into your framing and finishes over time.
Which flooring works best for a finished basement?
Flooring choice defines the feel of a basement more than almost any other single decision. The wrong material in a below-grade environment will buckle, grow mould, or feel cold underfoot within a year or two. The right choice lasts decades and contributes directly to the warmth and comfort of the space.
Luxury vinyl plank (LVP) is the industry-recommended flooring for basements due to its waterproofing and durability. Material costs typically run between $2 and $5 per square foot, and pairing LVP with a cork or foam underlayment adds warmth underfoot and absorbs sound between floors. LVP now comes in realistic wood and stone finishes that are genuinely difficult to distinguish from the real thing at a glance.
| Flooring type | Best use | Moisture resistance | Approximate cost |
|---|---|---|---|
| Luxury vinyl plank (LVP) | Living rooms, offices, gyms | Excellent | $2–$5 per sq ft |
| Carpet with waterproof pad | Bedrooms, media rooms | Moderate | $3–$6 per sq ft |
| Rubber flooring | Home gyms, utility areas | Excellent | $2–$8 per sq ft |
| Engineered hardwood | Dry, climate-controlled basements | Low to moderate | $4–$10 per sq ft |
| Polished concrete | Industrial or modern aesthetic | Excellent | $2–$6 per sq ft |
Carpet remains popular for basement bedrooms and media rooms because it adds acoustic absorption and warmth. The critical caveat is that carpet must be paired with a waterproof pad, and it should never be installed in areas prone to any moisture. Rubber flooring in commercial-grade thickness (at least 8mm) is the correct choice for home gym zones, as it absorbs impact, resists moisture, and protects the subfloor from dropped weights.
Underlayment deserves more attention than most renovation guides give it. A quality cork or closed-cell foam underlayment beneath LVP raises the surface temperature noticeably, reduces sound transmission to the floor above, and adds a slight cushion that makes the space feel less industrial.
What lighting techniques create warmth in a basement interior?
Lighting is where most basement renovations either succeed or fail at creating a genuinely liveable space. The absence of natural light is the defining challenge of any below-grade environment, and flat institutional lighting makes the problem worse rather than better.
The most effective approach is a layered lighting system. Recessed LED can lights spaced 4 to 6 feet apart provide general illumination, while floor lamps, wall sconces, and task lighting add depth and warmth at different heights. This layering creates visual interest and prevents the flat, shadowless quality that makes basements feel like car parks.
Colour temperature matters more in basements than in any other room. The recommended range is 2700K to 3000K for general living areas. This warm white tone mimics incandescent light and reads as comfortable and residential rather than clinical. Avoid anything above 4000K for general lighting in a living zone.
For basements without windows, one genuinely clever solution is worth knowing. Thin 3/8-inch LED light panels mounted behind shutter frames at around 4200K simulate natural window light convincingly. The slight blue-white tone at that colour temperature reads as daylight coming through glass, and the shutter frame creates the visual cue of a window. The effect is surprisingly convincing and far less expensive than cutting an egress window.
Dimmers are non-negotiable for basement spaces that serve multiple functions. A basement used as a home cinema in the evening and a home office during the day needs lighting that can shift between those modes. Smart dimmer systems from brands like Lutron or Philips Hue allow scene-setting at the touch of a button.
Pro Tip: Install dimmers on every circuit in your basement from the start. Retrofitting them later means reopening walls or ceilings. The cost difference at installation is minimal, and the flexibility they provide is significant.
How to organise basement space using multi-zone layouts
A basement finished as one large, undifferentiated room wastes the potential of the space. Multi-zone layouts with flooring transitions, area rugs, and partial walls define distinct functions without losing the sense of openness that makes a basement feel generous rather than cramped.
The most functional basement layouts in 2026 typically combine three or four distinct zones within a single open-plan footprint. Here is a practical approach to planning those zones:
- Map your structural constraints first. Identify load-bearing columns, mechanical equipment, and the location of the staircase. These elements determine what is fixed and what can be repositioned or concealed.
- Assign zones based on noise and light needs. A home office or study nook benefits from being furthest from the entertainment zone. A gym area works well near the mechanical room where noise is less of a concern.
- Use flooring transitions to signal zone changes. Shifting from LVP in the living zone to rubber flooring in the gym area communicates the change of function without a wall. Area rugs within the LVP zone further define seating or dining areas.
- Consider partial walls or open shelving as dividers. A half-wall topped with a timber shelf separates a wet bar from a seating area while keeping the sightline open. Open shelving units achieve the same effect with more storage.
- Plan furniture scale carefully. Oversized sofas in a low-ceilinged basement make the space feel oppressive. Furniture with lower profiles and legs that reveal floor space reads as lighter and more proportionate.
- Use lighting to reinforce zones. A pendant light over a games table, a floor lamp beside a reading chair, and recessed lighting over the gym area each signal a different activity zone without physical separation.
Ceiling height is the one constraint that cannot be designed around. If your basement has less than 2.4 metres of clearance, planning a home addition or underpinning the slab may be worth considering before investing in finishes.
Styling tips for a cosy and modern finished basement
The finishing touches are where a basement renovation shifts from functional to genuinely enjoyable. The most successful finished basements either commit to erasing the below-grade feeling entirely or lean into it with intention.

Homeowners who embrace the basement character use moody, saturated palettes in deep greens, navies, or charcoals that feel deliberate rather than dim. This approach works particularly well in media rooms or bar areas where low light is an asset. Conversely, spaces intended as home offices or playrooms benefit from light-reflecting colours like warm white, soft sage, or pale terracotta that maximise the effect of artificial light.
Texture is the most underused tool in basement decorating. Layering a wool rug over LVP, adding linen curtains around a faux window, and introducing timber shelving or a reclaimed wood accent wall all add tactile warmth that paint alone cannot deliver. These materials also serve a practical function: soft furnishings absorb sound and reduce the echo that hard surfaces in a concrete box naturally produce.
Material selection for walls and ceilings should prioritise durability alongside aesthetics. Moisture-resistant paint finishes, mould-resistant drywall panels, and sealed timber are all appropriate. Avoid untreated MDF in any area that might experience humidity fluctuations.
For décor, the principle is purposeful rather than decorative. A basement bar with a curated collection of glassware, a gallery wall of framed prints in a media room, or a built-in bookcase in a study nook all serve a function while expressing personality. Clutter in a basement reads as storage overflow rather than character, so edit carefully.
Key takeaways
A successful basement interior depends on resolving moisture first, then selecting materials and lighting that match the function of each zone.
| Point | Details |
|---|---|
| Moisture control comes first | Professional waterproofing and rigid foam insulation must be in place before any finishes are applied. |
| LVP is the benchmark flooring | Luxury vinyl plank at $2 to $5 per sq ft offers waterproofing, durability, and warmth when paired with underlayment. |
| Layered lighting defines the space | Recessed LEDs at 2700K to 3000K combined with floor lamps and dimmers create a liveable, adaptable atmosphere. |
| Multi-zone layouts maximise function | Flooring transitions, area rugs, and partial walls define distinct areas without sacrificing openness. |
| Finishes should be moisture-resistant | Use greenboard, purple board, or DensArmor drywall and sealed surfaces throughout to extend durability. |
What I have learned from basement renovations done right
Having worked through dozens of basement renovation projects across South Africa and beyond, the single observation I keep returning to is this: the homeowners who invest in waterproofing before they spend a rand on décor always end up with better outcomes. The ones who skip it, or treat it as optional, almost always come back with a mould problem or a buckled floor within two years. No amount of clever lighting or stylish flooring survives a wet basement.
The LED faux window technique genuinely surprised me the first time I saw it executed well. I was sceptical that a light panel behind a shutter frame could read as a real window, but in a well-lit basement with the right colour temperature, it is convincing enough to change how the room feels. It is one of those solutions that costs relatively little and delivers disproportionate impact on the atmosphere of the space.
On the subject of preventing basement water damage over the long term, I would encourage any homeowner to treat waterproofing as infrastructure rather than a renovation cost. A finished basement that stays dry for 20 years adds genuine value to a property. One that fails after three years costs more to repair than the original waterproofing would have.
Basement finishing projects typically run 8 to 16 weeks and cost between $25,000 and $75,000 or more depending on scope. That is a significant investment, and the moisture foundation underneath it deserves proportionate attention. Get the waterproofing right, and everything else you build on top of it will last.
— Eben
Protect your basement interior with professional waterproofing
A beautifully designed basement interior is only as durable as the waterproofing beneath it. At Prowaterproofing, we provide professional waterproofing assessments and solutions for residential and commercial properties across South Africa, covering both interior and exterior basement waterproofing methods tailored to your specific site conditions.

Whether you are planning a full basement renovation or addressing an existing moisture problem, our team can inspect your foundation, recommend the correct treatment, and carry out the work to a professional standard. A dry basement is the foundation of every successful finished basement project. Visit Prowaterproofing to request a quote or book an inspection today.
FAQ
What is the most important step before finishing a basement?
Moisture mitigation is the mandatory first step. Untreated moisture causes mould, warping, and peeling finishes within seasons, regardless of the quality of materials used above it.
What flooring is best for a basement interior?
Luxury vinyl plank is the industry-recommended choice due to its waterproofing, durability, and realistic appearance. Pair it with a cork or foam underlayment for warmth and sound absorption.
How do you make a basement feel less dark?
Use recessed LED lights at 2700K to 3000K spaced 4 to 6 feet apart, supplemented with floor lamps and wall sconces. For windowless basements, LED light panels behind shutter frames at 4200K convincingly simulate natural daylight.
What insulation should be used in a basement?
Rigid foam board or closed-cell spray foam applied directly against foundation walls is the correct choice. Fibreglass insulation absorbs moisture in below-grade environments and creates mould risk.
How long does a basement renovation typically take?
Most basement finishing projects run between 8 and 16 weeks depending on scope, contractor availability, and permit requirements, with costs typically ranging from $25,000 to $75,000 or more.