
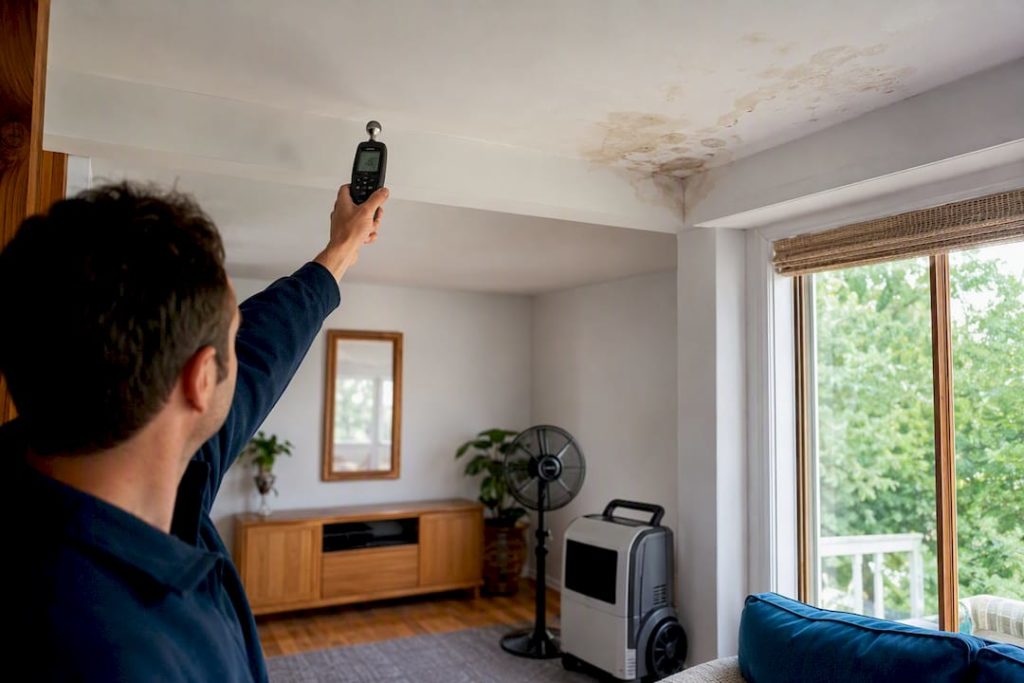
Stop the leak first, then get the water off the ceiling and out of the room. Shut off the water supply or geyser if that’s the source, cut power to any circuit near the wet patch, and put a bucket under the drip before you do anything else. A bulging or sagging ceiling can collapse without warning, so if you see the board bowing downward or hear cracking, get everyone out and call a professional immediately.
- Shut off the water main or geyser isolation valve if you can reach it safely.
- Switch off electrics at the board if the leak is anywhere near a light fitting or wiring.
- Move furniture, electronics and anything valuable out from under the wet area.
- Place buckets or basins, and lay towels to stop water spreading across the floor.
- Photograph the ceiling, the drip, and any pooled water for your insurer before you clean up.
A large sagging patch, bubbling paint, or a ceiling that’s making creaking or cracking noises is not a DIY job. Leave the room and call a tradesperson.
Pro Tip: Keep your phone in your pocket during the first walk-through. A few photos taken in the first five minutes, before you’ve mopped anything up, are worth more to an insurance claim than a detailed description written a week later.
Key Takeaways
Fixing a wet ceiling successfully means stopping the water source first, drying the board completely with a fan and dehumidifier combination, and only then repairing and repainting with a stain-blocking primer.
| Point | Details |
|---|---|
| Stop the source immediately | Shut off the water main, geyser valve or affected electrics before touching the ceiling itself. |
| Dry before you patch | Combine a fan, dehumidifier and mild heating; confirm dryness with a moisture meter before repairing. |
| Know the red flags | Sagging over a square metre, creaking sounds or rot in the battens mean call a professional immediately. |
| Use the right primer | Ordinary paint won’t block a water stain; use an oil or shellac-based stain-blocking primer first. |
| Call Prowaterproofing for structural jobs | Prowaterproofing handles roof waterproofing and damp treatment when damage goes beyond a DIY patch. |
Table of Contents
- Immediate actions to stop the leak and secure the room
- How do you know if ceiling damage is serious?
- How to dry a wet ceiling properly
- Removing water-damaged plasterboard, insulation and tiles
- Removing stains and mould before you repaint
- Patching, jointing and repainting the finished ceiling
- Tools and materials checklist for the repair
- What does fixing a wet ceiling actually cost and how long does it take?
- When should you stop DIY and call a professional?
- When Prowaterproofing should handle the fix for you
- Sources
Immediate actions to stop the leak and secure the room
Work through this in order rather than tackling whatever feels most urgent first. A wrong sequence, like mopping up before you’ve killed the water source, just means doing the job twice.
- Isolate the source. If you suspect a burst pipe or a leaking geyser, shut the mains or the geyser’s isolation valve. Geyser failures and burst pipes are among the most frequent causes of ceiling leaks, and neither stops on its own.
- Cut power to affected circuits. Water and electrics don’t mix. If the wet patch sits under or near a light fixture, switch that circuit off at the distribution board rather than guessing it’s fine.
- Contain the water. Buckets, towels, and a tarpaulin over furniture buy you time while you sort the bigger problem.
Safety checklist while you work:
- Don’t stand directly under a sagging or discoloured patch.
- Treat a wet floor near electrics as a hazard, not an inconvenience.
- If the flow is heavy or the ceiling is visibly bowing, evacuate and call an emergency plumber or roofer rather than improvising.
Even a slow, sustained drip can saturate a ceiling board and start mould growth within 48 hours, so treat any active leak as urgent, not just the dramatic ones. Photograph the damage now, note the date and time, and call your insurer early if the volume looks significant.
Pro Tip: Label a rough sketch of where the drip lands versus where the stain shows. Water rarely falls straight down from where it enters the roof, and that gap matters when a roofer starts tracing the source.
How do you know if ceiling damage is serious?
Press gently on the wet patch with the flat of your hand, wearing a glove. A soft, spongy give means the plasterboard has absorbed water and lost structural integrity. A firm surface that’s merely discoloured is a different, less urgent problem.
Run through this before deciding whether to grab tools or grab the phone:
- Tap the ceiling near the stain. A dull, hollow sound often signals that the board or tile has delaminated from moisture behind it, even before staining spreads.
- Check for warped edges or looseness around tile joints or cornices.
- Feel for warmth at the wet spot. Warmth usually points to a hot water pipe or geyser, not roof rainwater.
- Watch for active dripping versus a static stain. Active drips mean the source is still live.
- Note the size of any sagging. A bulge or sag over roughly one square metre is a red flag that calls for professional support rather than a patch job.
A cheap pin-type moisture meter, sold at most hardware stores, takes the guesswork out of “is this actually dry yet.” Push the probes into a spot you’re planning to cut out anyway and compare the reading to a dry section of the same ceiling.
Pro Tip: Never poke or pierce a bulging ceiling to “release the water.” It feels logical, but a sudden failure at that point can bring the whole section down on top of you. Leave bulges for a professional to manage.
How to dry a wet ceiling properly
Getting the ceiling bone dry before you touch a repair matters more than most people expect. Patch over a damp board and you’ll be repainting the same stain within months, sometimes with mould growing behind the new paint.
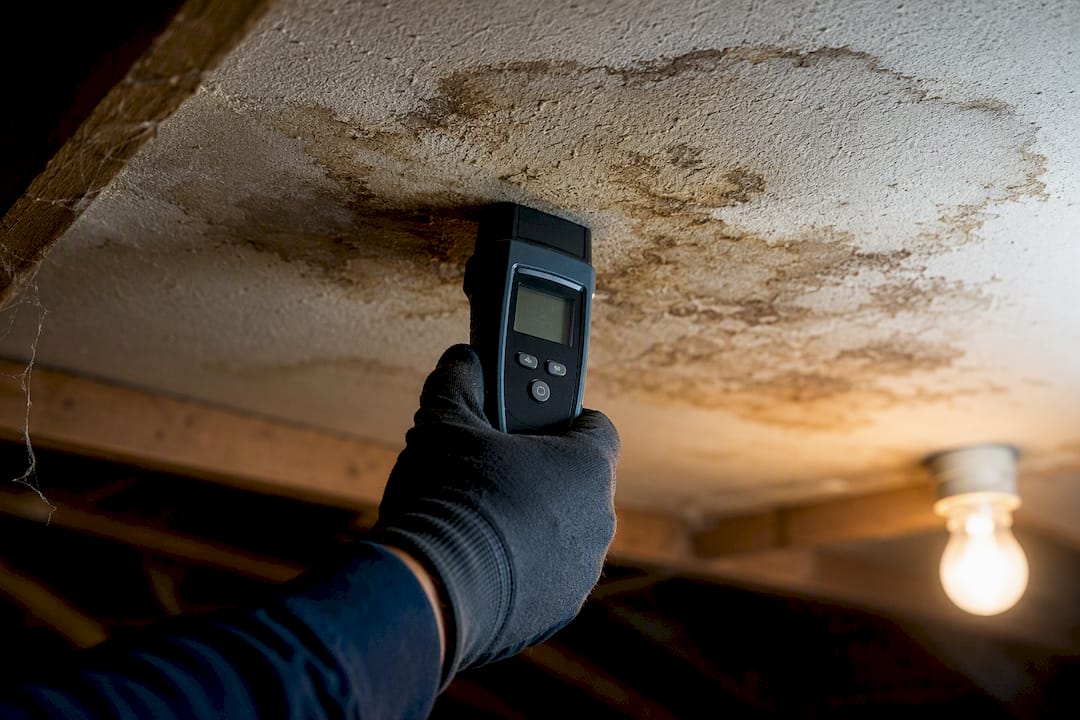
Ventilation alone struggles in humid weather. The combination that actually works is airflow, dehumidification, and gentle heat together. Running a fan, a dehumidifier and some form of heating at the same time can dry out a leaking ceiling in a matter of days in cases that would otherwise drag on for weeks. A fan alone shifts air across the surface but does little if the room’s ambient humidity stays high; the dehumidifier is what actually pulls the moisture out of the air the fan is circulating.
Set-up basics:
- Position a fan to blow air directly across the wet patch, not just around the room generally.
- Run a dehumidifier nearby and empty its reservoir regularly; a full tank stops working.
- Add mild heating if the weather is cold. Warm air holds more moisture, which speeds evaporation.
- Open a window slightly if outdoor humidity is lower than indoor humidity, otherwise keep the room sealed for the dehumidifier to do its job.
Realistic timelines vary a lot depending on how much water got in. A small stain from a brief drip might be surface dry within a day or two. A fully soaked section of plasterboard, especially with insulation packed above it, can take one to two weeks of active drying before it’s genuinely ready for repair work.
Cold weather, poor ventilation, and wet insulation sitting above the board all slow things down considerably.
Check progress with the moisture meter every couple of days rather than eyeballing it. Compare the readings against a dry patch of ceiling in another room. Once the numbers match and the board feels firm rather than soft to a gentle press, you’re clear to start cutting and patching.
Pro Tip: Don’t rush the primer stage because the surface “looks” dry. Plasterboard can feel dry to the touch while still holding moisture deeper inside the core, and trapping that moisture behind fresh paint is exactly how mould gets started.
Removing water-damaged plasterboard, insulation and tiles
Small, contained damage can often be cut out and patched. Widespread saturation, sagging boards, or anything touching the ceiling joists usually needs full removal rather than a repair around the edges.
- Mark the wet area with a pencil, extending the line about 100mm into visibly dry, sound material.
- Cut along the line with a utility knife or drywall saw, supporting the cut edge so it doesn’t tear further as you work.
- Remove the damaged section and check the joists or battens above for staining, softness, or rot.
- Pull out any wet insulation above the cut and discard it. Wet insulation loses its performance and often can’t be dried effectively in place.
- Vacuum debris and dust before assessing whether the exposed timber needs treatment or replacement.
Protect yourself while doing this:
- Lay dust sheets over floors and furniture before cutting.
- Wear gloves, eye protection, and a properly rated respirator if there’s any visible mould, since disturbing it releases spores into the air.
- Seal off the room from the rest of the house with plastic sheeting if the area is large.
Call a professional rather than continuing solo if you find rot in the timber battens, if the wet section runs beyond roughly a square metre, or if the insulation is contaminated with sewage or grey water. That’s a job for someone insured to handle structural repairs, not a weekend project.
Pro Tip: Keep the offcut of removed board. Matching thickness exactly (most homes use either 6.4mm or 9.5mm plasterboard) saves a second trip to the hardware store and stops the new patch sitting proud or recessed against the old ceiling.

Removing stains and mould before you repaint
Light surface mould, the kind that shows as small dark speckling rather than a fuzzy growth, can usually be cleaned with a household detergent solution or a diluted bleach alternative applied with a sponge, then left to dwell for a few minutes before rinsing. Wear gloves and ventilate the room while you work.
Painting straight over a water stain with ordinary ceiling paint doesn’t work. The stain will bleed straight through even after two fresh coats, because water-based paint doesn’t block the tannins and minerals left behind. You need a proper stain-blocking primer, oil-based or shellac-based, applied once the board is fully dry.
- Sand the patched area lightly to key the surface.
- Apply the stain-blocking primer in one even coat and let it cure fully.
- Follow with your regular ceiling paint once the primer has dried according to the tin’s instructions.
If mould covers more than roughly a square metre, carries a strong musty smell, or a household member has respiratory issues, bring in a mould remediation specialist rather than tackling it with a sponge and hoping.
Pro Tip: Buy slightly more stain-blocking primer than you think you need. Running out mid-coat and mixing a second batch almost always leaves a visible line once the topcoat goes on.
Patching, jointing and repainting the finished ceiling
With the area dry and the damaged section cut out, the actual repair follows a fairly standard sequence that any competent DIYer can manage for a patch under a square metre or so.
- Cut a new piece of plasterboard to match the removed section, checking it against the exposed joists or battens for a snug fit.
- Screw the new board to the battens, keeping screws roughly 150mm apart along the edges.
- Apply paper or mesh joint tape over every seam where old meets new.
- Skim joint compound over the tape, feathering the edges out well beyond the joint itself.
- Let it dry fully, then sand smooth. A second thin coat is usually needed to disappear the seam entirely.
- Prime with a stain-blocking product if any staining remains visible, then paint.
Getting texture to match an existing ceiling, whether it’s a light stipple or a smooth finish, is the part most DIYers underestimate. Feathering works well for smooth ceilings but rarely blends cleanly against a textured finish; you may need to retexture the whole ceiling rather than just the patch to avoid an obvious rectangle.
Paint the entire ceiling rather than just the patched section. Painting only the repaired area, even with an exact colour match, tends to leave a visible sheen difference under certain light, sometimes called flashing. Respect drying times between coats rather than rushing a second layer onto a tacky first one.
For a small sagging patch under about a square metre, where the board itself is sound, plaster washers and screws can pull the board back flush against the batten rather than requiring full replacement. Anything larger or genuinely waterlogged needs the board swapped out.
Pro Tip: Work in daylight, or under bright, even artificial light, when checking your joint compound finish. Uneven sanding is far more visible once the paint goes on than it looks while you’re standing there with a torch.
Tools and materials checklist for the repair
Gather these before you start rather than making three separate trips to the hardware store mid-job:
- Tools: pin-type moisture meter, stepladder, utility knife or drywall saw, screwdriver, jointing knife, sanding block, torch.
- Materials: matching plasterboard thickness, joint tape, joint compound, oil-based or shellac-based stain-blocking primer, ceiling paint, replacement insulation if needed.
- PPE: gloves, eye protection, disposable overalls, and an N95 or better respirator if mould is present.
What does fixing a wet ceiling actually cost and how long does it take?
A small stain repair, from drying through to a repainted patch, can realistically be a weekend job costing little more than the price of primer, paint, and a small offcut of board. Full board replacement across a wider area, especially with insulation to replace and drying equipment to hire, stretches into one to two weeks and a considerably higher materials bill.
The main cost and time drivers are the size of the affected area, whether structural timber needs attention, how accessible the ceiling void is, and whether you need to hire a dehumidifier rather than borrowing or buying one outright.
For your insurance file, keep:
- Timestamped photographs from the first sighting of the leak through to completed repair.
- Any invoices from plumbers, roofers, or equipment hire.
- A written note of when the leak started and when it was stopped.
- Receipts for materials if you’re claiming DIY repair costs.
When should you stop DIY and call a professional?
A few clear signals mean it’s time to put the tools down and pick up the phone:
- The wet area is sagging, bulging, or larger than roughly a square metre.
- You find soft, rotten timber in the battens or joists above the ceiling.
- Mould covers a wide area or carries a strong, persistent smell.
- The leak involves wiring, a light fitting, or any electrical component.
- You can hear cracking or creaking coming from the ceiling itself.
Trust a hollow tap sound and a genuine moisture meter reading over a visual guess, and never assume warmth at the wet patch is roof rainwater. Warmth usually means a hot water pipe or geyser is the actual source.
The most common DIY mistakes are piercing a bulge to drain it, patching over a board that isn’t fully dry, and skipping the root cause entirely because the visible stain looks fixed. All three tend to bring the same problem back within a season.
Pro Tip: If you’re not sure whether a stain is active or historical, stick a strip of masking tape across it with today’s date written on it. Check back in a week. No change in colour or shape means the leak causing it is genuinely stopped.
A homeowner’s account: catching it early
A brown ring appeared on my landing ceiling on a Tuesday evening. I shut off the geyser isolation valve straight away, then set up a dehumidifier and fan overnight. By the weekend, the moisture meter reading matched the rest of the ceiling, so I called a roofer to trace and fix the actual leak before patching anything. The lesson that stuck with me: dry it properly first, chase the cause second, patch it last.
When Prowaterproofing should handle the fix for you
If your ceiling damage involves sagging over a square metre, rot in the roof timbers, or a leak source you simply can’t pin down after checking pipes, geysers and roof flashings, that’s the point where DIY stops making sense. Prowaterproofing handles exactly this category of job: roof waterproofing, damp wall treatment, and the structural side of water damage that goes beyond a patch-and-paint weekend, for residential, commercial and industrial properties.

What sets calling in a professional apart here isn’t just skill with a jointing knife. It’s tracing the actual entry point, since water often travels along roof timbers and pipe runs before it ever shows as a stain, meaning the visible damage on your ceiling can sit well away from where the leak actually starts. Chase the wrong spot and you’ll be back here in six months with a new patch and the same drip.
Before requesting a quote from Prowaterproofing, take photos of the damaged ceiling, note when the leak started, and write down anything you’ve already checked, like the geyser or visible roof flashings. That gives the contractor a running start on diagnosing the source rather than starting from zero on-site.
Sources
- Ceiling collapse risk? How to fix water damage & sagging ceilings safely | ServiceLink SA
- How I dried a ceiling leak in a matter of days | Homes & Gardens
- Water leaking from ceiling | Causes & what to do
- How to repair ceiling tiles with water damage: a step-by-step guide | Ceiling Tiles
Where sagging, rot, or a hidden leak source is involved, book a professional inspection rather than guessing further.