TL;DR:
- Ignoring damp patches in your basement can lead to costly structural damage and mold growth over time.
- Effective repairs involve diagnosing leak sources, proper preparation, and selecting suitable methods like crack sealing or interior drainage.
- Long-term prevention requires ongoing monitoring, proper drainage, and timely professional intervention for severe or structural issues.
A damp patch on your basement wall might seem minor. Leave it six months and you could be dealing with crumbling mortar, mould colonies, and a repair bill that makes your eyes water. Basement foundation leak repair is one of those jobs where the timing matters as much as the technique. This guide walks you through identifying what you are dealing with, preparing properly, choosing the right repair method, and keeping your basement dry long after the work is done. Whether you have spotted a hairline crack or your floor is pooling water after every downpour, the answers are here.
Table of Contents
- Key takeaways
- Identifying basement foundation leaks
- Preparation before starting repairs
- Step-by-step repair methods
- Post-repair verification and prevention
- My take on basement leak repairs
- Get professional help from Prowaterproofing
- FAQ
Key takeaways
| Point | Details |
|---|---|
| Diagnose before you repair | Identifying the crack type and moisture source determines which repair method will actually work. |
| Surface sealers have limits | Paint and sealants offer temporary relief but do not address the hydrostatic pressure driving water in. |
| Interior drainage is often best | Sump pump systems manage water reliably and are less disruptive than exterior excavation. |
| Prevention is ongoing | Gutters, grading, and humidity control are as important as the repair itself. |
| Know when to call a professional | Horizontal or bulging cracks larger than 3/16 inch require a structural engineer, not a DIY fix. |
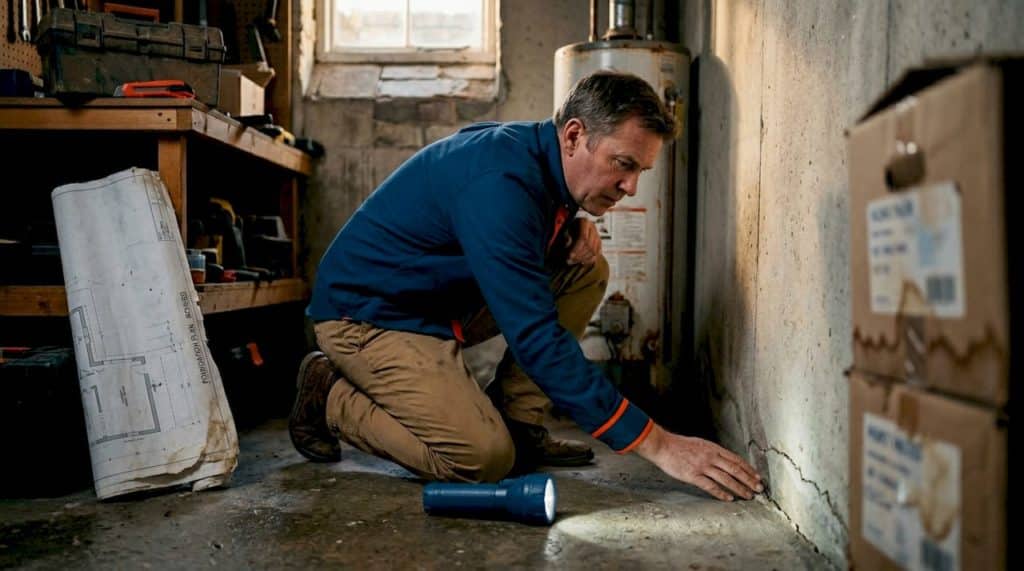
Identifying basement foundation leaks
Before you buy a single tube of sealant, you need to understand what you are actually dealing with. Basement leaks announce themselves in several ways, and reading the signs correctly saves you from wasting money on the wrong fix.
The most common symptoms include:
- Damp or wet patches on walls, particularly after heavy rain or snow melt
- White or chalky deposits (called efflorescence) left behind when water evaporates through masonry
- Musty odours that persist even when the basement is ventilated
- Water stains along the base of walls or at floor junctions
- Visible cracks running horizontally, vertically, or diagonally across walls or the floor slab
The cause behind the leak matters enormously. Vertical hairline cracks in poured concrete are common as foundations settle and usually pose limited structural risk. Horizontal cracks are a different matter entirely. They often signal lateral soil pressure pushing against the wall, which is a structural concern. Cracks larger than 3/16 inch, particularly horizontal or bulging ones, require a structural engineer to assess before any waterproofing work begins.
Hydrostatic pressure is the underlying culprit in most basement leaks. When soil surrounding your foundation becomes saturated, water exerts pressure against the wall and finds any weakness to exploit. Poor drainage, blocked gutters, and soil that slopes towards the house all accelerate this process.
Pro Tip: Tape a piece of plastic sheeting over a damp patch and leave it for 24 hours. If moisture appears behind the plastic, the damp is coming through the wall. If it forms on the surface of the plastic, you are dealing with condensation, which requires a different solution entirely.
Mould compounds the problem quickly. The EPA recommends drying water intrusion within 24 to 48 hours to prevent mould taking hold, so speed matters once you have identified the source.
Preparation before starting repairs
Rushing into a basement wall leak repair without proper preparation is one of the most common reasons repairs fail within a season. You need the right materials, a dry working surface, and a clear understanding of your own limits.
Tools and materials overview
| Item | Typical use |
|---|---|
| Hydraulic cement | Sealing active leaks and filling cracks under water pressure |
| Polyurethane injection kit | Filling structural cracks from the inside without excavation |
| Waterproof masonry sealant | Surface treatment for minor dampness on block or brick walls |
| Sump pump and basin | Managing groundwater that collects at floor level |
| Interior drain channel | Directing water from wall junctions to a sump pump |
| Dehumidifier | Controlling indoor humidity after repairs are complete |
| Wire brush and hammer | Cleaning and widening cracks before filling |
| Safety goggles and gloves | Personal protection when working with cement and sealants |
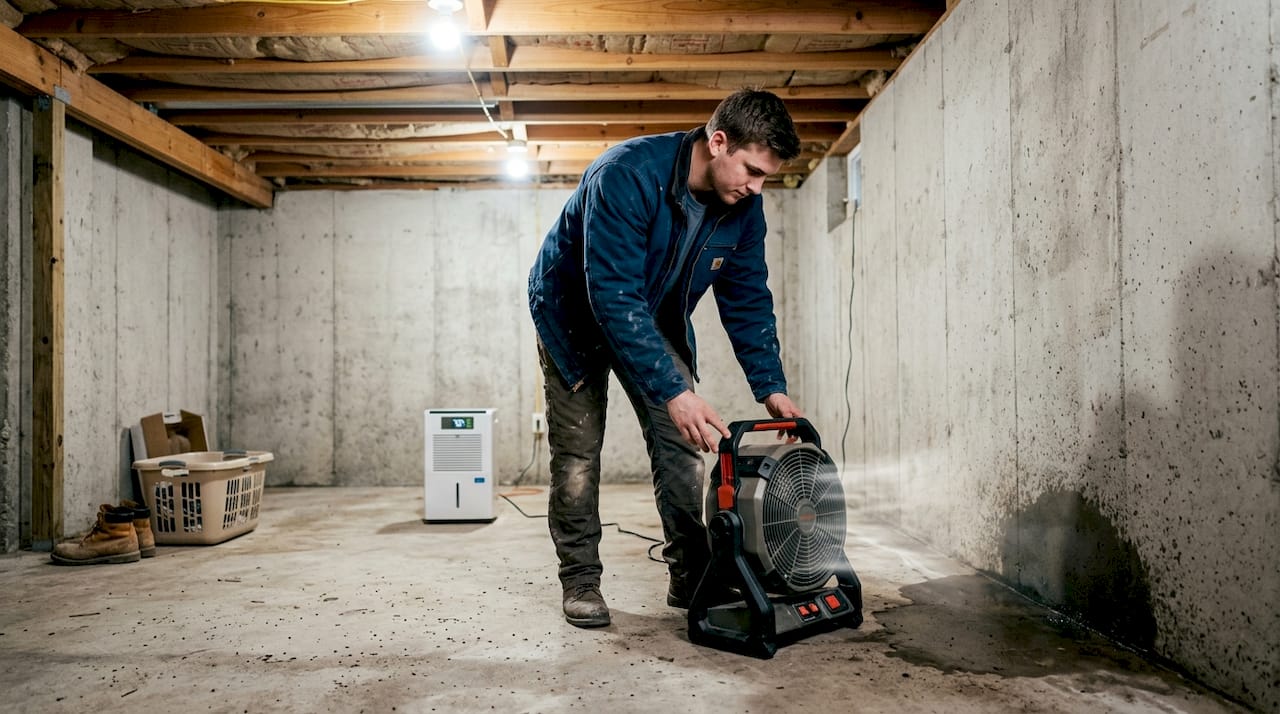
Before you begin any repair work, the area must be as dry as possible. Use fans and a dehumidifier to reduce moisture in the space. If there is active seepage, allow it to slow before attempting to seal.
Hydraulic cement expands as it cures, which makes it excellent for sealing cracks with active water flow. It sets quickly though, so mix small batches and work fast.
Ventilation is non-negotiable. Many sealants and injection resins produce fumes that accumulate in enclosed spaces. Open windows, run an extractor fan, and wear a respirator mask when working with chemicals.
- Remove any loose concrete, old sealant, or paint from the repair area using a wire brush
- Undercut cracks slightly with a cold chisel to create a better bonding surface for cement
- Vacuum or blow out dust before applying any material
Pro Tip: Do not attempt basement leak repair during or immediately after prolonged heavy rain. Saturated soil means water pressure behind your walls is at its peak, and even freshly applied hydraulic cement may struggle to hold until pressure drops.
Professional basement waterproofing costs in 2026 range from approximately $3,000 to $15,000 depending on scope, which is useful context for deciding whether a DIY approach is worth attempting or whether the scale of the problem warrants professional help from the outset.
Step-by-step repair methods
How you fix a basement leak depends entirely on how water is getting in and how severe the intrusion is. There is no single method that suits every situation, so match your approach to the problem.
Method 1: sealing minor cracks
For hairline and small vertical cracks with limited water flow, hydraulic cement or polyurethane foam injection is your starting point.
- Chip out the crack to a minimum width of about 12mm using a cold chisel and hammer
- Brush away all debris and dust
- Mix hydraulic cement to a stiff putty consistency and press firmly into the crack, holding it in place for three to five minutes as it sets
- For larger or deeper cracks, use a polyurethane injection kit, which expands to fill voids and remains flexible after curing
- Allow 24 hours before applying any surface waterproof coating over the repaired area
Method 2: interior drainage systems
When hydrostatic pressure drives water through multiple points along the floor-wall junction, sealing individual cracks is fighting a losing battle. Interior drainage systems collect water as it enters and route it to a sump pump for removal.
- Cut a channel along the perimeter of the basement floor, just inside the footing
- Lay perforated drain pipe in the channel and cover with clean gravel
- Route the pipe to a sump pit positioned at the lowest point of the floor
- Install a sump pump with battery backup in the pit
- Seal the channel with concrete and test the system with water before finishing the floor
Interior drainage systems are weather-independent for installation and far less disruptive than exterior excavation, which is a significant practical advantage for occupied homes.
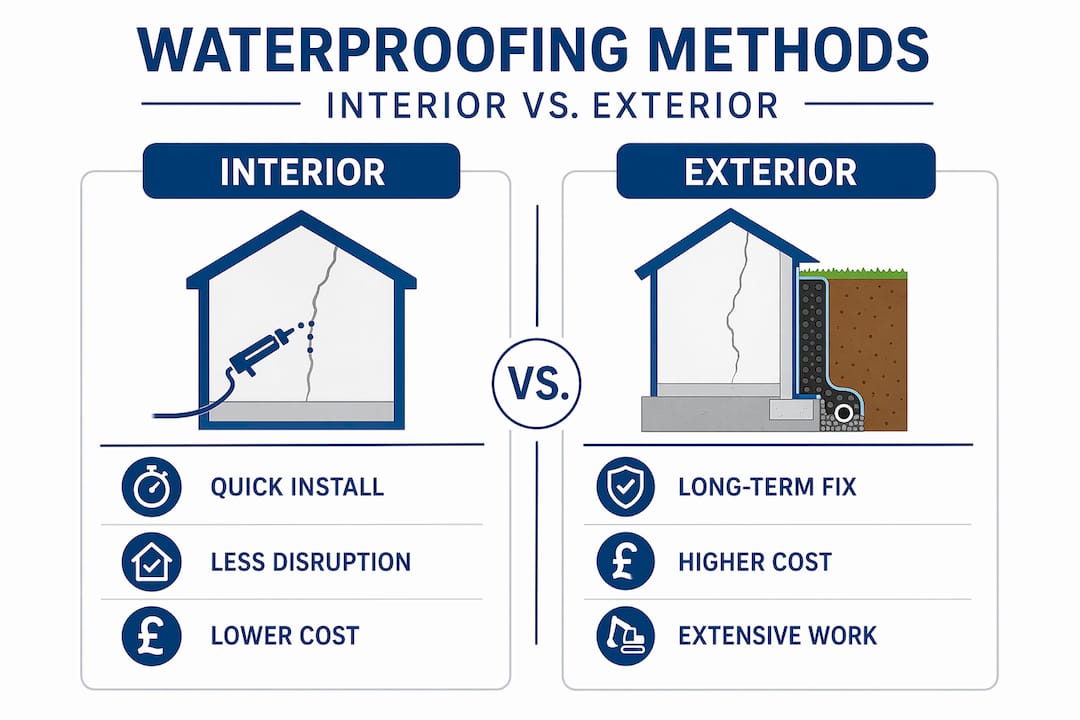
Interior vs. exterior waterproofing: a direct comparison
| Method | Best for | Approximate cost | Disruption level |
|---|---|---|---|
| Interior crack sealing | Minor cracks, limited seepage | Low | Minimal |
| Interior drainage + sump pump | Persistent groundwater intrusion | Moderate ($5,000–$9,000) | Moderate |
| Exterior excavation and membrane | Severe hydrostatic pressure, wall failure | High ($8,000–$15,000+) | Significant |
Exterior waterproofing stops water at the foundation wall before it even reaches the interior. It is the most thorough solution for severe situations, but it involves excavating around the entire foundation perimeter, which is disruptive and expensive. As exterior waterproofing guidance explains, it is recommended primarily where structural wall failure or severe hydrostatic pressure leaves no other viable option.
Avoid relying on surface sealers or waterproof paint as your primary defence. Paint and sealers provide temporary dampness control but do nothing to relieve the groundwater pressure behind your walls. They peel, crack, and fail, often within a year or two.
One of the most common mistakes people make when learning how to stop basement walls from leaking is applying a single solution without addressing the water pathway. Fix the entry point, manage the pressure, and then seal. Doing it in reverse order means the pressure simply finds a new weakness.
Post-repair verification and prevention
A successful repair is only half the story. Keeping your basement dry over the long term requires ongoing attention to the conditions that cause leaks in the first place.
After completing any basement water leak repair, monitor the area closely for at least three months. Look for new damp patches, efflorescence, or odours. A simple hygrometer (humidity meter) placed in the basement gives you an ongoing read on moisture levels. The EPA guidance on indoor humidity recommends keeping levels below 60% to prevent mould growth. A good dehumidifier running during wet seasons helps maintain this.
Perimeter drainage is equally important. Gutters blocked with leaves funnel water directly against your foundation during every rainstorm. Grading soil to slope away from the foundation by at least six inches over ten horizontal feet is one of the most cost-effective leak prevention measures available. It costs almost nothing and genuinely works.
Pro Tip: After every significant rain event in the first year following your repair, do a quick visual check of the repaired areas and floor-wall junctions. Catching a failure early means a small patch job rather than a full redo.
Your routine maintenance checklist should include:
- Cleaning gutters and downpipes at least twice per year
- Checking that downpipe extensions direct water at least 1.5 metres from the foundation
- Inspecting visible foundation walls each spring for new cracks or shifting
- Testing your sump pump by pouring water into the pit before the rainy season begins
- Fixing any surface cracks in external render or brickwork before winter
When mould does appear, the correct sequence is to fix the leak, dry the area within 48 hours, and then treat the mould. Cleaning mould before stopping the moisture source leads to immediate recontamination. For guidance on preventing water damage long term, the approach is consistent: manage the exterior conditions, monitor the interior, and act quickly when anything changes.
If you notice new horizontal cracking, bowing walls, or doors that no longer close properly following a repair, those are signs that require professional reassessment rather than another DIY attempt.
My take on basement leak repairs
I have seen a lot of basement repairs over the years, and the pattern that frustrates me most is this: someone spends a weekend applying waterproof paint, calls it done, and six months later has a worse problem than before because the paint trapping moisture has accelerated the deterioration underneath.
The honest truth about how to fix basement leaks is that it is rarely a single-step job. Efficient leak repair requires managing moisture comprehensively, not just applying a coating and hoping for the best. The most durable outcomes I have seen combine crack repair with proper exterior grading and some form of interior moisture management. None of those three elements alone does the full job.
I also think homeowners underestimate the value of staging repairs. You do not have to spend $15,000 on full exterior excavation to make meaningful progress. Starting with simpler fixes like sealing, gutter upgrades, and regrading can resolve a surprising number of leaks before you need to consider anything more involved. Save the big investment for the problems that genuinely cannot be managed any other way.
For anything structural, please get a professional assessment. I know it costs money upfront, but the cost of fixing a wall that has been incorrectly repaired is always higher than getting it right first time.
— Eben
Get professional help from Prowaterproofing

Prowaterproofing offers specialist basement waterproofing assessments and repair solutions for residential, commercial, and industrial properties across South Africa. Whether you are dealing with a single leaking crack or persistent groundwater intrusion across an entire basement, the team provides expert diagnosis and tailored repair plans that address the root cause rather than the symptom. Their waterproofing services include interior drainage installation, crack injection, exterior membrane application, and sump pump fitting, all backed by warranty and aftercare support. Reach out through the website for a free inspection quote and get a clear picture of exactly what your property needs before committing to any repair work.
For guidance on what to look for in a contractor and how to waterproof your basement from the inside, the Prowaterproofing resource library covers the process in detail.
FAQ
What causes most basement foundation leaks?
Hydrostatic pressure from saturated soil is the primary driver of basement leaks. Water accumulates around the foundation and forces its way through cracks, joints, and porous masonry whenever pressure builds.
How do you fix a leaky basement yourself?
Small vertical cracks can be repaired with hydraulic cement or polyurethane injection following proper surface preparation. For persistent groundwater intrusion, an interior drainage system with a sump pump is more reliable than sealing alone.
When should I call a structural engineer?
Horizontal or bulging cracks larger than 3/16 inch indicate potential structural failure and require professional structural assessment before any repair work begins. Do not attempt to seal these yourself.
How do I stop basement walls from leaking after heavy rain?
Address the exterior drainage first: clean gutters, extend downpipes, and regrade soil away from the foundation. Combine this with interior crack repairs and, if needed, an interior drainage channel to capture water at the floor-wall junction.
How quickly does mould develop after a basement leak?
Mould can begin growing within 24 to 48 hours of water intrusion. The EPA recommends drying affected areas within this window and fixing the moisture source before cleaning any existing mould growth to avoid recontamination.