
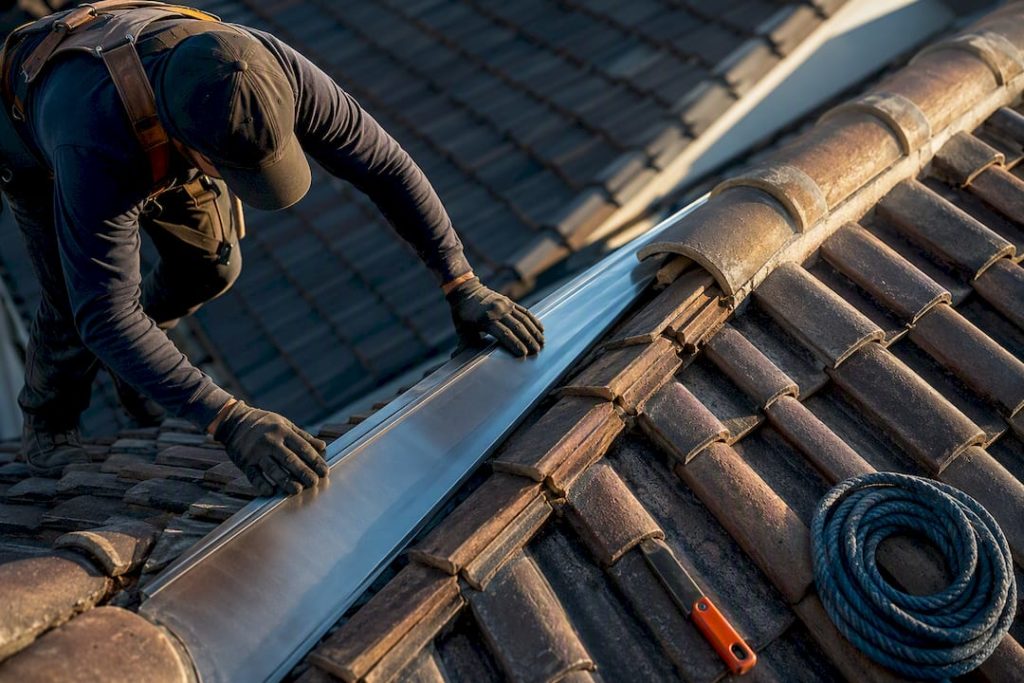
The right approach is to inspect first, repair second, then treat the vulnerable details rather than the whole surface. Fix cracked tiles, ridge mortar and flashings before anything else. Then apply detailing at valleys, chimneys and parapets using under-tile membranes, liquid-applied membranes or impregnating sealers, chosen by pitch and access. Small jobs on a low, safe roof suit a confident DIYer; anything involving scaffold, structural rot or a warranty requirement needs a contractor.
TL;DR:
- Waterproofing should focus on fixing cracked tiles, ridges, and flashings before applying any sealants or membranes to ensure lasting effectiveness.
- Using under-tile membranes is advisable for re-roofing and low-pitch roofs, while liquid membranes suit junctions and valleys on existing tiles.
- Regular inspection, cleaning, and timely repairs are essential for extending waterproofing lifespan, which varies from three to fifteen years depending on the method.
- Scaffold, safety gear, and professional assessment are necessary for roofs with pitches over 15 degrees or structural issues, with warranties favoring certified contractors.
- Most DIY failures stem from neglecting diagnosis and detailed repair, leading to recurrent leaks and damage that simple surface coatings cannot prevent.
Table of Contents
- Tools, materials and safety you need before you start
- How do you inspect a tiled roof for leaks before waterproofing?
- Fixing tiles, ridges and flashings before you seal anything
- Waterproofing methods for tiled roofs: what they do and when to use them
- Step-by-step: applying waterproofing to a tiled roof
- How long does roof waterproofing last, and when do you recoat?
- When should you hire a professional instead of doing it yourself?
- Our take: why most DIY roof waterproofing goes wrong
- Get a professional inspection from Prowaterproofing
- Sources
- FAQ
Tools, materials and safety you need before you start
Before touching a ladder, get the safety gear sorted. A harness and fall-arrest line matter on any pitch over roughly 15 degrees, and a properly footed or tied-off ladder is non-negotiable. Gloves, eye protection and a dust mask cover you for cutting and mixing.
On the tools side, you need a soft-wash kit rather than a pressure washer, stiff-bristle brushes, rollers, a pointing trowel, a utility knife and a tape measure for calculating coverage. Materials fall into a few clear categories: under-tile membranes for continuous protection, liquid-applied membranes for detailing, impregnating sealers for porous tiles, plus flashing tape, mastic and reinforcing mesh for joints.
- Harness, helmet and non-slip footwear for any pitched roof work
- Soft-wash sprayer and biocide, not a pressure washer
- Trowel, mixing bucket, roller and brushes sized to the job
- Flashing tape, mastic gun and reinforcing mesh for junctions
Pro Tip: If your roof pitch exceeds around 35 degrees or the ridge line sits more than two storeys up, hire scaffold or rope access rather than relying on ladders. Contractor safety guidance from bodies like the ECA exists precisely because falls, not faulty membranes, cause most roofing injuries.
How do you inspect a tiled roof for leaks before waterproofing?
Start indoors. Look for ceiling stains, damp patches near chimneys, and run marks along rafters that trace water back to its entry point. Then get onto the roof, or use binoculars from ground level if access is limited, and work through this sequence:
- Check valleys first. They collect the most water and show blocked debris or cracked lead flashing fastest.
- Inspect ridge mortar for hairline cracks, crumbling edges or lifted ridge tiles.
- Examine flashings around chimneys, parapets and skylights, where degraded seals cause a large share of reported failures.
- Lift a few tiles near suspect areas to check underlay condition; brittle or torn underlay signals a bigger job ahead.
Common failure points include cracked or slipped tiles, blocked valleys, and defective waterproofing at parapets and chimneys. Clean before you assess further, but only with a soft wash and biocide. High-pressure cleaning forces water beneath interlocking tiles and can damage underlay that was otherwise fine. If you find sagging timbers, extensive rot, or underlay that crumbles when touched, stop and call a structural professional rather than proceeding with surface treatments.
Fixing tiles, ridges and flashings before you seal anything
Waterproofing over damaged tiles just traps the problem underneath. A cracked tile needs lifting clear of its neighbours, sliding out from under the batten, and replacing with a matching profile secured on the same nail or clip points as the original. Slipped tiles usually just need re-hooking onto battens, sometimes with an added clip if wind has worked them loose repeatedly.
Ridge mortar takes more care. Rake out crumbling sections back to sound material, then re-bed using a polyester-reinforced or acrylic-fortified mortar rather than plain sand and cement, which cracks again within a season or two in most climates. For metal flashings around chimneys and parapets, renew any section showing pinholes or lifted edges, and reinforce the joint with a compatible membrane strip rather than mastic alone, since mastic degrades faster under UV exposure.
- Replace, don’t patch, any tile with a crack running edge to edge
- Re-bed ridge mortar with reinforcement, not plain mix, on exposed roofs
- Renew flashings showing corrosion, not just visible gaps
- Treat persistent staining below a repaired area as a sign the underlay itself needs attention
Pro Tip: Photograph every repair before you cover it with membrane or sealant. If a leak reappears months later, that record tells you and any contractor exactly what was already addressed.
Waterproofing methods for tiled roofs: what they do and when to use them
Three method categories cover most tiled roof jobs, and each solves a different problem. Manufacturer guidance on tiled roof waterproofing treats these as complementary rather than interchangeable, and mixing them up is where most DIY jobs go wrong.
Under-tile membranes sit beneath the tiles themselves, forming a continuous barrier that catches anything that gets past the tile surface. They suit re-roofing projects, low-pitch tiled roofs below around 15 degrees, and situations where you genuinely need uninterrupted coverage rather than spot repairs. Installing one means lifting tiles, which limits how practical this is on an occupied home.
Liquid-applied membranes work without removing tiles, which is why independent construction guidance treats them as the go-to for valleys, chimney junctions and skylight surrounds. They need dry, clean substrate and typically 24 to 48 hours of cure time before rain, so check the forecast.
Impregnating sealers penetrate porous clay or concrete tiles and reduce water absorption, but they are not a membrane substitute. They work well on tiles that are otherwise sound but chalky or porous, not as a fix for underlay that has already failed.
- Low pitch, full re-roof, or new build: under-tile membrane
- Existing tiles, targeted junctions, valleys: liquid-applied membrane
- Porous, ageing tiles with sound underlay: impregnating sealer
Step-by-step: applying waterproofing to a tiled roof
- Inspect and document. Walk the whole roof, photograph every defect, and note pitch, access and material type before buying anything.
- Clean and dry. Soft-wash with biocide, then let the roof dry fully before any product goes on.
- Repair first. Replace tiles, re-bed ridges and renew flashings exactly as covered above. Nothing gets sealed over unfinished repairs.
- Detail the junctions. Apply flashing tape and liquid membrane at valleys, chimneys and parapets before considering any wider area treatment. This detail-first sequencing is standard in manufacturer application guides and it’s the step most DIY attempts skip.
- Finish and check. Confirm cure times against product data, check for ponding after the next rain, and run water through gutters and downpipes to confirm clear flow.
Pro Tip: Never coat an entire tile surface with a continuous, non-breathable liquid membrane as a blanket fix. It can trap moisture underneath and accelerate tile and structural deterioration, exactly the outcome you’re trying to prevent. Seal the joints and junctions, not the whole roof.
For the full walkthrough with photos and product-specific timings, Prowaterproofing’s roof waterproofing steps guide and application process guide cover the workmanship checks in more depth.
How long does roof waterproofing last, and when do you recoat?
Lifespan varies a lot by method. Impregnating sealers generally last 3 to 8 years before reapplication, depending on UV exposure and tile porosity. Liquid-applied membranes typically run 5 to 15 years if the substrate prep was done properly. Correctly installed under-tile membranes usually outlast both, often matching the tile roof’s own service life.
Routine maintenance stretches all of these figures. Clear valleys and gutters at least twice a year, inspect after major storms, and remove moss every 2 to 3 years in shaded, damp-prone areas before it lifts tiles.
- Bi-annual visual inspection, spring and autumn
- Gutter and valley clearance after leaf fall
- Moss and lichen removal every 2 to 3 years in shaded zones
- New staining or ponding after rain means inspect immediately, don’t wait for the next scheduled check
Keep a simple record of what was done, when, and with which product. Warranty claims and future contractor quotes both move faster with photos and dates on file rather than a vague memory of “a few years back.”
When should you hire a professional instead of doing it yourself?
Some situations simply aren’t worth the DIY risk. Unsafe access, a roof pitch that needs scaffold or rope work, widespread underlay failure, or any sign of structural rot in rafters or battens are all clear triggers to bring in a contractor. So is any job where you want a warranty-backed installation, since most manufacturers only honour warranties on professionally certified work.
When vetting a contractor, check licensing and public liability insurance, ask for a written scope of work with a stated warranty period, and request references or photos from similar tiled roof jobs. A body like CIAT publishes workmanship standards worth asking a contractor whether they follow.
- Ask for a fixed timeline and how waste tiles or old materials get disposed of
- Get the warranty terms in writing before signing anything
- Treat a quote with no site visit, or unusually vague scope, as a red flag
Our take: why most DIY roof waterproofing goes wrong
The mistake we see most often at Prowaterproofing isn’t laziness. It’s homeowners treating waterproofing as a single product you apply once, rather than a sequence of decisions that starts with diagnosis. Someone notices a damp patch, buys a tin of roof sealant, coats the whole visible surface, and feels like the job is done. Eighteen months later the same stain reappears, sometimes worse, because the actual failure was a cracked ridge tile the coating never touched.
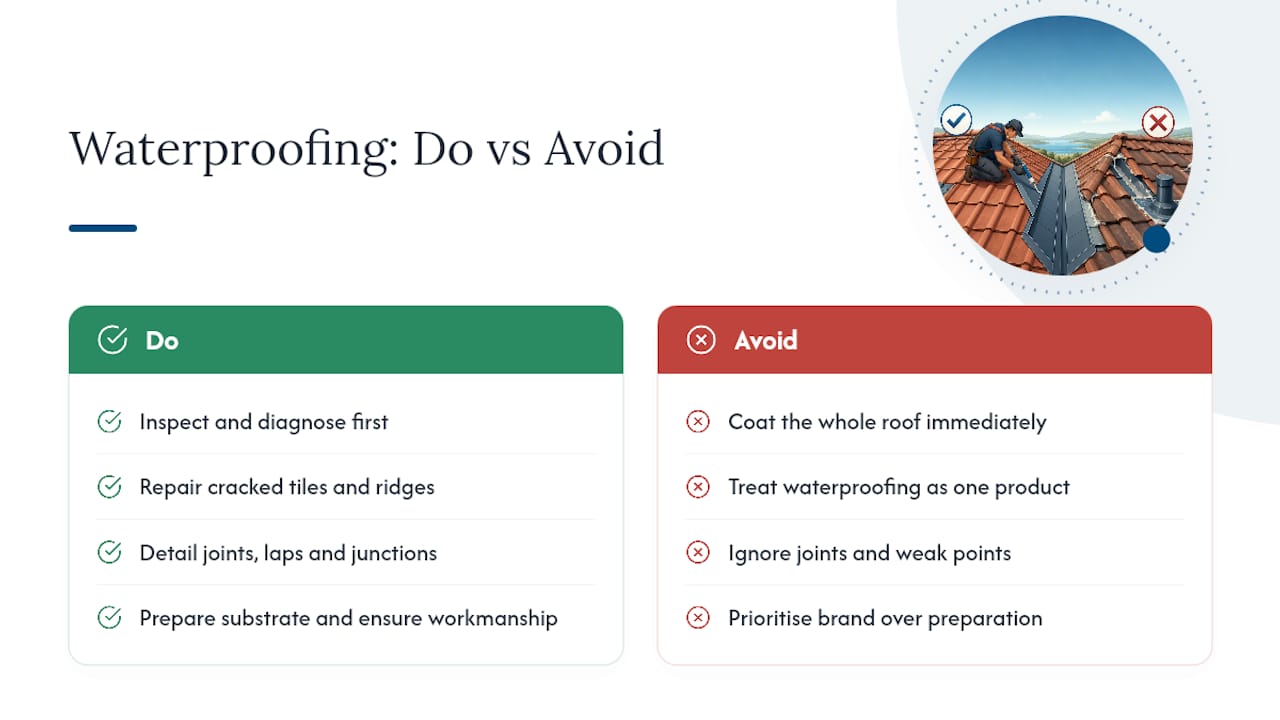
The uncomfortable truth is that product choice matters far less than most marketing suggests. Workmanship and substrate preparation decide whether a system lasts five years or fifteen, not which brand of membrane you bought. That’s not a popular message for anyone selling waterproofing products, but it’s the one borne out by how these systems actually fail in the field: at joints, laps and junctions that were never properly detailed, not across the flat expanse of the tile itself.
If there’s one habit worth adopting, it’s resisting the urge to coat first and diagnose later. A roof that’s been correctly inspected, repaired at its weak points, and detailed at the junctions will usually outperform one that’s had an expensive full-surface treatment slapped over unresolved defects.
— Eben
Get a professional inspection from Prowaterproofing
Reading a guide gets you most of the way, but a trained eye still catches things photographs miss, hairline ridge cracks, underlay that looks sound but flexes wrong underfoot, flashing laps that are technically intact but ageing badly. Prowaterproofing connects you with vetted contractors across residential, commercial and industrial properties, and a typical enquiry results in a site inspection followed by a written quote, not a hard sell.

An inspection usually costs far less than the repeat call-outs that follow a rushed DIY coating job gone wrong. If your roof has already had one failed fix, or you’d simply rather not spend a weekend on a ladder, request a quote through Prowaterproofing and get a proper assessment before committing to a method.
Sources
For technical detail beyond this guide, manufacturer application instructions from Sika cover product-specific cure times, while Designing Buildings offers independent construction context. Manufacturer advice tends to favour that manufacturer’s own system; independent bodies like CIAT offer workmanship standards without a product to sell.
- How to Waterproof a Tiled Roof
- How to Waterproof Roof Without Removing Tiles
- CIAT (Chartered Institute of Architectural Technologists)
- Cleaning Africa — roof cleaning guidance
FAQ
What is the best thing to seal roof tiles with?
There’s no single best product. Liquid-applied membranes suit valleys and junctions without removing tiles, while impregnating sealers suit porous tiles that are otherwise structurally sound.
Are roof tiles 100% waterproof?
No roof tile system is completely waterproof on its own. Tiles shed most water by overlap and gravity, but junctions, valleys and flashings need dedicated waterproofing to stop water finding its way underneath.
What is the best waterproof solution for roof tiles?
It depends on the roof’s pitch and condition: under-tile membranes for re-roofs and low-pitch roofs, liquid-applied membranes for existing tiles needing detail work, and impregnating sealers for porous tiles with sound underlay.
What is a good waterproof sealant for roof tiles?
A good sealant is one matched to the substrate, applied after proper cleaning and repair, with adequate cure time before rain. Product choice matters less than correct surface preparation and detailing at joints.
Can I waterproof a tiled roof myself?
Small, low-risk repairs and detailing on an accessible roof are reasonable DIY jobs with the right PPE and materials. Anything involving scaffold access, structural damage or warranty requirements calls for a professional contractor.